Jetty 是一个开源的servlet容器,它为基于Java的web容器,例如JSP和servlet提供运行环境。Jetty是使用Java语言编写的,它的API以一组JAR包的形式发布。开发人员可以将Jetty容器实例化成一个对象,可以迅速为一些独立运行(stand-alone)的Java应用提供网络和web连接。Jetty相比与Tomcat是轻量级的,而且Jetty更灵活,体现在其可插拔性和可扩展性,更易于开发者对Jetty本身进行二次开发,定制一个适合自身需求的Web Server。
Jetty可以向Tomcat一样单独作为一个纯粹的web容器,但是Jetty的开发文档更偏向于推荐我们将jetty内嵌到我们的项目中,最为一个可插拔的组件进行开发。
下面直接上代码:
POM文件
<properties>
        <project.build.sourceEncoding>UTF-8</project.build.sourceEncoding>
        <java.version>1.8</java.version>
        <jetty.version>9.4.8.v20171121</jetty.version>
        <spring.version>4.0.6.RELEASE</spring.version>
        <mybatis.version>3.3.0</mybatis.version>
        <mysql.version>5.1.24</mysql.version>
        <slf4j.version>1.7.25</slf4j.version>
        <logback.version>1.2.3</logback.version>
    </properties>

    <dependencies>
        <dependency>
            <groupId>junit</groupId>
            <artifactId>junit</artifactId>
            <version>4.11</version>
            <scope>test</scope>
        </dependency>
        <dependency>
            <groupId>org.eclipse.jetty</groupId>
            <artifactId>jetty-server</artifactId>
            <version>${jetty.version}</version>
        </dependency>
        <dependency>
            <groupId>org.eclipse.jetty</groupId>
            <artifactId>jetty-webapp</artifactId>
            <version>${jetty.version}</version>
        </dependency>
        <dependency>
            <groupId>org.eclipse.jetty</groupId>
            <artifactId>jetty-security</artifactId>
            <version>${jetty.version}</version>
        </dependency>
        <dependency>
            <groupId>org.eclipse.jetty</groupId>
            <artifactId>jetty-start</artifactId>
            <version>${jetty.version}</version>
        </dependency>

        <!-- 添加Spring依赖 -->
        <dependency>
            <groupId>org.springframework</groupId>
            <artifactId>spring-core</artifactId>
            <version>${spring.version}</version>
        </dependency>
        <dependency>
            <groupId>org.springframework</groupId>
            <artifactId>spring-context</artifactId>
            <version>${spring.version}</version>
        </dependency>
        <dependency>
            <groupId>org.springframework</groupId>
            <artifactId>spring-context-support</artifactId>
            <version>${spring.version}</version>
        </dependency>
        <dependency>
            <groupId>org.springframework</groupId>
            <artifactId>spring-aop</artifactId>
            <version>${spring.version}</version>
        </dependency>
        <dependency>
            <groupId>org.springframework</groupId>
            <artifactId>spring-aspects</artifactId>
            <version>${spring.version}</version>
        </dependency>
        <dependency>
            <groupId>org.springframework</groupId>
            <artifactId>spring-tx</artifactId>
            <version>${spring.version}</version>
        </dependency>
        <dependency>
            <groupId>org.springframework</groupId>
            <artifactId>spring-jdbc</artifactId>
            <version>${spring.version}</version>
        </dependency>
        <dependency>
            <groupId>org.springframework</groupId>
            <artifactId>spring-web</artifactId>
            <version>${spring.version}</version>
        </dependency>
        <dependency>
            <groupId>org.springframework</groupId>
            <artifactId>spring-webmvc</artifactId>
            <version>${spring.version}</version>
        </dependency>
        <dependency>
            <groupId>org.springframework</groupId>
            <artifactId>spring-beans</artifactId>
            <version>${spring.version}</version>
        </dependency>

        <!-- Spring AOP需要 aspectj Jar -->
        <dependency>
            <groupId>org.aspectj</groupId>
            <artifactId>aspectjrt</artifactId>
            <version>1.8.0</version>
        </dependency>
        <dependency>
            <groupId>org.aspectj</groupId>
            <artifactId>aspectjweaver</artifactId>
            <version>1.8.0</version>
        </dependency>

        <!-- Jackson -->
        <dependency>
            <groupId>com.fasterxml.jackson.core</groupId>
            <artifactId>jackson-core</artifactId>
            <version>2.8.8</version>
        </dependency>
        <dependency>
            <groupId>com.fasterxml.jackson.core</groupId>
            <artifactId>jackson-databind</artifactId>
            <version>2.8.8</version>
        </dependency>

        <!-- mysql驱动包 -->
        <dependency>
            <groupId>mysql</groupId>
            <artifactId>mysql-connector-java</artifactId>
            <version>${mysql.version}</version>
        </dependency>

        <!-- c3p0 -->
        <dependency>
            <groupId>c3p0</groupId>
            <artifactId>c3p0</artifactId>
            <version>0.9.1.2</version>
        </dependency>

        <!--mybatis依赖 -->
        <dependency>
            <groupId>org.mybatis</groupId>
            <artifactId>mybatis</artifactId>
            <version>${mybatis.version}</version>
        </dependency>

        <!-- mybatis/spring包 -->
        <dependency>
            <groupId>org.mybatis</groupId>
            <artifactId>mybatis-spring</artifactId>
            <version>1.2.1</version>
        </dependency>

        <!-- 添加servlet3.0核心包 -->
        <dependency>
            <groupId>javax.servlet</groupId>
            <artifactId>javax.servlet-api</artifactId>
            <version>3.1.0</version>
        </dependency>
        <dependency>
            <groupId>javax.servlet.jsp</groupId>
            <artifactId>javax.servlet.jsp-api</artifactId>
            <version>2.3.2-b01</version>
        </dependency>

        <!-- log日志 start -->
        <dependency>
            <groupId>org.slf4j</groupId>
            <artifactId>slf4j-api</artifactId>
            <version>${slf4j.version}</version>
        </dependency>
        <dependency>
            <groupId>ch.qos.logback</groupId>
            <artifactId>logback-core</artifactId>
            <version>${logback.version}</version>
        </dependency>
        <dependency>
            <groupId>ch.qos.logback</groupId>
            <artifactId>logback-classic</artifactId>
            <version>${logback.version}</version>
        </dependency>
        <!-- log日志 end -->

        <!--fileupload -->
        <dependency>
            <groupId>commons-fileupload</groupId>
            <artifactId>commons-fileupload</artifactId>
            <version>1.3.1</version>
        </dependency>

        <!-- jstl -->
        <dependency>
            <groupId>javax.servlet</groupId>
            <artifactId>jstl</artifactId>
            <version>1.2</version>
        </dependency>
    </dependencies>

    <build>
       <finalName>jetty-demo</finalName>
       <sourceDirectory>src/main/java</sourceDirectory>
       <outputDirectory>${project.build.directory}/classes</outputDirectory>
       <resources>
            <resource>
          <!-- 将resources中的文件放进打的jar包中 -->
                <directory>src/main/resources</directory>
            </resource>
            <resource>
          <!-- 将src/main/webapp下的文件放到打的jar包外 -->
                <directory>src/main/webapp</directory>
                <targetPath>${project.build.directory}/webapp/</targetPath>
            </resource>
        </resources>
        <plugins>
            <!-- 编译时跳过单元测试 -->
            <plugin>
                <groupId>org.apache.maven.plugins</groupId>
                <artifactId>maven-surefire-plugin</artifactId>
                <version>2.9</version>
                <configuration>
                    <skip>true</skip>
                </configuration>
            </plugin>
            <plugin>
                <groupId>org.apache.maven.plugins</groupId>
                <artifactId>maven-compiler-plugin</artifactId>
                <configuration>
                    <defaultLibBundleDir>lib</defaultLibBundleDir>
                    <source>${java.version}</source>
                    <target>${java.version}</target>
                    <encoding>${project.build.sourceEncoding}</encoding>
                </configuration>
            </plugin>
            <plugin>
                <groupId>org.apache.maven.plugins</groupId>
                <artifactId>maven-jar-plugin</artifactId>
                <configuration>
                    <archive>
                        <manifest>
                            <addClasspath>true</addClasspath>
                            <classpathPrefix>lib</classpathPrefix>
                            <mainClass>com.test.JettyServer</mainClass>
                        </manifest>
                    </archive>
                </configuration>
            </plugin>
            <!-- 拷贝依赖的jar包到lib目录 -->
            <plugin>
                <groupId>org.apache.maven.plugins</groupId>
                <artifactId>maven-dependency-plugin</artifactId>
                <executions>
                    <execution>
                        <id>copy-dependencies</id>
                        <phase>prepare-package</phase>
                        <goals>
                            <goal>copy-dependencies</goal>
                        </goals>
                        <configuration>
                            <outputDirectory>${project.build.directory}/lib</outputDirectory>
                            <overWriteReleases>false</overWriteReleases>
                            <overWriteSnapshots>true</overWriteSnapshots>
                            <overWriteIfNewer>true</overWriteIfNewer>
                        </configuration>
                    </execution>
                </executions>
            </plugin>
            <!-- 要将源码放上去,需要加入这个插件 -->
            <plugin>
                <artifactId>maven-source-plugin</artifactId>
                <version>2.1</version>
                <configuration>
                    <attach>true</attach>
                </configuration>
                <executions>
                    <execution>
                        <phase>compile</phase>
                        <goals>
                            <goal>jar</goal>
                        </goals>
                    </execution>
                </executions>
            </plugin>
        </plugins>
    </build>
web.xml
<!-- 设置编码格式 -->
    <filter>
        <filter-name>encodingFilter</filter-name>
        <filter-class>org.springframework.web.filter.CharacterEncodingFilter
        </filter-class>
        <init-param>
            <param-name>encoding</param-name>
            <param-value>UTF-8</param-value>
        </init-param>
        <init-param>
            <param-name>forceEncoding</param-name>
            <param-value>true</param-value>
        </init-param>
    </filter>
    <filter-mapping>
        <filter-name>encodingFilter</filter-name>
        <url-pattern>/*</url-pattern>
    </filter-mapping>

    <!-- spring mvc servlet-->
    <servlet>
        <servlet-name>restfulServlet</servlet-name>
        <servlet-class>org.springframework.web.servlet.DispatcherServlet</servlet-class>
        <init-param>
            <param-name>contextConfigLocation</param-name>
            <param-value>classpath:/springMVC.xml</param-value>
        </init-param>
        <init-param>
            <param-name>useFileMappedBuffer</param-name>
            <param-value>false</param-value>
        </init-param>
        <load-on-startup>1</load-on-startup>
    </servlet>

    <servlet-mapping>
        <servlet-name>restfulServlet</servlet-name>
        <url-pattern>*.json</url-pattern>
    </servlet-mapping>

    <welcome-file-list>
        <welcome-file>index.html</welcome-file>
    </welcome-file-list>

    <!-- Session 超时 -->
    <session-config>
        <session-timeout>30</session-timeout>
    </session-config>
springMVC配置文件,就是普通的配置
  <context:component-scan base-package="com.test" />
    <!--
         <mvc:default-servlet-handler/>
         将在 SpringMVC 上下文中定义一个 DefaultServletHttpRequestHandler,
         它会对进入 DispatcherServlet 的 请求进行筛查,如果发现是没有经过映射的请求,
         就将该请求交由 WEB 应用服务器默认的 Servlet 处理,如果不是静态资源的请求,才由 DispatcherServlet 继续处理
      -->
    <mvc:default-servlet-handler/>
    <!-- 让注解重新启动  @RequestMapping-->
    <mvc:annotation-driven />

    <bean id="mappingJackson2HttpMessageConverter" class="org.springframework.http.converter.json.MappingJackson2HttpMessageConverter">
        <property name="supportedMediaTypes">
            <list>
                <value>application/json;charset=UTF-8</value>
                <value>text/javascript;charset=UTF-8</value>
                <value>text/plain;charset=UTF-8</value>
            </list>
        </property>
    </bean>

    <bean class="org.springframework.web.servlet.mvc.method.annotation.RequestMappingHandlerAdapter">
        <property name="messageConverters">
            <list>
                <ref bean="mappingJackson2HttpMessageConverter" />
            </list>
        </property>
    </bean>

    <bean name="down" class="org.springframework.web.servlet.mvc.ParameterizableViewController">
        <property name="viewName" value="down"/>
    </bean>

    <!-- 配置视图解析器 -->
    <bean
        class="org.springframework.web.servlet.view.InternalResourceViewResolver">
        <property name="prefix" value="" />
        <property name="suffix" value=".jsp" /><!--可为空,方便实现自已的依据扩展名来选择视图解释类的逻辑 -->
        <!-- <property name="viewClass"
            value="org.springframework.web.servlet.view.JstlView" /> -->
    </bean>

    <!-- 处理文件上传 -->
    <bean id="multipartResolver"
          class="org.springframework.web.multipart.commons.CommonsMultipartResolver">
        <property name="defaultEncoding" value="UTF-8" /> <!-- 编码 -->
        <property name="maxInMemorySize" value="10240" /> <!-- 上传时占用最大内存大小 (10240) -->
        <property name="maxUploadSize" value="-1" /> <!-- 最大文件大小,-1为无限止(-1) -->
    </bean>
</beans>
springIOC容器配置文件
<?xml version="1.0" encoding="UTF-8"?>
<beans xmlns="http://www.springframework.org/schema/beans"
    xmlns:xsi="http://www.w3.org/2001/XMLSchema-instance"
    xmlns:aop="http://www.springframework.org/schema/aop"
    xmlns:tx="http://www.springframework.org/schema/tx"
    xmlns:context="http://www.springframework.org/schema/context"
    xmlns:mvc="http://www.springframework.org/schema/mvc"
    xsi:schemaLocation="http://www.springframework.org/schema/beans
        http://www.springframework.org/schema/beans/spring-beans-3.2.xsd
           http://www.springframework.org/schema/aop
           http://www.springframework.org/schema/aop/spring-aop-3.2.xsd
           http://www.springframework.org/schema/tx
           http://www.springframework.org/schema/tx/spring-tx-3.2.xsd
           http://www.springframework.org/schema/context
           http://www.springframework.org/schema/context/spring-context-3.2.xsd
        http://www.springframework.org/schema/mvc
        http://www.springframework.org/schema/mvc/spring-mvc-3.2.xsd ">

    <context:component-scan base-package="com.test" />

</beans>
这里没有将springIOC容器配置和springMVC配置文件放在一起,也没有在springMVC配置文件中引用springIOC配置文件,主要是实现解耦分离
创建JettyServer
package com.test;

import java.io.File;
import java.net.URISyntaxException;
import java.net.URL;

import org.eclipse.jetty.server.ConnectionFactory;
import org.eclipse.jetty.server.HttpConfiguration;
import org.eclipse.jetty.server.HttpConnectionFactory;
import org.eclipse.jetty.server.Server;
import org.eclipse.jetty.server.ServerConnector;
import org.eclipse.jetty.webapp.WebAppContext;
import org.slf4j.Logger;
import org.slf4j.LoggerFactory;
import org.springframework.context.support.AbstractXmlApplicationContext;
import org.springframework.context.support.ClassPathXmlApplicationContext;
import org.springframework.web.context.WebApplicationContext;
import org.springframework.web.context.support.XmlWebApplicationContext;

/**
 * jetty 服务器
 */
public class JettyServer {

    private static Logger logger = LoggerFactory.getLogger(JettyServer.class);

    private static final int HTTP_PORT = 8080;
    private static final int HTTPS_PORT = 8443;
    private static final String CONTEXT = "/";

    public static void main(String[] args) {
        Server server = new JettyServer().createServer();
        try {
            server.start();
            logger.info("jetty服务开启!!!");
            server.join();
        } catch (Exception e) {
            e.printStackTrace();
        }
    }

    private JettyServer() {}

    private Server createServer() {
        // jetty server 默认的最小连接线程是8,最大是200,连接线程最大闲置时间60秒
        Server server = new Server();
        HttpConfiguration httpConfig = new HttpConfiguration();
        httpConfig.setSecureScheme("https");
        httpConfig.setSecurePort(HTTPS_PORT);
        httpConfig.setOutputBufferSize(32768);
        httpConfig.setRequestHeaderSize(8192);
        httpConfig.setResponseHeaderSize(8192);
        httpConfig.setSendServerVersion(true);
        httpConfig.setSendDateHeader(false);
        httpConfig.setHeaderCacheSize(512);
        ConnectionFactory connectionFactory = new HttpConnectionFactory(httpConfig);
        ServerConnector connector = new ServerConnector(server, connectionFactory);
        connector.setPort(HTTP_PORT);
        connector.setSoLingerTime(-1);
        // 连接线程最大空闲时间
        connector.setIdleTimeout(30000);
        server.addConnector(connector);

        URL url = JettyServer.class.getProtectionDomain().getCodeSource().getLocation();
        String path = "";
        try {
            path = new File(url.toURI()).getParent();
        } catch (URISyntaxException e) {
        }/*
         * 如果将项目的配置文件打包到jar包外,可以使用FileSystemXmlApplicationContext加载
         * AbstractXmlApplicationContext applicationContext = new FileSystemXmlApplicationContext(path+ "/webapp/WEB-INF/springConfig/applicationContext.xml");
         */
        // 如果在springMVC配置文件中,引入了springIOC配置文件applicationContext.xml,在这里就没有必要再创建applicationContext并将其放入到webApplicationContext中
        // 这里使用ClassPathXmlApplicationContext的原因是在打包后,打包的jar文件目录其实是classpath目录,不会出现文件找不到
        AbstractXmlApplicationContext applicationContext = new ClassPathXmlApplicationContext("classpath:applicationContext.xml");
        WebAppContext webAppContext = new WebAppContext();
        /*
         * contextPath 是URL的前缀。例如一个contextPath 是/foo,它将处理 /foo, /foo/index.html, /foo/bar/,and /foo/bar/image.png等请求,
         * 但是它不会处理像/,/other/,or /favicon.ico这样的请求
         */
        webAppContext.setContextPath(CONTEXT);
        webAppContext.setDescriptor(path+"/webapp/WEB-INF/web.xml");

        // 配置资源,这个配置是一个目录,包含各种静态资源信息,可以是图片或者HTML页面。
        webAppContext.setResourceBase(path+"/webapp");
        // 配置监听主机ip或名称,没有配置的将不会被监听到。
        //webAppContext.setVirtualHosts(new String[] {});
        webAppContext.setConfigurationDiscovered(true);
        webAppContext.setParentLoaderPriority(true);
        webAppContext.setMaxFormContentSize(10 << 20);
        webAppContext.setClassLoader(Thread.currentThread().getContextClassLoader());

        XmlWebApplicationContext xmlWebAppContext = new XmlWebApplicationContext();
        xmlWebAppContext.setParent(applicationContext);
        xmlWebAppContext.setConfigLocation("");
        xmlWebAppContext.setServletContext(webAppContext.getServletContext());
        xmlWebAppContext.refresh();
        // 配置属性,可以传递到实体类中,比如javax.servlet.context.tempdir属性用来配置临时目录。
        webAppContext.setAttribute(
                WebApplicationContext.ROOT_WEB_APPLICATION_CONTEXT_ATTRIBUTE,
                xmlWebAppContext);
        server.setHandler(webAppContext);
        return server;
    }

}
其他别的配置就和普通的web项目配置一样。
注意:项目运行之前要先进行编译,不然会找不到启动类,项目进行编译或者打包后,在target中找到如图所示的文件
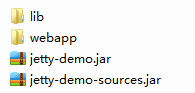
jetty-demo.jar是打包好的可运行的jar,使用Java -jar 命令就可以运行;项目依赖的jar包在lib文件夹下;webapp文件存放的是项目的静态资源、html文件、JS文件,在学习中发现一个有趣的现象,我在webapp文件夹中放入一个新的html页面,不用将服务器进行重启就可以用浏览器访问,算是一个小的优点吧(运行中的项目改变前端页面后,直接将页面进行替换,不需要将项目进行重启);jetty-demo-sources.jar放的是项目的源文件。