记下自己的react学习之路 ,官方文档写的很详尽,学起来应该比较简单
官方文档地址:react.http://reactjs.cn/react/docs/getting-started.html
2 .1运行一个服务器
我使用的是wampserver,当图标显示为绿色时表示服务器正常开启 。红色表示服务器异常。
进入www目录,初始index.php名称改成其他的,我改成index11.php。
将下载后的压缩包(react-tutorial-master)解压,改名成react后复制到进入www目录。
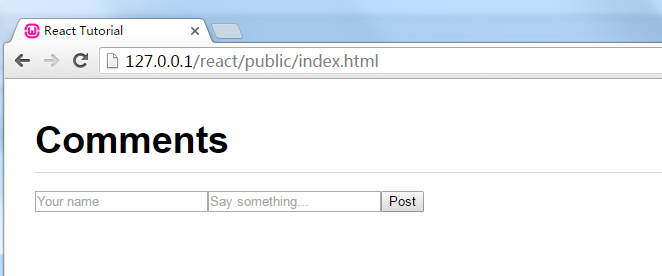
在浏览器中输入http://127.0.0.1/react/public/index.html 正常显示

2.2你的第一个组件
// tutorial1.js
var CommentBox = React.createClass({
  render: function() {
    return (
      <div className="commentBox">
        Hello, world! I am a CommentBox.
      </div>
    );
  }
});
ReactDOM.render(
  <CommentBox />,
  document.getElementById('content')
);
React.createClass构造react网页组件。可以理解为在内存中创建了一个虚拟网页。
ReactDOM.render();render()函数有两个参数。第一个指的是需要从内存中取出的网页,第二个指的是要渲染到的目标对象。

2.3制作组件

逻辑和1.2一样,只是在结构嵌套一层,更符合实际。
本例代码结构:构造一个CommentList组件和CommentForm组件。
<script type="text/babel">
var CommentList = React.createClass({
  render: function() {
    return (
      <div className="commentList">
        Hello, world! I am a CommentList.
      </div>
    );
  }
});

var CommentForm = React.createClass({
  render: function() {
    return (
      <div className="commentForm">
        Hello, world! I am a CommentForm.
      </div>
    );
  }
});

var CommentBox = React.createClass({
  render: function() {
    return (
      <div className="commentBox">
        <h1>Comments</h1>
        <CommentList />
        <CommentForm />
      </div>
    );
  }
});

ReactDOM.render(
  React.createElement(CommentBox, null),
  document.getElementById('content')
);
</script>
2.4使用属性与2.5组件属性
如果纯粹2.2,2.3中的使用方法,把所有内容直接写出来,那还不如直接在html里面写简单,模板标签也失去了存在的意义。
正是有了属性,才使得模板有了血液,模板和数据进行分离。
var CommentForm = React.createClass({
  render: function() {
    return (
      <div className="commentForm">
        Hello, world! I am a CommentForm.
      </div>
    );
  }
});

var CommentBox = React.createClass({
  render: function() {
    return (
      <div className="commentBox">
        <h1>Comments</h1>
        <CommentList />
        <CommentForm />
      </div>
    );
  }
});

var Comment = React.createClass({
  render: function() {
    return (
      <div className="comment">
        <h2 className="commentAuthor">
          {this.props.author}
        </h2>
        {this.props.children}
      </div>
    );
  }
});

var CommentList = React.createClass({
  render: function() {
    return (
      <div className="commentList">
        <Comment author="Pete Hunt">This is one comment</Comment>
        <Comment author="Jordan Walke">This is *another* comment</Comment>
      </div>
    );
  }
});

ReactDOM.render(
  React.createElement(CommentBox, null),
  document.getElementById('content')
);
2.6 添加 Markdown 语法格式的评论
本节可以看到,<p>标签并没有被解析成html标签,而是直接被输出到页面。
2.7接入数据模型
我们的使用越来越接近实际开发了。
data可以看作是接口给我们返回的数据
 var data = [
  {author: "Pete Hunt", text: "This is one comment"},
  {author: "Jordan Walke", text: "This is *another* comment"}
];

var Comment = React.createClass({
  rawMarkup: function() {
    var rawMarkup = marked(this.props.children.toString(), {sanitize: true});
    return { __html: rawMarkup };
  },

  render: function() {
    return (
      <div className="comment">
        <h2 className="commentAuthor">
          {this.props.author}
        </h2>
        <span dangerouslySetInnerHTML={this.rawMarkup()} />
      </div>
    );
  }
});
var CommentList = React.createClass({
  render: function() {
    var commentNodes = this.props.data.map(function (comment) {
      return (
        <Comment author={comment.author}>
          {comment.text}
        </Comment>
      );
    });
    return (
      <div className="commentList">
        {commentNodes}
      </div>
    );
  }
});

var CommentForm = React.createClass({
  render: function() {
    return (
      <div className="commentForm">
        Hello, world! I am a CommentForm.
      </div>
    );
  }
});

var CommentBox = React.createClass({
  render: function() {
    return (
      <div className="commentBox">
        <h1>Comments</h1>
        <CommentList data={this.props.data} />
        <CommentForm />
      </div>
    );
  }
});

ReactDOM.render(
  <CommentBox data={data} />,
  document.getElementById('content')
);
2.8从服务器获取数据
2.9响应状态变化( Reactive state )