STEP ONE:定义相关游戏变量
好了,让我们打开GameCanvas文件,在data中加入如下变量。
NO_BLOCK: 0,
HAVE_BLOCK: 1,
tetris_status: null,
currentFall: null
其中,tetris_status是存放地图上方块有无的数组,NO_BLOCK是没有方块的状态,HAVE_BLOCK是有方块的状态。如果你想设计五颜六色的 方块,可以添加相应的变量,我们这里为了简单起见,只有一种颜色的方块。currentFall存储正在掉落的方块。
然后再用computed定义我们的几种方块。
computed: {
    // 定义几种可能出现的方块组合
    blockArr: function () {
      return [
      // Z
        [
          {x: this.TETRIS_COLS / 2 - 1, y: 0},
          {x: this.TETRIS_COLS / 2, y: 0},
          {x: this.TETRIS_COLS / 2, y: 1},
          {x: this.TETRIS_COLS / 2 + 1, y: 1}
        ],
        // 反Z
        [
          {x: this.TETRIS_COLS / 2 + 1, y: 0},
          {x: this.TETRIS_COLS / 2, y: 0},
          {x: this.TETRIS_COLS / 2, y: 1},
          {x: this.TETRIS_COLS / 2 - 1, y: 1}
        ],
        // 田
        [
          {x: this.TETRIS_COLS / 2 - 1, y: 0},
          {x: this.TETRIS_COLS / 2, y: 0},
          {x: this.TETRIS_COLS / 2 - 1, y: 1},
          {x: this.TETRIS_COLS / 2, y: 1}
        ],
        // L
        [
          {x: this.TETRIS_COLS / 2 - 1, y: 0},
          {x: this.TETRIS_COLS / 2 - 1, y: 1},
          {x: this.TETRIS_COLS / 2 - 1, y: 2},
          {x: this.TETRIS_COLS / 2, y: 2}
        ],
        // J
        [
          {x: this.TETRIS_COLS / 2, y: 0},
          {x: this.TETRIS_COLS / 2, y: 1},
          {x: this.TETRIS_COLS / 2, y: 2},
          {x: this.TETRIS_COLS / 2 - 1, y: 2}
        ],
        // □□□□
        [
          {x: this.TETRIS_COLS / 2, y: 0},
          {x: this.TETRIS_COLS / 2, y: 1},
          {x: this.TETRIS_COLS / 2, y: 2},
          {x: this.TETRIS_COLS / 2, y: 3}
        ],
        // ┴
        [
          {x: this.TETRIS_COLS / 2, y: 0},
          {x: this.TETRIS_COLS / 2 - 1, y: 1},
          {x: this.TETRIS_COLS / 2, y: 1},
          {x: this.TETRIS_COLS / 2 + 1, y: 1}
        ]
      ]
    }
  }
这样我们新生成的方块就能在地图最顶上的中间出现。
定义了变量,接下来让我们初始化他们。
在mounted()方法里,我们在最后加上这一句:this.newGame()
然后我们在methods里定义newGame()
initData () {
      this.tetris_status = []
      for (let i = 0; i < this.TETRIS_ROWS; i++) {
        this.tetris_status[i] = []
        for (let j = 0; j < this.TETRIS_COLS; j++) {
          this.tetris_status[i][j] = this.NO_BLOCK
        }
      }
    }
以上。
STEP TWO:方块生成。
首先,每次刷新都要重新绘制方块的位置,我们将其放在drawBlocks里面。
drawBlocks () {
      // 清空地图
      for (let i = 0; i < this.TETRIS_ROWS; i++) {
        for (let j = 0; j < this.TETRIS_COLS; j++) {
          this.canvasCtx.clearRect(j * this.CELL_SIZE + 1, i * this.CELL_SIZE + 1, this.CELL_SIZE - 2, this.CELL_SIZE - 2)
        }
      }
      // 绘制地图
      for (let i = 0; i < this.TETRIS_ROWS; i++) {
        for (let j = 0; j < this.TETRIS_COLS; j++) {
          if (this.tetris_status[i][j] !== this.NO_BLOCK) {
            this.canvasCtx.fillRect(j * this.CELL_SIZE + 1, i * this.CELL_SIZE + 1, this.CELL_SIZE - 2, this.CELL_SIZE - 2)// 中间留点缝隙
          }
        }
      }
      // 绘制currentFall
      for (let i = 0; i < this.currentFall.length; i++) {
        this.canvasCtx.fillRect(this.currentFall[i].x * this.CELL_SIZE + 1, this.currentFall[i].y * this.CELL_SIZE + 1, this.CELL_SIZE - 2, this.CELL_SIZE - 2)
      }
    }
现在方块可以绘制了。但——没有方块啊!
那就创建方块!
    createBlock () {
      var rand = Math.floor(Math.random() * this.blockArr.length)
      // 随机生成正在下掉的方块
      this.currentFall = [
        {x: this.blockArr[rand][0].x, y: this.blockArr[rand][0].y},
        {x: this.blockArr[rand][1].x, y: this.blockArr[rand][1].y},
        {x: this.blockArr[rand][2].x, y: this.blockArr[rand][2].y},
        {x: this.blockArr[rand][3].x, y: this.blockArr[rand][3].y}
      ]
}
然后我们先做个小测试。
往我们的newGame()里添加
 this.createBlock()
 this.drawBlocks()
然后打开我们的localhost:8080
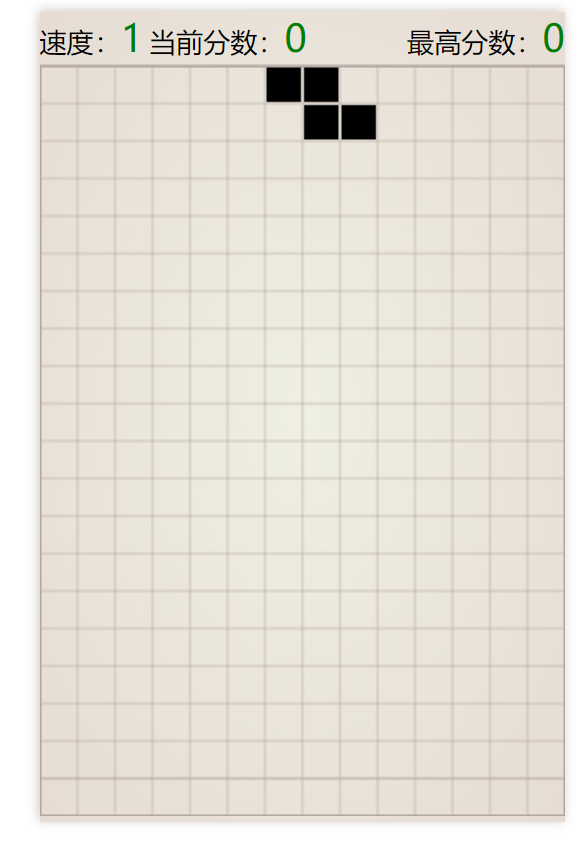
好了,我们的方块生成也成功了!
STEP THREE:编写游戏逻辑
方块有了,是时候让他们动起来了 !
// judge can move down and if touch others or arrive at the bottom then return true, else return false
    moveDown () {
      for (let i = 0; i < this.currentFall.length; i++) {
        if (this.currentFall[i].y >= this.TETRIS_ROWS - 1 || this.tetris_status[this.currentFall[i].y + 1][this.currentFall[i].x] !== this.NO_BLOCK) {
          // 记录block
          for (let i = 0; i < this.currentFall.length; i++) {
            this.tetris_status[this.currentFall[i].y][this.currentFall[i].x] = this.HAVE_BLOCK
          }
          // 判断有没有满行的
          for (let j = 0; j < this.currentFall.length; j++) {
            for (let i = 0; i < this.TETRIS_COLS; i++) {
              if (this.tetris_status[this.currentFall[j].y][i] === this.NO_BLOCK) {
                break
              }
              // 最后一行满了
              if (i === this.TETRIS_COLS - 1) {
                // 消除最后一行
                for (let i = this.currentFall[j].y; i > 0; i--) {
                  for (let j = 0; j < this.TETRIS_COLS; j++) {
                    this.tetris_status[i][j] = this.tetris_status[i - 1][j]
                  }
                }
              }
            }
          }
          return true
        }
      }
      for (let i = 0; i < this.currentFall.length; i++) {
        this.currentFall[i].y += 1
      }
      this.drawBlocks()
      return false
    },
    // 右移
    moveRight () {
      for (let i = 0; i < this.currentFall.length; i++) {
        if (this.currentFall[i].x + 1 >= this.TETRIS_ROWS || this.tetris_status[this.currentFall[i].y][this.currentFall[i].x + 1] !== this.NO_BLOCK) {
          return
        }
      }
      for (let i = 0; i < this.currentFall.length; i++) {
        this.currentFall[i].x++
      }
      this.drawBlocks()
    },
    // 左移
    moveLeft () {
      for (let i = 0; i < this.currentFall.length; i++) {
        if (this.currentFall[i].x < 1 || this.tetris_status[this.currentFall[i].y][this.currentFall[i].x - 1] !== this.NO_BLOCK) {
          return
        }
      }
      for (let i = 0; i < this.currentFall.length; i++) {
        this.currentFall[i].x--
      }
      this.drawBlocks()
    },
    // 旋转
    rotate () {
      // 定义记录能否旋转的旗标
      var canRotate = true
      for (var i = 0; i < this.currentFall.length; i++) {
        var preX = this.currentFall[i].x
        var preY = this.currentFall[i].y
        // 始终以第三个方块作为旋转的中心,
        // i == 2时,说明是旋转的中心
        if (i !== 2) {
          // 计算方块旋转后的x、y坐标
          var afterRotateX = this.currentFall[2].x + preY - this.currentFall[2].y
          var afterRotateY = this.currentFall[2].y + this.currentFall[2].x - preX
          // 如果旋转后所在位置已有方块,表明不能旋转
          if (this.tetris_status[afterRotateY][afterRotateX + 1] !== this.NO_BLOCK) {
            canRotate = false
            break
          }
          // 如果旋转后的坐标已经超出了最左边边界
          if (afterRotateX < 0 || this.tetris_status[afterRotateY - 1][afterRotateX] !== this.NO_BLOCK) {
            this.moveRight()
            afterRotateX = this.currentFall[2].x + preY - this.currentFall[2].y
            afterRotateY = this.currentFall[2].y + this.currentFall[2].x - preX
            break
          }
          if (afterRotateX < 0 || this.tetris_status[afterRotateY - 1][afterRotateX] !== this.NO_BLOCK) {
            this.moveRight()
            break
          }
          // 如果旋转后的坐标已经超出了最右边边界
          if (afterRotateX >= this.TETRIS_COLS - 1 || this.tetris_status[afterRotateY][afterRotateX + 1] !== this.NO_BLOCK) {
            this.moveLeft()
            afterRotateX = this.currentFall[2].x + preY - this.currentFall[2].y
            afterRotateY = this.currentFall[2].y + this.currentFall[2].x - preX
            break
          }
          if (afterRotateX >= this.TETRIS_COLS - 1 || this.tetris_status[afterRotateY][afterRotateX + 1] !== this.NO_BLOCK) {
            this.moveLeft()
            break
          }
        }
      }
      if (canRotate) {
        for (var j = 0; j < this.currentFall.length; j++) {
          preX = this.currentFall[j].x
          preY = this.currentFall[j].y
          if (j !== 2) {
            this.currentFall[j].x = this.currentFall[2].x + preY - this.currentFall[2].y
            this.currentFall[j].y = this.currentFall[2].y + this.currentFall[2].x - preX
          }
        }
        this.drawBlocks()
      }
    }
这四个方法,只有moveDown有点特殊,它有返回值。如果碰到了别的方块的顶部,或者到了最底下,那么就返回true,否则,返回false。
然后我们就可以封装一个方法next。
为了让GameCanvas仅实现游戏地图的绘制,我们将定时下移的方法定义在Index.vue里。
 1 next () { // 方块下移
 2       if (this.$refs.gameCanvas.moveDown()) {
 3         // 判断是否触顶
 4         for (let i = 0; i < this.$refs.gameCanvas.currentFall.length; i++) {
 5           if (this.$refs.gameCanvas.currentFall[i].y === 0) {
 6             // gameEnd()
 7             return
 8           }
 9         }
10         // 新的block
11         this.$refs.gameCanvas.createBlock()
12       }
13     }
在第二行里我们调用了gameCanvas里的moveDown()。
为了实现这一点,我们要对Index.vue里的html代码做一点修改。
将<game-canvas></game-canvas>改为<game-canvas ref="gameCanvas"></game-canvas>
这样就好了!
然后让我们在这个文件里也创建一个newGame方法。
newGame () {
      this.curScore = 0
      this.curSpeed = 1
      this.$refs.gameCanvas.newGame()// 调用gameCanvas里的newGame
    }
同时在mounted里调用它。
mounted () {
    this.newGame()
  }
然后让我们把gameCanvas里mounted里的this.newGame()删掉。
这样我们的newGame方法就封装好了。之后新建游戏就只需要调用Index里的newGame了!
最后,我们可以开始编写方向键移动了。
在mounted方法里,我们绑定事件监听。
document.onkeydown = ({ keyCode }) => {
      switch (keyCode) {
        // 向下
        case 40:// ↓
        case 83:// S
          this.next()
          break
        // 向左
        case 37:// ←
        case 65:// A
          this.$refs.gameCanvas.moveLeft()
          break
        // 向右
        case 39:// →
        case 68:// D
          this.$refs.gameCanvas.moveRight()
          break
        // 旋转
        case 38:// ↑
        case 87:// W
          this.$refs.gameCanvas.rotate()
          break
      }
    }
ok!
只剩定时下移了。
让我们在data里定义一个timer,并在newGame里为他赋值。
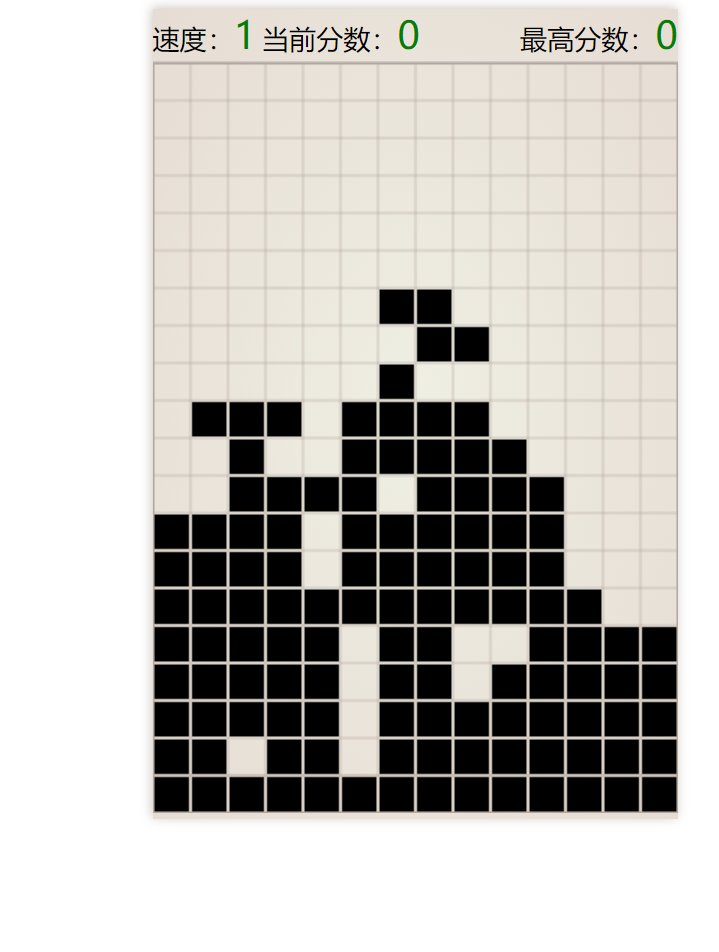
详细代码我已经传到github上了,大家有兴趣的可以去看一下。

PS:我弟今天玩的时候发现出了一个bug:会在按下的时候方块会重叠。不过是偶然出现,目前仍未找到原因。大家如果有什么想法的可以在下面评论,或者发邮件到1179713734@qq.com