在SpringBoot项目的配置文件中, 至少会有数据库用户名和密码,或其他敏感信息的配置。 通常都是用明文显示的, 对于比较敏感的信息, 则可对其内容加密。
这里使用jasypt进行加密,步骤如下:
1)pom导入依赖:
<dependency>
      <groupId>com.github.ulisesbocchio</groupId>
      <artifactId>jasypt-spring-boot-starter</artifactId>
      <version>3.0.4</version>
</dependency>
2)在配置文件配置加/解密的秘钥
jasypt.encryptor.password=5177251cc96740fdae33893599768b9e
秘钥是自定义的,也不能太简单。
3)测试加密与解密
package com.zys.example;


import org.jasypt.encryption.StringEncryptor;
import org.junit.Test;
import org.junit.runner.RunWith;
import org.springframework.beans.factory.annotation.Autowired;
import org.springframework.boot.test.context.SpringBootTest;
import org.springframework.test.context.junit4.SpringRunner;

@RunWith(SpringRunner.class)
@SpringBootTest
public class SpringbootTestExampleApplicationTests {

    @Autowired
    private StringEncryptor stringEncryptor;

    @Test
    public void test() {
        String username = stringEncryptor.encrypt("root");
        System.out.println("加密的值:" + username);
        System.out.println("解密的值:" +stringEncryptor.decrypt(username));
        String password = stringEncryptor.encrypt("zys123456");
        System.out.println("加密的值:" + password);
    }

}
打印结果如下:
加密的值:hewlv1rHszR5pR9ZgbEqw6kf+UUqkRSiYquLjOzAltEgzphROOLH6INDaT3KieJ8
解密的值:root
加密的值:b35mhYQ0vx5PlswtJYKXFVUHU4KfcuTPr6LXf8xCDdH7zvO2xeS0MdJMtITPiKIb
4)将加密后的字符串替换原明文
在替换时,需要使用ENC()标识加密,括号里面放加密的值。配置文件中只要配置了ENC开头的内容, jasypt都会在用到值的时候进行PBE解密。如果值没有以ENC开头, 则不进行解密。
原始配置:
spring.datasource.type=com.alibaba.druid.pool.DruidDataSource
spring.datasource.url=jdbc:mysql://localhost:3306/db2020?serverTimezone=Hongkong&useUnicode=true&characterEncoding=utf8&useSSL=false
spring.datasource.username=root
spring.datasource.password=zys123456
加密后的配置:
jasypt.encryptor.password=5177251cc96740fdae33893599768b9e
spring.datasource.type=com.alibaba.druid.pool.DruidDataSource
spring.datasource.url=jdbc:mysql://localhost:3306/db2020?serverTimezone=Hongkong&useUnicode=true&characterEncoding=utf8&useSSL=false
spring.datasource.username=ENC(hewlv1rHszR5pR9ZgbEqw6kf+UUqkRSiYquLjOzAltEgzphROOLH6INDaT3KieJ8)
spring.datasource.password=ENC(b35mhYQ0vx5PlswtJYKXFVUHU4KfcuTPr6LXf8xCDdH7zvO2xeS0MdJMtITPiKIb)
配置后也可正常访问数据库,对敏感信息进行了加密。
5)额外说明:
若把加/解密的秘钥直接放在配置文件中,则可轻松解密出原文。那么更好的做法是不在配置文件中指定,而是将明文加密后,在启动项目时通过启动参数来携带秘钥从而保证信息更加安全。
首先删除配置文件中秘钥的配置,然后见下面三种情况:
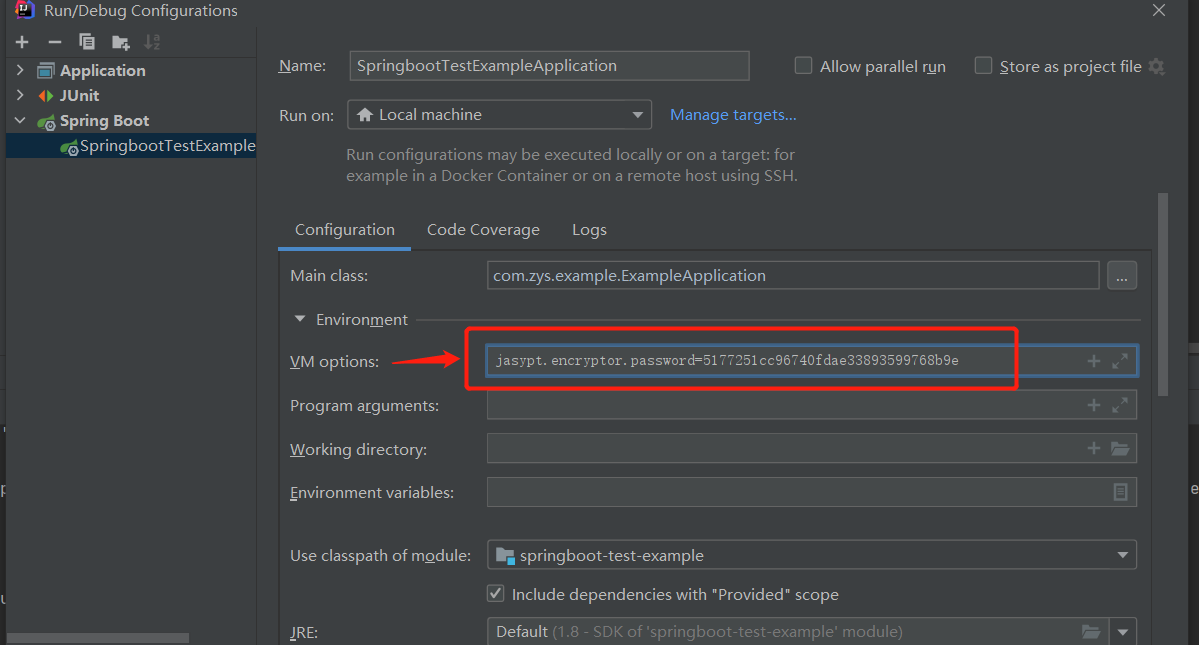
A.当使用IDEA进行测试时指定参数:
-Djasypt.encryptor.password=5177251cc96740fdae33893599768b9e
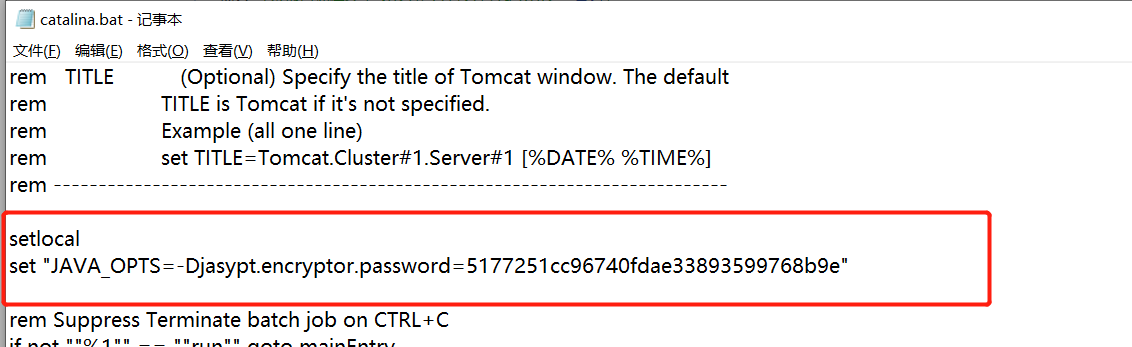
B.当项目是war时,在tomcat中设置参数后再启动:
在Windows中,打开tomcat的bin/catalina.bat文件,找到setlocal,后面加上参数:
set "JAVA_OPTS=-Djasypt.encryptor.password=5177251cc96740fdae33893599768b9e"
截图如下:
在Linux中,打开tomcat的bin/catalina.sh文件,找到setlocal,后面加上参数: