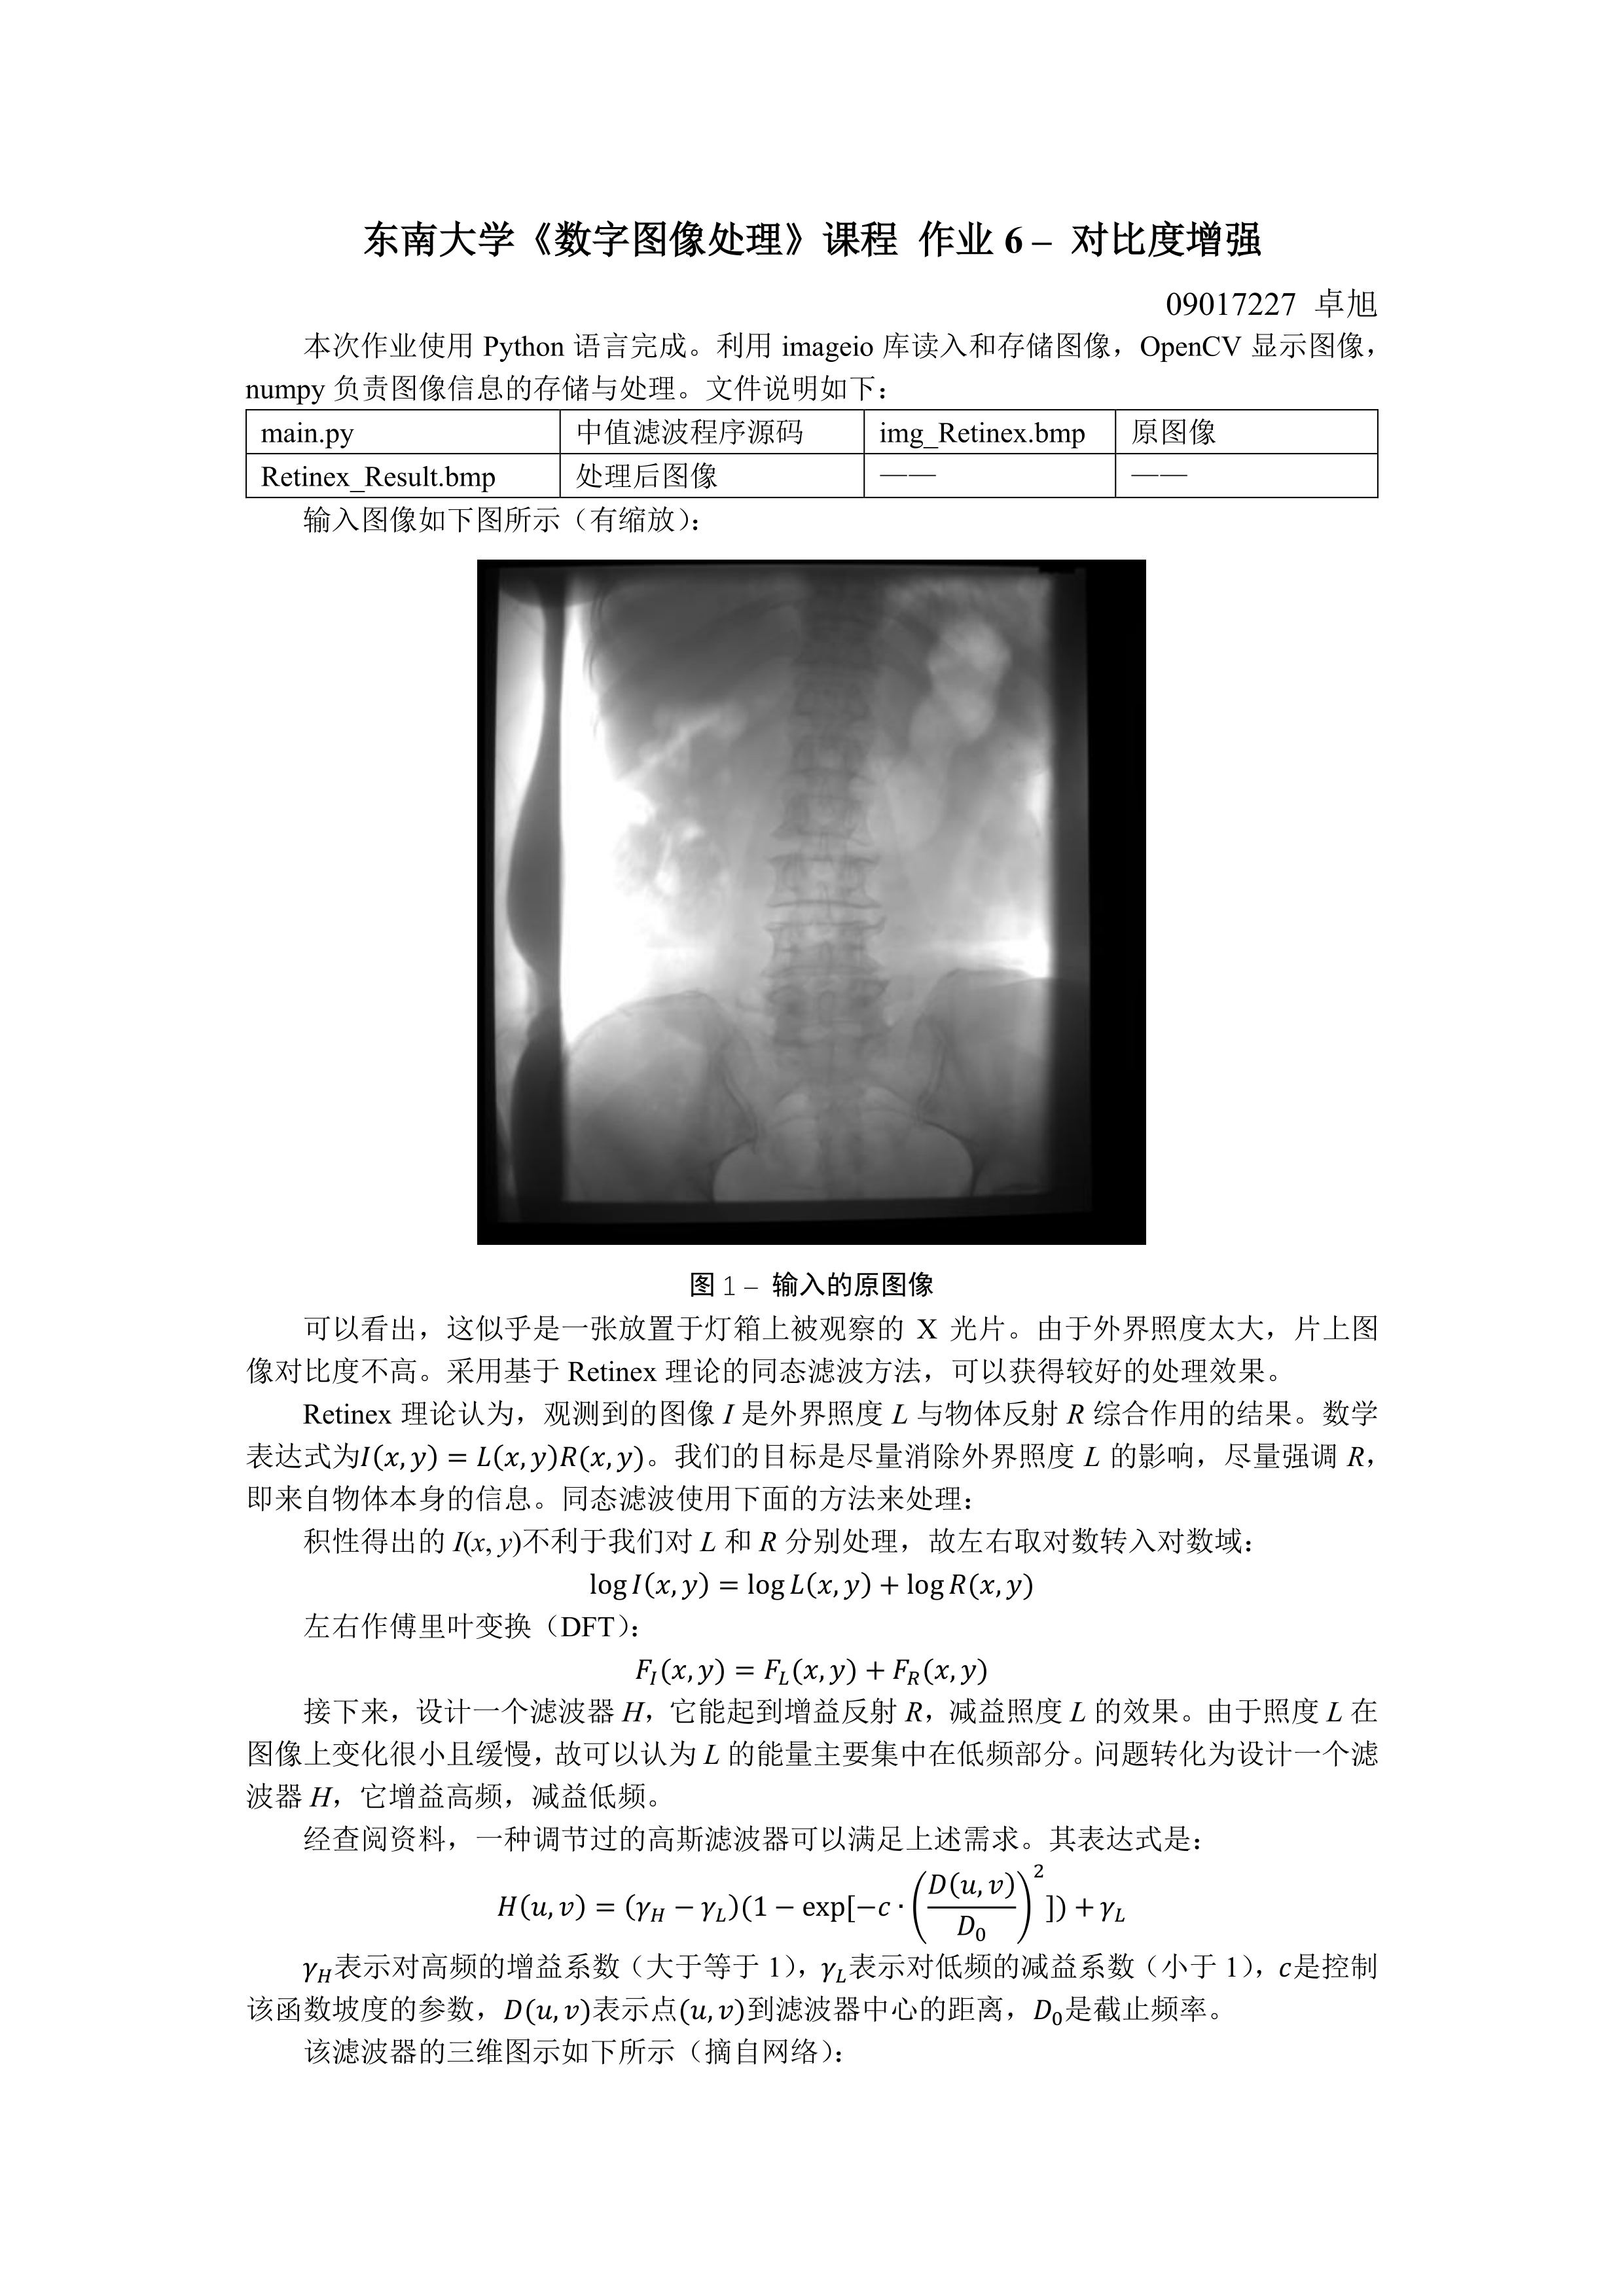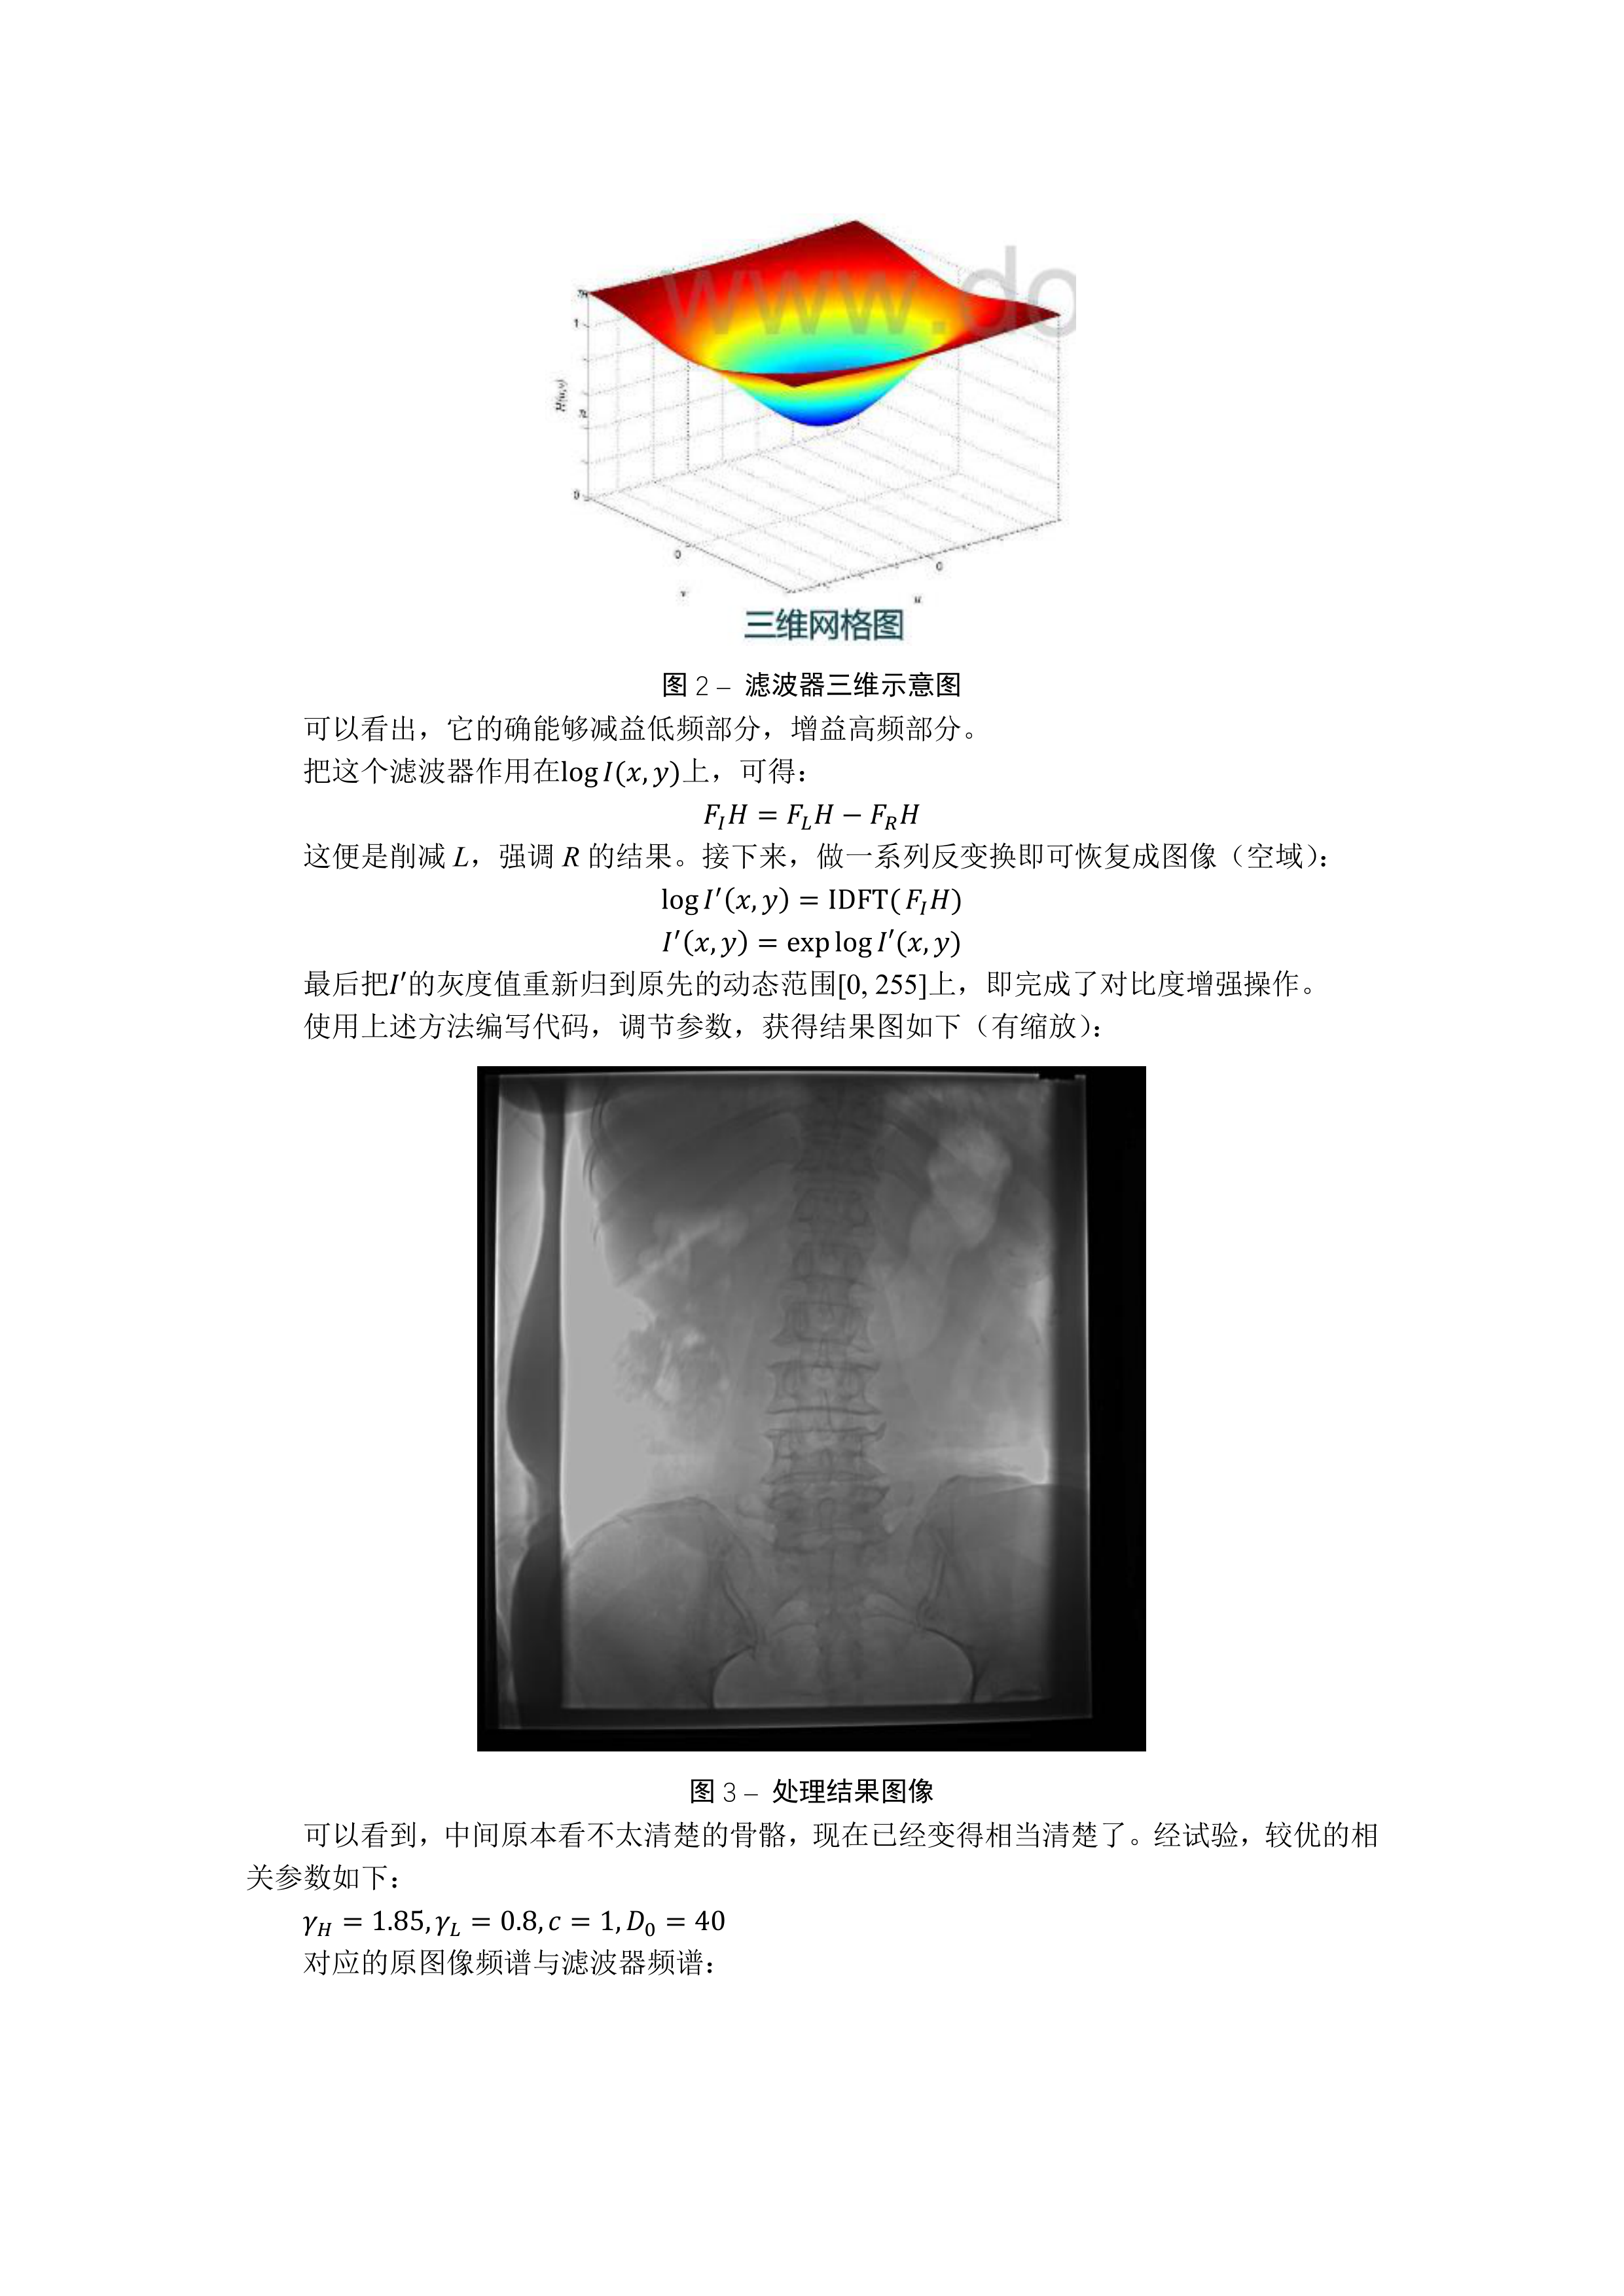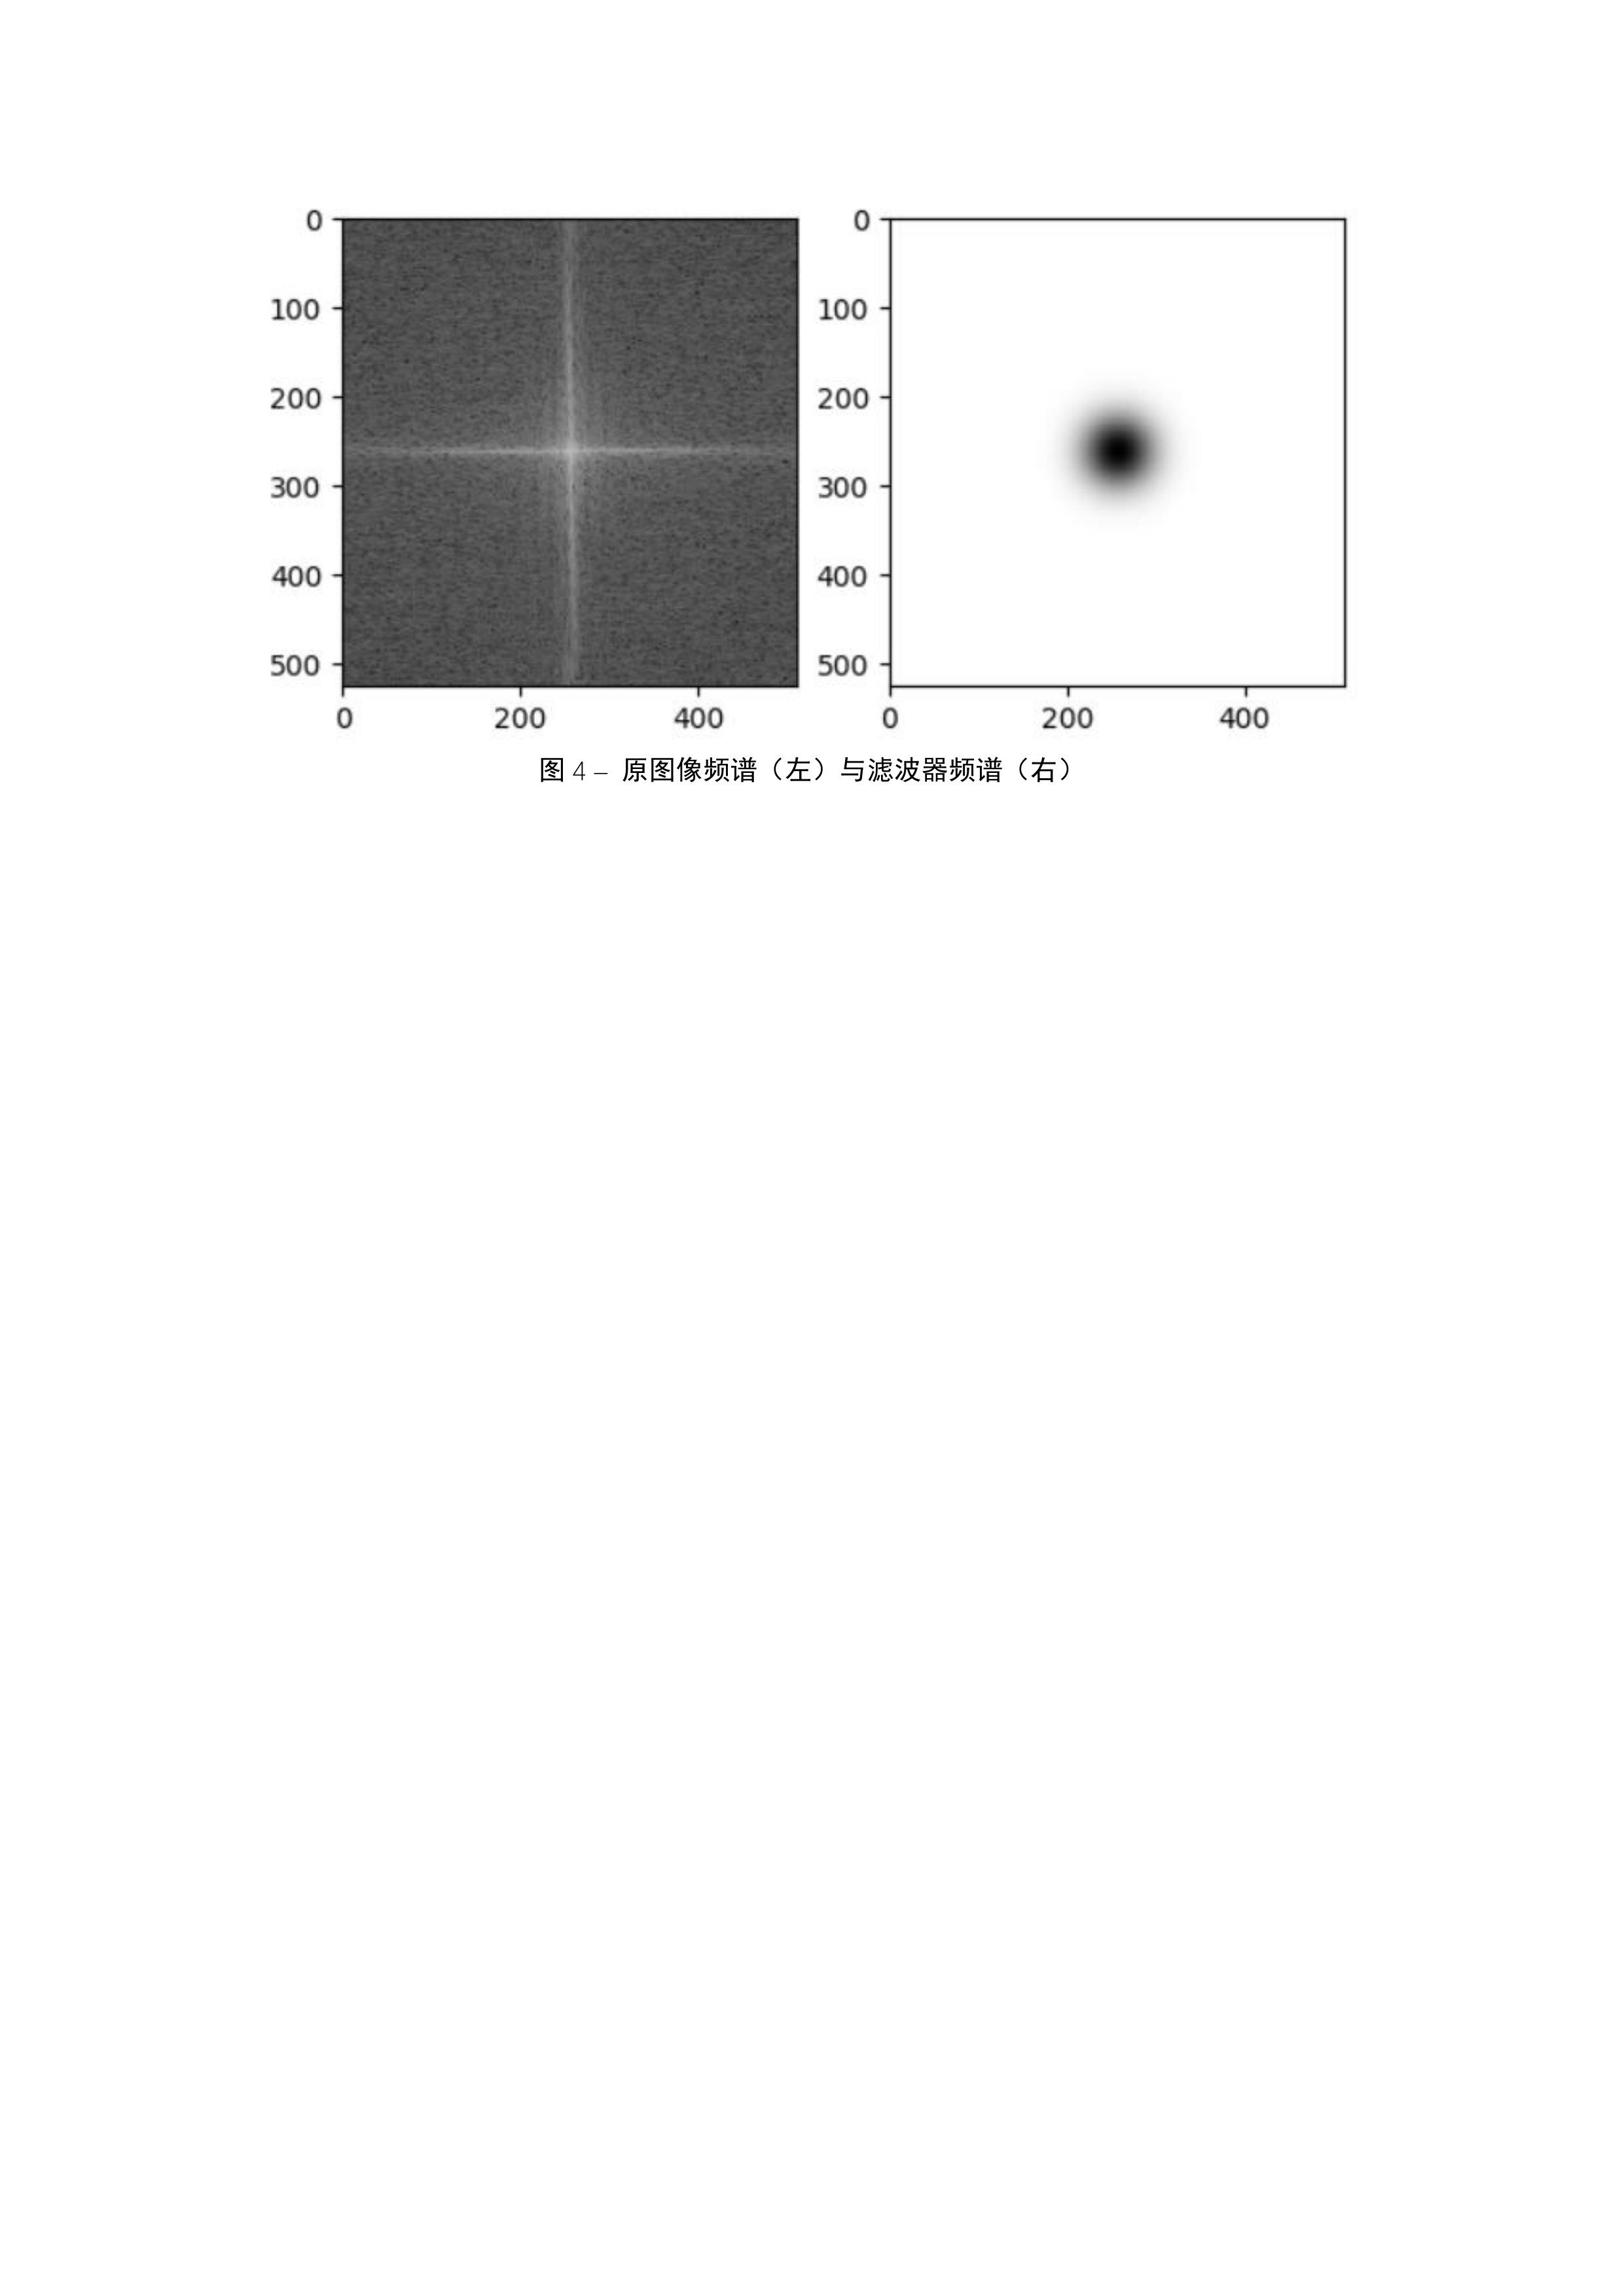


程序代码
# coding: utf-8

'''
东南大学《数字图像处理》课程 作业6 - 对比度增强
09017227 卓旭 written with Python 3

本程序内灰度图像作为二维数组,存储顺序为[行][列],像素点坐标表示为img[x][y],坐标系为
O--------> [y axis]
|
|
V [x axis]
'''

import imageio
import numpy as np
import cv2 # OpenCV仅用于显示图片
import matplotlib.pyplot as plt

IMAGE_PATH='./img_Retinex.bmp'

'''
  读入灰度图像,转为二维numpy数组
'''
def readImage(imagePath):
  return imageio.imread(imagePath)

'''
  Retinex实现
'''
def Retinex(I):
  I = I + 1. # 为避免log(0)错误,转为1~256区间
  # 不使用 I=I+微小量 的原因是log(0)→-∞,会对后续exp过程产生影响
  I_log = np.log(I) # log I = log L + log R
  I_log_fft = np.fft.fft2(I_log) # 对数域作DFT转入频域
  I_log_fft_shift = np.fft.fftshift(I_log_fft) # shift结果,把低频放到中心而不是四角

  # 频谱绘制相关
  # plt.subplot(121)
  # plt.imshow(np.log(np.abs(I_log_fft_shift)), cmap='gray')

  # 接下来设计一个滤波器,它减益低频,增益高频
  # 这是一个调整过的高斯滤波器,详见说明文档
  # 其中心在图像中心,与前面的shift对应
  def AdjustedGaussFilter(lowAlpha, highAlpha, c, cutFreq, height, width):
    H = np.zeros((height, width))
    squareD0 = cutFreq ** 2
    delta = highAlpha - lowAlpha
    centerX, centerY = height // 2, width // 2
    for i in range(height):
      for j in range(width):
        squareD = (i - centerX) ** 2 + (j - centerY) ** 2
        res = delta * (1 - np.exp(-c * squareD / squareD0)) + lowAlpha
        H[i, j] = res
    return H
  HL = 0.8 # 低频减益系数
  HH = 1.85 # 高频增益系数
  C = 1 # 坡度控制参数
  CUT_FREQ = 40 # 截止频率
  AGF = AdjustedGaussFilter(HL, HH, C, CUT_FREQ, I.shape[0], I.shape[1])

  # 频谱绘制相关
  # plt.subplot(122)
  # plt.imshow(AGF, cmap='gray')
  # plt.show()

  # 用这个滤波器作用于I_log_fft_shift,可以认为削减了照度L的量
  R_log_fft_shift = I_log_fft_shift * AGF
  # 反傅里叶变换
  R_log_fft = np.fft.ifftshift(R_log_fft_shift)
  R_log = np.fft.ifft2(R_log_fft)
  R = np.abs(np.exp(R_log)) # 指数处理,去掉log
  R = R - 1 # 把之前加的1减去
  # 化到0~255区间
  R_norm = np.zeros(R.shape)
  minR, maxR = np.min(R), np.max(R)
  rangeR = maxR - minR
  for i in range(R.shape[0]):
    for j in range(R.shape[1]):
      R_norm[i, j] = (R[i, j] - minR) / rangeR * 255.

  return np.asarray(R_norm, np.uint8)

if __name__ == '__main__':
  print("开始计算...")
  result = Retinex(readImage(IMAGE_PATH))
  imageio.imwrite('Retinex_Result.bmp', result)
  cv2.imshow("Retinex", result)
  cv2.waitKey(0)


