1.首先,我们需要两台虚拟机(CentOS7,Linux文本)。
2.给两台虚拟机配置网络环境分别为桥接模式 CentOS7 ip为192.168.100.137、24,linux文本ip为192.168.100.237/24,然后各自配置yum源配置文件(http://www.cnblogs.com/zxbdbk/p/6020679.html)。
3.给CentOS7中安装httpd、php、php-mysql,然后重启服务及关闭防火墙:
systemctl restart httpd.service       //重启httpd服务
systemctl stop firewalld.service      //临时关闭防火墙
setenforce 0                         //关闭selinux
4.接下来给linux文本中修改yum配置文件及安装mysql-server 及关闭防火墙:
yum -y install mysql-server          //安装mysql服务
service mysqld restart               //重启mysql
service iptables stop                //关闭防火墙
setenforce 0
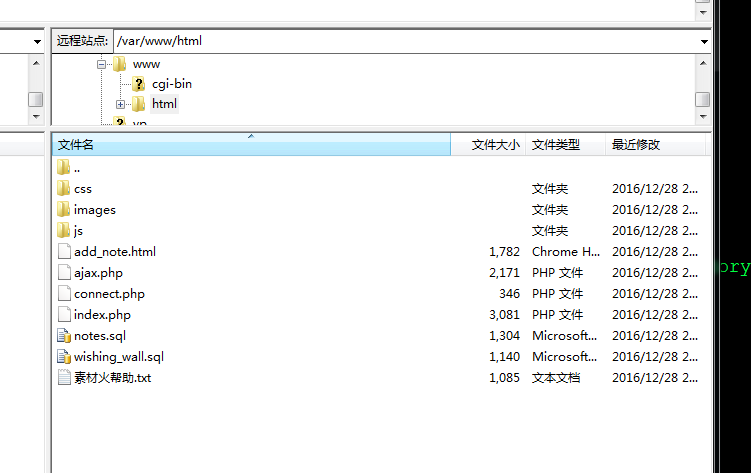
5.将网站文件放入CentOS7中的/var/www/html目录下。

6.Linux文本 数据库处理
[root@root ~]# mysql                        #进入数据库
Welcome to the MySQL monitor.  Commands end with ; or g.
Your MySQL connection id is 2 to server version: 5.0.22

Type 'help;' or 'h' for help. Type 'c' to clear the buffer.

mysql> create user 'zxb'@'192.168.100.137' identified by '123456';  #创建新用户
Query OK, 0 rows affected (0.00 sec)

mysql> show databases;   #查看数据库
+--------------------+
| Database           |
+--------------------+
| information_schema |
| mysql              |
| sjk                |
| test               |
+--------------------+
4 rows in set (0.00 sec)

mysql> grant all privileges on sjk.* to 'zxb'@'192.168.100.137';   #将数据库的权限给用户
Query OK, 0 rows affected (0.00 sec)

use sjk;   #进入数据库
{  mysql> /*!40101 SET CHARACTER_SET_CLIENT=@OLD_CHARACTER_SET_CLIENT */;
Query OK, 0 rows affected (0.00 sec)
mysql> /*!40101 SET CHARACTER_SET_RESULTS=@OLD_CHARACTER_SET_RESULTS */;
Query OK, 0 rows affected (0.00 sec)
mysql> /*!40101 SET COLLATION_CONNECTION=@OLD_COLLATION_CONNECTION */;
Query OK, 0 rows affected (0.00 sec)   }      #上传数据库文件
quit   #退出数据库
service mysqld restart #重启mysql
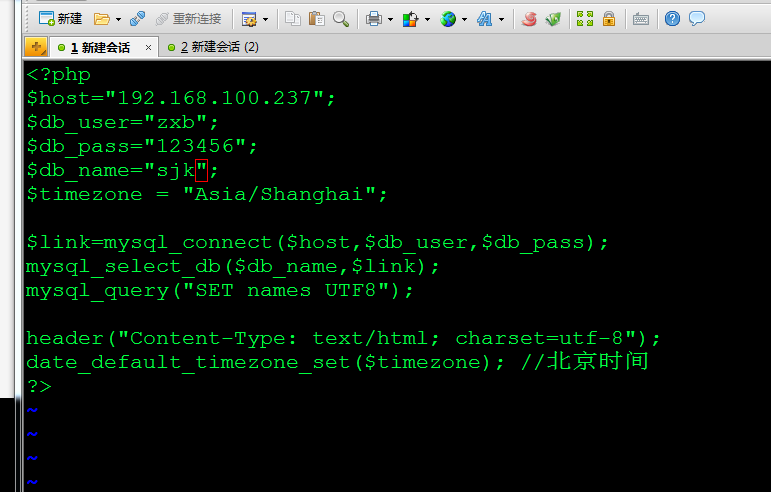
7. 再进入CentOS7 中 /etc 下进入 /var/www/html 下 再输入命令: vi connec.php 修改配置文件:

8.效果图。
