1. 图片优化
首先是UI设计师对图片进行一次压缩,到了前端工程师手上再进行一次压缩,推荐网站https://tinypng.com/。本人使用的技术栈时VUE和webpack,代码压缩在webpack中可以配置,不再详述。
2. webpack打包优化
如果按照vue-cli的正常配置进行打包,打包出来的包会非常大,即使进行了压缩。打包出来的东西分为2部分,第一部分是vue组件,以及业务逻辑部分;第二部分为插件打包,例如vue,vue-router,axios,vuex,vueScroll等插件。
a. 第一部分:一般的单页面都会涉及到路由加载。在第一次加载的时候,只需要加载首页的路由即可,其他的路由可以进行懒加载设置。vue路由懒加载有3种方法可以实现
/*1. vue异步组件技术 */
{
path: '/home',
name: 'home',
component: resolve => require(['@/components/home'],resolve)
},{
path: '/index',
name: 'Index',
component: resolve => require(['@/components/index'],resolve)
},{
path: '/about',
name: 'about',
component: resolve => require(['@/components/about'],resolve)
}

// 2.下面2行代码,没有指定webpackChunkName,每个组件打包成一个js文件。(官方网站推荐)
/* const Home = () => import('@/components/home')
const Index = () => import('@/components/index')
const About = () => import('@/components/about') */
// 下面2行代码,指定了相同的webpackChunkName,会合并打包成一个js文件。 把组件按组分块
const Home = () => import(/* webpackChunkName: 'ImportFuncDemo' */ '@/components/home')
const Index = () => import(/* webpackChunkName: 'ImportFuncDemo' */ '@/components/index')
const About = () => import(/* webpackChunkName: 'ImportFuncDemo' */ '@/components/about')
/* 3.组件懒加载: webpack提供的require.ensure() */
{
path: '/home',
name: 'home',
component: r => require.ensure([], () => r(require('@/components/home')), 'demo')
}, {
path: '/index',
name: 'Index',
component: r => require.ensure([], () => r(require('@/components/index')), 'demo')
}, {
path: '/about',
name: 'about',
component: r => require.ensure([], () => r(require('@/components/about')), 'demo-01')
}
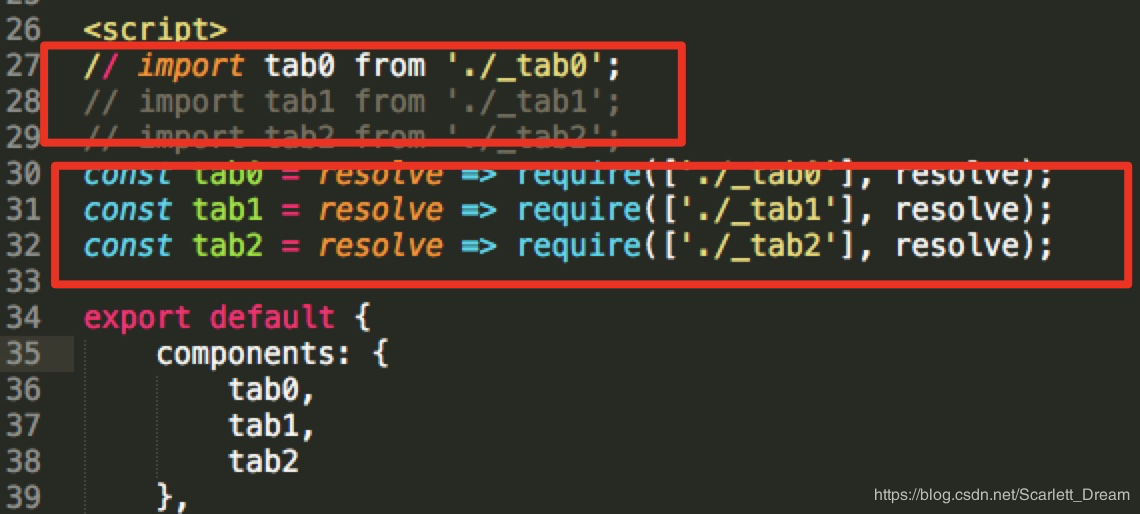
需要注意的是:require或者import该组件进行懒加载后,不能在路由外在进行import该组件,否则webpack打包不生效。
b. 第二部分:减小第三方插件的包。相对从服务器加载数十甚至数百兆的资源,更倾向从cdn引入。
具体做法: 在index.html中加入vue,vuex等资源
在vue资源管理文件build文件夹中的webpack.base.conf.js,此js文件是vue基础打包配置,在此配置中加入
externals: {
'vue': 'Vue',
'vue-router': 'VueRouter',
'element-ui': 'ELEMENT',
'mui': 'mui'
},
externals中的键值对格式为 'aaa' : 'bbb', 其中,aaa表示要引入的资源的名字,bbb表示该模块提供给外部引用的名字,由对应的库自定。例如,vue为Vue,vue-router为VueRouter.
关于vue中性能优化在webpack中配置exexternals节点
正常情况下,项目中的依赖包,例如 vue, vue-router, axios, lodash, echarts, nprogress 这样的包,都是直接从 node_modules 目录中打包进项目中,无形中增加了打包出来的文件的体积;
为了减少打包出来的文件的体积,我们可以使用 webpack 提供的 externals 节点,把上述包配置成外联的形式;
注意:被 externals 节点配置的包,不会被打包到最终的项目里,从而减少了打包完毕后项目的体积;
www.bootcdn.cn 这是html里找包的那个网站
externals 节点的配置步骤:
1.打开 build 目录下的 webpack.prod.conf.js 文件,添加如下代码:
externals: {
// 包名: window全局对象,
echarts: ‘echarts’,
vue: ‘Vue’,
‘vue-router’: ‘VueRouter’,
axios: ‘axios’,
lodash: ‘_’,
nprogress: ‘NProgress’
}
2.打开 index.html 首页,在头部header区域添加如下代码:
< link rel=”stylesheet” href=”https://cdn.bootcss.com/nprogress/0.2.0/nprogress.min.css”>
< script src=”https://cdn.bootcss.com/nprogress/0.2.0/nprogress.min.js”>< /script>
< script src=”https://cdn.bootcss.com/echarts/4.1.0/echarts.min.js”>< /script>
< script src=”https://cdn.bootcss.com/vue/2.5.16/vue.runtime.min.js”>< /script>
< script src=”https://cdn.bootcss.com/vue-router/3.0.1/vue-router.min.js”>< /script>
< script src=”https://cdn.bootcss.com/axios/0.18.0/axios.min.js”>
< script src=”https://cdn.bootcss.com/lodash.js/4.17.10/lodash.min.js”>< /script>
路由懒加载
运行 npm i babel-plugin-syntax-dynamic-import -D
在 .babelrc 的 plugins 节点下,新增如下插件配置:
“babel-plugin-syntax-dynamic-import”
把路由改造成懒加载形式:
// 导入 登录组件
// import Login from ‘@/components/Login’ 改造成如下格式:
const Login = () => import(/* webpackChunkName: “login” */ ‘@/components/Login’)
4,减少dom操作,合理使用v-if和v-show
5. 使用Webpack 的内置语句: import(*)
代码:在tabs的change事件中按需加载

6. require.ensure:
require.ensure([’./tab0.vue’], () => { resolve(require(’./tab0.vue’)) }, ‘tab0’)
7.使用() => import()
代码: