NGINX的使用
-
源码安装nginx
-
第一步:依赖环境安装:
yum install pcre pcre-devel openssl openssl-devel zlib zlib-devel -y yum install gcc gcc-c++ make libtool -y -
第二步:下载nginx 版本
官网下载地址: wget http://nginx.org/download/wget http://nginx.org/download/nginx-1.17.7.tar.gz 解压下载nginx版本: tar -xvf nginx-1.13.10.tar.gz -
第三步:编译
./configure --prefix=/usr --sbin-path=/usr/sbin/nginx --conf-path=/etc/nginx/nginx.conf --error-log-path=/var/log/nginx/error.log --pid-path=/var/run/nginx/nginx.pid --lock-path=/var/lock/nginx.lock --user=nginx --group=nginx --with-http_ssl_module --with-http_flv_module --with-http_gzip_static_module --http-log-path=/var/log/nginx/access.log --http-client-body-temp-path=/var/tem/nginx/client --http-proxy-temp-path=/var/tem/nginx/proxy --http-fastcgi-temp-path=/var/tem/nginx/fcgi --with-http_stub_status_module -
第四步:安装
make && make install -
第五步:启动
nginx -c /etc/nginx/nginx.conf -
第六步:如果出现[emerg] getpwnam("nginx") failed 错误
执行: useradd -s /sbin/nologin -M nginx id nginx -
第七步:如果出现 [emerg] mkdir() "/var/temp/nginx/client" failed (2: No such file or directory) 错误
执行: sudo mkdir -p /var/tem/nginx/client -
注:
# 如果您正在运行防火墙,请运行以下命令以允许HTTP和HTTPS通信:
sudo firewall-cmd --permanent --zone=public --add-service=http
sudo firewall-cmd --permanent --zone=public --add-service=https
sudo firewall-cmd --reload
-
-
找到nginx配置文件目录
nginx -t # 配置文件目录 # nginx: the configuration file /etc/nginx/nginx.conf syntax is ok # nginx: configuration file /etc/nginx/nginx.conf test is successful -
切换到/etc/nginx目录下,新建文件夹命名为conf.d
-
进入conf.d文件夹,新建一个xxx.conf文件
-
把一下内容复制进去
server { listen 80; #监听端口 server_name 192.168.93.135; # 域名或者ip location / { proxy_pass http://127.0.0.1:8000; # 反向代理的端口 # 如uwsgi中与nginx的通信连接为socket,则使用以下设置 # uwsgi_pass 0.0.0.0:8000; # include uwsgi_params; #Proxy Settings proxy_redirect off; proxy_set_header Host $host; proxy_set_header X-Real-IP $remote_addr; proxy_set_header X-Forwarded-For $proxy_add_x_forwarded_for; proxy_next_upstream error timeout invalid_header http_500 http_502 http_503 http_504; proxy_max_temp_file_size 0; proxy_connect_timeout 90; proxy_send_timeout 90; proxy_read_timeout 90; proxy_buffer_size 4k; proxy_buffers 4 32k; proxy_busy_buffers_size 64k; proxy_temp_file_write_size 64k; } } -
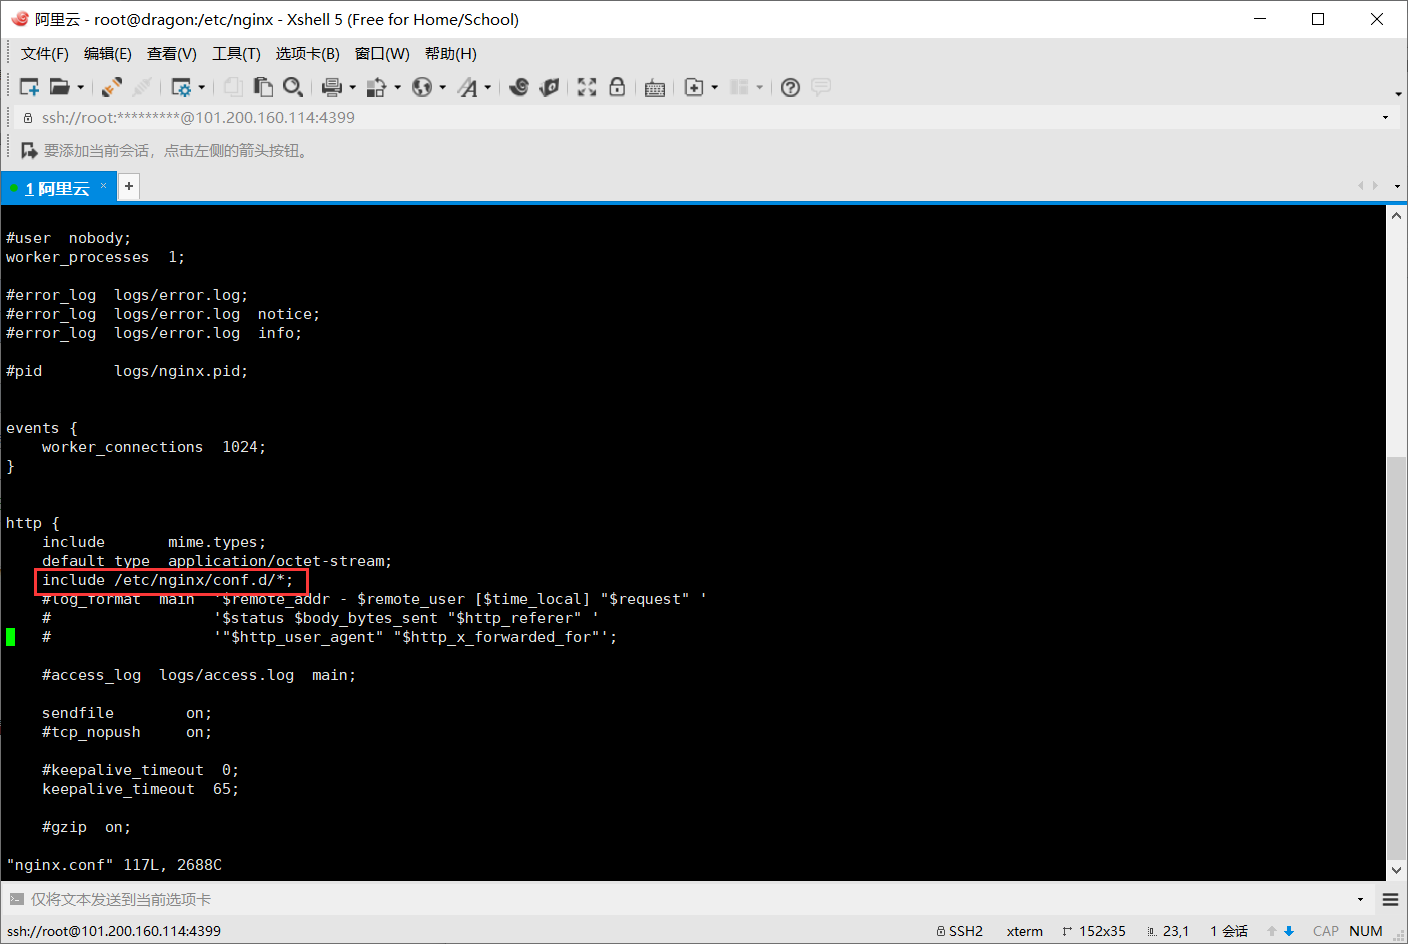
切换到/etc/nginx目录下
# 编辑nginx.conf文件
vi nginx.conf
添加如下一行内容
include /etc/nginx/conf.d/*;
-
nginx使用django目录下的配置文件启动
# 启动 nginx -c /etc/nginx/nginx.conf # 停止 nginx -s stop # 重启 nginx -s reload -
nginx的卸载
-
停掉nginx
nginx -s stop -
删除nginx的自动启动
chkconfig nginx off -
源头删除nginx
rm -rf /usr/sbin/nginx rm -rf /etc/nginx rm -rf /etc/init.d/nginx -
使用yum清理
yum remove nginx -
ok,结束
-