一、创建movie的视图
二、对cinema、movie视图添加‘添加信息’的操作
一、创建movie的视图
在views文件夹下添加Movie文件夹,在这个文件夹下添加Index.cshtml视图,为什么添加Index.cshtml这个名字的视图,可以看看我们写的MovieController控制器
@using DemoCoreStudy.Models
@model IEnumerable<Movie>

<div class="container">
    <div class="row">
        <table class="table">
            <thead class="thead-dark">
                <tr>
                    <th scope="col">Id</th>
                    <th scope="col">Name</th>
                    <th scope="col">Staring</th>
                    <th scope="col">ReleseDate</th>
                     <th></th>
                </tr>
            </thead>
            <tbody>
                @Html.DisplayForModel()
            </tbody>
        </table>
    </div>
</div>
然后再Movie文件夹下添加DispalyTemplates文件夹,其中添加Movie.cshtml视图
@model DemoCoreStudy.Models.Movie

<tr>
    <th scope="col">@Model.Id</th>
    <td>@Model.Name</td>
    <td>@Model.Starring</td>
    <td>@Model.ReleseDate</td>
    <td asp-action="Edit" asp-route-movieId="@Model.Id">编辑</td>
</tr>
接下来回到MovieController控制器添加Edit方法
public IActionResult Edit(int movieId)
        {
            return RedirectToAction("Index");
        }
``
`然后我们回到Cinema.cshtml,写下一个跳转链接,点一下电影名可以跳转到对应的的电影界面
@model DemoCoreStudy.Models.Cinema
@Model.Id @Model.Name @Model.Location @Model.Capacity 编辑 ``` 就插了一行,现在运行,可以完美运行QWQ
开心
二、对cinema、movie视图添加‘添加信息’的操作
接下来就是对信息添加功能的操作了
先对cinema进行添加操作
我们需要有个添加的按钮
打开cinema视图的index添加,
@model IEnumerable<DemoCoreStudy.Models.Cinema>

<div class="container">
    <div class="row">
        <table class="table">
            <thead class="thead-dark">
            <tr>
                <th scope="col">Id</th>
                <th scope="col">Name</th>
                <th scope="col">Location</th>
                <th scope="col">Capacity</th>
                <th></th>
            </tr>
            </thead>
            <tbody>
            @Html.DisplayForModel()
            </tbody>
        </table>
        <a asp-action="Add">添加</a>
    </div>
</div>
接下来建立Add.cshtml
打开bootstrap官网,左边菜单 Components->Forms

下面是官方原本的代码
<form>
  <div class="form-group row">
    <label for="staticEmail" class="col-sm-2 col-form-label">Email</label>
    <div class="col-sm-10">
      <input type="text" readonly class="form-control-plaintext" id="staticEmail" value="email@example.com">
    </div>
  </div>
  <div class="form-group row">
    <label for="inputPassword" class="col-sm-2 col-form-label">Password</label>
    <div class="col-sm-10">
      <input type="password" class="form-control" id="inputPassword" placeholder="Password">
    </div>
  </div>
</form>
根据官方给出的文档修改下,再Home文件夹下建立Add.cshtml
Add.cshtml
@model DemoCoreStudy.Models.Cinema

<div class="container">
    <form asp-action="Add">
        <div class="form-group row">
            <label asp-for="Name" class="col-sm-2 col-form-label">电影名称</label>
            <div class="col-sm-10">
                <input type="text" class="form-control" asp-for="Name" />
            </div>
        </div>
        <div class="form-group row">
            <label asp-for="Location" class="col-sm-2 col-form-label">地点</label>
            <div class="col-sm-10">
                <input type="text" class="form-control" asp-for="Location" />
            </div>
        </div>
        <div class="form-group row">
            <label asp-for="Capacity" class="col-sm-2 col-form-label">容纳多少观众</label>
            <div class="col-sm-10">
                <input type="text" class="form-control" asp-for="Capacity" />
            </div>
        </div>

        <div class="form-group row">
            <div class="col-sm-10 offset-sm-2">
                <button type="submit" class="btn btn-primary">Submit</button>
            </div>
        </div>
    </form>
</div>
来运行下吧


啊哈哈哈!搞定了,对于movie的添加原理相同,不同的是你要添加到那个电影院的Id名头下
在movie文件夹下的Index添加按钮
@using DemoCoreStudy.Models
@model IEnumerable<Movie>

<div class="container">
    <div class="row">
        <table class="table">
            <thead class="thead-dark">
                <tr>
                    <th scope="col">Id</th>
                    <th scope="col">Name</th>
                    <th scope="col">Staring</th>
                    <th scope="col">ReleseDate</th>
                    <th></th>
                </tr>
            </thead>
            <tbody>
                @Html.DisplayForModel()
            </tbody>
        </table>
        <a asp-action="Add" asp-route-cinemaId="@ViewBag.cinemaId">添加</a>
    </div>
</div>
asp-route-cinemaId="@ViewBag.cinemaId"这句话意思为要返回一个对应cinemaId的值,将电影数据加入对应的电影院之下
在movie文件夹下添加Add.cshtml视图
@model DemoCoreStudy.Models.Movie

<div class="container">
    <form asp-action="Add">
        <input type="hidden" asp-for="CinemaId" /><!--隐藏返回的Id属性-->
        <div class="form-group row">
            <label asp-for="Name" class="col-sm-2 col-form-label">电影名称</label>
            <div class="col-sm-10">
                <input type="text" class="form-control" asp-for="Name" />
            </div>
        </div>
        <div class="form-group row">
            <label asp-for="Starring" class="col-sm-2 col-form-label">主演</label>
            <div class="col-sm-10">
                <input type="text" class="form-control" asp-for="Starring" />
            </div>
        </div>
        <div class="form-group row">
            <label asp-for="ReleseDate" class="col-sm-2 col-form-label">上映时间</label>
            <div class="col-sm-10">
                <input type="date" class="form-control" asp-for="ReleseDate" />
            </div>
        </div>

        <div class="form-group row">
            <div class="col-sm-10 offset-sm-2">
                <button type="submit" class="btn btn-primary">Submit</button>
            </div>
        </div>
    </form>
</div>

这两个地方出现了问题,改下
第一张图的问题就不解释了
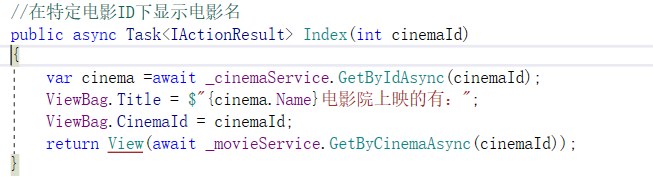
第二张图

我们的Add.cshtml中需要得到cinemaId,所以要添加ViewBag.CinemaId = cinemaId;
告诉它应该放入那个电影院中

已经可以了