跨域,你需要知道的全在这里
这篇文章是之前写的,我重新整理了下,阅读本文前,希望你有一定的 JS/Node 基础,这里不另外介绍如何使用 Ajax 做异步请求,如果不了解,可以先看:
最近在面试的时候常被问到如何解决跨域的问题,看了网上的一些文章后,许多文章并没有介绍清楚,经常使读者(我)感到困惑,所以今天我整理一下常用的跨域技巧,写这篇关于跨域的文章目的在于:
- 介绍常见的跨域的解决方案以及其优缺点
- 模拟实际的跨域场景,在每种方案后给出一个简单的实例,能够让读者和我一起敲代码,直观地理解这些跨域技巧
如果觉得本文有帮助,可以点 star 鼓励下,本文所有代码都可以从 github 仓库下载,读者可以按照下述打开:
git clone https://github.com/happylindz/blog.git
cd blog/code/crossOrigin/
yarn
建议你 clone 下来,方便你阅读代码,跟我一起测试。
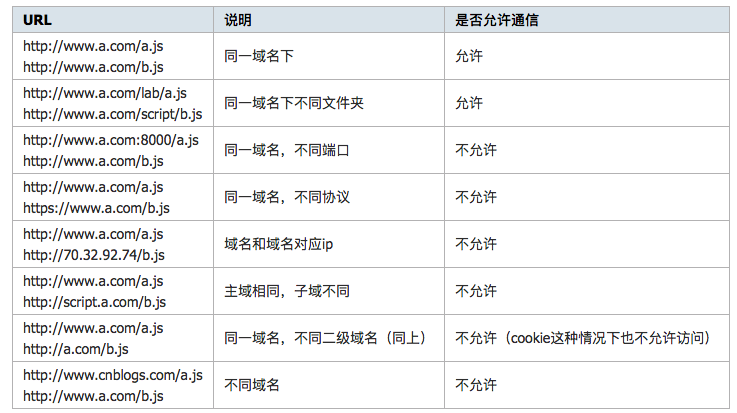
同源策略
使用过 Ajax 的同学都知道其便利性,可以在不向服务端提交完整页面的情况下,实现局部刷新,在当今 SPA 应用普遍使用,但是浏览器处于对安全方面的考虑,不允许跨域调用其它页面的对象,这对于我们在注入 iframe 或是 ajax 应用上带来不少麻烦。
简单来说,只有当协议,域名,端口号相同的时候才算是同一个域名,否则,均认为需要做跨域处理。
跨域方法
今天一共介绍七种常用的跨域技巧,关于跨域技巧大致可以分为 iframe 跨域和 API 跨域请求。
下面就先介绍三种 API 跨域的方法:
1. JSONP:
只要说到跨域,就必须聊到 JSONP,JSONP 全称为:JSON with padding,可用于解决老版本浏览器的跨域数据访问问题。
由于 web 页面上调用 js 文件不受浏览器同源策略的影响,所以通过 script 标签可以进行跨域请求:
- 首先前端需要先设置好回调函数,并将其作为 url 的参数。
- 服务端接收到请求后,通过该参数获取到回调函数名,并将数据放在参数中将其返回
- 收到结果后因为是 script 标签,所以浏览器会当做是脚本进行运行,从而达到跨域获取数据的目的
jsonp 之所以能够跨域的关键在于页面调用 JS 脚本是不受同源策略的影响,相当于向后端发起一条 http 请求,跟后端约定好函数名,后端拿到函数名,动态计算出返回结果并返回给前端执行 JS 脚本,相当于是一种 "动态 JS 脚本"
接下来我们通过一个实例来尝试:
后端逻辑:
// jsonp/server.js
const url = require('url');

require('http').createServer((req, res) => {
	const data = {
		x: 10
	};
	// 拿到回调函数名
	const callback = url.parse(req.url, true).query.callback;
	console.log(callback);
	res.writeHead(200);
	res.end(`${callback}(${JSON.stringify(data)})`);

}).listen(3000, '127.0.0.1');

console.log('启动服务,监听 127.0.0.1:3000');
前端逻辑:
// jsonp/index.html
<script>
    function jsonpCallback(data) {
        alert('获得 X 数据:' + data.x);
    }
</script>
<script src="http://127.0.0.1:3000?callback=jsonpCallback"></script>
然后在终端开启服务:
之所以能用脚本指令,是因为我在 package.json 里面设置好了脚本命令:
{
  // 输入 yarn jsonp 等于 "node ./jsonp/server.js & http-server ./jsonp"
  "scripts": {
    "jsonp": "node ./jsonp/server.js & http-server ./jsonp",
    "cors": "node ./cors/server.js & http-server ./cors",
    "proxy": "node ./serverProxy/server.js",
    "hash": "http-server ./hash/client/ -p 8080 & http-server ./hash/server/ -p 8081",
    "name": "http-server ./name/client/ -p 8080 & http-server ./name/server/ -p 8081",
    "postMessage": "http-server ./postMessage/client/ -p 8080 & http-server ./postMessage/server/ -p 8081",
    "domain": "http-server ./domain/client/ -p 8080 & http-server ./domain/server/ -p 8081"
  },
  // ...
}
yarn jsonp
// 因为端口 3000 和 8080 分别属于不同域名下
// 在 localhost:3000 查看效果,即可收到后台返回的数据 10
打开浏览器访问 localhost:8080 即可看到获取到的数据。

至此,通过 JSONP 跨域获取数据已经成功了,但是通过这种方式也存在着一定的优缺点:
优点:
- 它不像XMLHttpRequest 对象实现 Ajax 请求那样受到同源策略的限制
- 兼容性很好,在古老的浏览器也能很好的运行
- 不需要 XMLHttpRequest 或 ActiveX 的支持;并且在请求完毕后可以通过调用 callback 的方式回传结果。
缺点:
- 它支持 GET 请求而不支持 POST 等其它类行的 HTTP 请求。
- 它只支持跨域 HTTP 请求这种情况,不能解决不同域的两个页面或 iframe 之间进行数据通信的问题
- 无法捕获 Jsonp 请求时的连接异常,只能通过超时进行处理
CORS:
CORS 是一个 W3C 标准,全称是"跨域资源共享"(Cross-origin resource sharing)它允许浏览器向跨源服务器,发出 XMLHttpRequest 请求,从而克服了 ajax 只能同源使用的限制。
CORS 需要浏览器和服务器同时支持才可以生效,对于开发者来说,CORS 通信与同源的 ajax 通信没有差别,代码完全一样。浏览器一旦发现 ajax 请求跨源,就会自动添加一些附加的头信息,有时还会多出一次附加的请求,但用户不会有感觉。
因此,实现 CORS 通信的关键是服务器。只要服务器实现了 CORS 接口,就可以跨域通信。
前端逻辑很简单,只要正常发起 ajax 请求即可:
// cors/index.html
<script>
	const xhr = new XMLHttpRequest();
	xhr.open('GET', 'http://127.0.0.1:3000', true);
	xhr.onreadystatechange = function() {
		if(xhr.readyState === 4 && xhr.status === 200) {
			alert(xhr.responseText);
		}
	}
	xhr.send(null);
</script>
这似乎跟一次正常的异步 ajax 请求没有什么区别,关键是在服务端收到请求后的处理:
// cors/server.js
require('http').createServer((req, res) => {

	res.writeHead(200, {
		'Access-Control-Allow-Origin': 'http://localhost:8080',
		'Content-Type': 'text/html;charset=utf-8',
	});
	res.end('这是你要的数据:1111');

}).listen(3000, '127.0.0.1');

console.log('启动服务,监听 127.0.0.1:3000');
关键是在于设置相应头中的 Access-Control-Allow-Origin,该值要与请求头中 Origin 一致才能生效,否则将跨域失败。
然后我们执行命令:yarn cors 打开浏览器访问 localhost:3000 即可看到效果:
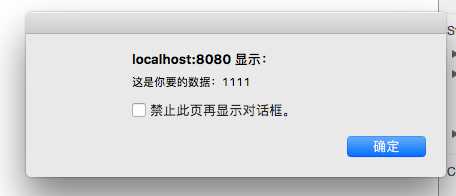
成功的关键在于 Access-Control-Allow-Origin 是否包含请求页面的域名,如果不包含的话,浏览器将认为这是一次失败的异步请求,将会调用 xhr.onerror 中的函数。
CORS 的优缺点:
- 使用简单方便,更为安全
- 支持 POST 请求方式
- CORS 是一种新型的跨域问题的解决方案,存在兼容问题,仅支持 IE 10 以上
这里只是对 CORS 做一个简单的介绍,如果想更详细地了解其原理的话,可以看看下面这篇文章:
3. 服务端代理:
服务器代理,顾名思义,当你需要有跨域的请求操作时发送请求给后端,让后端帮你代为请求,然后最后将获取的结果发送给你。
假设有这样的一个场景,你的页面需要获取 CNode:Node.js专业中文社区 论坛上一些数据,如通过 https://cnodejs.org/api/v1/topics,当时因为不同域,所以你可以将请求后端,让其对该请求代为转发。
代码如下:
// serverProxy/server.js
const url = require('url');
const http = require('http');
const https = require('https');

const server = http.createServer((req, res) => {
	const path = url.parse(req.url).path.slice(1);
	if(path === 'topics') {
		https.get('https://cnodejs.org/api/v1/topics', (resp) => {
			let data = "";
			resp.on('data', chunk => {
				data += chunk;
			});
			resp.on('end', () => {
				res.writeHead(200, {
					'Content-Type': 'application/json; charset=utf-8'
				});
				res.end(data);
			});
		})
	}
}).listen(3000, '127.0.0.1');
console.log('启动服务,监听 127.0.0.1:3000');
通过代码你可以看出,当你访问 http://127.0.0.1:3000/topics 的时候,服务器收到请求,会代你发送请求 https://cnodejs.org/api/v1/topics 最后将获取到的数据发送给浏览器。
启动服务 yarn proxy 并访问 http://localhost:3000/topics 即可看到效果:
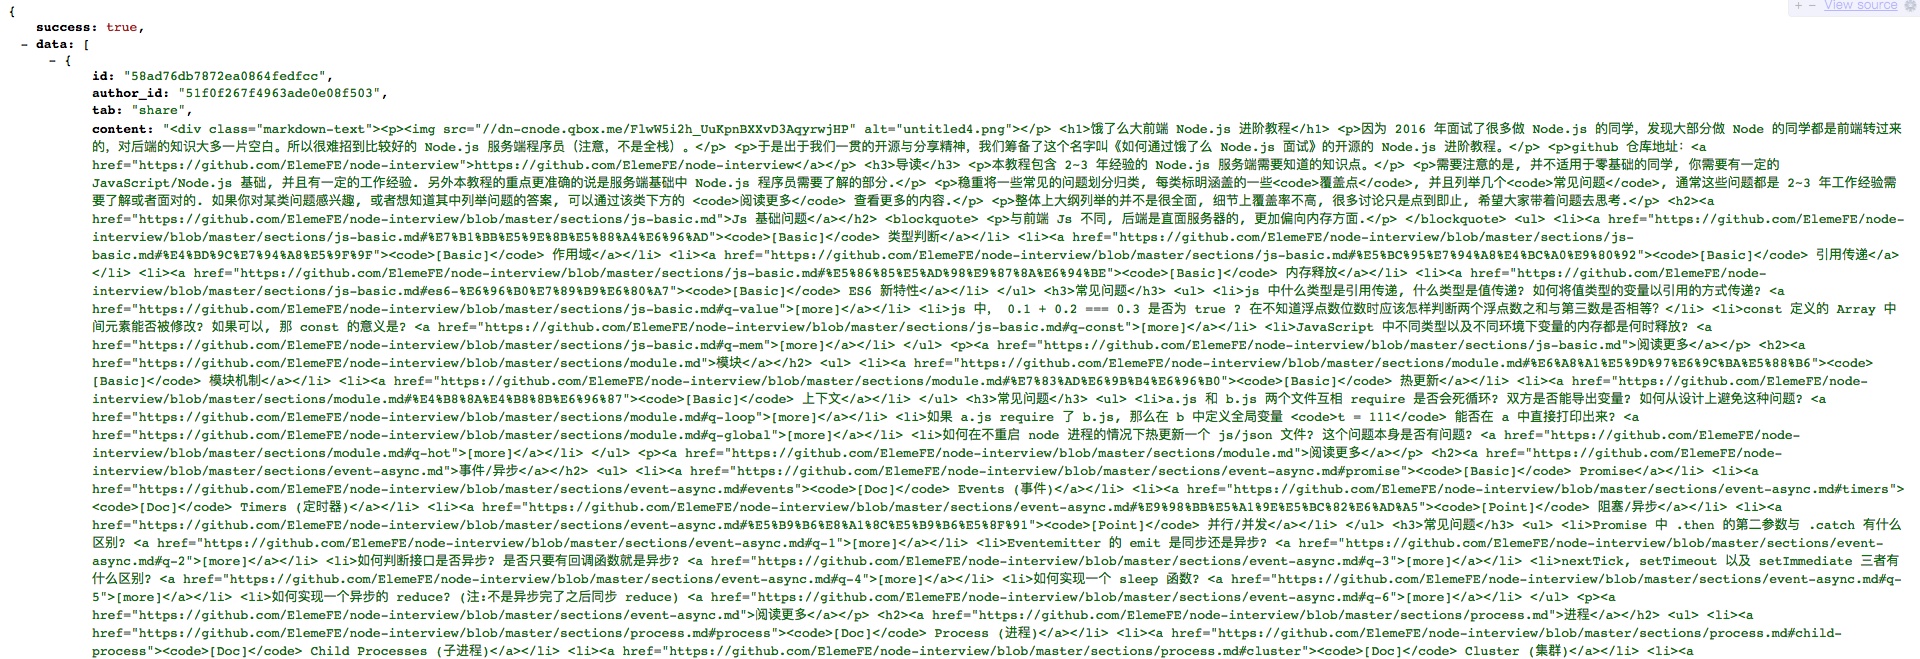
跨域请求成功。纯粹的获取跨域获取后端数据的请求的方式已经介绍完了,另外介绍四种通过 iframe 跨域与其它页面通信的方式。
location.hash:
在 url 中,http://www.baidu.com#helloworld 的 "#helloworld" 就是 location.hash,改变 hash 值不会导致页面刷新,所以可以利用 hash 值来进行数据的传递,当然数据量是有限的。
假设 localhost:8080 下有文件 index.html 要和 localhost:8081 下的 data.html 传递消息,index.html 首先创建一个隐藏的 iframe,iframe 的 src 指向 localhost:8081/data.html,这时的 hash 值就可以做参数传递。
// hash/client/index.html 对应 localhost:8080/index.html
<script>
	let ifr = document.createElement('iframe');
	ifr.style.display = 'none';
	ifr.src = "http://localhost:8081/data.html#data";
	document.body.appendChild(ifr);

	function checkHash() {
		try {
			let data = location.hash ? location.hash.substring(1) : '';
			console.log('获得到的数据是:', data);
		}catch(e) {

		}
	}
	window.addEventListener('hashchange', function(e) {
		console.log('获得的数据是:', location.hash.substring(1));
	});
</script>
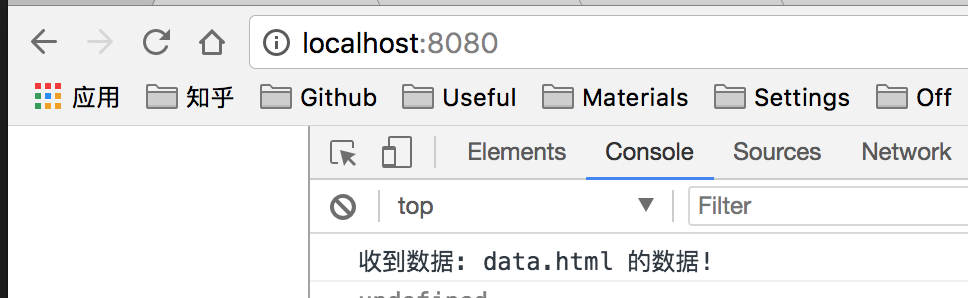
data.html 收到消息后通过 parent.location.hash 值来修改 index.html 的 hash 值,从而达到数据传递。
// hash/server/data.html 对应 localhost:8081/data.html
<script>
	switch(location.hash) {
		case "#data":
			callback();
			break;
	}
	function callback() {
		const data = "data.html 的数据"
		try {
			parent.location.hash = data;
		}catch(e) {
			// ie, chrome 下的安全机制无法修改 parent.location.hash
			// 所以要利用一个中间的代理 iframe
			var ifrproxy = document.createElement('iframe');
			ifrproxy.style.display = 'none';
			ifrproxy.src = 'http://localhost:8080/proxy.html#' + data;     // 该文件在 client 域名的域下
			document.body.appendChild(ifrproxy);
		}
	}
</script>
由于两个页面不在同一个域下 IE、Chrome 不允许修改 parent.location.hash 的值,所以要借助于 localhost:8080 域名下的一个代理 iframe 的 proxy.html 页面
// hash/client/proxy.html 对应 localhost:8080/proxy.html
<script>
    parent.parent.location.hash = self.location.hash.substring(1);
</script>
之后启动服务 yarn hash,即可在 localhost:8080 下观察到:

当然这种方法存在着诸多的缺点:
- 数据直接暴露在了 url 中
- 数据容量和类型都有限等等
window.name:
window.name(一般在 js 代码里出现)的值不是一个普通的全局变量,而是当前窗口的名字,这里要注意的是每个 iframe 都有包裹它的 window,而这个 window 是 top window 的子窗口,而它自然也有 window.name 的属性,window.name 属性的神奇之处在于 name 值在不同的页面(甚至不同域名)加载后依旧存在(如果没修改则值不会变化),并且可以支持非常长的 name 值(2MB)。
举个简单的例子:
你在某个页面的控制台输入:
window.name = "Hello World"
window.location = "http://www.baidu.com"
页面跳转到了百度首页,但是 window.name 却被保存了下来,还是 Hello World,跨域解决方案似乎可以呼之欲出了:
前端逻辑:
// name/client/index.html 对应 localhost:8080/index.html
<script>
	let data = '';
	const ifr = document.createElement('iframe');
	ifr.src = "http://localhost:8081/data.html";
	ifr.style.display = 'none';
	document.body.appendChild(ifr);
	ifr.onload = function() {
		ifr.onload = function() {
			data = ifr.contentWindow.name;
			console.log('收到数据:', data);
		}
		ifr.src = "http://localhost:8080/proxy.html";
	}
</script>
数据页面:
// name/server/data.html 对应 localhost:8081/data.html
<script>
	window.name = "data.html 的数据!";
</script>
localhost:8080index.html 在请求数据端 localhost:8081/data.html 时,我们可以在该页面新建一个 iframe,该 iframe 的 src 指向数据端地址(利用 iframe 标签的跨域能力),数据端文件设置好 window.name 的值。
但是由于 index.html 页面与该页面 iframe 的 src 如果不同源的话,则无法操作 iframe 里的任何东西,所以就取不到 iframe 的 name 值,所以我们需要在 data.html 加载完后重新换个 src 去指向一个同源的 html 文件,或者设置成 'about:blank;' 都行,这时候我只要在 index.html 相同目录下新建一个 proxy.html 的空页面即可。如果不重新指向 src 的话直接获取的 window.name 的话会报错:

之后运行 yarn name 即可看到效果:
6.postMessage
postMessage 是 HTML5 新增加的一项功能,跨文档消息传输(Cross Document Messaging),目前:Chrome 2.0+、Internet Explorer 8.0+, Firefox 3.0+, Opera 9.6+, 和 Safari 4.0+ 都支持这项功能,使用起来也特别简单。
前端逻辑:
// postMessage/client/index.html 对应 localhost:8080/index.html
<iframe src="http://localhost:8081/data.html" style='display: none;'></iframe>
<script>
	window.onload = function() {
		let targetOrigin = 'http://localhost:8081';
		window.frames[0].postMessage('index.html 的 data!', targetOrigin);
	}
	window.addEventListener('message', function(e) {
		console.log('index.html 接收到的消息:', e.data);
	});
</script>
创建一个 iframe,使用 iframe 的一个方法 postMessage 可以想 http://localhost:8081/data.html 发送消息,然后监听 message,可以获得其文档发来的消息。
数据端逻辑:
// postMessage/server/data.html 对应 localhost:8081/data.html
<script>
window.addEventListener('message', function(e) {
if(e.source != window.parent) {
return;
}
let data = e.data;
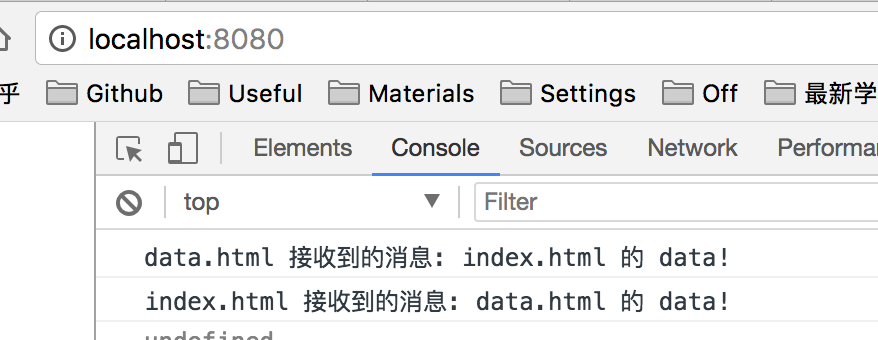
console.log('data.html 接收到的消息:', data);
parent.postMessage('data.html 的 data!', e.origin);
});
</script>
启动服务:yarn postMessage 并打开浏览器访问:
对 postMessage 感兴趣的详细内容可以看看教程:
PostMessage_百度百科
Window.postMessage()
7.document.domain
对于主域相同而子域不同的情况下,可以通过设置 document.domain 的办法来解决,具体做法是可以在 http://www.example.com/index.html 和 http://sub.example.com/data.html 两个文件分别加上 document.domain = "example.com" 然后通过 index.html 文件创建一个 iframe,去控制 iframe 的 window,从而进行交互,当然这种方法只能解决主域相同而二级域名不同的情况,如果你异想天开的把 script.example.com 的 domain 设为 qq.com 显然是没用的,那么如何测试呢?
测试的方式稍微复杂点,需要安装 nginx 做域名映射,如果你电脑没有安装 nginx,请先去安装一下: nginx
前端逻辑:
// domain/client/index.html 对应 sub1.example.com/index.html
<script>
	document.domain = 'example.com';
	let ifr = document.createElement('iframe');
	ifr.src = 'http://sub2.example.com/data.html';
	ifr.style.display = 'none';
	document.body.append(ifr);
	ifr.onload = function() {
		let win = ifr.contentWindow;
		alert(win.data);
	}
</script>
数据端逻辑:
// domain/server/data 对应 sub2.example.com/data.html
<script>
	document.domain = 'example.com';
	window.data = 'data.html 的数据!';
</script>
打开操作系统下的 hosts 文件:mac 是位于 /etc/hosts 文件,并添加:
127.0.0.1 sub1.example.com
127.0.0.1 sub2.example.com
之后打开 nginx 的配置文件:/usr/local/etc/nginx/nginx.conf,并在 http 模块里添加,记得输入 nginx 启动 nginx 服务:
/usr/local/etc/nginx/nginx.conf
http {
    // ...
    server {
        listen 80;
        server_name sub1.example.com;
        location / {
            proxy_pass http://127.0.0.1:8080/;
        }
    }
    server {
        listen 80;
        server_name sub2.example.com;
        location / {
            proxy_pass http://127.0.0.1:8081/;
        }
    }
    // ...
}
相当于是讲 sub1.example.com 和 sub2.example.com 这些域名地址指向本地 127.0.0.1:80,然后用 nginx 做反向代理分别映射到 8080 和 8081 端口。
这样访问 sub1(2).example.com 等于访问 127.0.0.1:8080(1)
启动服务 yarn domain 访问浏览器即可看到效果:

总结:
前面七种跨域方式我已经全部讲完,其实讲道理,常用的也就是前三种方式,后面四种更多时候是一些小技巧,虽然在工作中不一定会用到,但是如果你在面试过程中能够提到这些跨域的技巧,无疑在面试官的心中是一个加分项。
上面阐述方法的时候可能有些讲的不明白,希望在阅读的过程中建议你跟着我敲代码,当你打开浏览器看到结果的时候,你也就能掌握到这种方法。