不多说,直接上干货!
见官网
https://suricata.readthedocs.io/en/latest/setting-up-ipsinline-for-linux.html
11. Setting up IPS/inline for Linux
In this guide will be explained how to work with Suricata in layer3 inline mode and how to set iptables for that purpose.
First start with compiling Suricata with NFQ support. For instructions see Ubuntu Installation. For more information about NFQ and iptables, see NFQ.
To check if you have NFQ enabled in your Suricata, enter the following command:
suricata --build-info
and examine if you have NFQ between the features.
To run suricata with the NFQ mode, you have to make use of the -q option. This option tells Suricata which of the queue numbers it should use.
sudo suricata -c /etc/suricata/suricata.yaml -q 0
11.1. Iptables configuration
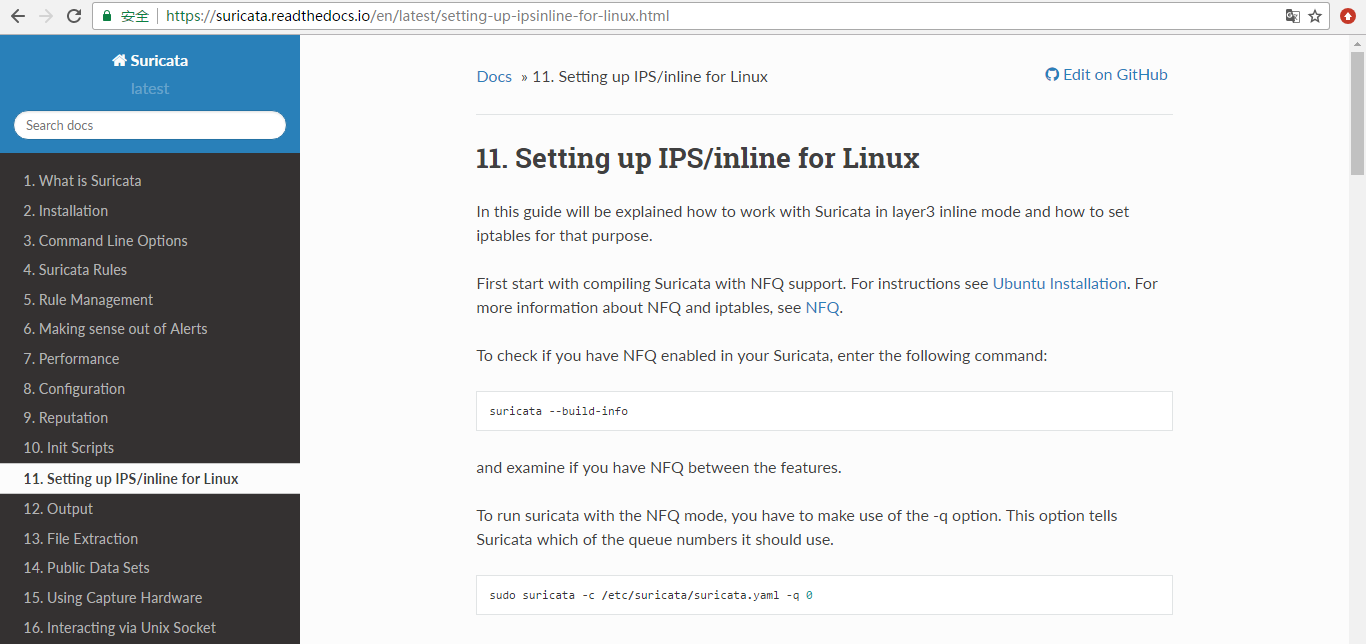
First of all it is important to know which traffic you would like to send to Suricata. Traffic that passes your computer or traffic that is generated by your computer.
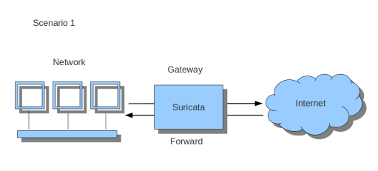
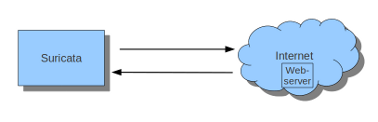
If Suricata is running on a gateway and is meant to protect the computers behind that gateway you are dealing with the first scenario: forward_ing . If Suricata has to protect the computer it is running on, you are dealing with the second scenario: host (see drawing 2). These two ways of using Suricata can also be combined.
The easiest rule in case of the gateway-scenario to send traffic to Suricata is:
sudo iptables -I FORWARD -j NFQUEUE
In this case, all forwarded traffic goes to Suricata.
In case of the host situation, these are the two most simple iptable rules;
sudo iptables -I INPUT -j NFQUEUE
sudo iptables -I OUTPUT -j NFQUEUE
It is possible to set a queue number. If you do not, the queue number will be 0 by default.
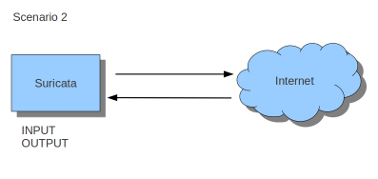
Imagine you want Suricata to check for example just TCP-traffic, or all incoming traffic on port 80, or all traffic on destination-port 80, you can do so like this:
sudo iptables -I INPUT -p tcp  -j NFQUEUE
sudo iptables -I OUTPUT -p tcp -j NFQUEUE
In this case, Suricata checks just TCP traffic.
sudo iptables -I INPUT -p tcp --sport 80  -j NFQUEUE
sudo iptables -I OUTPUT -p tcp --dport 80 -j NFQUEUE
In this example, Suricata checks all input and output on port 80.
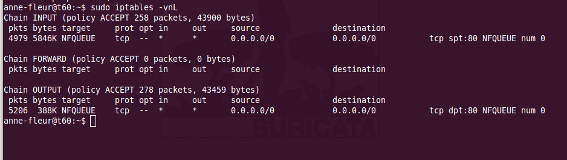
To see if you have set your iptables rules correct make sure Suricata is running and enter:
sudo iptables -vnL
In the example you can see if packets are being logged.
This description of the use of iptables is the way to use it with IPv4. To use it with IPv6 all previous mentioned commands have to start with ‘ip6tables’. It is also possible to let Suricata check both kinds of traffic.
There is also a way to use iptables with multiple networks (and interface cards). Example:

sudo iptables -I FORWARD -i eth0 -o eth1 -j NFQUEUE
sudo iptables -I FORWARD -i eth1 -o eth0 -j NFQUEUE
The options -i (input) -o (output) can be combined with all previous mentioned options
If you would stop Suricata and use internet, the traffic will not come through. To make internet work correctly, you have to erase all iptable rules.
To erase all iptable rules, enter:
sudo iptables -F