以下两种方法都可以,推荐用方法一!
如果有误,请见博客
MySQL用户权限(Host,User,Password)管理(mysql.user)
可以自己去增加和删除用户。别怕,zhouls!
方法一:
步骤一: yum -y install mysql-server
步骤二:service mysqld start
步骤三:mysql -u root -p
Enter password: (默认是空密码,按enter)
mysql > CREATE USER 'hive'@'%' IDENTIFIED BY 'hive';
mysql > GRANT ALL PRIVILEGES ON *.* TO 'hive'@'%' WITH GRANT OPTION;
mysql > flush privileges;
mysql > exit;
步骤四:去hive的安装目录下的lib,下将 mysql-connector-java-5.1.21.jar 传到这个目录下。
步骤五:去hive的安装目录下的conf,下配置hive-site.xml
<property>
<name>javax.jdo.option.ConnectionDriverName</name>
<value>com.mysql.jdbc.Driver</value>
<description>Driver class name for a JDBC metastore</description>
</property>
<property>
<name>javax.jdo.option.ConnectionURL</name>
<value>jdbc:mysql://localhost:3306/hive?createDatabaseIfNotExist=true</value>
<description>JDBC connect string for a JDBC metastore</description>
</property>
<property>
<name>javax.jdo.option.ConnectionUserName</name>
<value>hive< /value>
<description>Username to use against metastore database</description>
</property>
<property>
<name>javax.jdo.option.ConnectionPassword</name>
<value>hive< /value>
<description>password to use against metastore database</description>
</property>

  步骤六:切换到root用户,配置/etc/profile文件,source生效。
  步骤七:OK成功!

 编程这一块时,可以用自己的IP啦, 如  “jdbc:hive//192.168.80.128:10000/hivebase”
方法二:
步骤一:
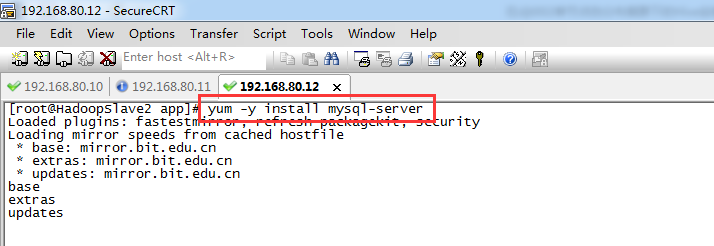
[root@HadoopSlave2 app]# yum -y install mysql-server
Loaded plugins: fastestmirror, refresh-packagekit, security
Loading mirror speeds from cached hostfile
* base: mirror.bit.edu.cn
* extras: mirror.bit.edu.cn
* updates: mirror.bit.edu.cn
base | 3.7 kB 00:00
extras | 3.4 kB 00:00
updates | 3.4 kB 00:00
updates/primary_db | 3.1 MB 00:04
Setting up Install Process
Resolving Dependencies
--> Running transaction check
---> Package mysql-server.x86_64 0:5.1.73-7.el6 will be installed
--> Processing Dependency: mysql = 5.1.73-7.el6 for package: mysql-server-5.1.73-7.el6.x86_64
--> Processing Dependency: perl-DBI for package: mysql-server-5.1.73-7.el6.x86_64
--> Processing Dependency: perl-DBD-MySQL for package: mysql-server-5.1.73-7.el6.x86_64
--> Processing Dependency: perl(DBI) for package: mysql-server-5.1.73-7.el6.x86_64
--> Running transaction check
---> Package mysql.x86_64 0:5.1.73-7.el6 will be installed
--> Processing Dependency: mysql-libs = 5.1.73-7.el6 for package: mysql-5.1.73-7.el6.x86_64
---> Package perl-DBD-MySQL.x86_64 0:4.013-3.el6 will be installed
---> Package perl-DBI.x86_64 0:1.609-4.el6 will be installed
--> Running transaction check
---> Package mysql-libs.x86_64 0:5.1.71-1.el6 will be updated
---> Package mysql-libs.x86_64 0:5.1.73-7.el6 will be an update
--> Finished Dependency Resolution
Dependencies Resolved
=======================================================================================================================================================================
Package Arch Version Repository Size
=======================================================================================================================================================================
Installing:
mysql-server x86_64 5.1.73-7.el6 base 8.6 M
Installing for dependencies:
mysql x86_64 5.1.73-7.el6 base 894 k
perl-DBD-MySQL x86_64 4.013-3.el6 base 134 k
perl-DBI x86_64 1.609-4.el6 base 705 k
Updating for dependencies:
mysql-libs x86_64 5.1.73-7.el6 base 1.2 M
Transaction Summary
=======================================================================================================================================================================
Install 4 Package(s)
Upgrade 1 Package(s)
Total download size: 12 M
Downloading Packages:
(1/5): mysql-5.1.73-7.el6.x86_64.rpm | 894 kB 00:01
(2/5): mysql-libs-5.1.73-7.el6.x86_64.rpm | 1.2 MB 00:02
(3/5): mysql-server-5.1.73-7.el6.x86_64.rpm | 8.6 MB 00:15
(4/5): perl-DBD-MySQL-4.013-3.el6.x86_64.rpm | 134 kB 00:00
(5/5): perl-DBI-1.609-4.el6.x86_64.rpm | 705 kB 00:01
-----------------------------------------------------------------------------------------------------------------------------------------------------------------------
Total 548 kB/s | 12 MB 00:21
Running rpm_check_debug
Running Transaction Test
Transaction Test Succeeded
Running Transaction
Warning: RPMDB altered outside of yum.
** Found 3 pre-existing rpmdb problem(s), 'yum check' output follows:
1:libreoffice-core-4.0.4.2-9.el6.x86_64 has missing requires of libjawt.so()(64bit)
1:libreoffice-core-4.0.4.2-9.el6.x86_64 has missing requires of libjawt.so(SUNWprivate_1.1)(64bit)
1:libreoffice-ure-4.0.4.2-9.el6.x86_64 has missing requires of jre >= ('0', '1.5.0', None)
Updating : mysql-libs-5.1.73-7.el6.x86_64 1/6
Installing : perl-DBI-1.609-4.el6.x86_64 2/6
Installing : perl-DBD-MySQL-4.013-3.el6.x86_64 3/6
Installing : mysql-5.1.73-7.el6.x86_64 4/6
Installing : mysql-server-5.1.73-7.el6.x86_64 5/6
Cleanup : mysql-libs-5.1.71-1.el6.x86_64 6/6
Verifying : mysql-5.1.73-7.el6.x86_64 1/6
Verifying : mysql-libs-5.1.73-7.el6.x86_64 2/6
Verifying : perl-DBD-MySQL-4.013-3.el6.x86_64 3/6
Verifying : mysql-server-5.1.73-7.el6.x86_64 4/6
Verifying : perl-DBI-1.609-4.el6.x86_64 5/6
Verifying : mysql-libs-5.1.71-1.el6.x86_64 6/6
Installed:
mysql-server.x86_64 0:5.1.73-7.el6
Dependency Installed:
mysql.x86_64 0:5.1.73-7.el6 perl-DBD-MySQL.x86_64 0:4.013-3.el6 perl-DBI.x86_64 0:1.609-4.el6
Dependency Updated:
mysql-libs.x86_64 0:5.1.73-7.el6
Complete!
[root@HadoopSlave2 app]#
步骤二:
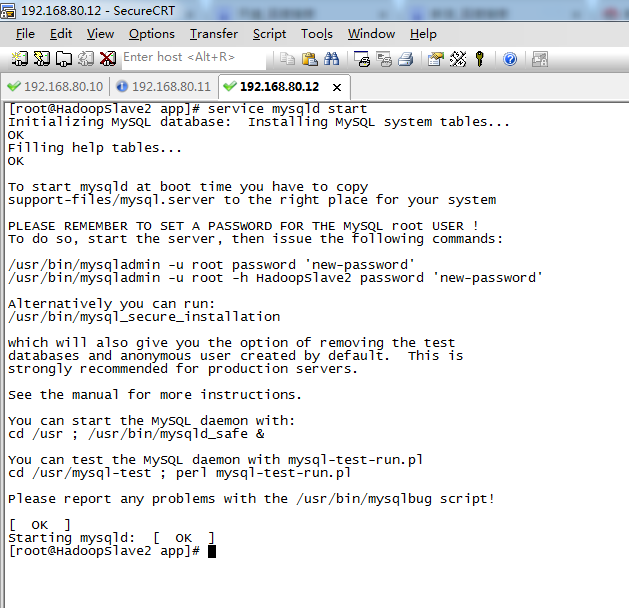
[root@HadoopSlave2 app]# service mysqld start
Initializing MySQL database: Installing MySQL system tables...
OK
Filling help tables...
OK
To start mysqld at boot time you have to copy
support-files/mysql.server to the right place for your system
PLEASE REMEMBER TO SET A PASSWORD FOR THE MySQL root USER !
To do so, start the server, then issue the following commands:
/usr/bin/mysqladmin -u root password 'new-password'
/usr/bin/mysqladmin -u root -h HadoopSlave2 password 'new-password'
Alternatively you can run:
/usr/bin/mysql_secure_installation
which will also give you the option of removing the test
databases and anonymous user created by default. This is
strongly recommended for production servers.
See the manual for more instructions.
You can start the MySQL daemon with:
cd /usr ; /usr/bin/mysqld_safe &
You can test the MySQL daemon with mysql-test-run.pl
cd /usr/mysql-test ; perl mysql-test-run.pl
Please report any problems with the /usr/bin/mysqlbug script!
[ OK ]
Starting mysqld: [ OK ]
[root@HadoopSlave2 app]#
步骤三:
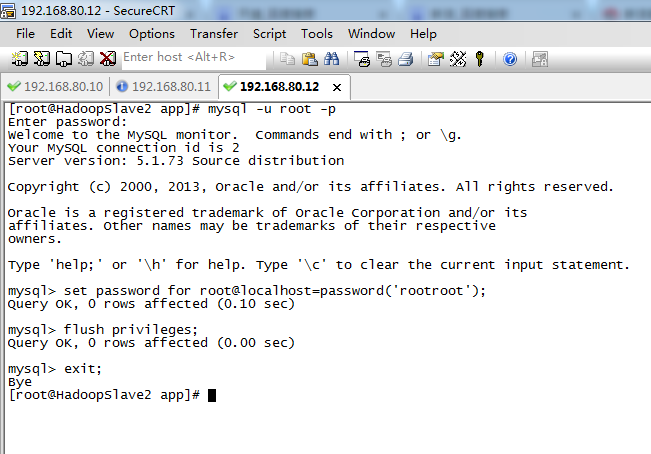
[root@HadoopSlave2 app]# mysql -u root -p
Enter password: (默认是空密码,按enter)
Welcome to the MySQL monitor. Commands end with ; or g.
Your MySQL connection id is 2
Server version: 5.1.73 Source distribution
Copyright (c) 2000, 2013, Oracle and/or its affiliates. All rights reserved.
Oracle is a registered trademark of Oracle Corporation and/or its
affiliates. Other names may be trademarks of their respective
owners.
Type 'help;' or 'h' for help. Type 'c' to clear the current input statement.
mysql> set password for root@localhost=password('rootroot');
Query OK, 0 rows affected (0.10 sec)
mysql> flush privileges;
Query OK, 0 rows affected (0.00 sec)
mysql> exit;
Bye
[root@HadoopSlave2 app]#
步骤四:
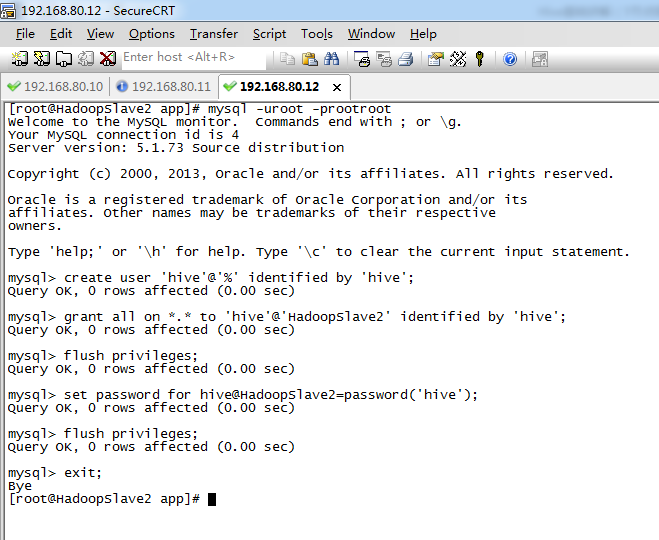
[root@HadoopSlave2 app]# mysql -uroot -prootroot
Welcome to the MySQL monitor. Commands end with ; or g.
Your MySQL connection id is 4
Server version: 5.1.73 Source distribution
Copyright (c) 2000, 2013, Oracle and/or its affiliates. All rights reserved.
Oracle is a registered trademark of Oracle Corporation and/or its
affiliates. Other names may be trademarks of their respective
owners.
Type 'help;' or 'h' for help. Type 'c' to clear the current input statement.
mysql> create user 'hive'@'%' identified by 'hive';
Query OK, 0 rows affected (0.00 sec)
mysql> grant all on *.* to 'hive'@'HadoopSlave2' identified by 'hive';
Query OK, 0 rows affected (0.00 sec)
mysql> flush privileges;
Query OK, 0 rows affected (0.00 sec)
mysql> set password for hive@HadoopSlave2=password('hive');
Query OK, 0 rows affected (0.00 sec)
mysql> flush privileges;
Query OK, 0 rows affected (0.00 sec)
mysql> exit;
Bye
[root@HadoopSlave2 app]#
步骤五:
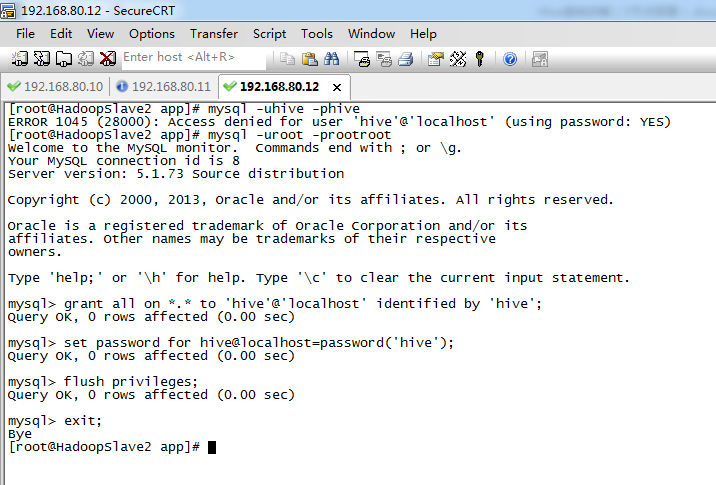
[root@HadoopSlave2 app]# mysql -uhive -phive
ERROR 1045 (28000): Access denied for user 'hive'@'localhost' (using password: YES)
[root@HadoopSlave2 app]# mysql -uroot -prootroot
Welcome to the MySQL monitor. Commands end with ; or g.
Your MySQL connection id is 8
Server version: 5.1.73 Source distribution
Copyright (c) 2000, 2013, Oracle and/or its affiliates. All rights reserved.
Oracle is a registered trademark of Oracle Corporation and/or its
affiliates. Other names may be trademarks of their respective
owners.
Type 'help;' or 'h' for help. Type 'c' to clear the current input statement.
mysql> grant all on *.* to 'hive'@'localhost' identified by 'hive';
Query OK, 0 rows affected (0.00 sec)
mysql> set password for hive@localhost=password('hive');
Query OK, 0 rows affected (0.00 sec)
mysql> flush privileges;
Query OK, 0 rows affected (0.00 sec)
mysql> exit;
Bye
[root@HadoopSlave2 app]#
步骤六:
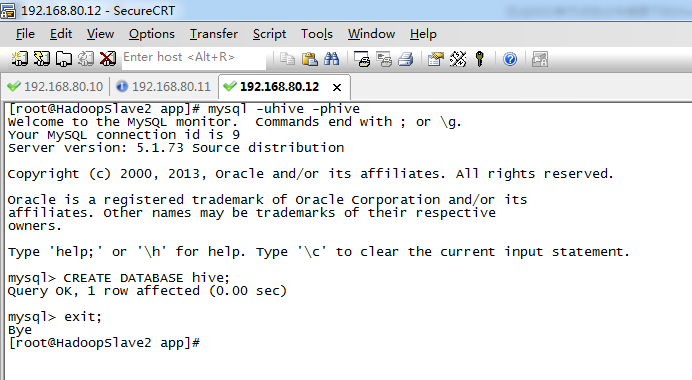
[root@HadoopSlave2 app]# mysql -uhive -phive
Welcome to the MySQL monitor. Commands end with ; or g.
Your MySQL connection id is 9
Server version: 5.1.73 Source distribution
Copyright (c) 2000, 2013, Oracle and/or its affiliates. All rights reserved.
Oracle is a registered trademark of Oracle Corporation and/or its
affiliates. Other names may be trademarks of their respective
owners.
Type 'help;' or 'h' for help. Type 'c' to clear the current input statement.
mysql> CREATE DATABASE hive;
Query OK, 1 row affected (0.00 sec)
mysql> exit;
Bye
[root@HadoopSlave2 app]#
步骤七:
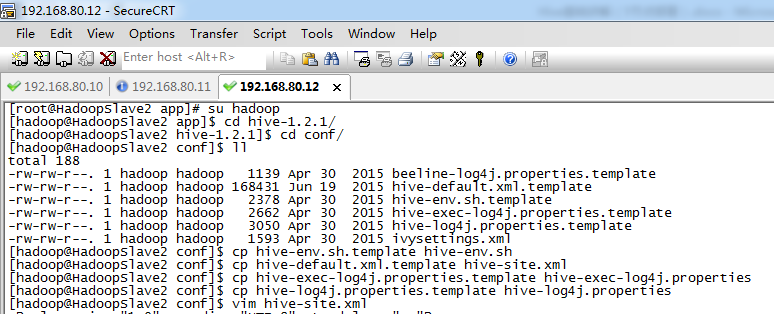
[root@HadoopSlave2 app]# su hadoop
[hadoop@HadoopSlave2 app]$ cd hive-1.2.1/
[hadoop@HadoopSlave2 hive-1.2.1]$ cd conf/
[hadoop@HadoopSlave2 conf]$ ll
total 188
-rw-rw-r--. 1 hadoop hadoop 1139 Apr 30 2015 beeline-log4j.properties.template
-rw-rw-r--. 1 hadoop hadoop 168431 Jun 19 2015 hive-default.xml.template
-rw-rw-r--. 1 hadoop hadoop 2378 Apr 30 2015 hive-env.sh.template
-rw-rw-r--. 1 hadoop hadoop 2662 Apr 30 2015 hive-exec-log4j.properties.template
-rw-rw-r--. 1 hadoop hadoop 3050 Apr 30 2015 hive-log4j.properties.template
-rw-rw-r--. 1 hadoop hadoop 1593 Apr 30 2015 ivysettings.xml
[hadoop@HadoopSlave2 conf]$ cp hive-env.sh.template hive-env.sh
[hadoop@HadoopSlave2 conf]$ cp hive-default.xml.template hive-site.xml
[hadoop@HadoopSlave2 conf]$ cp hive-exec-log4j.properties.template hive-exec-log4j.properties
[hadoop@HadoopSlave2 conf]$ cp hive-log4j.properties.template hive-log4j.properties
[hadoop@HadoopSlave2 conf]$ vim hive-site.xml
< property>
< name>javax.jdo.option.ConnectionDriverName< /name>
< value>com.mysql.jdbc.Driver< /value>
< description>Driver class name for a JDBC metastore< /description>
< /property>
< property>
< name>javax.jdo.option.ConnectionURL< /name>
< value>jdbc:mysql://HadoopSlave2:3306/hive?characterEncoding=UTF-8< /value>
< description>JDBC connect string for a JDBC metastore< /description>
< /property>
< property>
< name>javax.jdo.option.ConnectionUserName< /name>
< value>hive< /value>
< description>Username to use against metastore database< /description>
< /property>
< property>
< name>javax.jdo.option.ConnectionPassword< /name>
< value>hive< /value>
< description>password to use against metastore database< /description>
< /property>
步骤八:


步骤九:
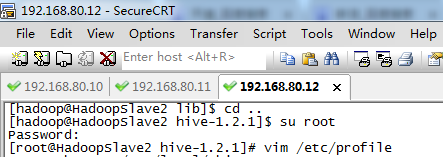
[hadoop@HadoopSlave2 lib]$ cd ..
[hadoop@HadoopSlave2 hive-1.2.1]$ su root
Password:
[root@HadoopSlave2 hive-1.2.1]# vim /etc/profile
export JAVA_HOME=/home/hadoop/app/jdk1.7.0_79
export HADOOP_HOME=/home/hadoop/app/hadoop-2.6.0
export ZOOKEEPER_HOME=/home/hadoop/app/zookeeper-3.4.6
export HIVE_HOME=/home/hadoop/app/hive-1.2.1
export PATH=$PATH:$JAVA_HOME/bin:$HADOOP_HOME/bin:$HADOOP_HOME/sbin:$ZOOKEEPER_HOME/bin:$HIVE_HOME/bin
[root@HadoopSlave2 hive-1.2.1]# source /etc/profile
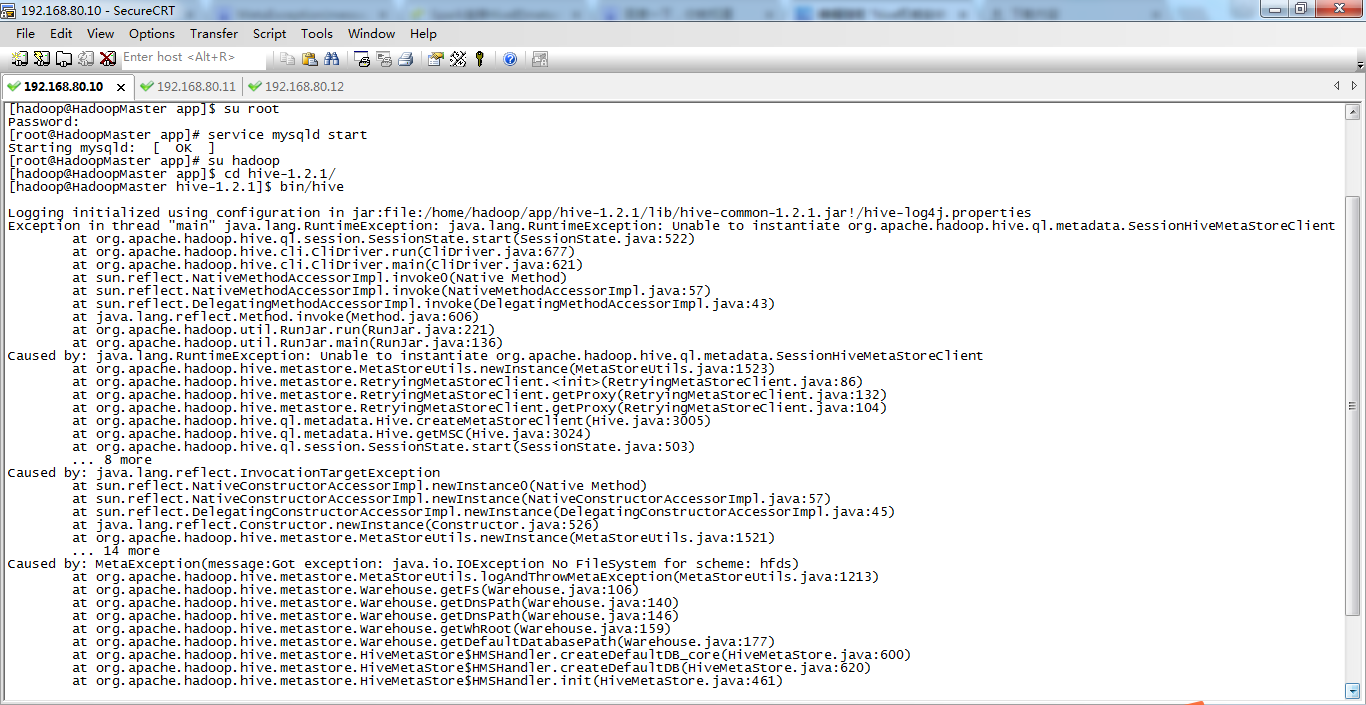
hive启动时如果遇到以下错误:
Exceptionin thread "main"java.lang.RuntimeException:
java.lang.IllegalArgumentException:java.net.URISyntaxException:
Relative path in absolute URI:${system:java.io.tmpdir%7D/$%7Bsystem:user.name%7D
则,在hive 安装目录下,创建一个临时的IO文件iotmp

< property>
< name>hive.querylog.location< /name>
< value>/home/hadoop/app/hive-1.2.1/iotmp< /value>
< description>Location of Hive run time structured log file< /description>
< /property>
< property>
< name>hive.exec.local.scratchdir< /name>
< value>/home/hadoop/app/hive-1.2.1/iotmp< /value>
< description>Local scratch space for Hive jobs< /description>
< /property>
< property>
< name>hive.downloaded.resources.dir< /name>
< value>/home/hadoop/app/hive-1.2.1/iotmp< /value>
< description>Temporary local directory for added resources in the remote file system.< /description>
< /property>
或者,/usr/local/data/hive/iotmp
主节点与从节点,都测试过,均出现这个问题!!!
[hadoop@HadoopSlave2 hive-1.2.1]$ su root
Password:
[root@HadoopSlave2 hive-1.2.1]# cd ..
[root@HadoopSlave2 app]# clear
[root@HadoopSlave2 app]# service mysqld start
Starting mysqld: [ OK ]
[root@HadoopSlave2 app]# su hadoop
[hadoop@HadoopSlave2 app]$ cd hive-1.2.1/
[hadoop@HadoopSlave2 hive-1.2.1]$ bin/hive
Logging initialized using configuration in file:/home/hadoop/app/hive-1.2.1/conf/hive-log4j.properties
Exception in thread "main" java.lang.RuntimeException: java.lang.RuntimeException: Unable to instantiate org.apache.hadoop.hive.ql.metadata.SessionHiveMetaStoreClient
at org.apache.hadoop.hive.ql.session.SessionState.start(SessionState.java:522)
at org.apache.hadoop.hive.cli.CliDriver.run(CliDriver.java:677)
at org.apache.hadoop.hive.cli.CliDriver.main(CliDriver.java:621)
at sun.reflect.NativeMethodAccessorImpl.invoke0(Native Method)
at sun.reflect.NativeMethodAccessorImpl.invoke(NativeMethodAccessorImpl.java:57)
at sun.reflect.DelegatingMethodAccessorImpl.invoke(DelegatingMethodAccessorImpl.java:43)
at java.lang.reflect.Method.invoke(Method.java:606)
at org.apache.hadoop.util.RunJar.run(RunJar.java:221)
at org.apache.hadoop.util.RunJar.main(RunJar.java:136)
Caused by: java.lang.RuntimeException: Unable to instantiate org.apache.hadoop.hive.ql.metadata.SessionHiveMetaStoreClient
at org.apache.hadoop.hive.metastore.MetaStoreUtils.newInstance(MetaStoreUtils.java:1523)
at org.apache.hadoop.hive.metastore.RetryingMetaStoreClient.<init>(RetryingMetaStoreClient.java:86)
at org.apache.hadoop.hive.metastore.RetryingMetaStoreClient.getProxy(RetryingMetaStoreClient.java:132)
at org.apache.hadoop.hive.metastore.RetryingMetaStoreClient.getProxy(RetryingMetaStoreClient.java:104)
at org.apache.hadoop.hive.ql.metadata.Hive.createMetaStoreClient(Hive.java:3005)
at org.apache.hadoop.hive.ql.metadata.Hive.getMSC(Hive.java:3024)
at org.apache.hadoop.hive.ql.session.SessionState.start(SessionState.java:503)
... 8 more
Caused by: java.lang.reflect.InvocationTargetException
at sun.reflect.NativeConstructorAccessorImpl.newInstance0(Native Method)
at sun.reflect.NativeConstructorAccessorImpl.newInstance(NativeConstructorAccessorImpl.java:57)
at sun.reflect.DelegatingConstructorAccessorImpl.newInstance(DelegatingConstructorAccessorImpl.java:45)
at java.lang.reflect.Constructor.newInstance(Constructor.java:526)
at org.apache.hadoop.hive.metastore.MetaStoreUtils.newInstance(MetaStoreUtils.java:1521)
... 14 more
Caused by: MetaException(message:Got exception: java.io.IOException No FileSystem for scheme: hfds)
at org.apache.hadoop.hive.metastore.MetaStoreUtils.logAndThrowMetaException(MetaStoreUtils.java:1213)
at org.apache.hadoop.hive.metastore.Warehouse.getFs(Warehouse.java:106)
at org.apache.hadoop.hive.metastore.Warehouse.getDnsPath(Warehouse.java:140)
at org.apache.hadoop.hive.metastore.Warehouse.getDnsPath(Warehouse.java:146)
at org.apache.hadoop.hive.metastore.Warehouse.getWhRoot(Warehouse.java:159)
at org.apache.hadoop.hive.metastore.Warehouse.getDefaultDatabasePath(Warehouse.java:177)
at org.apache.hadoop.hive.metastore.HiveMetaStore$HMSHandler.createDefaultDB_core(HiveMetaStore.java:600)
at org.apache.hadoop.hive.metastore.HiveMetaStore$HMSHandler.createDefaultDB(HiveMetaStore.java:620)
at org.apache.hadoop.hive.metastore.HiveMetaStore$HMSHandler.init(HiveMetaStore.java:461)
at org.apache.hadoop.hive.metastore.RetryingHMSHandler.<init>(RetryingHMSHandler.java:66)
at org.apache.hadoop.hive.metastore.RetryingHMSHandler.getProxy(RetryingHMSHandler.java:72)
at org.apache.hadoop.hive.metastore.HiveMetaStore.newRetryingHMSHandler(HiveMetaStore.java:5762)
at org.apache.hadoop.hive.metastore.HiveMetaStoreClient.<init>(HiveMetaStoreClient.java:199)
at org.apache.hadoop.hive.ql.metadata.SessionHiveMetaStoreClient.<init>(SessionHiveMetaStoreClient.java:74)
... 19 more
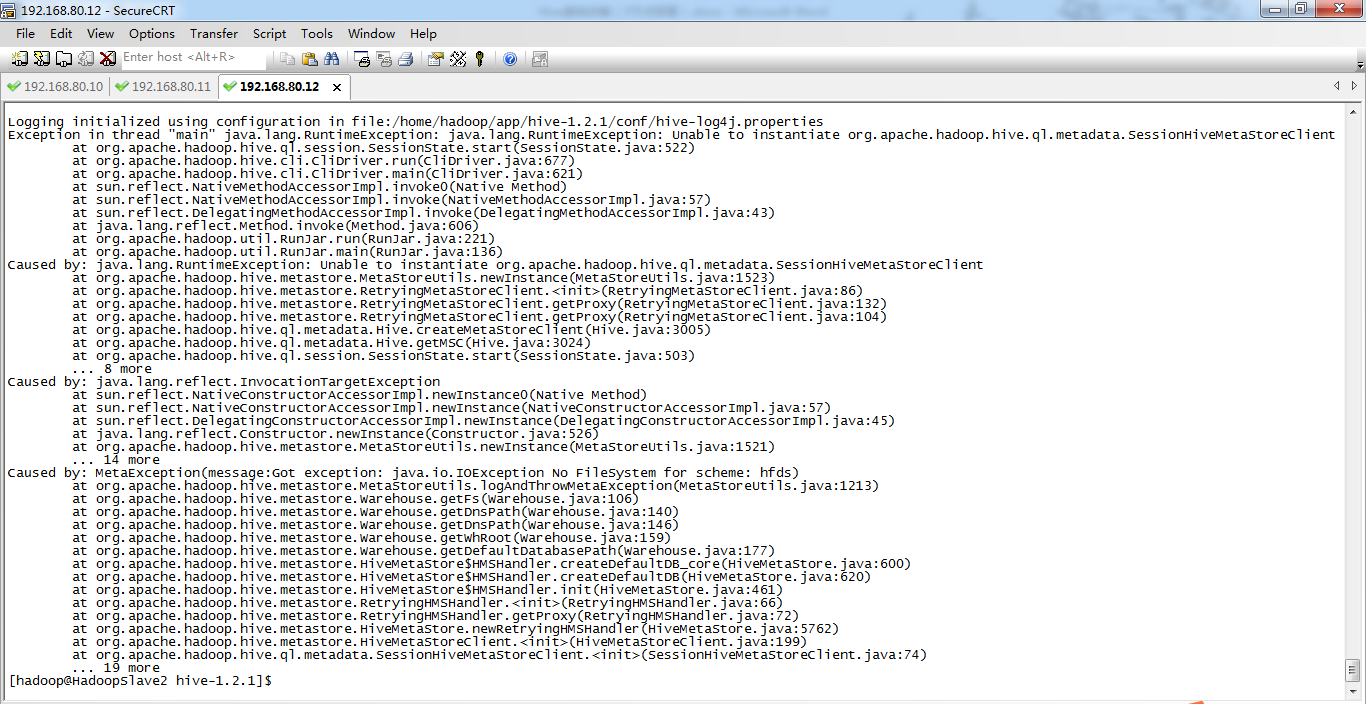
现在,到了这一步,不知道是哪里出现错误!
猜想一:是不是与hive 1.* 与 hive 0.*的版本,导致的问题?
猜想二:是不是与HadoopSlave2的大写有关,一般别人都是如,master、slave1、slave2等。
经过本人测验 ,不是版本的问题,也不是大写的问题。
单节点伪分布集群(weekend110)的Hive子项目启动顺序
1 复习ha相关 + weekend110的hive的元数据库mysql方式安装配置
对于,三点集群,最好起名为,master、slave1、slave2
五点集群,最好起名为,master、slave1、slave2、slave3、slave4
单点集群,也最好起名为小写!!!
而是把, hdfs 写成了 hfds。
http://www.cnblogs.com/braveym/p/6685045.html
对于,hive的更高级配置,请见 hive安装配置 !
[root@HadoopSlave1 hadoop]# cd ..
[root@HadoopSlave1 etc]# cd ..
[root@HadoopSlave1 hadoop-2.6.0]# cd ..
[root@HadoopSlave1 app]# service mysqld start
Starting mysqld: [ OK ]
[root@HadoopSlave1 app]# su hadoop
[hadoop@HadoopSlave1 app]$ cd hive-1.2.1/
[hadoop@HadoopSlave1 hive-1.2.1]$ bin/hive
Logging initialized using configuration in file:/home/hadoop/app/hive-1.2.1/conf/hive-log4j.properties
[ERROR] Terminal initialization failed; falling back to unsupported
java.lang.IncompatibleClassChangeError: Found class jline.Terminal, but interface was expected
at jline.TerminalFactory.create(TerminalFactory.java:101)
at jline.TerminalFactory.get(TerminalFactory.java:158)
at jline.console.ConsoleReader.<init>(ConsoleReader.java:229)
at jline.console.ConsoleReader.<init>(ConsoleReader.java:221)
at jline.console.ConsoleReader.<init>(ConsoleReader.java:209)
at org.apache.hadoop.hive.cli.CliDriver.setupConsoleReader(CliDriver.java:787)
at org.apache.hadoop.hive.cli.CliDriver.executeDriver(CliDriver.java:721)
at org.apache.hadoop.hive.cli.CliDriver.run(CliDriver.java:681)
at org.apache.hadoop.hive.cli.CliDriver.main(CliDriver.java:621)
at sun.reflect.NativeMethodAccessorImpl.invoke0(Native Method)
at sun.reflect.NativeMethodAccessorImpl.invoke(NativeMethodAccessorImpl.java:57)
at sun.reflect.DelegatingMethodAccessorImpl.invoke(DelegatingMethodAccessorImpl.java:43)
at java.lang.reflect.Method.invoke(Method.java:606)
at org.apache.hadoop.util.RunJar.run(RunJar.java:221)
at org.apache.hadoop.util.RunJar.main(RunJar.java:136)
Exception in thread "main" java.lang.IncompatibleClassChangeError: Found class jline.Terminal, but interface was expected
at jline.console.ConsoleReader.<init>(ConsoleReader.java:230)
at jline.console.ConsoleReader.<init>(ConsoleReader.java:221)
at jline.console.ConsoleReader.<init>(ConsoleReader.java:209)
at org.apache.hadoop.hive.cli.CliDriver.setupConsoleReader(CliDriver.java:787)
at org.apache.hadoop.hive.cli.CliDriver.executeDriver(CliDriver.java:721)
at org.apache.hadoop.hive.cli.CliDriver.run(CliDriver.java:681)
at org.apache.hadoop.hive.cli.CliDriver.main(CliDriver.java:621)
at sun.reflect.NativeMethodAccessorImpl.invoke0(Native Method)
at sun.reflect.NativeMethodAccessorImpl.invoke(NativeMethodAccessorImpl.java:57)
at sun.reflect.DelegatingMethodAccessorImpl.invoke(DelegatingMethodAccessorImpl.java:43)
at java.lang.reflect.Method.invoke(Method.java:606)
at org.apache.hadoop.util.RunJar.run(RunJar.java:221)
at org.apache.hadoop.util.RunJar.main(RunJar.java:136)
[hadoop@HadoopSlave1 hive-1.2.1]$
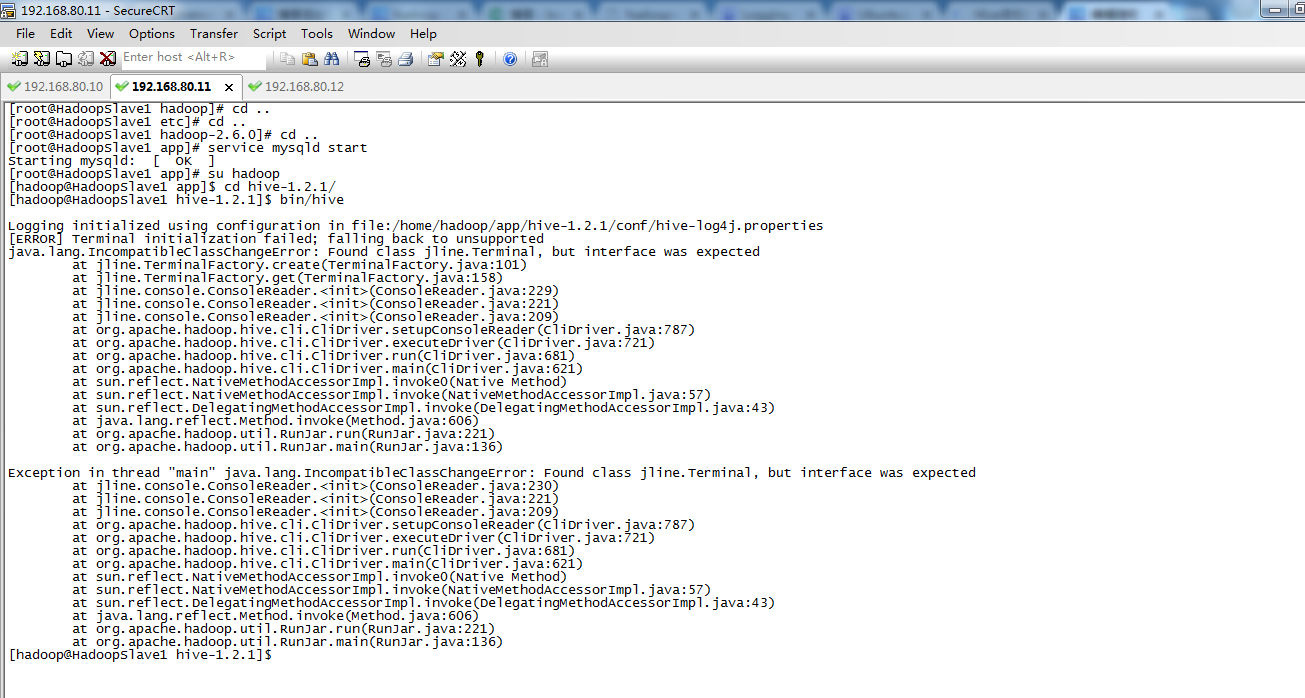
参考: http://blog.csdn.net/jdplus/article/details/46493553
解决方案(Hive on Spark Getting Started):
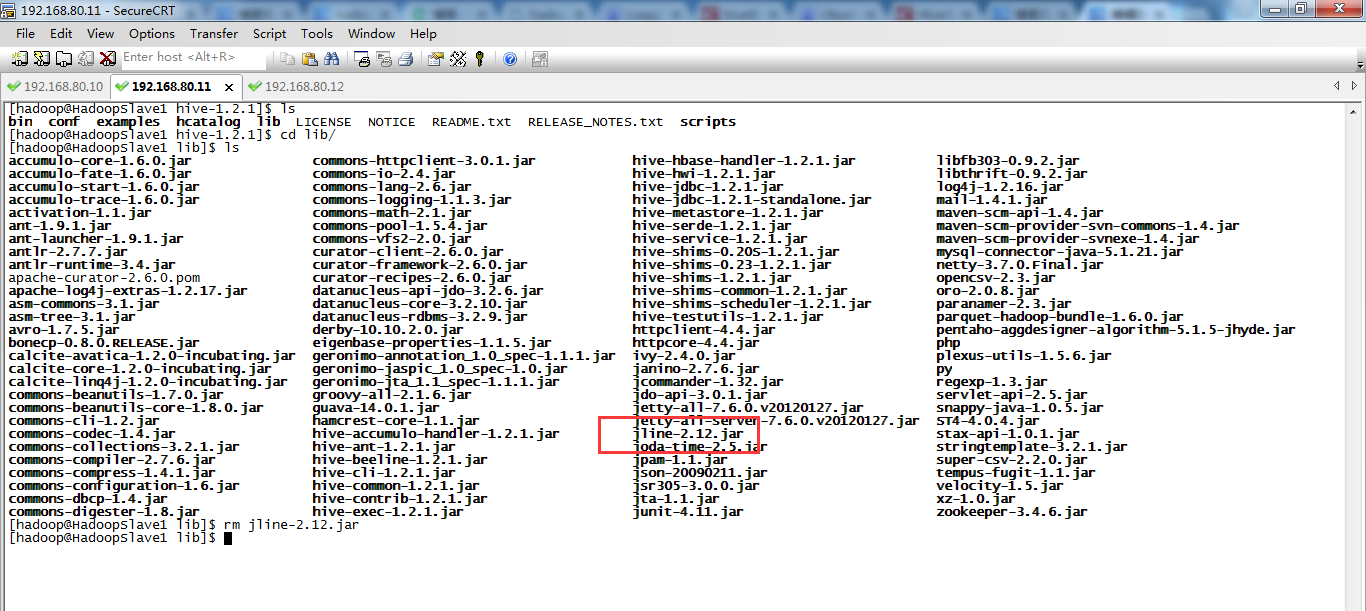
1.Delete jline from the Hadoop lib directory (it's only pulled in transitively from ZooKeeper).
2.export HADOOP_USER_CLASSPATH_FIRST=true
接着,运行啊!

参考:http://blog.csdn.net/zhumin726/article/details/8027802
http://blog.csdn.net/xgjianstart/article/details/52192879
解决方法:jline版本不一致,把HADOOP_HOME/share/hadoop/yarn/lib和HIVE_HOME/lib下的jline-**.jar版本一致就可以了,复制其中一个高版本覆盖另一个。
即,取其中的高版本即可。
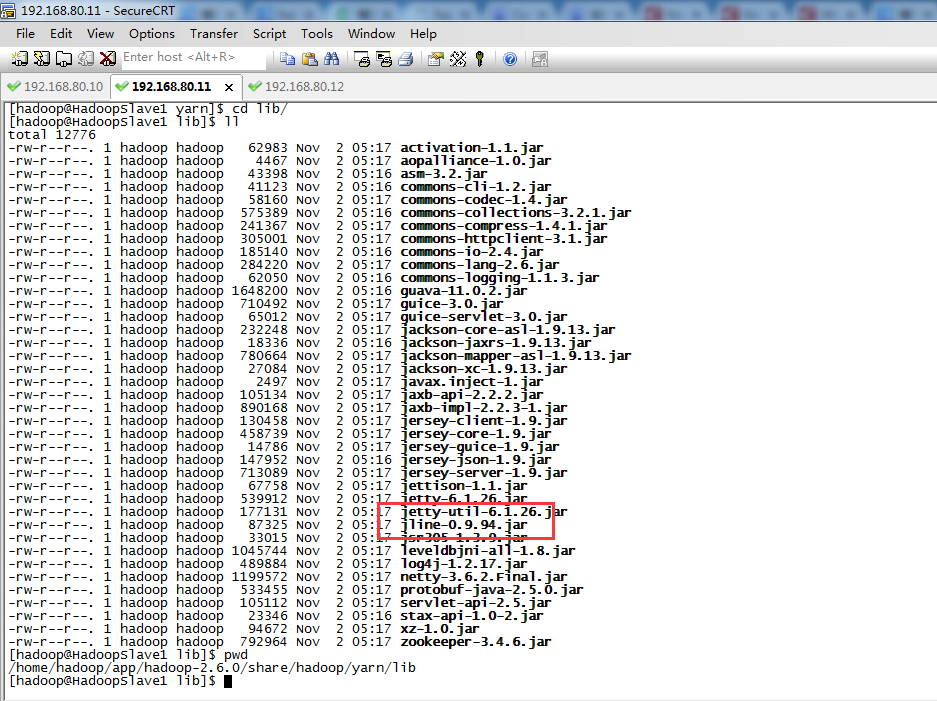

OK,启动成功!

解决方案,见 hive安装配置及遇到的问题解决
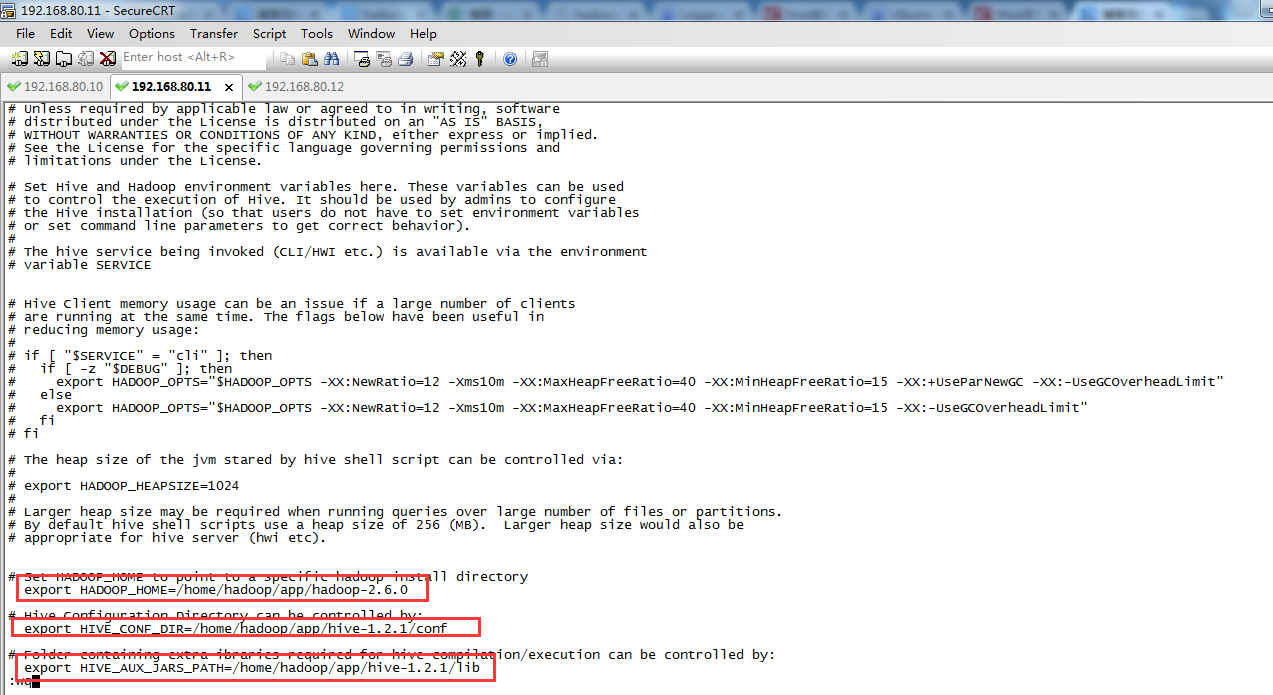
# Set HADOOP_HOME to point to a specific hadoop install directory
export HADOOP_HOME=/home/hadoop/app/hadoop-2.6.0
# Hive Configuration Directory can be controlled by:
export HIVE_CONF_DIR=/home/hadoop/app/hive-1.2.1/conf
# Folder containing extra ibraries required for hive compilation/execution can be controlled by:
export HIVE_AUX_JARS_PATH=/home/hadoop/app/hive-1.2.1/lib
再,保存,用 source ./hive-env.sh(生效文件)
在修改之前,要相应的创建目录,以便与配置文件中的路径相对应,否则在运行hive时会报错的。
mkdir -p /home/hadoop/data/hive-1.2.1/warehouse
mkdir -p /home/hadoop/data/hive-1.2.1/tmp
mkdir -p /home/hadoop/data/hive-1.2.1/log
<property>
<name>hive.metastore.warehouse.dir</name>
<value>/home/hadoop/data/hive-1.2.1/warehouse</value>
<description>location of default database for the warehouse</description>
</property>
<property>
<name>hive.exec.scratchdir</name>
<value>/home/hadoop/data/hive-1.2.1/tmp</value>
</property>
<property>
<name>hive.querylog.location</name>
<value>/home/hadoop/data/hive-1.2.1/log</value>
</property>
到此,hive-site.xml文件修改完成!
然后在conf文件夹下,cp hive-log4j.properties.template hive-log4j.proprties
打开hive-log4j.proprties文件,sudo gedit hive-log4j.proprties (Ubuntu系统里),若是CentOS里,则 vim hive-log4j.properties
寻找hive.log.dir=
这个是当hive运行时,相应的日志文档存储到什么地方
( 我的: hive.log.dir=/home/hadoop/data/hive-1.2.1/log/${user.name} )
hive.log.file=hive.log
这个是hive日志文件的名字是什么
默认的就可以,只要您能认出是日志就好。
只有一个比较重要的需要修改一下,否则会报错。
log4j.appender.EventCounter=org.apache.hadoop.log.metrics.EventCounter
如果没有修改的话会出现:
WARNING: org.apache.hadoop.metrics.EventCounter is deprecated.
please use org.apache.hadoop.log.metrics.EventCounter in all the log4j.properties files.
(只要按照警告提示修改即可)。
至此,hive-log4j.proprties文件修改完成。

接下来,是重头戏!
接下来要配置的是以MySQL作为存储元数据库的hive的安装(此中模式下是将hive的metadata存储在mysql中,mysql的运行环境支撑双向同步和集群工作环境,这样的话
,至少两台数据库服务器上汇备份hive的元数据),要使用hadoop来创建相应的文件夹路径,
并设置权限:
bin/hadoop fs -mkdir /user/hadoop/hive/warehouse
bin/hadoop fs -mkdir /user/hadoop/hive/tmp
bin/hadoop fs -mkdir /user/hadoop/hive/log
bin/hadoop fs -chmod g+w /user/hadoop/hive/warehouse
bin/hadoop fs -chmod g+w /user/hadoop/hive/tmp
bin/hadoop fs -chmod g+w /user/hadoop/hive/log
继续配置hive-site.xml
[1]
<property>
<name>hive.metastore.warehouse.dir</name>
<value>hdfs://localhost:9000/user/hadoop/hive/warehouse</value>
(这是单节点的) (我的是3节点集群,在HadoopSlave1里安装的hive,所以是HadoopMaster,但是会报错误啊!)
(所以啊,若是单节点倒无所谓,若是跟我这样,3节点啊,最好是HadoopMaster这台机器上,安装Hive啊!!!血淋淋的教训)
(这里就与前面的hadoop fs -mkdir -p /user/hadoop/hive/warehouse相对应)
(要么,就是如在HadoopSlave1上,则为/home/hadoop/data/hive-1.2.1/warehouse)
</property>
其中localhost指的是笔者的NameNode的hostname;
[2]
<property>
<name>hive.exec.scratchdir</name>
<value>hdfs://localhost:9000/user/hadoop/hive/scratchdir</value>
</property>
[3]
//这个没有变化与derby配置时相同
<property>
<name>hive.querylog.location</name>
<value>/usr/hive/log</value>
</property>
-------------------------------------
[4]
<property>
<name>javax.jdo.option.ConnectionURL</name>
<value>jdbc:mysql://localhost:3306/hive?createDatabaseIfNoExist=true</value>
</property>
javax.jdo.option.ConnectionURL
这个参数使用来设置元数据连接字串
注意红字部分在hive-site.xml中是有的,不用自己添加。
我自己的错误:没有在文件中找到这个属性,然后就自己添加了结果导致开启hive一直报错。最后找到了文件中的该属性选项然后修改,才启动成功。
Unableto open a test connection to the given database. JDBC url =jdbc:derby:;databaseName=/usr/local/hive121/metastore_db;create=true,username = hive. Terminating connection pool (set lazyInit to true ifyou expect to start your database after your app). OriginalException: ------
java.sql.SQLException:Failed to create database '/usr/local/hive121/metastore_db', see thenext exception for details.
atorg.apache.derby.impl.jdbc.SQLE
-------------------------------------
[5]
<property>
<name>javax.jdo.option.ConnectionDriverName</name>
<value>com.mysql.jdbc.Driver</value>
</property>
javax.jdo.option.ConnectionDriverName
关于在hive中用java来开发与mysql进行交互时,需要用到一个关于mysql的connector,这个可以将java语言描述的对database进行的操作转化为mysql可以理解的语句。
connector是一个用java语言描述的jar文件,而这个connector可以在官方网站上下载,经验正是connector与mysql的版本号不一致也可以运行。
connector要copy到/usr/local/hive1.2.1/lib目录下
[6]
<property>
<name>javax.jdo.option.ConnectorUserName</name>
<value>hive</value>
</property>
这个javax.jdo.option.ConnectionUserName
是用来设置hive存放元数据的数据库(这里是mysql数据库)的用户名称的。
[7]
--------------------------------------
<property>
<name>javax.jdo.option.ConnectionPassword</name>
<value>hive</value>
</property>
这个javax.jdo.option.ConnetionPassword是用来设置,
用户登录数据库(上面的数据库)的时候需要输入的密码的.
[8]
<property>
<name>hive.aux.jars.path</name>
<value>file:///usr/local/hive/lib/hive-hbase-handler-0.13.1.jar,file:///usr/local/hive/lib/protobuf-java-2.5.0.jar,file:///us
r/local/hive/lib/hbase-client-0.96.0-hadoop2.jar,file:///usr/local/hive/lib/hbase-common-0.96.0-hadoop2.jar,file:///usr/local
/hive/lib/zookeeper-3.4.5.jar,file:///usr/local/hive/lib/guava-11.0.2.jar</value>
</property>
/相应的jar包要从hbase的lib文件夹下复制到hive的lib文件夹下。
[9]
<property>
<name>hive.metastore.uris</name>
<value>thrift://localhost:9083</value>
</property>
</configuration>
---------------------------------------- 到此原理介绍完毕
要使用Hadoop来创建相应的文件路径,
并且要为它们设定权限:
bin/hadoop fs -mkdir -p /usr/hive/warehouse
bin/hadoop fs -mkdir -p /usr/hive/tmp
bin/hadoop fs -mkdir -p /usr/hive/log
bin/hadoop fs -chmod g+w /usr/hive/warehouse
bin/hadoop fs -chmod g+w /usr/hive/tmp
bin/hadoop fs -chmod g+w /usr/hive/log