1、预准备
进入帮助页面https://www.raspberrypi.org/help/,可以直接看到GET START WITH PASPBERRY PI,点击进入;
接下来会引导你检查配件是否齐全:树莓派一个、显示器、HDMI线、鼠标、键盘、电源、8GB以上SD卡;
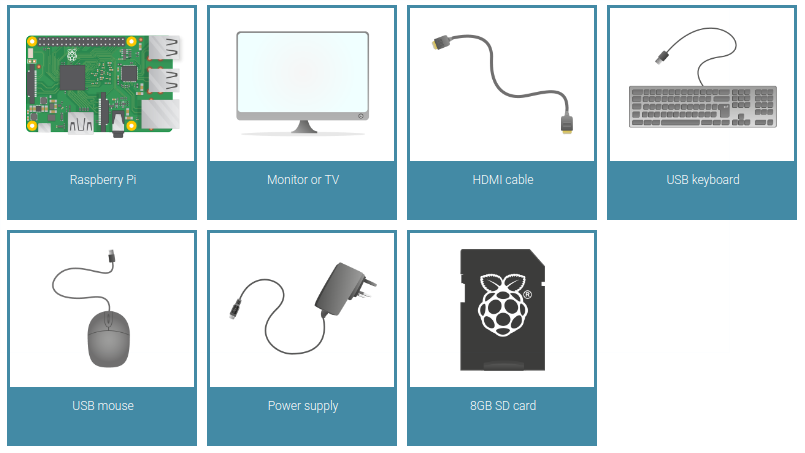
在最下面的Check you have the right equipment to start 对上述配件进行了更详细的描述,其中最值得注意的一个是SD卡!
2、制作SD卡启动盘
和用U盘在普通PC上安装新系统类似,树莓派需要用一个≥8GB的micro SD卡来制作启动盘!
The latest version of Raspbian, the default operating system recommended for the Raspberry Pi, requires an 8GB (or larger) micro SD card. Not all SD cards are made equal, and some have higher failure rates than others. If you're unsure, you can always buy our official SD cards from RS or Farnell. Any 8GB SD card will work, although you'll need to follow the software setup guide to learn how to load an operating system onto the card.
其中 Downloading and installing the Raspberry Pi software 详细介绍如何在windows上制作 启动SD卡,主要是按照要求格式化SD卡、下载NOOBS文件并解压到格式化后的SD卡。但是楼主并没有windows电脑,而在linux上制作SD卡使我走了些弯路:
a) 参考https://www.raspberrypi.org/documentation/installation/noobs.md发现可以在linux系统上用命令行制作启动SD卡;
b) 参考http://qdosmsq.dunbar-it.co.uk/blog/2013/06/noobs-for-raspberry-pi/用命令行制作启动SD卡,下面是用到的命令:
1> sudo fdisk -l 查看所有硬盘设备
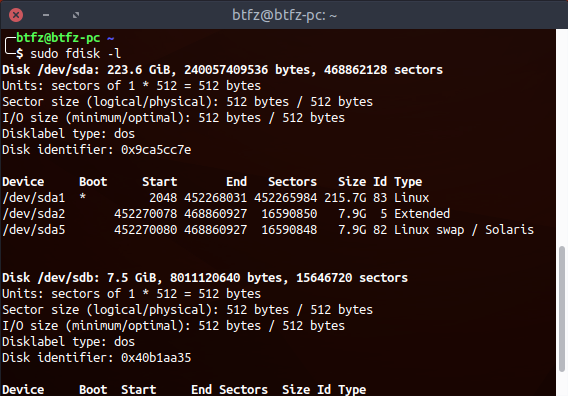
2> sudo umount /dev/sdb || sudo umount /dev/sdb1 || sudo umount /dev/sdb2 全部卸载目标盘
3> sudo fdisk /dev/sdb 利用fdisk命令进行制作
根据提示删除完所有的partition,我这里有两个,有些SD卡这一步会有警告,可以忽略

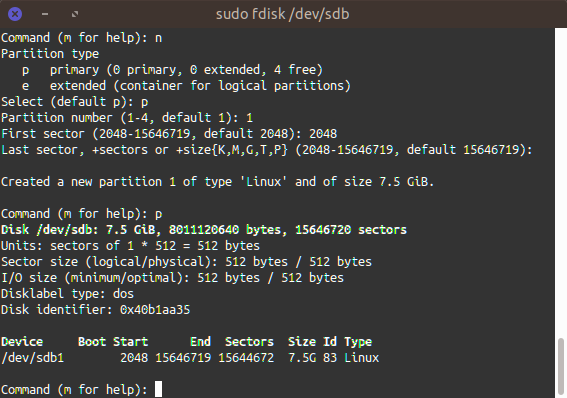
用n命令创建一个新的主分区,命名为1,使用默认的起始与结束扇区值,下面的操作在整个SD上只建立一个分区:
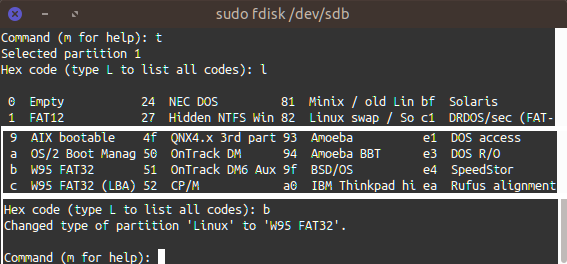
由于这里我们需要的不是Linux类型的分区,而是FAT32型的,因此我们可以用t命令修改它:
最后用write命令将新的分区表写入SD卡:(有的卡会有警告,可忽略)

3、安装系统
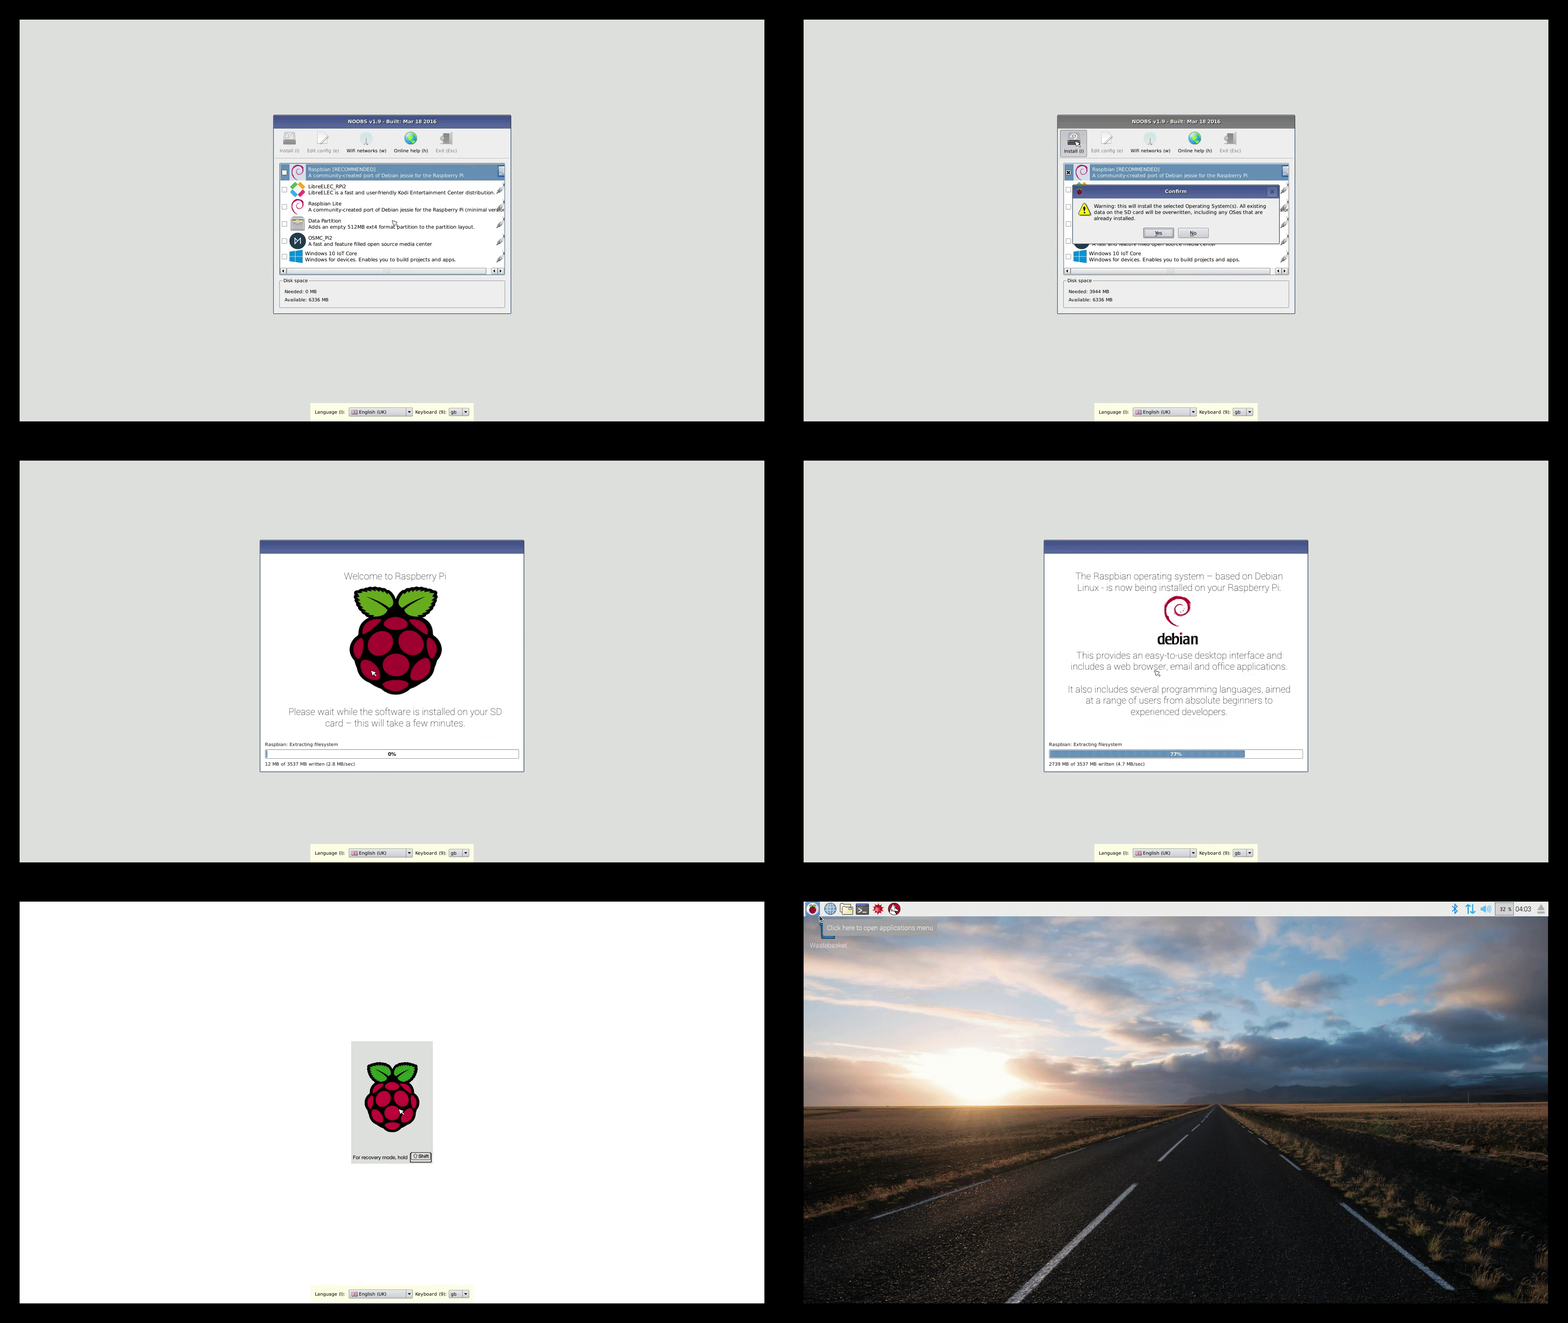
将上面制作好的SD卡插入树莓派、连接显示器、鼠标、键盘,给树莓派上电,按照安装引导安装:
资料链接
- 1. 树莓派实验室[CN]:http://shumeipai.nxez.com/
- 2. 树莓派官网帮助页:https://www.raspberrypi.org/help/
- 3.官方安装系统的引导页:https://www.raspberrypi.org/learning/software-guide/quickstart/
- 4.NOOBS介绍及在WIN/LINUX/MAC上制作启动SD卡的方法:https://www.raspberrypi.org/documentation/installation/noobs.md
- 5.Linux制作启动SD卡介绍:http://qdosmsq.dunbar-it.co.uk/blog/2013/06/noobs-for-raspberry-pi/
- 6.一个Linux上制作启动SD卡最后写入分区信息表时有警告的例子(直接忽略)
:: 如果您觉得不错,请推荐给更多人,帮助他们更快地解决实际问题中的坑~
@beautifulzzzz
智能硬件、物联网,热爱技术,关注产品
博客:http://blog.beautifulzzzz.com
园友交流群:414948975