
Hibernate充当持久化层
项目结构:

一、创建项目导入jar包。
hibernate-core & junit4 & mysql-jdbc
二、src目录下创建hibernate.cfg.xml文件配置hibernate
<?xml version="1.0" encoding="UTF-8"?> <!DOCTYPE hibernate-configuration PUBLIC "-//Hibernate/Hibernate Configuration DTD 3.0//EN" "http://hibernate.sourceforge.net/hibernate-configuration-3.0.dtd"> <hibernate-configuration> <session-factory> <property name="connection.username">root</property> <property name="connection.password">123</property> <property name="connection.driver.class">com.mysql.jdbc.Driver</property> <property name="connection.url">jdbc:mysql:///hibernate?useUnicode=true&characterEncoding=UTF-8</property> <property name="dialect">org.hibernate.dialect.MySQLDialect</property> <property name="show_sql">true</property> <property name="format_sql">true</property> <property name="hbm2ddl.auto">create</property> <mapping resource="Students.hbm.xml" /> </session-factory> </hibernate-configuration>
三、创建持久化类Students
package hibernate_01;

import java.util.Date;
//学生表
public class Students {

    //创建持久化类
    //1.公有的类
    //2.提供公有的不带参数的
    //3.私有属性
    //4.属性  setter&getter 封装


    private int sid;//学号
    private String sname;//姓名
    private String gender;//性别
    private Date birthday;//出生日期
    private String address;//地址

    public Students(){

    }

    public Students(int sid, String sname, String gender, Date birthday, String address) {
        this.sid = sid;
        this.sname = sname;
        this.gender = gender;
        this.birthday = birthday;
        this.address = address;
    }

    public int getSid() {
        return sid;
    }

    public void setSid(int sid) {
        this.sid = sid;
    }

    public String getSname() {
        return sname;
    }

    public void setSname(String sname) {
        this.sname = sname;
    }

    public String getGender() {
        return gender;
    }

    public void setGender(String gender) {
        this.gender = gender;
    }

    public Date getBirthday() {
        return birthday;
    }

    public void setBirthday(Date birthday) {
        this.birthday = birthday;
    }

    public String getAddress() {
        return address;
    }

    public void setAddress(String address) {
        this.address = address;
    }

    @Override
    public String toString() {
        return "Students [sid=" + sid + ", sname=" + sname + ", gender=" + gender + ", birthday=" + birthday
                + ", address=" + address + "]";
    }


}
四、创建对象-关系映射文件和数据库
src目录下创建一个hbm.xml文件(系统会自动匹配文件名)——>Students.hbm.xml
将实体类自动映射成数据库中的一张表(属性映射成数据库中的字段)
<?xml version="1.0"?>
<!DOCTYPE hibernate-mapping PUBLIC "-//Hibernate/Hibernate Mapping DTD 3.0//EN"
"http://hibernate.sourceforge.net/hibernate-mapping-3.0.dtd">
<!-- Generated 2017-3-6 16:43:30 by Hibernate Tools 3.4.0.CR1 -->
<hibernate-mapping>
    <class name="hibernate_01.Students" table="STUDENTS">
        <id name="sid" type="int">
            <column name="SID" />
            <generator class="assigned" />
        </id>
        <property name="sname" type="java.lang.String">
            <column name="SNAME" />
        </property>
        <property name="gender" type="java.lang.String">
            <column name="GENDER" />
        </property>
        <property name="birthday" type="java.util.Date">
            <column name="BIRTHDAY" />
        </property>
        <property name="address" type="java.lang.String">
            <column name="ADDRESS" />
        </property>
    </class>
</hibernate-mapping>
完成后将其加入hibernate配置文档中,在hibernate.cfg.xml文件中加上一个标签
<mapping resource="Students.hbm.xml" />
之后再创建名为hibernate的数据库。。。
五、使用junit测试(新建source Folder存放测试文件)&通过hibernate API编写访问数据库的代码

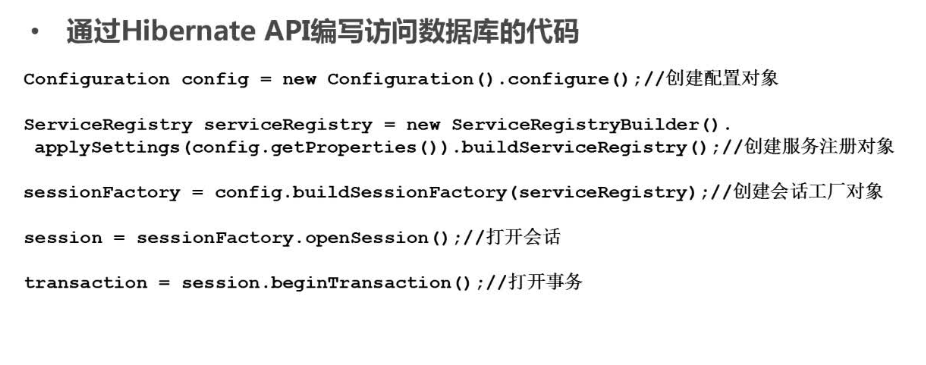
package hibernate_01;


import java.util.Date;

import org.hibernate.Session;
import org.hibernate.SessionFactory;
import org.hibernate.Transaction;
import org.hibernate.cfg.Configuration;
import org.hibernate.service.ServiceRegistry;
import org.hibernate.service.ServiceRegistryBuilder;
import org.junit.After;
import org.junit.Before;
import org.junit.Test;

//测试的源程序要写在新建的Source Folder里

//测试类
public class StudentsTest {

    private SessionFactory sessionFactory;
    private Session session;
    private Transaction transaction;

    @Before
    public void init(){
        //创建配置对象
        Configuration config =new Configuration().configure();
        //创建服务注册对象
        ServiceRegistry serviceRegistry=new ServiceRegistryBuilder().applySettings(config.getProperties()).buildServiceRegistry();
        //创建会话工厂对象
        sessionFactory=config.buildSessionFactory(serviceRegistry);
        //会话对象
        session =sessionFactory.openSession();
        //开启事务
        transaction =session.beginTransaction();


    }

    @After
    public void destory(){
        transaction.commit();//提交事务
        session.close();//关闭会话
        sessionFactory.close();//关闭会话工厂
    }


    @Test
    public void testSaveStudents(){

        //生成学生对象
        Students s=new Students(1,"张三","男",new Date(),"山东");
        //保存对象进数据库
        session.save(s);
    }
}
六、Run as——>Junit Test
可看到控制台输出如下

表也在数据库中创建
