第一步: 创建一个.net core console app。

第二步:安装EFCore package 和 design(以前vs是有EF项目模板的,core版本现在没有,所有安装这个工具来创建ModelsType Context等).
工具-->Nuget包管理器-->程序包管理控制台
1.Install-package microsoft.entityframeworkcore.sqlserver
2.Install-package microsoft.entityframeworkcore.sqlserver.design
3.Install-Package Microsoft.EntityFrameworkCore.Tools –Pre (-Pre应该是预览版的意思)
第三步:使用工具的scaffold-dbcontext(数据库上下文脚手架)指令来生成models和context。
Nuget包管理器里面:PM
PM>Scaffold-DbContext "Data Source=.;Initial Catalog=database1;User ID=sa;Password=123456" Microsoft.EntityFrameworkCore.SqlServer -OutputDir Model
指令详细介绍:
Scaffold-DbContext [-Connection] <String> [-Provider] <String> [-OutputDir <String>] [-Context <String>]
[-Schemas <String>] [-Tables <String>] [-DataAnnotations] [-Force] [-Project <String>]
[-StartupProject <String>] [-Environment <String>] [<CommonParameters>]
PARAMETERS
-Connection <String>
Specifies the connection string of the database.
-Provider <String>
Specifies the provider to use. For example, Microsoft.EntityFrameworkCore.SqlServer.
-OutputDir <String>
Specifies the directory to use to output the classes. If omitted, the top-level project directory is used.
-Context <String>
Specifies the name of the generated DbContext class.
-Schemas <String>
Specifies the schemas for which to generate classes.
-Tables <String>
Specifies the tables for which to generate classes.
-DataAnnotations [<SwitchParameter>]
Use DataAnnotation attributes to configure the model where possible. If omitted, the output code will use only the fluent API.
-Force [<SwitchParameter>]
Force scaffolding to overwrite existing files. Otherwise, the code will only proceed if no output files would be overwritten.
覆盖已经有的文件,重新拉取数据库的表生成model
-Project <String>
Specifies the project to use. If omitted, the default project is used.
-StartupProject <String>
Specifies the startup project to use. If omitted, the solution's startup project is used.
-Environment <String>
Specifies the environment to use. If omitted, "Development" is used.
本文实例:
Scaffold-dbcontext "Server=192.168.1.159;database=SGD.Invest;Integrated Security=false;user id=****;password=*****" Microsoft.EntityFrameworkCore.SqlServer -outputdir /filepath/Models -Force
Integrated Security(是否集成认证 windows账户认证的意思)

第四步:上面我们已经看到Context文件已经生成,只需要生成它的实例就可以使用了。


附:
配置dbcontext的官方文档:https://docs.microsoft.com/en-us/ef/core/miscellaneous/configuring-dbcontext
第五步:
-OutputDir Models: 生成的文件的存放目录,目前目录是根目录下的Models目录
之后引擎会试图连接你的SQL Server 数据库,并生成文件在你指定的目录里。
在目录中找到一个***Context.cs并打开它,你会发现一个如下方法,
protected override void OnConfiguring(DbContextOptionsBuilder optionsBuilder)
{
  #warning To protect potentially sensitive information in your connection string, you should move it out of source code. See http://go.microsoft.com/fwlink/?LinkId=723263 for guidance on storing connection strings.
  optionsBuilder.UseSqlServer(@"{your sql connect string}");
}
如自动生成代码里所写的warning一样,我们不应该把连接字符串放在这里。接下来的工作,让我们来从appsettings.json中读取配置。
在/Models/***Context.cs中添加一个属性用来存放ConnectionString,另外我们需要重写OnConfiguring方法【注释原来方法】,完整的代码应该是这样:
public static string ConnectionString { get; set; }
protected override void OnConfiguring(DbContextOptionsBuilder optionsBuilder)
{
  optionsBuilder.UseSqlServer(ConnectionString);
}
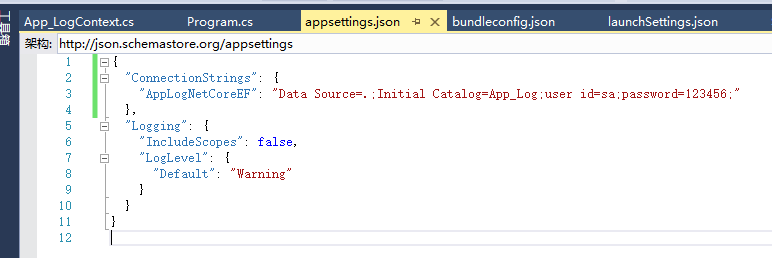
打开appSetting.json,添加如下代码:
"ConnectionStrings": {
  "TestNetCoreEF": "Data Source={your sql server host address};Initial Catalog=TestNetCoreEF;user id={your username};password={your password};"
},
打开 Startup.cs,在ConfigureServices(IServiceCollection services)方法中添加如下代码:
TestNetCoreEFContext.ConnectionString = Configuration.GetConnectionString("TestNetCoreEF");
完整的代码应该是这样:
public void ConfigureServices(IServiceCollection services)
{
  //config the db connection string
  TestNetCoreEFContext.ConnectionString = Configuration.GetConnectionString("TestNetCoreEF");

  // Add framework services.
  services.AddMvc();
}

之后的调用和ef一样,