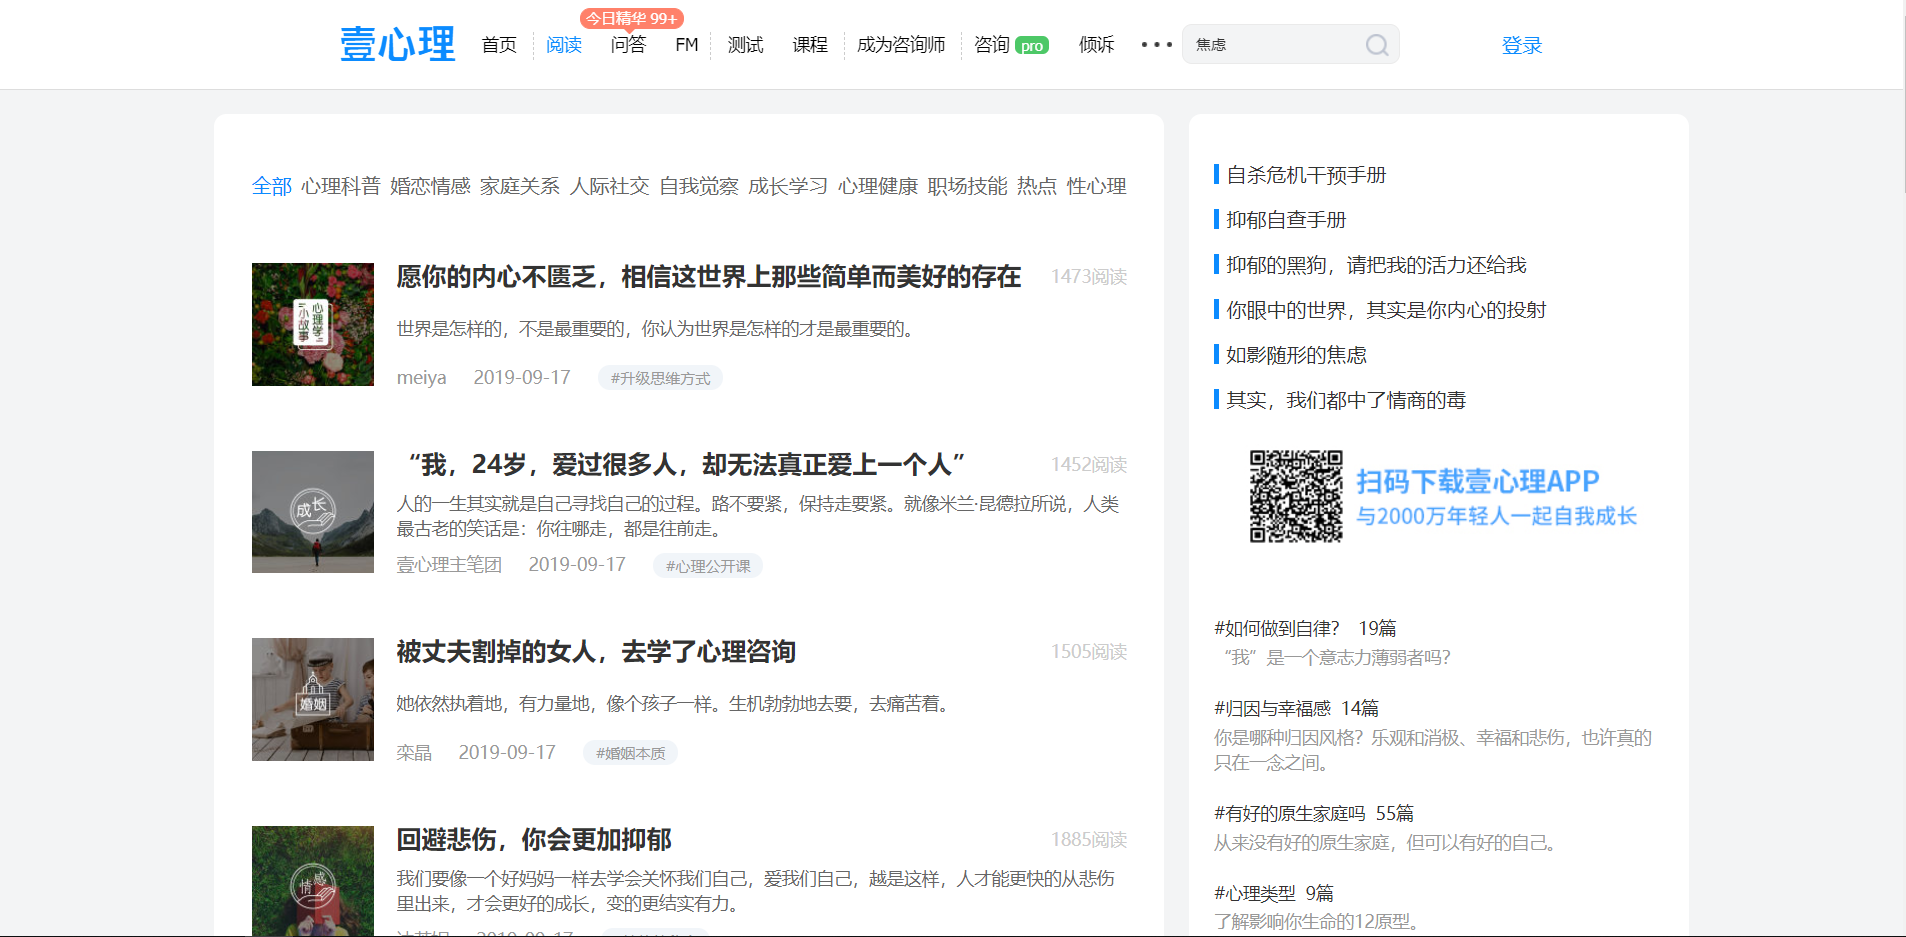
这里以一个很简单的小爬虫为例,爬取 壹心理 网站的阅读页面第一页的所有文章及其对应的图片,文章页面如下:
创建项目
首先新建一个 scrapy 项目,安装好相关依赖(步骤可参考:scrapy 安装及新建爬虫项目并运行)。
新建一个爬虫:
scrapy genspider xinli001 'www.xinli001.com/info'
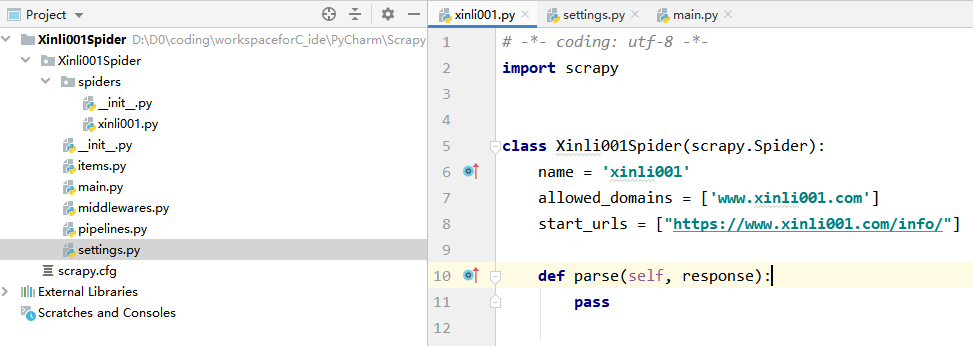
此时项目工程目录与新建的爬虫如下:
爬取信息并编写图片自动下载逻辑
本次主要是记录自定义 pipeline 来爬取图片,所以只是简单的选取一些信息来爬取,包括文章标题、图片、发布时间和作者。
1.通过 xpath 提取出文章模块,就是下图中方框中的:
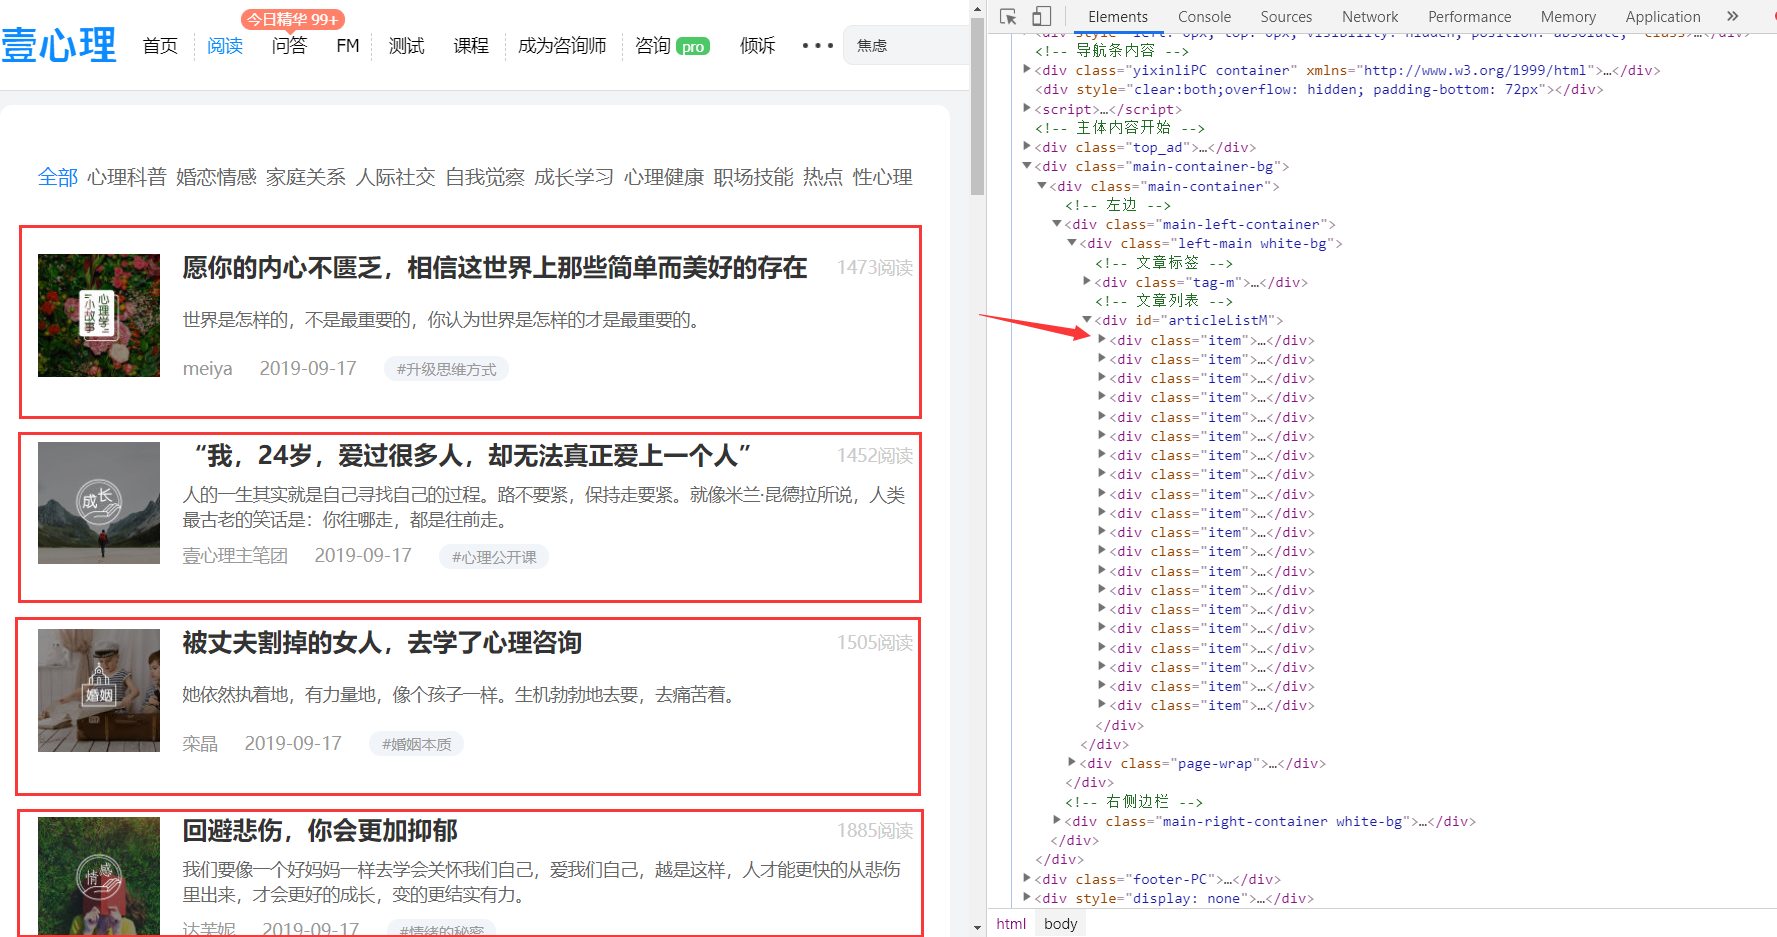
上图右边便是对应的代码位置,下面将先使用 xpath 提取所有 item 模组,之后在对所有 item 组块遍历分别提取其对应的相关信息。
提取 item:
post_nodes = response.xpath('//*[@id="articleListM"]//div[@class="item"]')
2.遍历 post_nodes 并从中提取出相关信息:
下面给出第一个 item 中的网页结构:
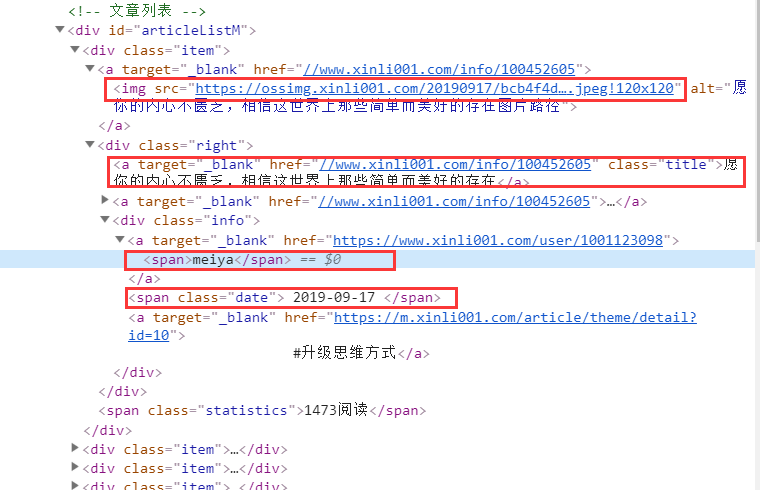
对照上面结构提取相关信息:
# 图片
image_url= post_node.xpath('a/img/@src').extract_first()
# 标题
title = post_node.xpath('div[@class="right"]/a/text()').extract_first()
# 发布时间
create_date = post_node.xpath('div[@class="right"]/div[@class="info"]/span/text()').extract_first()
# 作者
writer = post_node.xpath('div[@class="right"]/div[@class="info"]/a[1]/span/text()').extract_first()
3.定义 Xinli001Item
在 item.py 文件中添加 xinli001 爬虫对应的 item:
class Xinli001SpiderItem(scrapy.Item):
    title = scrapy.Field()
    image_url = scrapy.Field()
    writer = scrapy.Field()
    create_date = scrapy.Field()
4.提交 item 实例
# -*- coding: utf-8 -*- import scrapy from scrapy.http import Request from urllib import parse from Xinli001Spider.items import Xinli001SpiderItem class Xinli001Spider(scrapy.Spider): name = 'xinli001' allowed_domains = ['www.xinli001.com'] start_urls = ["https://www.xinli001.com/info/"] def parse(self, response): # 提取文章 model post_nodes = response.xpath('//*[@id="articleListM"]//div[@class="item"]') for post_node in post_nodes: # 创建 item 实例 article_item = Xinli001SpiderItem() # 图片 image_url= post_node.xpath('a/img/@src').extract_first() # 标题 title = post_node.xpath('div[@class="right"]/a/text()').extract_first() # 发布时间 create_date = post_node.xpath('div[@class="right"]/div[@class="info"]/span/text()').extract_first() # 作者 writer = post_node.xpath('div[@class="right"]/div[@class="info"]/a[1]/span/text()').extract_first() article_item['image_url'] = [image_url] article_item['title'] = title article_item['create_date'] = create_date article_item['writer'] = writer # 提交 item 实例给 pipeline 处理 yield article_item
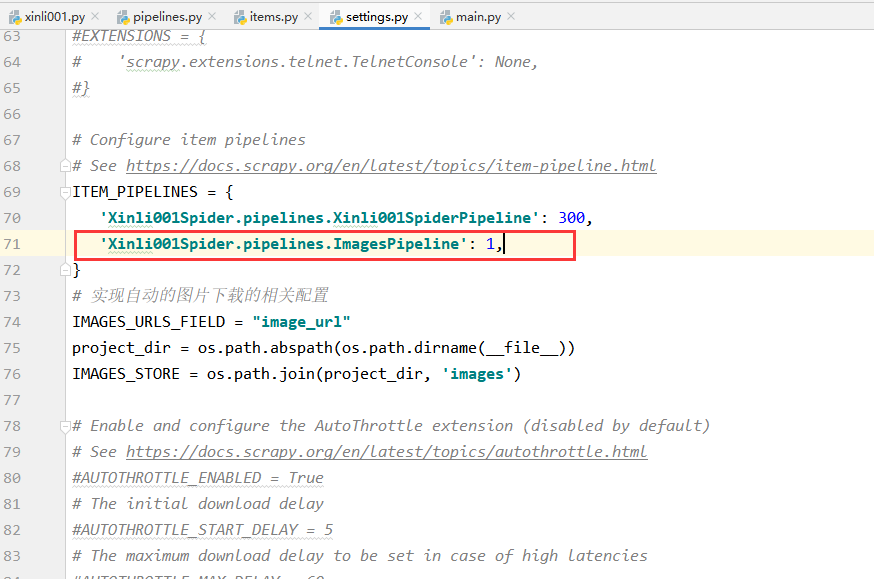
5.配置图片下载相关参数:
# 实现自动的图片下载的相关配置
IMAGES_URLS_FIELD = "image_url"     # 图片
project_dir = os.path.abspath(os.path.dirname(__file__))    # 获取当前路径
IMAGES_STORE = os.path.join(project_dir, 'images')  # 将图片保存到当前项目路径下的 images 文件夹下
将上面的代码加入到 settings.py 中 Configure item pipelines 相关代码的下方。
6.启用 scrapy 的图片下载
在第5步之后,需要在 settings.py 中开启图片下载的服务:
7.再次运行爬虫,便可实现图片的自动下载
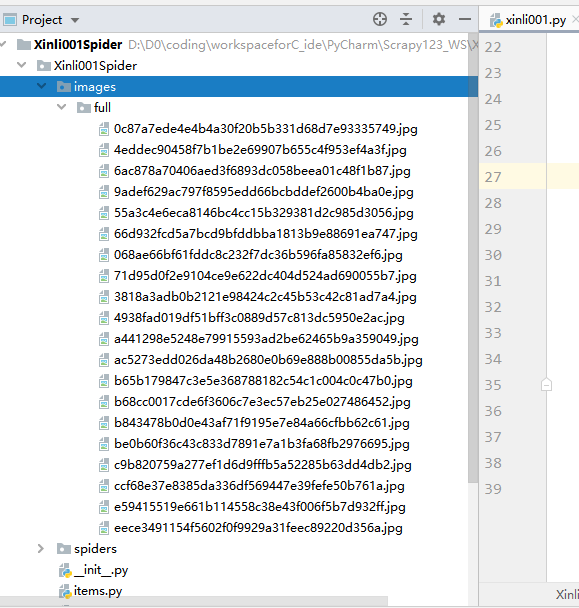
获取图片存放路径
图片下载之后,若要想访问图片,则需要获得图片的存放路径,此时我们便可对上面的 ImagePipeline 实现自定义来将获取图片存放路径的逻辑填充进代码中。
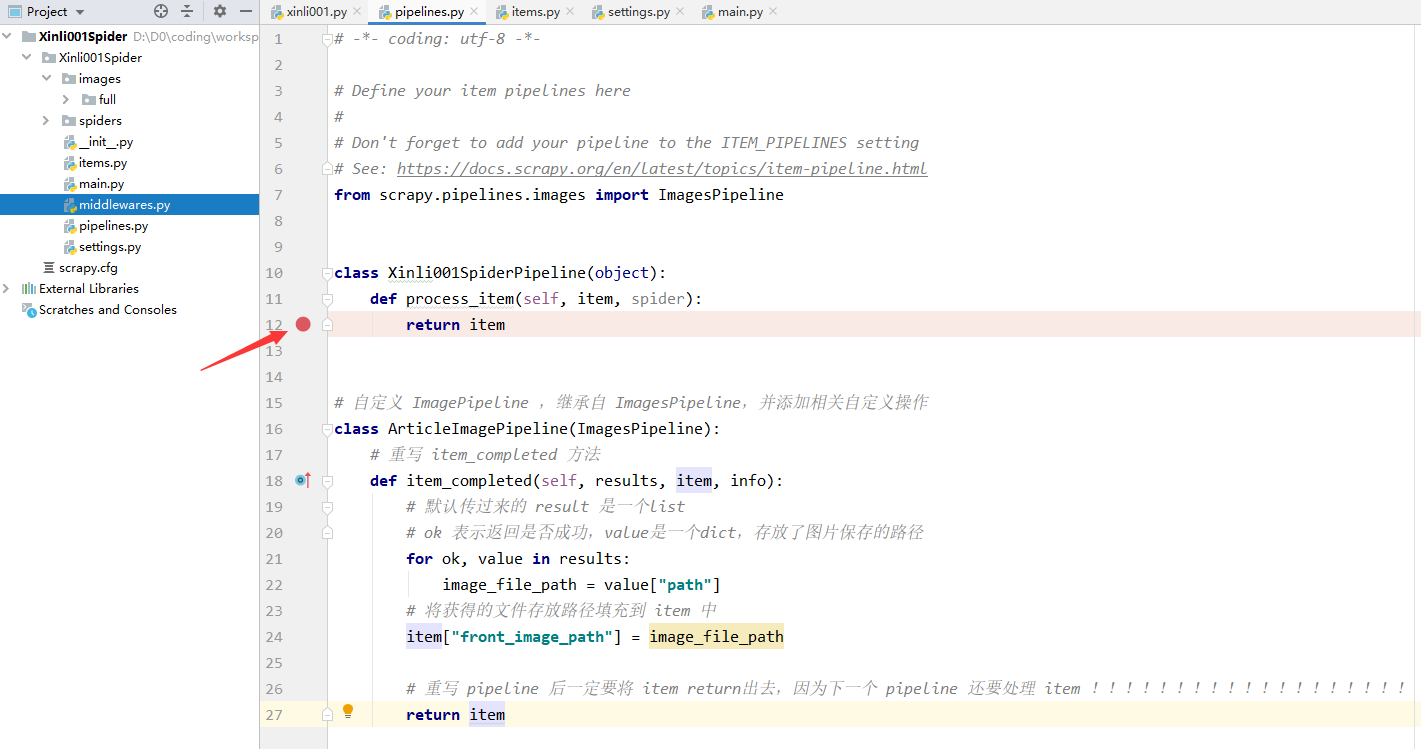
1-首先,添加 ArticleImagePipeline 类:
# 自定义 ImagePipeline ,继承自 ImagesPipeline,并添加相关自定义操作 class ArticleImagePipeline(ImagesPipeline): # 重写 item_completed 方法 def item_completed(self, results, item, info): # 默认传过来的 result 是一个list # ok 表示返回是否成功,value是一个dict,存放了图片保存的路径 for ok, value in results: image_file_path = value["path"] # 将获得的文件存放路径填充到 item 中 item["front_image_path"] = image_file_path # 返回item return item
2-将 ArticleImagePipeline 配置到 settings.py 文件中:
# Configure item pipelines
# See https://docs.scrapy.org/en/latest/topics/item-pipeline.html
ITEM_PIPELINES = {
   'Xinli001Spider.pipelines.Xinli001SpiderPipeline': 300,
   # 'Xinli001Spider.pipelines.ImagesPipeline': 1,
   'Xinli001Spider.pipelines.ArticleImagePipeline': 1,
}
注意上面之前使用的 ImagesPipeline 不需要了,要注释掉。
3-添加相关 item 属性
在 Xinli001SpiderItem 中添加一个 front_image_path 属性来存储图片存放路径:

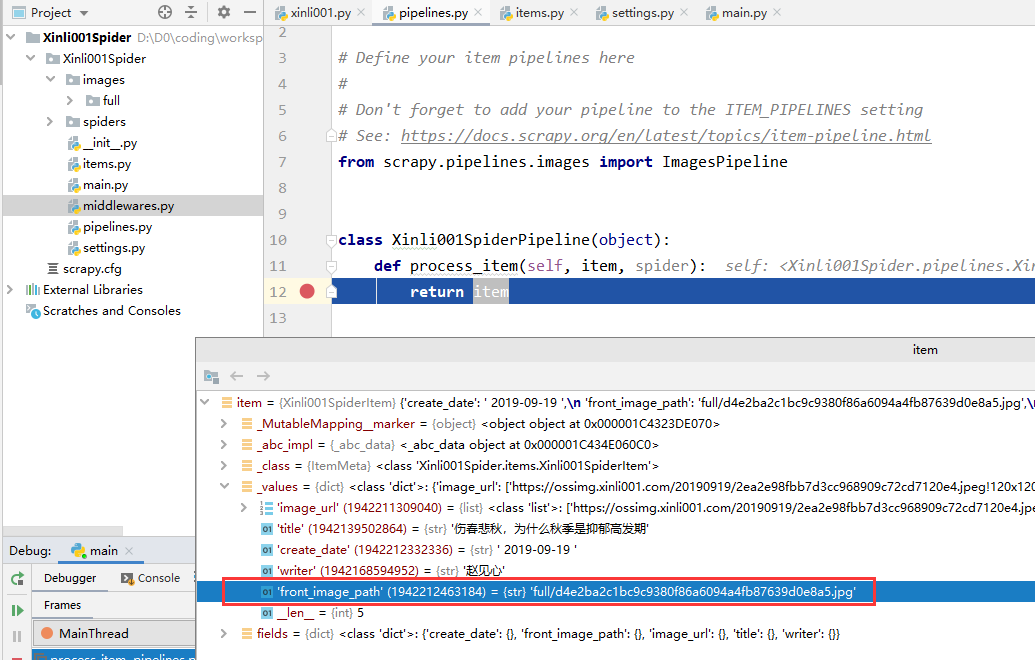
4-查看返回的图片路径
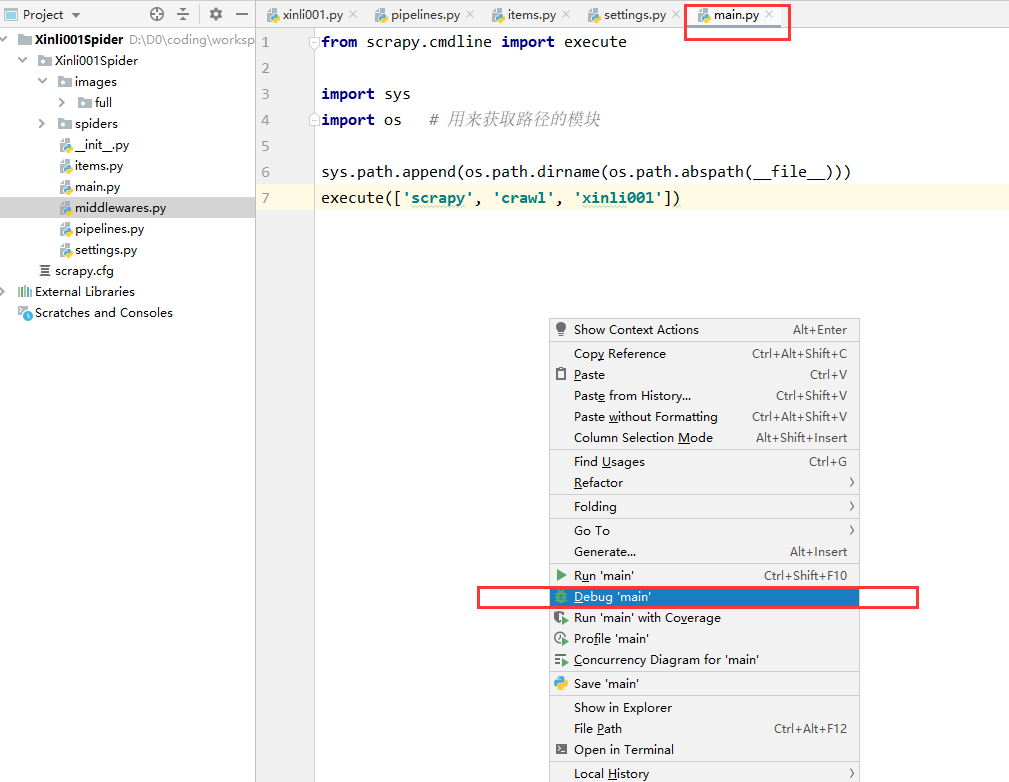
第二步中我们配置了两个 Pipeline ,一个顺序在前(ArticleImagePipeline:1),一个在后(Xinli001SpiderPipeline:300),我们可以在后面的 Pipeline 处理函数处打个断点,然后启动调试功能来运行。
打断点:
debug 一下:
可以看到执行到断点处时,已经提取到了图片存放路径: