参考文章:
https://blog.csdn.net/huang_fen/article/details/95996830
https://www.jianshu.com/p/611c588d67b8
https://blog.csdn.net/huang_fen/article/details/95996830
学习点:
- 安装uirecorder
- 用工具(UI Recorder)录制测试脚本
- 测试脚本的回放
本文意在安装UI Recorder,并且利用该工具进行测试脚本(.js)的录制与回放。
一、安装NodeJS
https://www.cnblogs.com/sirdong/p/11447739.html
由于直接yum安装的nodejs版本太低,所以本篇文章向大家介绍在 Linux 上安装 Node.js 最新版的方法。
-
安装环境
-
本机系统:CentOS Linux release 7.5
-
Node.js:v10.16.0
-
获取Node.js 安装包
-
Node.js 安装包及源码下载地址为:https://nodejs.org/en/download/,你可以根据不同平台系统选择你需要的 Node.js 安装包,这里选择的是Linux Binaries (x64)。
Linux 上安装 Node.js
wget https://nodejs.org/dist/v10.16.0/node-v10.16.0-linux-x64.tar.xz    // 下载
tar xf node-v10.16.0-linux-x64.tar.xz                                   // 解压
cd node-v10.16.0-linux-x64                                              // 进入解压目录
解压文件的 bin 目录底下包含了 node、npm 等命令,我们可以修改linux系统的环境变量(profile)来设置直接运行命令:
老规矩先备份,养成修改重要文件之前先备份的好习惯。
cp /etc/profile /etc/profile.bak
然后vim /etc/profile,在最下面添加 export PATH=$PATH: 后面跟上node下bin目录的路径
export PATH=$PATH:/root/node-v10.16.0-linux-x64/bin
立即生效
source /etc/profile
[root@localhost ~]# node -v
v10.16.0
二.安装Chrome
https://www.cnblogs.com/qiaoliming/p/chrome.html
1.配置yum源:
在目录 /etc/yum.repos.d/ 下新建文件 google-chrome.repo
[root@localhost ~]#  cd /ect/yum.repos.d/
[root@localhost yum.repos.d]#  vim google-chrome.repo
编辑google-chrome.repo,内容如下,编辑后保存退出(:wq)
[google-chrome]
name=google-chrome
baseurl=http://dl.google.com/linux/chrome/rpm/stable/$basearch
enabled=1
gpgcheck=1
gpgkey=https://dl-ssl.google.com/linux/linux_signing_key.pub
安装google chrome浏览器:
[root@localhost yum.repos.d]# yum -y install google-chrome-stable --nogpgcheck
查看浏览器版本
google-chrome --version
修改浏览器配置,让其在root下成功启动:
cd /opt/google/chrome
vim google-chrome
# 在exec -a "$0" "$HERE/chrome" "$@" 后面加上  --no-sandbox
2.离线安装chrome
思路: 找一台可以上网的服务器,下载下来安装包并保存下来.拷贝到不能安装的那台机器上
1)将yum下载的安装包保存到本地
修改yum的配置文件,它的位置:/etc/yum.conf该文件有两个重要参数
keepcache=1   改为真(1)将网络yum源使用过的软件包保存下来
cachedir=/var/cache/yum/$basearch/$releasever   保存在这个位置根据系统版本和包的源可能有所不同
安装一个小软件测试
yum install sl -y
切换到该目录
[root@test /]# cd /var/cache/yum/x86_64/6/epel/packages
[root@test packages]# ls
sl-5.02-1.el6.x86_64.rpm
2.下载并拷贝到对应目录
备注: chrome启动需要linux操作系统支持GUI,即需要有图形界面,否则无法使用
安装Xvfb(virtual framebuffer X server for X Version)
在无界面的服务器上安装Chrome时,应该这样安装:
sudo apt-get update-
sudo apt-get install google-chrome-stable。chrome在linux系统上有最低版本要求,如果报错了,多半需要升级系统 -
sudo apt-get update && sudo apt-get install -y xfonts-100dpi xfonts-75dpi xfonts-scalable xfonts-cyrillic Xvfb x11-apps imagemagick firefox google-chrome-stable
这是为了安装Xvfb(virtual framebuffer X server for X Version),可以直接处理图形化功能,同时不会把图形输出到屏幕上。因为无界面服务器上无法从本地打开Chrome - 执行
Xvfb :2 -screen 0 1024x768x16启动服务,让Xvfb把显示图像放到2号屏幕上 - 执行
export DISPLAY=:2,指定控制台就是2号屏幕。 - 执行
google-chrome-stable www.baidu.com,如果出现Xlib: extension "RANDR" missing on display ":2",就代表启动成功了
三.安装UIRECORDER
https://www.cnblogs.com/vae860514/p/8459523.html
1)解决权限问题:
在虚拟机Linux操作系统下,会涉及到另一种安装失败的情况:权限不足(permission denied)。故在install uirecorder之前,先配置权限:
#sudo chown -R $(whoami) $(npm config get prefix)/{lib/node_modules,bin,share}
- 以上命令表示为当前用户设置npm相关安装目录的权限
- chown全称为change owner,授予权限命令
- -R 表示递归,对指定目录下所有的子目录和文件采取同种操作
- $(whoami) 表示获取当前用户名,即为当前用户设置权限【也可以直接写用户名】
- $(npm config get prefix) 表示获取 npm 全局安装默认目录
2)安装uirecorder和mocha:
npm install uirecorder mocha -g
若是安装失败(在安装到chrome相关包时可能会失败),则试试用cnpm命令,#cnpm install uirecorder mocha -g
【安装cnpm:#npm install -g cnpm --registry-https://registry.npm.taobao.org】
3)检查版本与建立软链接:
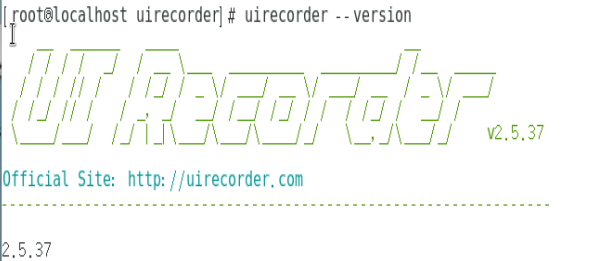
检查uirecorder安装成功与否,可以用查看版本的命令检查【Linux】:
#uirecorder --version
如果报错:bash: uirecorder: 未找到命令... 则需要建立软链接,才能使用uirecorder命令。
转到 root 权限,建立软链接:
#sudo ln -s /opt/tools/node-v9.2.0-linux-x64/bin/uirecorder /usr/local/bin/uirecorder
【ln -s 源文件 目标文件】
【 /usr/local/bin 目录是给用户放置自己的可执行程序的地方(Linux),避免系统升级而覆盖同名文件】
再检查版本:
#uirecorder --version

成功!接下来就可以在具体的项目中进行测试脚本的录制啦!
四、安装WebDriver
- 安装服务Selenium standalone server:
#npm install selenium-standalone -g
- 建立软链接:
#sudo ln -s /opt/tools/node-v9.2.0-linux-x64/bin/selenium-standalone /usr/local/bin/selenium-standalone
#sudo ln -s /opt/tools/node-v9.2.0-linux-x64/bin/start-selenium /usr/local/bin/start-selenium<br><br>
selenium-standalone install
selenium-standalone start
或者 java -jar selenium-server-standalone-3.7.1.jar
错误记录
1.maxsized错误
Error: the string "unknown error: failed to change window state to normal, current state is maximized (Session info: chrome=80.0.3987.149) (Driver info: chromedriver=2.43.600233 (523efee95e3d68b8719b3a1c83051aa63aa6b10d),platform=Linux 3.10.0-1062.18.1.el7.x86_64 x86_64)" was thrown, throw an Error :)
2.unknown error: DevToolsActivePort file doesn't exist
from selenium.webdriver.chrome.options import Options
chrome_options = Options()
chrome_options.add_argument('--no-sandbox')
chrome_options.add_argument('--disable-dev-shm-usage')
chrome_options.add_argument('--headless')
browser = webdriver.Chrome(chrome_options=chrome_options)
其中
“–no-sandbox”参数是让Chrome在root权限下跑
“–headless”参数是不用打开图形界面
可以额外加这些参数获得更好体验