最近在做一款交互性较为复杂的APP,需要开发一个方向操作控件。最终用自定义控件做了一个简单的版本。
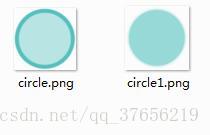
这里我准备了两张素材图,作为方向盘被点击和没被点击的背景图。下面看看自定义的Wheel类
public class Wheel extends View implements View.OnTouchListener{
    int xPosition;//点击按钮的x坐标
    int yPosition;//点击按钮的y坐标
    int centerX;//方向盘X轴中心
    int centerY;//方向盘Y轴中心
    int mainRadius;
    int secondRadius;//点击的圆形按钮的半径
    boolean isClicked;//用于判断方向盘是否被点击

    public Wheel(Context context) {
        super(context);
    }

    public Wheel(Context context, @Nullable AttributeSet attrs) {
        super(context, attrs);
    }

    public Wheel(Context context, @Nullable AttributeSet attrs, int defStyleAttr) {
        super(context, attrs, defStyleAttr);
        isClicked=false;//初始化为未点击状态
    }
}
上面这是最初的代码,仅仅是声明了一些变量。
接下来我们来复写OnMeasure
@Override
    protected void onMeasure(int widthMeasureSpec, int heightMeasureSpec) {
        super.onMeasure(widthMeasureSpec, heightMeasureSpec);
        int width =MeasureSpec.getMode(widthMeasureSpec)==MeasureSpec.UNSPECIFIED?100:MeasureSpec.getSize(widthMeasureSpec);
        int height = MeasureSpec.getMode(heightMeasureSpec)==MeasureSpec.UNSPECIFIED?100:MeasureSpec.getSize(heightMeasureSpec);
        if(width>height){//将自定义控件的区域限制为正方形
            width=height;
        }else{
            height=width;
        }
        this.mainRadius=(getWidth()-100)/2;//给主要半径赋值
        this.secondRadius=mainRadius/5*2;//赋值可点击的圆形按钮的半径
        setMeasuredDimension(width, height);
        this.centerX=getWidth()/2;//确定中心
        this.centerY=getHeight()/2;
        this.xPosition=centerX;//最初可点击的圆形按钮在中心位置
        this.yPosition=centerY;
    }
接着是OnDraw函数
    @Override
    protected void onDraw(Canvas canvas){
        Bitmap bm;//背景图的bitmap
        Paint circlePaint=new Paint();//可点击的圆形按钮的Paint对象
        circlePaint.setColor(Color.parseColor("#52c1bd"));//设置颜色
        circlePaint.setStyle(Paint.Style.FILL);//设置作图形式为填满
        if(!isClicked){//如果为点击就将bm赋值为circle1这张图的bitmap对象,否则为circle
            bm=((BitmapDrawable)getResources().getDrawable(R.mipmap.circle1)).getBitmap();
        }
        else {
            bm = ((BitmapDrawable) getResources().getDrawable(R.mipmap.circle)).getBitmap();
        }
        Rect mSrcRect = new Rect(0, 0, bm.getWidth(), bm.getHeight());//设置原始图像中要被画出来的区域
        Rect mDestRect = new Rect(30, 30,getWidth()-30, getHeight()-30);//设置目标区域中会被画进去图像的区域
        canvas.drawBitmap(bm,mSrcRect,mDestRect,BackgroundPaint);//画背景图
        canvas.drawCircle(this.xPosition,this.yPosition,secondRadius,circlePaint);//画出可点击的中心按钮
    }
上面我们创建Wheel类时还使用了OnTouchListener接口,所以要复写onTouch函数,但这里我们仅仅是写成下面的代码就行
不需要实现额外功能
    @Override
    public boolean onTouch(View v, MotionEvent event) {
        return false;
    }
我们实际上要用的是下面这个函数
   @Override
    public boolean onTouchEvent(MotionEvent event){
        isClicked=true;//设置为已经点击
        this.xPosition = (int) event.getX();//得到点击的x坐标
        this.yPosition = (int) event.getY();//得到点击的y坐标
        //如果点击的位置与圆心距离差距大于半径,就限制按钮的位置在边界处
        if(Math.sqrt((this.xPosition-this.centerX)*(this.xPosition-this.centerX)+(this.yPosition-this.centerY)*(this.yPosition-this.centerY))>mainRadius){
            double Yrate=(this.yPosition-this.centerY)/Math.sqrt((this.xPosition-this.centerX)*(this.xPosition-this.centerX)+(this.yPosition-this.centerY)*(this.yPosition-this.centerY));
            double Xrate=(this.xPosition-this.centerX)/Math.sqrt((this.xPosition-this.centerX)*(this.xPosition-this.centerX)+(this.yPosition-this.centerY)*(this.yPosition-this.centerY));
            this.yPosition=(int)(mainRadius*Yrate)+this.centerY;//设置可点击圆心按钮的位置在边界处
            this.xPosition=(int)(mainRadius*Xrate)+this.centerX;
        }

        if(this.myWheelMoveListener!=null){//这里是之后我们要实现交互用的,限制先忽略
            this.myWheelMoveListener.onValueChanged(this.xPosition,this.yPosition);
        }
        invalidate();

        if(event.getAction()==1){//如果点击释放后
            isClicked=false;//设置为未点击状态
            this.yPosition=this.centerY;//按钮归于圆心
            this.xPosition=this.centerX;
            if(this.myWheelMoveListener!=null){
                this.myWheelMoveListener.onValueChanged(this.xPosition,this.yPosition);
            }
            invalidate();//重新绘图
        }
        return true;
    }
到这里我们的按钮已经可以用了,但是我们还需要实现控件与外部的交互所以我们要定义接口,如下
public void setOnMyWheelMoveListener(OnMyWheelMoveListener listener){    //设置交互事件
        this.myWheelMoveListener=listener;
    }
    public static abstract interface OnMyWheelMoveListener {
        public abstract void onValueChanged(int xDistance, int yDistance);
    }
下面看看完整的代码
public class Wheel extends View implements View.OnTouchListener{
    int xPosition;
    int yPosition;
    int centerX;
    int centerY;
    int mainRadius;
    int secondRadius;
    boolean isClicked;
    OnMyWheelMoveListener myWheelMoveListener;

    public Wheel(Context context) {
        super(context);
    }

    public Wheel(Context context, @Nullable AttributeSet attrs) {
        super(context, attrs);
    }

    public Wheel(Context context, @Nullable AttributeSet attrs, int defStyleAttr) {
        super(context, attrs, defStyleAttr);
        isClicked=false;
    }

    @Override

    protected void onMeasure(int widthMeasureSpec, int heightMeasureSpec) {
        super.onMeasure(widthMeasureSpec, heightMeasureSpec);
        int width =MeasureSpec.getMode(widthMeasureSpec)==MeasureSpec.UNSPECIFIED?100:MeasureSpec.getSize(widthMeasureSpec);
        int height = MeasureSpec.getMode(heightMeasureSpec)==MeasureSpec.UNSPECIFIED?100:MeasureSpec.getSize(heightMeasureSpec);
        if(width>height){
            width=height;
        }else{
            height=width;
        }
        this.mainRadius=(getWidth()-100)/2;
        this.secondRadius=mainRadius/5*2;
        setMeasuredDimension(width, height);
        this.centerX=getWidth()/2;
        this.centerY=getHeight()/2;
        this.xPosition=centerX;
        this.yPosition=centerY;
    }

    @Override
    protected void onDraw(Canvas canvas){
        Bitmap bm;
        Paint BackgroundPaint = new Paint(Paint.ANTI_ALIAS_FLAG);
        BackgroundPaint.setFilterBitmap(true);
        BackgroundPaint.setDither(true);

        Paint circlePaint=new Paint();
        circlePaint.setColor(Color.parseColor("#52c1bd"));
        circlePaint.setStyle(Paint.Style.FILL);
        if(!isClicked){
            bm=((BitmapDrawable)getResources().getDrawable(R.mipmap.circle1)).getBitmap();
        }
        else {
            bm = ((BitmapDrawable) getResources().getDrawable(R.mipmap.circle)).getBitmap();
        }
        Rect mSrcRect = new Rect(0, 0, bm.getWidth(), bm.getHeight());
        Rect mDestRect = new Rect(30, 30,getWidth()-30, getHeight()-30);
        canvas.drawBitmap(bm,mSrcRect,mDestRect,BackgroundPaint);
        canvas.drawCircle(this.xPosition,this.yPosition,secondRadius,circlePaint);

    }

    @Override
    public boolean onTouch(View v, MotionEvent event) {
        return false;
    }

    @Override
    public boolean onTouchEvent(MotionEvent event){
        isClicked=true;
        this.xPosition = (int) event.getX();
        this.yPosition = (int) event.getY();
        if(Math.sqrt((this.xPosition-this.centerX)*(this.xPosition-this.centerX)+(this.yPosition-this.centerY)*(this.yPosition-this.centerY))>mainRadius){
            double Yrate=(this.yPosition-this.centerY)/Math.sqrt((this.xPosition-this.centerX)*(this.xPosition-this.centerX)+(this.yPosition-this.centerY)*(this.yPosition-this.centerY));
            double Xrate=(this.xPosition-this.centerX)/Math.sqrt((this.xPosition-this.centerX)*(this.xPosition-this.centerX)+(this.yPosition-this.centerY)*(this.yPosition-this.centerY));
            this.yPosition=(int)(mainRadius*Yrate)+this.centerY;
            this.xPosition=(int)(mainRadius*Xrate)+this.centerX;
        }
        if(this.myWheelMoveListener!=null){
            this.myWheelMoveListener.onValueChanged(this.xPosition,this.yPosition);
        }
        invalidate();

        if(event.getAction()==1){
            isClicked=false;
            this.yPosition=this.centerY;
            this.xPosition=this.centerX;
            if(this.myWheelMoveListener!=null){
                this.myWheelMoveListener.onValueChanged(this.xPosition,this.yPosition);
            }
            invalidate();
        }
        return true;
    }

    public void setOnMyWheelMoveListener(OnMyWheelMoveListener listener){
        this.myWheelMoveListener=listener;
    }
    public static abstract interface OnMyWheelMoveListener {
        public abstract void onValueChanged(int xDistance, int yDistance);
    }
}
到这里自定义简单方向盘控件就基本实现了,下面看看具体使用
布局文件
<?xml version="1.0" encoding="utf-8"?>
<RelativeLayout xmlns:android="http://schemas.android.com/apk/res/android"
    xmlns:app="http://schemas.android.com/apk/res-auto"
    xmlns:tools="http://schemas.android.com/tools"
    android:layout_width="match_parent"
    android:layout_height="match_parent"
    tools:context="com.drw.myapplication.MainActivity"
    android:background="#fff">

    <com.drw.myapplication.Wheel
        android:id="@+id/myWheel"
        android:layout_width="200dp"
        android:layout_height="200dp"
        android:layout_alignParentLeft="true"
        android:layout_alignParentStart="true"
        android:layout_alignParentTop="true" />
    <TextView
        android:id="@+id/tv"
        android:layout_width="match_parent"
        android:layout_height="wrap_content"
        android:layout_alignParentBottom="true"/>

</RelativeLayout>
主类
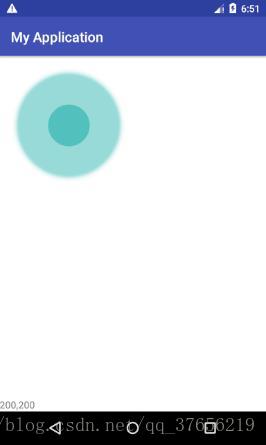
public class MainActivity extends AppCompatActivity {
    Wheel wheel;
    TextView tv;
    @Override
    protected void onCreate(Bundle savedInstanceState) {
        super.onCreate(savedInstanceState);
        setContentView(R.layout.activity_main);
        wheel=(Wheel)findViewById(R.id.myWheel);
        tv=(TextView)findViewById(R.id.tv);
        wheel.setOnMyWheelMoveListener(new Wheel.OnMyWheelMoveListener() {//设置交互事件
            @Override
            public void onValueChanged(int xDistance, int yDistance) {
                tv.setText(""+xDistance+","+yDistance);
            }
        });
    }
}
执行的效果图如下