一直也没有找到合适的类似Socat + Haproxy 的组合能用在Nginx,后来发现了Nginx的几个模块,但是也存在各种不足. 而且Nginx 在大流量的情况下nginx -s reload 是有15% 以上的损耗,并且work线程要处理完以后才会退出,并生成新的线程去处理连接. 作为Ha转发器是不是很蛋疼?最后觉得还是nginx_upsync_module 能够通过命令行来平滑上下线主机的需求, 之后就来怎么使用吧.
1 ) 几种Nginx 上下线模块说明:
## 1.1) 因为nginx本身并没有提供这些上下线API,需要openresty并配合一些第三方扩展来实现
Tengine 的Dyups模块(ngx_http_dyups_module)。
新浪微博的Upsync+Consul 实现动态负载均衡。
OpenResty的balancer_by_lua(又拍云使用其开源的slardar(Consul balancer_by_lua))。


ngx_http_dyups_module (https://github.com/yzprofile/ngx_http_dyups_module)          # 提供了粗粒度的upstream管理方法,可以对整个upstream进行新增,删除。
lua-upstream-nginx-module (https://github.com/openresty/lua-upstream-nginx-module)  #则提供了细粒度的管理方式,可以对某一个服务IP进行管理,其中提供的set_peer_down方法,可以对upstream中的某个ip进行上下线。
ngx_dynamic_upstream (https://github.com/cubicdaiya/ngx_dynamic_upstream)           #这些插件有一个共同点,那就是在不需要重启nginx的基础上, 动态修改nginx的配置.

最终决定使用 微博的 Nginx + Upsync + Consul 这个方案,主要考虑了配置持久化的问题和注册中心挂了,是否影响生产的问题.正好可以达到效果所以最后决定采用这个方案.

## 1.2) Github上开源的 Lua + nginx 上下线的项目:
https://github.com/firstep/grayscale
2 ) 实验环境 :
| 主机名 | 域名 | 端口 | 软件 | 内网IP | 功能 | 系统 |
|---|---|---|---|---|---|---|
| bj-node-1 | con.linux08.com | 8500 | Consul_0.6.4 | 10.10.78.17 | 注册中心 | Centos 7 x64 |
| bj-master-1 | www.linux08.com | 80 | Nginx + upsync | 10.10.123.235 | nginx 分发 | Centos 7 x64 |
| cli-1 | 空 | 80 | nginx web | 10.10.16.182 | web服务 | Centos 7 x64 |
| cli-2 | 空 | 80 | nginx web | 10.10.185.201 | web服务 | Centos 7 x64 |
2.2) 环境说明:
 2.2.1) 四台主机要互相可以连通. cli-1和cli-2 安装好nginx-1.10.1,并配置好首页文件随便写点内容用来区别主机.
 2.2.2) 提前做好防火墙策略,实验就开放所有端口给办公IP.(注意网络安全尤其是Consul web 权限管理太弱了).

2.3) 使用模块:
nginx-upsync-module                  # 与consul交换数据模块,配合Consul组成nginx upstream 平滑上下线主机功能(新浪开发)。
nginx_upstream_check_module          # 探测nginx upstream 组内主机并显示Web的模块(阿里开发).


2.4) 版本说明:
 Nginx 对插件的版本要求很高, 其他的试了几次都没有把两种软件都加入到Nginx里并编译成功的. 最后看了几个文章发现都是用下面的版本号来做的,
  Nginx-1.10.1
  Consul_0.6.4_linux_amd64
  nginx_upstream_check_module      # 这个里面的补丁包都写了版本号, 尽量按照教程来.本次使用(check_1.9.2+.patch )
3 ) 安装Nginx 并添加模块:
    cd /data/src/
3.1 )下载nginx源码:
    wget http://nginx.org/download/nginx-1.10.1.tar.gz

3.2) 下载nginx_upstream_check_module 模块:
    git clone https://github.com/xiaokai-wang/nginx_upstream_check_module

3.2) 下载 nginx-upsync-module :
    wget https://codeload.github.com/weibocom/nginx-upsync-module/tar.gz/v2.1.2

3.4) 解压缩软件:
    tar -zxf nginx-1.10.1.tar.gz
    tar -zxf v2.1.2

3.5) 安装依赖包:
    yum -y install libpcre3 libpcre3-dev ruby zlib1g-dev patch openssl openssl-devel pcre pcre-devel

3.6)  给Nginx 打补丁(nginx_upstream_check_module):
   ** 注意 ** 此补丁适用于nginx-1.10+ (一定要用这个版本):
    cd /data/src/nginx-1.10.1/
    patch -p0 < /data/src/nginx_upstream_check_module/check_1.9.2+.patch

   如下显示即打补丁成功:
   [root@bj-master-1 nginx-1.10.1]#     patch -p0 < /data/src/nginx_upstream_check_module/check_1.9.2+.patch
    patching file src/http/modules/ngx_http_upstream_hash_module.c
    patching file src/http/modules/ngx_http_upstream_ip_hash_module.c
    patching file src/http/modules/ngx_http_upstream_least_conn_module.c
    patching file src/http/ngx_http_upstream_round_robin.c
    patching file src/http/ngx_http_upstream_round_robin.h


3.7)编译安装nginx:
    groupadd -g 1001 work
    useradd -u 1001 -g 1001 work
    echo '123456' | passwd --stdin work

    cd /data/src/nginx-1.10.1/
    ./configure --user=work --group=work --prefix=/data/work/nginx
     --with-http_ssl_module --with-pcre
     --with-http_stub_status_module --with-http_ssl_module
     --with-http_gzip_static_module
     --with-http_realip_module --with-http_sub_module
     --add-module=/data/src/nginx_upstream_check_module
     --add-module=/data/src/nginx-upsync-module-2.1.2

    make -j 2 && make install

    ** 注意 **  --add-module= 后边跟着的都是补丁和模块的源码包路径. 版本号补丁要写正确,如果是新版本的话请自行核对.

    测试看Nginx 是否添加模块成功:

    [root@bj-master-1 sbin]# ./nginx  -V
    nginx version: nginx/1.10.1
    built by gcc 4.8.5 20150623 (Red Hat 4.8.5-39) (GCC)
    built with OpenSSL 1.0.2k-fips  26 Jan 2017
    TLS SNI support enabled
    configure arguments: --user=work --group=work --prefix=/data/work/nginx --with-http_ssl_module --with-pcre --with-http_stub_status_module --with-http_ssl_module --with-http_gzip_static_module --with-http_realip_module --with-http_sub_module --add-module=/data/src/nginx_upstream_check_module --add-module=/data/src/nginx-upsync-module-2.1.2


4 ) 安装Consul_0.6.4并启动:
4.1) 下载Consul_0.6.4:
wget https://releases.hashicorp.com/consul/0.6.4/consul_0.6.4_linux_amd64.zip
4.2) 安装并启动Consul_0.6.4:
unzip consul_0.6.4_linux_amd64.zip
mkdir -p /data/soft/consul/data; mv consul /data/soft/consul/
cd /data/soft/consul
./consul agent -server -ui -bootstrap-expect=1 -syslog -bind=10.10.78.17 -client=0.0.0.0 -data-dir=/data/soft/consul/data -log-level=debug &
4.3) Condul 启动脚本:
cd /data/soft/consul/
vim start.sh
#!/bin/bash
cd /data/soft/consul
nohup ./consul agent -server -ui -bootstrap-expect=1 -syslog -bind=10.10.78.17 -client=0.0.0.0
-data-dir=/data/soft/consul/data -log-level=debug &
chmod 755 start.sh
sh start.sh
4.5)查看Consul 启动日志:
tail -f -n nohup.log
2020/12/21 18:43:02 [INFO] raft: Node at 10.10.78.17:8300 [Follower] entering Follower state
2020/12/21 18:43:02 [INFO] serf: EventMemberJoin: bj-node-1 10.10.78.17
2020/12/21 18:43:02 [INFO] serf: EventMemberJoin: bj-node-1.dc1 10.10.78.17
2020/12/21 18:43:02 [INFO] consul: adding LAN server bj-node-1 (Addr: 10.10.78.17:8300) (DC: dc1)
2020/12/21 18:43:02 [INFO] consul: adding WAN server bj-node-1.dc1 (Addr: 10.10.78.17:8300) (DC: dc1)
2020/12/21 18:43:02 [ERR] agent: failed to sync remote state: No cluster leader
2020/12/21 18:43:03 [WARN] raft: Heartbeat timeout reached, starting election
2020/12/21 18:43:03 [INFO] raft: Node at 10.10.78.17:8300 [Candidate] entering Candidate state
2020/12/21 18:43:03 [DEBUG] raft: Votes needed: 1
2020/12/21 18:43:03 [DEBUG] raft: Vote granted from 10.10.78.17:8300. Tally: 1
2020/12/21 18:43:03 [INFO] raft: Election won. Tally: 1
2020/12/21 18:43:03 [INFO] raft: Node at 10.10.78.17:8300 [Leader] entering Leader state
2020/12/21 18:43:03 [INFO] consul: cluster leadership acquired
2020/12/21 18:43:03 [INFO] consul: New leader elected: bj-node-1
2020/12/21 18:43:03 [INFO] raft: Disabling EnableSingleNode (bootstrap)
2020/12/21 18:43:03 [DEBUG] raft: Node 10.10.78.17:8300 updated peer set (2): [10.10.78.17:8300]
2020/12/21 18:43:03 [DEBUG] raft: Node 10.10.78.17:8300 updated peer set (2): [10.10.78.17:8300]
2020/12/21 18:43:03 [DEBUG] consul: reset tombstone GC to index 6
2020/12/21 18:43:03 [DEBUG] agent: Service 'consul' in sync
2020/12/21 18:43:03 [INFO] agent: Synced node info
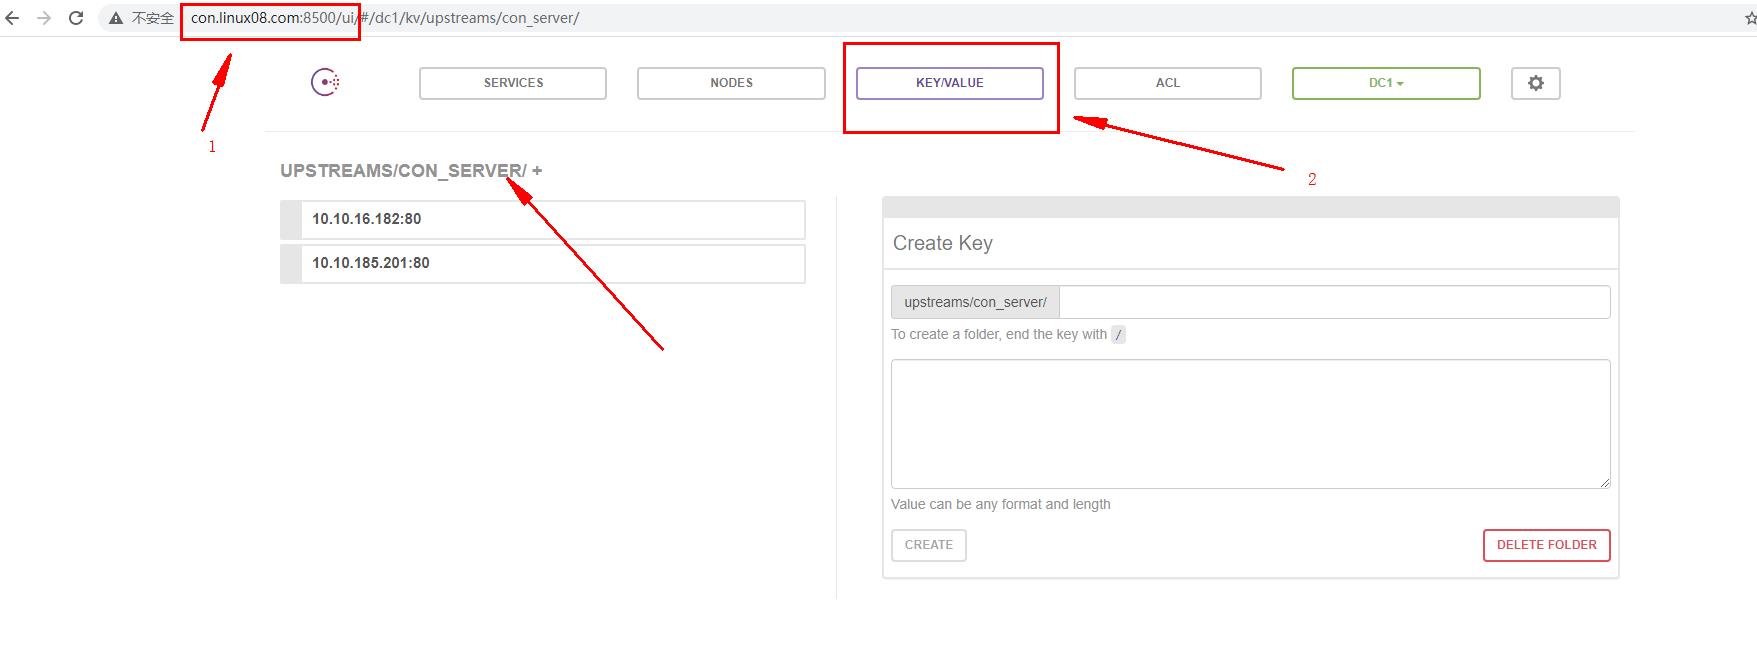
4.6) 访问Consul web 管理界面(web 端口8500):
http://con.linux08.com:8500/ui/
5 ) 配置Nginx upstream 并联动Consul:
## 5.1) 修改Nginx 配置文件:
vim /data/work/nginx/conf/nginx.conf
user work work;
worker_processes auto;
error_log /data/work/nginx/logs/error.log;
#pid logs/nginx.pid;
worker_rlimit_nofile 60000;
events {
use epoll;
worker_connections 60000;
}
http {
include mime.types;
default_type application/octet-stream;
charset utf-8;
log_format main '$remote_addr - $remote_user [$time_local]$upstream_addr-$upstream_status-$request_time'
'-$upstream_response_time-$bytes_sent-$gzip_ratio "$host$request_uri" '
'$status $body_bytes_sent "$http_referer" '
'"$http_user_agent" "$http_x_forwarded_for"';
log_format upstream '$time_iso8601 $http_x_forwarded_for $host $upstream_response_time $request $status $upstream_addr';
access_log /data/logs/nginx/access.log main;
types_hash_max_size 2048;
sendfile on;
.......... 此处省略部分配置..........
######################### Server ##############################
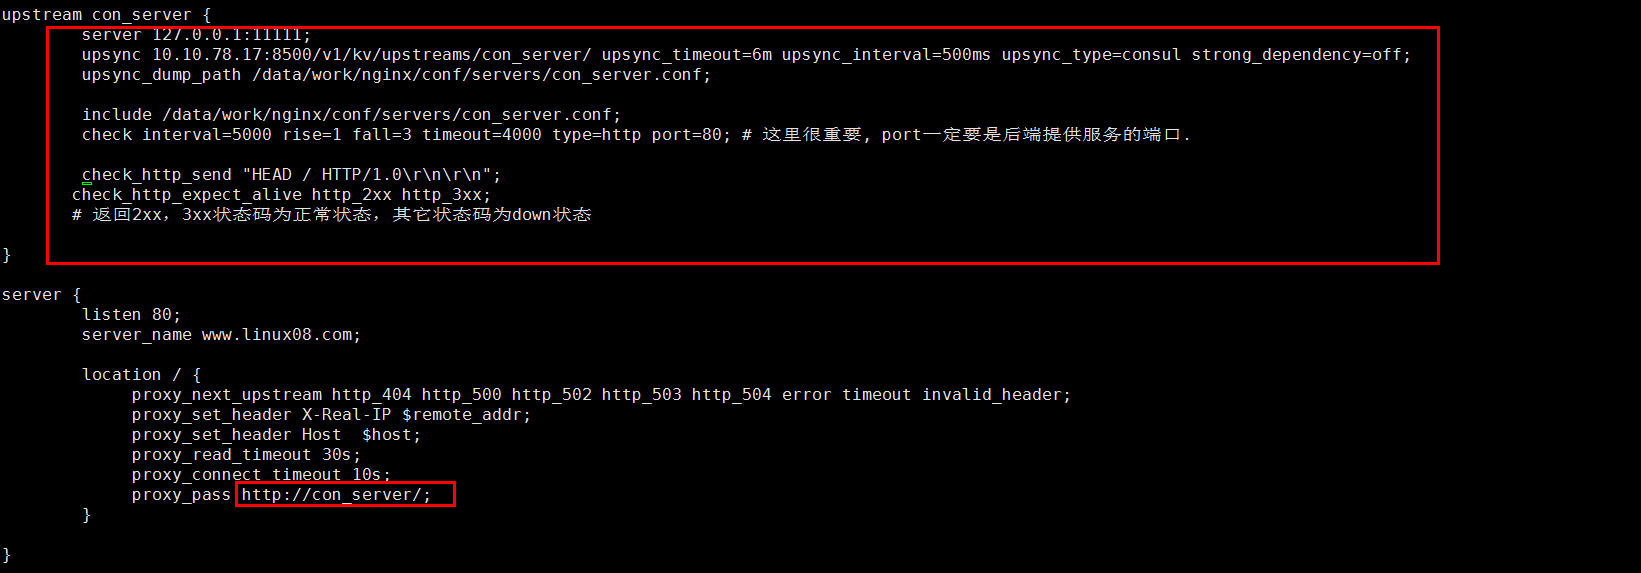
upstream con_server { # upstream 名字 很重要,consul Key 最好以这个命名.
server 127.0.0.1:11111; # 这行就是一个占位的, 没有它无法启动.
upsync 10.10.78.17:8500/v1/kv/upstreams/con_server/ upsync_timeout=6m upsync_interval=500ms upsync_type=consul strong_dependency=off;
upsync_dump_path /data/work/nginx/conf/servers/con_server.conf; # 将注册中心(Condul)的内容持久化到本地,下面的要和这个保持一致.
include /data/work/nginx/conf/servers/con_server.conf; # 引入持久化的配置文件,即使注册中心挂了服务依然可以运行. 目录和文件必须存在才能正常启动获取注册中心的信息.
check interval=5000 rise=1 fall=3 timeout=4000 type=http port=80; # upstream check 模块的必要选项,有了这些web status 才能显示.
}
server {
listen 80;
server_name www.linux08.com;
location / {
proxy_next_upstream http_404 http_500 http_502 http_503 http_504 error timeout invalid_header;
proxy_set_header X-Real-IP $remote_addr;
proxy_set_header Host $host;
proxy_read_timeout 30s;
proxy_connect_timeout 10s;
proxy_pass http://con_server/;
}
}
server {
listen 80;
server_name status.linux08.com;
location / {
check_status;
# allow 0.0.0.0;
# deny all;
auth_basic "login";
auth_basic_user_file /data/work/nginx/conf/.htpasswd;
}
}
}
## 5.2)创建备份配置文件目录并创建备份配置文件:
mkdir -p /data/work/nginx/conf/servers/ # 创建备份配置文件目录 (很重要启动前必须存在)
touch /data/work/nginx/conf/servers/con_server.conf # 创建备份配置文件,文件名就是server里面配置 (很重要启动前必须存在)
mkdir -p /data/logs/nginx/ # 创建日志文件目录
## 5.3)状态页验证创建:
yum install httpd-tools -y
htpasswd -bcm /data/work/nginx/conf/.htpasswd root 123456 # 最后2位是 账号和密码
[root@bj-master-1 conf]# htpasswd -bcm /data/work/nginx/conf/.htpasswd root 123456
Adding password for user root
## 5.4) 启动nginx:
/data/work/nginx/sbin/nginx -t
/data/work/nginx/sbin/nginx
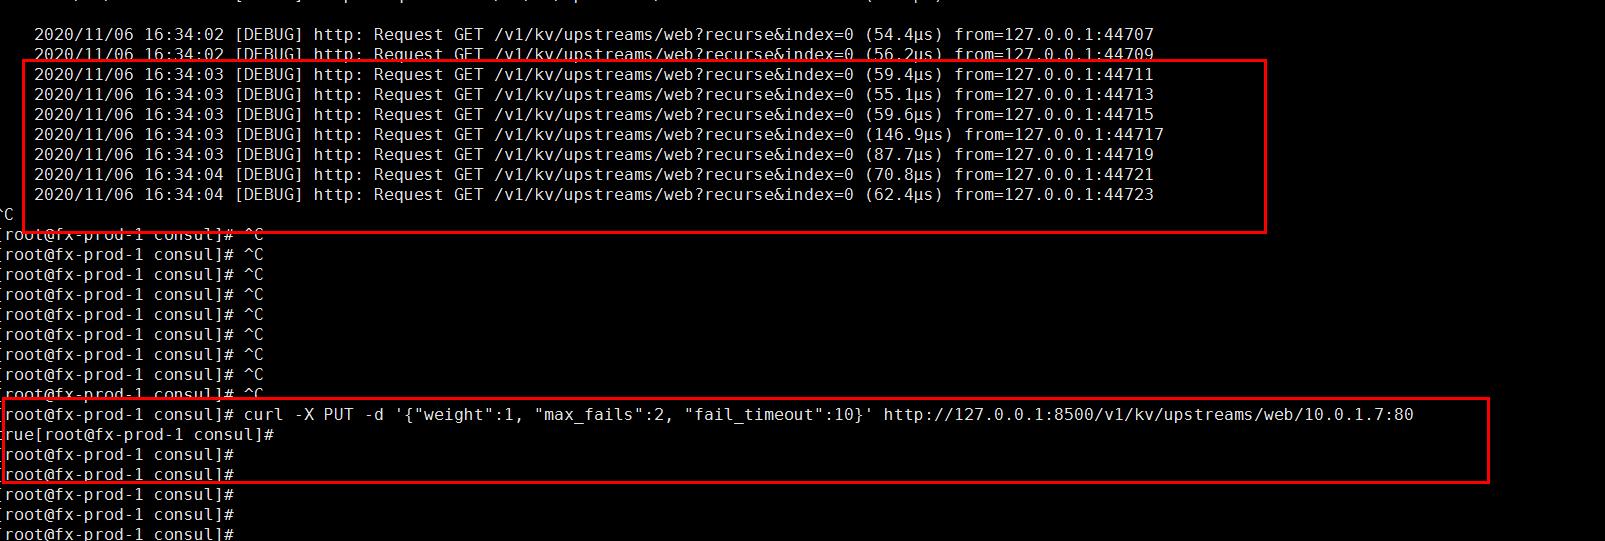
## 5.5)向Consul server () 添加主机:
curl -X PUT -d '{"weight":1, "max_fails":2, "fail_timeout":3}' 10.10.78.17:8500/v1/kv/upstreams/con_server/10.10.16.182:80
curl -X PUT -d '{"weight":1, "max_fails":2, "fail_timeout":3}' 10.10.78.17:8500/v1/kv/upstreams/con_server/10.10.185.201:80
[root@bj-master-1 nginx]# curl -X PUT -d '{"weight":1, "max_fails":2, "fail_timeout":3}' 10.10.78.17:8500/v1/kv/upstreams/con_server/10.10.16.182:80
true
## 5.6) 下线Consul server 主机:
curl -X DELETE http://10.10.78.17:8500/v1/kv/upstreams/con_server/10.10.16.182:80
curl -X DELETE http://10.10.78.17:8500/v1/kv/upstreams/con_server/10.10.185.201:80
** 注意: 每个组最好不要所有主机下线,否则无法提供服务.
[root@bj-master-1 nginx]# curl -X DELETE http://10.10.78.17:8500/v1/kv/upstreams/con_server/10.10.16.182:80
true ## 提交的信息没问题,命令会返回true. 反复提交也不报错, 只会覆盖.
## 5.7) 命令行获取结果:
curl -s http://10.10.78.17:8500/v1/kv/upstreams/con_server/?recurse
[root@bj-master-1 nginx]# curl -s http://10.10.78.17:8500/v1/kv/upstreams/con_server/?recurse
[{"LockIndex":0,"Key":"upstreams/con_server/10.10.16.182:80","Flags":0,"Value":"eyJ3ZWlnaHQiOjEsICJtYXhfZmFpbHMiOjIsICJmYWlsX3RpbWVvdXQiOjN9","CreateIndex":9616,"ModifyIndex":9623},{"LockIndex":0,"Key":"upstreams/con_server/10.10.185.201:80","Flags":0,"Value":"eyJ3ZWlnaHQiOjEsICJtYXhfZmFpbHMiOjIsICJmYWlsX3RpbWVvdXQiOjN9","CreateIndex":5311,"ModifyIndex":5311}][root@bj-master-1 nginx]#
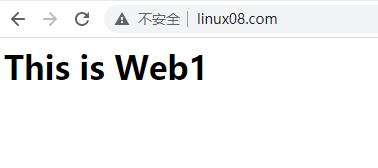
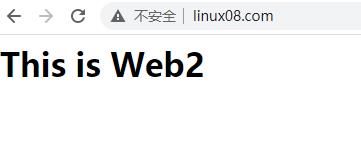
## 5.8) 测试结果:
访问 www.linux08.com 内容会在 web1 和 web2 之间切换, 用命令下线一台主机,再次刷新 只能显示一台在线.同时在status.linux08.com 页面上查看信息
6 ) Nginx status 介绍:
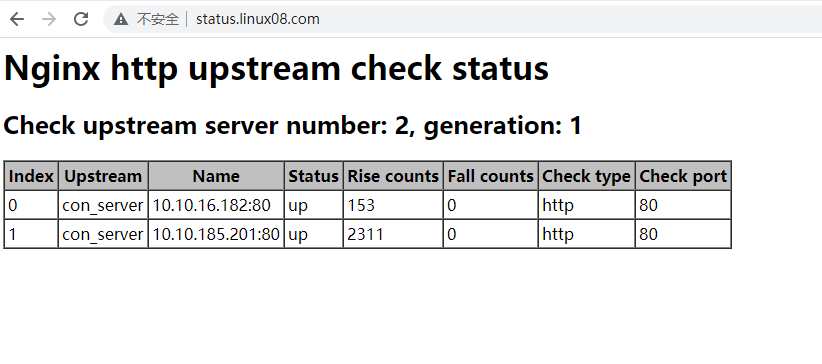
## 6.1 ) status 页面内容介绍:
server number     # 后端服务器的数量
generation        # Nginx reload的次数
Index             # 服务器的索引
Upstream          # 在配置中upstream的名称
Name              # 服务器IP
Status            # 服务器的状态
Rise              # 服务器连续检查成功的次数
Fall              # 连续检查失败的次数
Check type        # 检查的方式
Check port        # 后端专门为健康检查设置的端口
7 ) Nginx check status 配置参数介绍:
## 7.1 ) Nginx 配置文件内容
    ......
       check interval=5000 rise=1 fall=3 timeout=4000 type=http port=80;
        #每隔5秒检查后端真实节点状态,成功1次为up状态,失败3次为down状态,超时时间为4秒,检查类型为http

       check_http_send "HEAD / HTTP/1.0

";           # 该指令可以让负载均衡器模拟向后端realserver发送,监控检测的http包,模拟LVS的检测。
       check_http_expect_alive http_2xx http_3xx;           # 返回指定HTTP code,符合预期就算检测成功
                                                            # 返回2xx,3xx状态码为正常状态,其它状态码为down状态
    ......

## 7.2 ) 配置参数语法介绍:
Syntax: check interval=milliseconds [fall=count] [rise=count] [timeout=milliseconds] [default_down=true|false] [type=tcp|http|ssl_hello|mysql|ajp] [port=check_port]
Default: 如果没有配置参数,默认值是:interval=30000 fall=5 rise=2 timeout=1000 default_down=true type=tcp
Context: upstream


check interval 指令可以打开后端服务器的健康检查功能, 指令后面的参数意义是:

interval:                        # 向后端发送的健康检查包的间隔,单位为毫秒。
fall(fall_count):                 # 如果连续失败次数达到fall_count,服务器就被认为是down。
rise(rise_count):                 # 如果连续成功次数达到rise_count,服务器就被认为是up。
timeout:                          # 后端健康请求的超时时间,单位为毫秒。
default_down:                     # 设定初始时服务器的状态,如果是true,就说明默认是down的,如果是false,就是up的。默认值是true,也就是一开始服务器认为是不可用,要等健康检查包达到一定成功次数以后才会被认为是健康的。
type:                            # 健康检查包的类型,现在支持以下多种类型.

        tcp:简单的tcp连接,如果连接成功,就说明后端正常。
        ssl_hello:发送一个初始的SSL hello包并接受服务器的SSL hello包。
        http:发送HTTP请求,通过后端的回复包的状态来判断后端是否存活。
        mysql: 向mysql服务器连接,通过接收服务器的greeting包来判断后端是否存活。
        ajp:向后端发送AJP协议的Cping包,通过接收Cpong包来判断后端是否存活。

port:                             # 指定后端服务器的检查端口。

check_http_send:                 # 该指令可以让负载均衡器模拟向后端realserver发送,监控检测的http包,模拟LVS的检测。
check_http_expect_alive:         # 返回2xx,3xx状态码为正常状态,其它状态码为down状态.