依赖包安装:
yum install net-snmp* libssh-devel libssh2-devel -y
Zabbix server安装:
wget https://cdn.zabbix.com/zabbix/sources/stable/4.0/zabbix-4.0.24.tar.gz

groupadd -g 1010 zabbix
useradd -g 1010 -u 1010 zabbix -s /sbin/nologin

tar zxf zabbix-4.0.24.tar.gz && cd zabbix-4.0.24
./configure --prefix=/data/soft/zabbix --enable-server --enable-agent --with-mysql --disable-ipv6 --with-net-snmp --with-libcurl --enable-proxy --with-ssh2

make && make install
MySQL 数据部分导入:
# 创建数据库要注意,要设置collate为utf8_bin,否则首页会出现报错, 如果发生报错就需要删除数据库重新创建即可.
# 正确创建语句是:
create database zabbix character set utf8 collate utf8_bin

cd /data/src/zabbix-4.0.24/database/mysql/

mysql> create database zabbix character set utf8 collate utf8_bin;
mysql> grant all on zabbix.* to zabbix@localhost identified by 'zabbix';
mysql> flush privileges;
mysql> use zabbix;
mysql> source schema.sql;
mysql> source images.sql;
mysql> source data.sql;
Zabbix server 启动脚本:
cd /data/src/zabbix-4.0.24/misc/init.d/fedora/core

cp zabbix_server /etc/init.d/
chmod 755 /etc/init.d/zabbix_server
chkconfig --add zabbix_server
chkconfig --list | grep zabbix
zabbix_agentd  	0:关闭	1:关闭	2:关闭	3:关闭	4:关闭	5:关闭	6:关闭
zabbix_server  	0:关闭	1:关闭	2:关闭	3:关闭	4:关闭	5:关闭	6:关闭
chkconfig  zabbix_server on
chkconfig  zabbix_agentd on

/etc/init.d/zabbix_server restart
/etc/init.d/zabbix_agentd restart
Zabbix Web 安装:
#1 ) lnmp环境搭建:
nginx + php 环境自行搞定

#2 ) 复制代码:
mkdir /data/www/zabbix -p
cd /data/src/zabbix-4.0.24/frontends/php
cp -rf ./* /data/www/zabbix/                # 这是我的代码目录/data/www/zabbix
chown -R fmw.fmw /data/www/zabbix

#3)  修改php.ini 下面的参数:
post_max_size=16M
max_execution_time=300
max_input_time=300

#4) 访问页面开始安装
http://域名/
zabbix 字体乱码(显示呈现方块):
# 1) 进入代码存放目录的字体目录:
cd /data/www/zabbix/assets/fonts

# 2) 下载字体并解压缩:
http://y.downya.com/soft/simkai_downyi.com.zip
unzip simkai_downyi.com.zip

# 3) 赋予权限:
chmod 777 *.ttf

# 4) 修改php文件调用的字体文件名:
vim /data/www/zabbix/include/defines.inc.php
......
define('ZBX_FONTPATH',                          realpath('assets/fonts')); // where to search for font (GD > 2.0.18)
//define('ZBX_GRAPH_FONT_NAME',         'DejaVuSans'); // font file name
define('ZBX_GRAPH_FONT_NAME',           'simkai'); // font file name
define('ZBX_GRAPH_LEGEND_HEIGHT',       120); // when graph height is less then this value, some legend will not show up
......
* 注释原来的行,新增下面的行
define('ZBX_GRAPH_FONT_NAME',           'simkai');

。。。。。。 刷新访问页面即可解决问题.

zabbix 管理员密码忘记:
忘记密码这事 也挺正常的. zabbix存储在数据库中用户名密码是经过32位,小写,md5加密过的。手动修改数据库中用户的密码。
# 1) 登录数据库:
mysql -u root -pxxxxxxxx
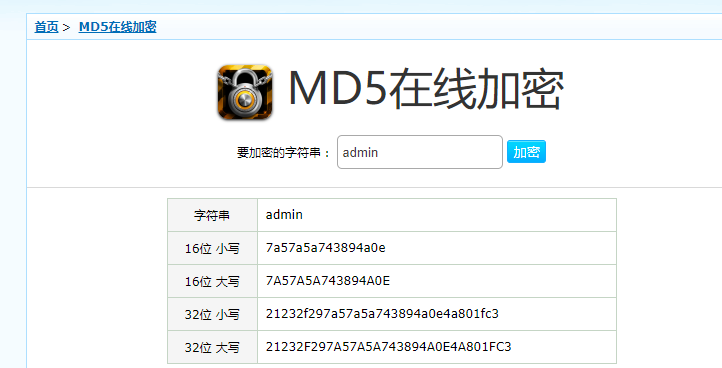
# 2) 生成密码(页面生成一个MD5加密信息即可,见下图):
https://md5jiami.51240.com/
# 3) 更新密码
update zabbix.users set passwd='21232f297a57a5a743894a0e4a801fc3' where alias='Admin';
# 4) 使用密码:
admin登陆即可,登陆后,可以再将自己的密码改成其他的。
Admin | admin
Zabbix Client 安装:
# 1 ) 安装依赖与下载安装包:
yum -y install pcre*
wget https://cdn.zabbix.com/zabbix/sources/stable/4.0/zabbix-4.0.24.tar.gz
# 2 ) 安装zabbix agentd :
groupadd -g 1010 zabbix
useradd -g 1010 -u 1010 zabbix -s /sbin/nologin
tar -zxf zabbix-4.0.24.tar.gz && cd zabbix-4.0.24
./configure --prefix=/data/soft/zabbix --enable-agent --disable-ipv6 --with-net-snmp --with-ssh2
make && make install
# 3 ) 修改配置Server,ServerActive,Hostname,(sed命令中s后面的字符为替换符,默认为/)
/data/soft/zabbix/etc/zabbix_agentd.conf
Server=127.0.0.1 改成 Server=10.20.0.197 # 指明server 的IP地址
LogFile=/data/logs/zabbix_agentd.log # 日志存放位置
ServerActive=127.0.0.1 改成 ServerActive=10.20.0.197 # 主动模式下访问的服务端IP
Hostname=Zabbix server 改成 Hostname=bj-resin1 # 本机的主机名
# 4 ) 复制启动文件并修改启动文件:
cd /data/src/zabbix-4.0.24
cp misc/init.d/fedora/core/zabbix_agentd /etc/init.d/
vim /etc/init.d/zabbix_agentd
BASEDIR=/usr/local
换成:
BASEDIR=/data/soft/zabbix
# 5 ) 启动zabbix_agentd
chmod 755 zabbix_agentd
chkconfig --add zabbix_agentd
chkconfig zabbix_agentd on
/etc/init.d/zabbix_agentd restart
错误:
zabbix_agentd [18929]: cannot open "/data/logs/zabbix_agentd.log": [13] Permission denied
这是因为改变了zabbix_agentd 的日志存储位置造成的. 执行: chmod 777 /data/logs
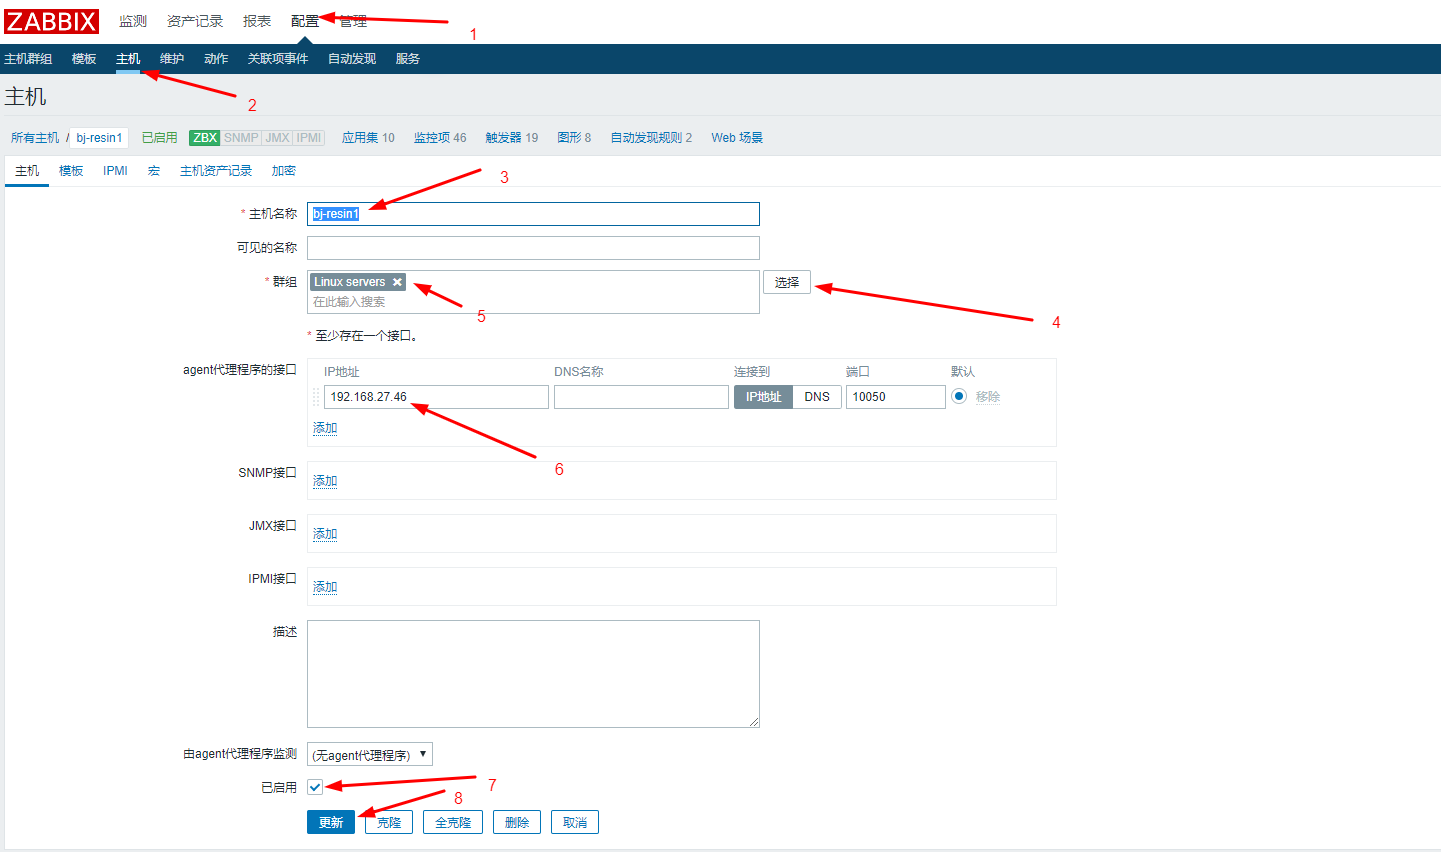
# 6 ) 服务端web界面添加:
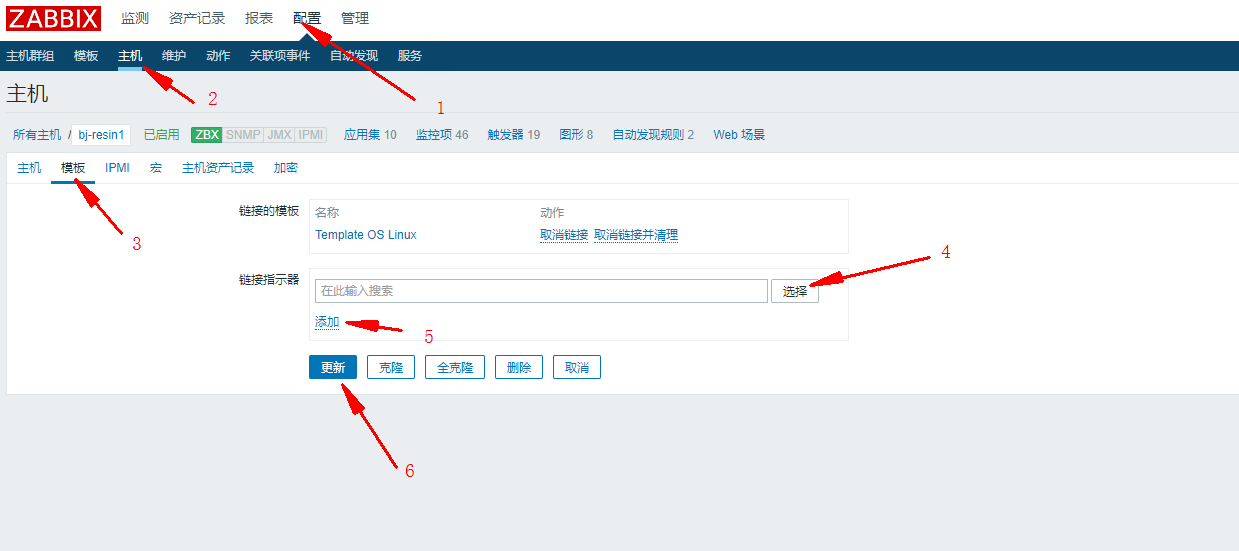
web -> 配置 -> 主机 -> 填写信息如下 -> 添加模板