本次在computer上进行搭建nfs存储
1:安装nfs后端存储
[root@compute02 ~]# yum install nfs-utils -y
2:配置共享目录:
[root@compute02 ~]# cat /etc/exports
/nfsdata 10.100.0.0/24(rw,async,no_root_squash,no_all_squash)
或者指定某个权限

3:启动nfs服务:
[root@compute02 ~]# systemctl restart rpcbind nfs
4:检测nfs服务器共享的目录
[root@compute01 ~]# showmount -e 10.100.214.203
Export list for 10.100.214.203:
/nfsdata 10.100.0.0/24
配置cinder存储:
由于我们的cinder存储适合计算节点公用的一个节点,所以cinder配置应该在计算节点上进行配置
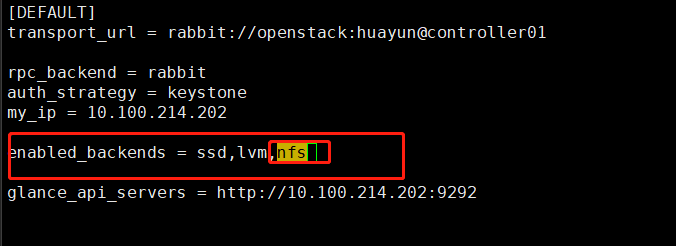
1:在/etc/cinder/cinder.conf打开nfs
2: 配置nfs
[nfs]
#调用nfs的python插件
volume_driver = cinder.volume.drivers.nfs.NfsDriver
nfs的挂载路径
nfs_shares_config = /etc/cinder/nfs_shares
volume_backend_name = nfs
创建nfs的挂载路径
[root@compute01 ~]# cat /etc/cinder/nfs_shares
10.100.214.203:/nfsdata
启动cinder-volume服务:
[root@compute01 ~]# systemctl restart openstack-cinder-volume
查使用是否成功:

测试
1:创建一个卷类型(也可以使用之前的方法,这边我使用另一种方法进行创建)
[root@controller01 ~]# openstack volume type create nfs_volume --description nfs
+-------------+--------------------------------------+
| Field | Value |
+-------------+--------------------------------------+
| description | nfs |
| id | 1430325a-ac72-4922-9b40-6555e92bd413 |
| is_public | True |
| name | nfs_volume |
+-------------+--------------------------------------+
2:查看创建的cinder类型
[root@controller01 ~]# openstack volume type list
+--------------------------------------+------------+-----------+
| ID | Name | Is Public |
+--------------------------------------+------------+-----------+
| 1430325a-ac72-4922-9b40-6555e92bd413 | nfs_volume | True |
| 9100474e-7840-46b5-8425-c32074a13bb4 | ssd | True |
+--------------------------------------+------------+-----------+
3:查看卷类型详细信息(缺少属性)

4:添加属性:
[root@controller01 ~]# openstack volume type set 1430325a-ac72-4922-9b40-6555e92bd413 --property volume_backend_name='nfs'
5:再次查看


创建一个卷测试:
[root@controller01 ~]# cinder create 2 --name volume03 --volume-type nfs_volume
创建之后有一个卷会在主机的目录下挂载

[root@compute01 ~]# ll -h /var/lib/cinder/mnt/6424d8a6767c03ab08650a8859168cdf
total 0
-rw-rw-rw- 1 root root 2.0G Jun 5 16:41 volume-fdf7bef9-1571-48aa-9ba6-9a77f1ed9e7d
[root@compute02 ~]# ls /nfsdata/
volume-fdf7bef9-1571-48aa-9ba6-9a77f1ed9e7d
查看类型
[root@compute02 ~]# qemu-img info /nfsdata/volume-fdf7bef9-1571-48aa-9ba6-9a77f1ed9e7d
image: /nfsdata/volume-fdf7bef9-1571-48aa-9ba6-9a77f1ed9e7d
file format: raw
virtual size: 2.0G (2147483648 bytes)
disk size: 0