spring session官网:
https://spring.io/projects/spring-session#overview
官网简介:
Spring Session provides an API and implementations for managing a user’s session information.
Spring Session提供了一个API和用于管理用户会话信息的实现。
Spring Session makes it trivial to support clustered sessions without being tied to an application container specific solution.
Spring会话使得在不绑定到特定于应用程序容器的解决方案的情况下支持集群会话变得很简单
背景介绍:
由于HTTP协议是无状态,浏览器和服务器交互一次,交互完成后下一次再交互,服务器无法记住交互的用户,这就需要一种机制去记录用户的状态,这种机制就是Session
服务端如何识别特定的用户,这个时候需要使用Cookie;每次HTTP请求的时候,客户端都会发送相应的Cookie信息到服务端。
实际上大多数的应用都是用 Cookie 来实现Session跟踪的,第一次创建Session时,服务端会在HTTP协议中向客户端 Cookie 中记录一个Session ID,以后每次请求把这个会话ID发送到服务器,这样服务端就知道客户端是谁了;
web项目中,session会话管理是很重要的一部分,用于存储用户的状态和信息,以及记录用户的操作行为等,通畅情况下session一般交由容器去管理,一般为Tomcat或者jetty等.但是随着互联网的兴起,单服务器应用已经无法满足需求,现在一般都是集群服务器对外提供服务,虽然性能大大提升,但是问题也随之而来,由于会话存储由服务器去管理,当用户第一次访问A服务器,A服务器记录用户信息,下次访问B服务器,B服务器却没有用户信息,session失效,用户退出登录.一旦服务器重启或者宕机,也会导致用户登录失效,因此需要一个高可用的系统,session管理也是很重要的一环.
解决方案: spring session
它把servlet容器实现的httpSession替换为spring-session,专注于解决 session管理问题,Session信息存储在Redis中,可简单快速且无缝的集成到我们的应用中;
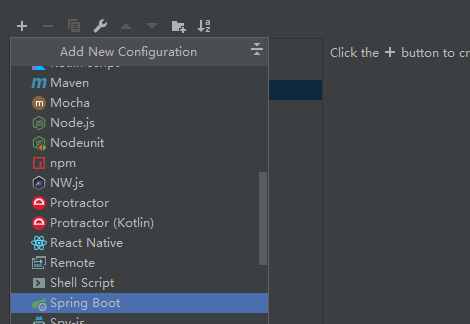
springboot 集成spring session
技术准备:
IDEA 2020 ,JDK8+ ,MAVEN3.6.1,REDIS
springboot:父级 2.1.3.RELEASE(后面我会说下高版本问题)
 <parent>
        <groupId>org.springframework.boot</groupId>
        <artifactId>spring-boot-starter-parent</artifactId>
        <version>2.1.3.RELEASE</version>
    </parent>
依赖
     <!--springboot 集成redis的依赖-->
        <dependency>
            <groupId>org.springframework.boot</groupId>
            <artifactId>spring-boot-starter-data-redis</artifactId>
        </dependency>

        <!--spring boot web项目依赖-->
        <dependency>
            <groupId>org.springframework.boot</groupId>
            <artifactId>spring-boot-starter-web</artifactId>
        </dependency>

        <!--配置spring session data redis的依赖-->
        <dependency>
            <groupId>org.springframework.session</groupId>
            <artifactId>spring-session-data-redis</artifactId>
        </dependency>
设置服务器端口号,配置redis连接配置
server.servlet.context-path=/spring-session-01
# 应用服务web访问端口
server.port=8080

spring.redis.host=xxx.xx.xx.xxx
spring.redis.port=6379
spring.redis.password=xxxxxx

# 指定spring session的存储类型为Redis
spring.session.store-type=redis
配置类(类似xml配置的<bean>标签)
@Configuration
public class SessionConfig {
    @Bean
    public RedisHttpSessionConfiguration redisHttpSessionConfiguration(){
        RedisHttpSessionConfiguration redisHttpSessionConfiguration=new RedisHttpSessionConfiguration();
        redisHttpSessionConfiguration.setMaxInactiveIntervalInSeconds(3600);//设置过期时间
        redisHttpSessionConfiguration.setCookieSerializer(defaultCookieSerializer());
        return redisHttpSessionConfiguration;
    }

    @Bean
    public DefaultCookieSerializer defaultCookieSerializer(){
        DefaultCookieSerializer defaultCookieSerializer=new DefaultCookieSerializer();
        // <!--设置同域名下不同项目名问题-->
        defaultCookieSerializer.setCookiePath("/");
        //   <!--下面为修改同根域名不同二级域名访问问题,不用情况下注释掉-->
       //  defaultCookieSerializer.setDomainName("taobao.com");
        return defaultCookieSerializer;
    }
}
springboot启动类添加自动配置注解@EnableRedisHttpSession
@SpringBootApplication
@EnableRedisHttpSession
public class SpringSessionApplication {

    public static void main(String[] args) {
        SpringApplication.run(SpringSessionApplication.class, args);
    }

}
添加两个请求入口测试session共享
@RestController
public class SessionController {

    @GetMapping("/springboot/set")
    public String setSession(HttpSession session){
        session.setAttribute("website","http://www.taobao.com");
        return "ok";
    }

    @GetMapping("/springboot/get")
    public String getSession(HttpSession session){
        String website = (String)session.getAttribute("website");
        return website==null?"NO SESSION":website;
    }
}
设置同一项目启用两个端口
然后我们访问
http://localhost:8080/spring-session-01/springboot/get ,没有session
http://localhost:8081/spring-session-01/springboot/get ,没有session
http://localhost:8080/spring-session-01/springboot/set ,放置session成功
http://localhost:8080/spring-session-01/springboot/get ,获取session成功
http://localhost:8081/spring-session-01/springboot/get ,获取session成功
结论:8080端口和8081端口两台服务器session共享成功,session信息存储在redis中
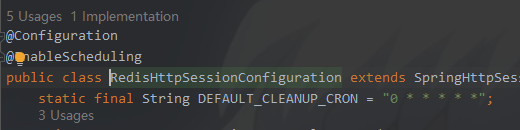
最后我要讲下版本问题:这是spring-session-data-redis:2.1.4.RELEASE
spring-session-data-redis:2.2.2.RELEASE
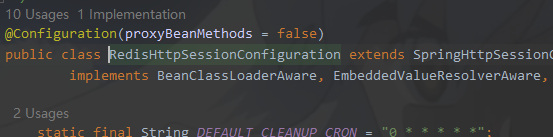
这个 @Configuration(proxyBeanMethods = false)会导致我们无法使用@Bean去配置RedisHttpSessionConfiguration的属性.我们可以换一种方式,去除config配置类
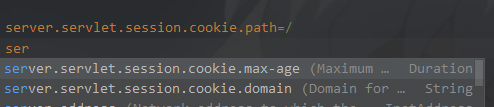
在配置文件也可以达到同样的效果,有兴趣可以看看SpringHttpSessionConfiguration的init()方法去了解一下
spring 集成spring session
技术准备:
IDEA 2020 ,JDK8+ ,MAVEN 3.6.1,REDIS
MAVEN依赖:
  <dependency>
            <groupId>org.springframework.session</groupId>
            <artifactId>spring-session-data-redis</artifactId>
            <version>1.3.1.RELEASE</version>
        </dependency>
        <!-- Spring session redis 依赖end -->

        <!-- spring web模块依赖 start -->
        <dependency>
            <groupId>org.springframework</groupId>
            <artifactId>spring-web</artifactId>
            <version>4.3.16.RELEASE</version>
        </dependency>
        <!-- spring web模块依赖end -->

        <!-- servlet依赖的jar包start -->
        <dependency>
            <groupId>javax.servlet</groupId>
            <artifactId>javax.servlet-api</artifactId>
            <version>3.1.0</version>
        </dependency>
        <!-- servlet依赖的jar包start -->

        <!-- jsp依赖jar包start -->
        <dependency>
            <groupId>javax.servlet.jsp</groupId>
            <artifactId>javax.servlet.jsp-api</artifactId>
            <version>2.3.1</version>
        </dependency>
        <!-- jsp依赖jar包end -->

        <!--jstl标签依赖的jar包start -->
        <dependency>
            <groupId>javax.servlet</groupId>
            <artifactId>jstl</artifactId>
            <version>1.2</version>
        </dependency>
        <!--jstl标签依赖的jar包end -->
    </dependencies>
web.xml配置
 <!--配置SpringSession代理过滤器-->
    <filter>
        <filter-name>springSessionRepositoryFilter</filter-name>
        <filter-class>org.springframework.web.filter.DelegatingFilterProxy</filter-class>
    </filter>
    <filter-mapping>
        <filter-name>springSessionRepositoryFilter</filter-name>
        <url-pattern>/*</url-pattern>
    </filter-mapping>

    <context-param>
        <param-name>contextConfigLocation</param-name>
        <param-value>classpath:applicationContext.xml</param-value>
    </context-param>
    <listener>
        <listener-class>org.springframework.web.context.ContextLoaderListener</listener-class>
    </listener>
配置applicationContext.xml
 <!--激活springBean中的注解-->
    <context:annotation-config/>

    <!-- Spring session 的配置类 -->
    <bean class="org.springframework.session.data.redis.config.annotation.web.http.RedisHttpSessionConfiguration">
        <!--设置session过期时间,单位是秒,默认是30分钟-->
        <property name="maxInactiveIntervalInSeconds" value="3600"/>
        <property name="cookieSerializer" ref="defaultCookieSerializer"/>
    </bean>

    <bean id="defaultCookieSerializer" class="org.springframework.session.web.http.DefaultCookieSerializer">
        <property name="cookiePath" value="/"/>
      <!--此处若为同域名,下面可以注释掉-->
        <property name="domainName" value="web.com"/>
    </bean>

    <!-- 配置jedis连接工厂,用于连接redis 此处可以引入配置文件,不写死在这里-->
    <bean id="jedisConnectionFactory" class="org.springframework.data.redis.connection.jedis.JedisConnectionFactory">
        <property name="hostName" value="122.122.122.122"/>
        <property name="port" value="6379"/>
        <property name="password" value="123456"/>
        <property name="usePool" value="true"/>
        <property name="timeout" value="150000"/>
    </bean>
编写servlet去测试
@WebServlet(urlPatterns = "/getSession")
public class GetSessionServlet extends HttpServlet {
    @Override
    protected void doGet(HttpServletRequest req, HttpServletResponse resp) throws ServletException, IOException {
        String website = (String) req.getSession().getAttribute("website");
        System.out.println(website);
        resp.getWriter().write(website==null?"NO SESSION":website);
        resp.getWriter().flush();
        resp.getWriter().close();
    }

    @Override
    protected void doPost(HttpServletRequest req, HttpServletResponse resp) throws ServletException, IOException {
        doGet(req,resp);
    }
}
@WebServlet(urlPatterns = "/setSession")
public class SetSessionServlet extends HttpServlet {
    @Override
    protected void doGet(HttpServletRequest req, HttpServletResponse resp) throws ServletException, IOException {
        req.getSession().setAttribute("website","http://www.bjpowernode.com");
        resp.getWriter().write("ok");
        resp.getWriter().flush();
        resp.getWriter().close();
    }

    @Override
    protected void doPost(HttpServletRequest req, HttpServletResponse resp) throws ServletException, IOException {
        doGet(req,resp);
    }
}
我们如果不涉及二级域名的共享,记得注释<property name="domainName" value="web.com"/>,最终也是可以实现集群服务器session共享的
重点补充:
这里我要讲一下DelegatingFilterProxy,我们在web.xml配置的是一个代理过滤器.DelegatingFilterProxy 中真正的Filter是SessionRepositoryFilter,
这个filet所做的事情就是接管容器中的session管理,我们可以进入这个SessionRepositoryFilter一探究竟
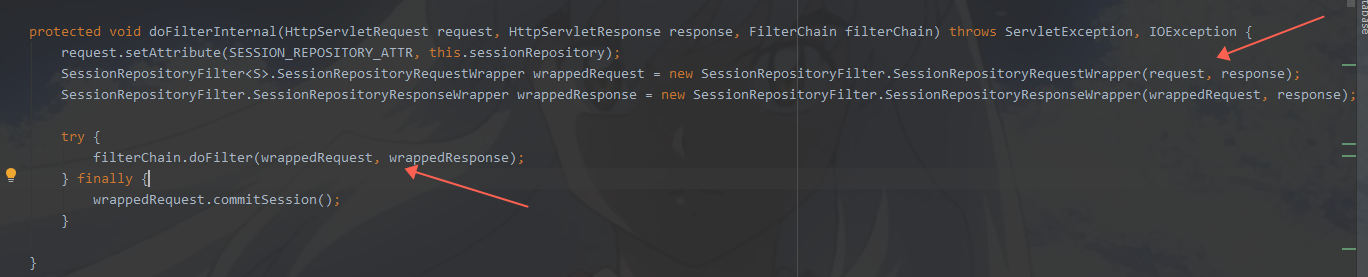
我们可以看到,进入到这个过滤器以后,当传递到下一个Filet的时候,HttpServletRequest已经被包装过,所以这里我们获取的session都是重写后的方法,就是这样接管了容器对于session的管理.
总结:
所有的request都会经过SessionRepositoryFilter,而 SessionRepositoryFilter是一个优先级最高的javax.servlet.Filter,它使用了SessionRepositoryRequestWrapper类接管了Http Session的创建和管理工作;