第七节时提到,上传文件时实际可能需要传输一个token。
方法一:
1、查看vue antdesign文档
https://vue.ant.design/components/upload-cn/

2、使用customRequest
customRequest 通过覆盖默认的上传行为,可以自定义自己的上传实现 Function
3、定义customRequest,之前定义action行为会被覆盖,可以注释掉
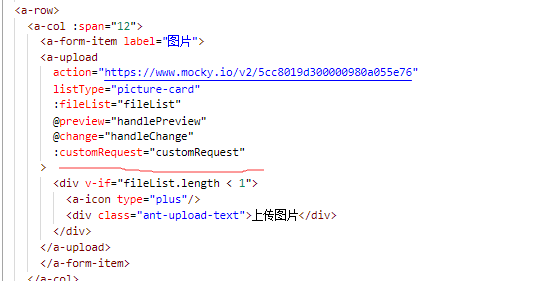
4、customRequest代码如下
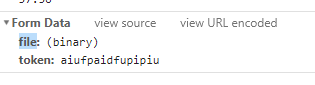
customRequest (data) {
      const formData = new FormData()
      formData.append('file', data.file)
      formData.append('token', 'aiufpaidfupipiu')//随便写一个token示例
      this.saveFile(formData)
    },
    saveFile (formData) {
      this.form.validateFields((err, values) => {
      if (!err) {
        let that = this
        this.axios(
        {
          method: 'post',
          url: 'http://localhost:4785/api/values/PostSingle',
          data: formData
        })
        .then((response) => {
          console.log(response)
        })
        .catch(function (error) {
          console.log(error)
        })
        }
      })
    },
5、这样当文件变化时,就会附带token并上传到服务器,NetWork观察提交数据如下
6、有同学反映无法接受数据,现给一个后端代码demo(.netcore)参考,新建一个.netcore webapi工程,修改Post代码如下。
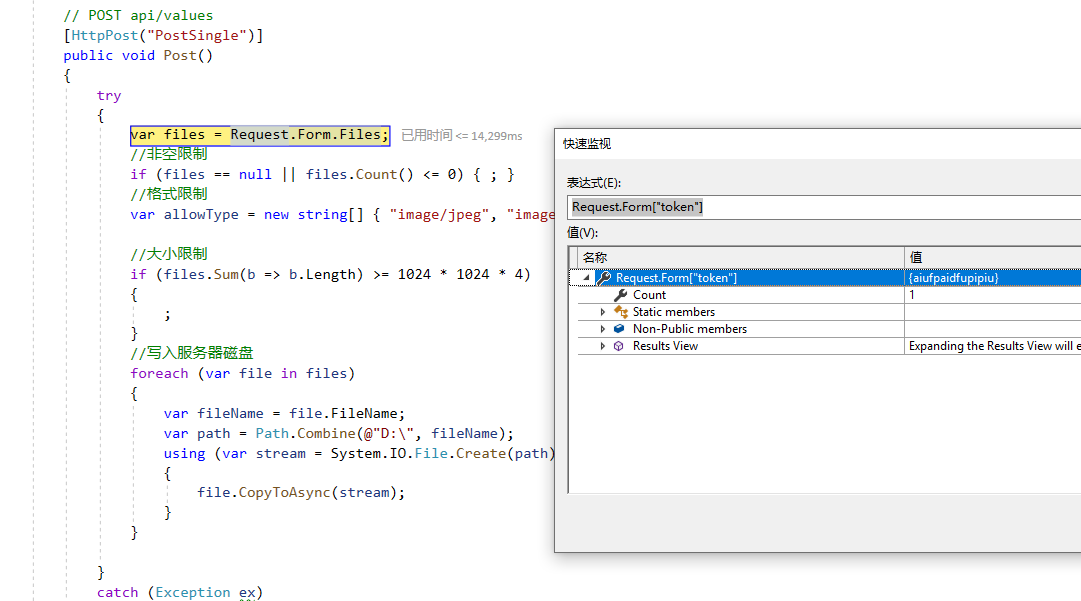
7、D盘下文件保存成功如下
方法二:
最近发现有一种官方例子更符合习惯思维的方法,看这个例子

<template>
  <div class="clearfix">
    <a-upload :fileList="fileList" :remove="handleRemove" :beforeUpload="beforeUpload">
      <a-button> <a-icon type="upload" /> Select File </a-button>
    </a-upload>
    <a-button
      type="primary"
      @click="handleUpload"
      :disabled="fileList.length === 0"
      :loading="uploading"
      style="margin-top: 16px"
    >
      {{ uploading ? 'Uploading' : 'Start Upload' }}
    </a-button>
  </div>
</template>
<script>
import reqwest from 'reqwest';
export default {
  data() {
    return {
      fileList: [],
      uploading: false,
    };
  },
  methods: {
    handleRemove(file) {
      const index = this.fileList.indexOf(file);
      const newFileList = this.fileList.slice();
      newFileList.splice(index, 1);
      this.fileList = newFileList;
    },
    beforeUpload(file) {
      this.fileList = [...this.fileList, file];
      return false;
    },
    handleUpload() {
      const { fileList } = this;
      const formData = new FormData();
      fileList.forEach(file => {
        formData.append('files[]', file);//后面再加上token
      });
      this.uploading = true;

      // You can use any AJAX library you like
      request({
        url: 'https://www.mocky.io/v2/5cc8019d300000980a055e76',
        method: 'post',
        processData: false,
        data: formData,
        success: () => {
          this.fileList = [];
          this.uploading = false;
          this.$message.success('upload successfully.');
        },
        error: () => {
          this.uploading = false;
          this.$message.error('upload failed.');
        },
      });
    },
  },
};
</script>