----------------------------------------------------------------
关于再画一个的问题
1.肯定想到的就是拷贝;
》不能每次用都拷贝,很麻烦
》现在我们画的是矩形(Rectangle),下次可能是 Border,Grid,StackPanel
所以拷贝不行;
2.把这些颜色都记下来
》太麻烦,这也不行
----------------------------------------------------------------
正题:
1. 下面我们来介绍下画布界面:
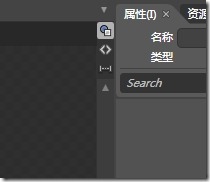
看到右上角有三个标志,分别是: 设计模式,代码模式,拆分模式
2.进入代码模式看看我们之前的代码:
<UserControl
	xmlns="http://schemas.microsoft.com/winfx/2006/xaml/presentation"
	xmlns:x="http://schemas.microsoft.com/winfx/2006/xaml"
	xmlns:d="http://schemas.microsoft.com/expression/blend/2008"
	xmlns:mc="http://schemas.openxmlformats.org/markup-compatibility/2006"
	mc:Ignorable="d"
	x:Class="StyleTest.ColorCard"
	d:DesignWidth="640" d:DesignHeight="480">

	<Grid x:Name="LayoutRoot" Background="#FF6A6A6A">
		<Rectangle Stroke="Black" Height="43" VerticalAlignment="Top">
			<Rectangle.Fill>
				<LinearGradientBrush EndPoint="0.5,1" StartPoint="0.5,0">
					<GradientStop Color="#FF606060" Offset="0"/>
					<GradientStop Color="Black" Offset="1"/>
					<GradientStop Color="#FE333333" Offset="0.487"/>
					<GradientStop Color="#FE161515" Offset="0.574"/>
				</LinearGradientBrush>
			</Rectangle.Fill>
		</Rectangle>
	</Grid>
</UserControl>
下面我们要复用这些代码中关于颜色填充的部分;
3. 在项目上点击右键》添加新项》资源字典; 我把他命名为: Style.xaml
4. 打开Style.xaml,显示无法再设计视图中编辑,点击切换到代码模式;默认代码如下:
<ResourceDictionary
	xmlns="http://schemas.microsoft.com/winfx/2006/xaml/presentation"
	xmlns:x="http://schemas.microsoft.com/winfx/2006/xaml">
	<!-- 应该在此定义资源字典条目。-->
</ResourceDictionary>
5. 把第二步中的:
	<LinearGradientBrush   EndPoint="0.5,1" StartPoint="0.5,0">
					<GradientStop Color="#FF606060" Offset="0"/>
					<GradientStop Color="Black" Offset="1"/>
					<GradientStop Color="#FE333333" Offset="0.487"/>
					<GradientStop Color="#FE161515" Offset="0.574"/>
	</LinearGradientBrush>
》 拷贝到 Style.xaml 的 “<!-- 应该在此定义资源字典条目。—> ” 下面;
》 程序会提示错误
》 给他取个名字例如: <LinearGradientBrush x:Key="AppleStyle1" 就好了;
这样我们就把这个填充样式加到字典里面了:
<ResourceDictionary
	xmlns="http://schemas.microsoft.com/winfx/2006/xaml/presentation"
	xmlns:x="http://schemas.microsoft.com/winfx/2006/xaml">
	<!-- 应该在此定义资源字典条目。-->

	<LinearGradientBrush x:Key="AppleStyle1" EndPoint="0.5,1" StartPoint="0.5,0">
					<GradientStop Color="#FF606060" Offset="0"/>
					<GradientStop Color="Black" Offset="1"/>
					<GradientStop Color="#FE333333" Offset="0.487"/>
					<GradientStop Color="#FE161515" Offset="0.574"/>
	</LinearGradientBrush>


</ResourceDictionary>
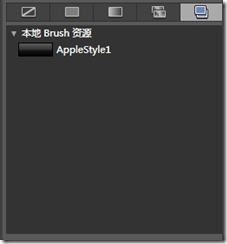
6. 回到ColorCard.xaml 页面;打开“库” 看到我们刚才的字典了!!!
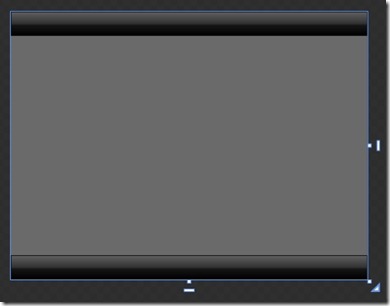
我们用他来填充我们刚才定义的矩形, 并且再复制一个效果如下:
代码如下:
	<Grid x:Name="LayoutRoot" Background="#FF6A6A6A">
		<Rectangle Stroke="Black" Height="43" VerticalAlignment="Top" Fill="{StaticResource AppleStyle1}"/>
		<Rectangle Stroke="Black" Height="43" VerticalAlignment="Bottom" Fill="{StaticResource AppleStyle1}"/>
	</Grid>
看看这代码是不是简洁多了!
说到这里你肯定知道:
》 以后画别的东西,就直接到”库“去选择就可以填充这个样式了;(实现了复用)
》 修改的时候只有修改 Style.xaml 里面的代码,这边就也更新了;(方便更新调整)
那么今天的主角 LinearGradientBrush 就和大家见面了!
silverlight 之 – Blend 一切源于Brush(一)
silverlight 之 – Blend 之 LinearGradientBrush (二)


