参考江南一点雨大佬的文章:
https://www.cnblogs.com/lenve/p/10728897.html
cron工具网站:
https://www.bejson.com/othertools/cron/
写在前面:Linux下的Cron跟Spring下的Cron表达式有些许的不一样,注意到网站上去验证
SpringBoot中实现定时任务的两种方式
在 Spring + SpringMVC 环境中,一般来说,要实现定时任务,我们有两中方案,一种是使用 Spring 自带的定时任务处理器 @Scheduled 注解,另一种就是使用第三方框架 Quartz 。
Spring Boot 源自 Spring+SpringMVC ,因此天然具备这两个 Spring 中的定时任务实现策略,当然也支持 Quartz,本文我们就来看下 Spring Boot 中两种定时任务的实现方式;
一、@Scheduled
使用 @Scheduled 非常容易,直接创建一个 Spring Boot 项目,并且添加 web 依赖 spring-boot-starter-web,项目创建成功后,添加 @EnableScheduling 注解
1、开启定时任务:
@EnableScheduling
@SpringBootApplication
public class Springboot19ScheduledApplication {

    public static void main(String[] args) {
        SpringApplication.run(Springboot19ScheduledApplication.class, args);
    }
}
2、配置定时任务:具体的表达式请参考上面的网址自行验证
cron表达式示例:
- second(秒), minute(分), hour(时), day of month(日), month(月), day of week(周几).
- 【0 0/5 14,18 * * ?】 每天14点整,和18点整,每隔5分钟执行一次
- 【0 15 10 ? * 1-6】 每个月的周一至周六10:15分执行一次
- 【0 0 2 ? * 6L】每个月的最后一个周六凌晨2点执行一次
- 【0 0 2 LW * ?】每个月的最后一个工作日凌晨2点执行一次
- 【0 0 2-4 ? * 1#1】每个月的第一个周一凌晨2点到4点期间,每个整点都执行一次;
import org.springframework.context.annotation.Configuration;
import org.springframework.scheduling.annotation.Scheduled;

import java.util.Date;

/**
 * @ClassName ScheduledTaskConfig
 * @Author zhangzhixi
 * @Description 定时任务配置类
 * @Date 2022-2-27 19:20
 * @Version 1.0
 */
@Configuration
public class ScheduledTaskConfig {
    @Scheduled(fixedRate = 2000)
    public void fixedRate() {
        System.out.println("fixedRate>>>" + new Date());
    }

    @Scheduled(fixedDelay = 2000)
    public void fixedDelay() {
        System.out.println("fixedDelay>>>" + new Date());
    }

    @Scheduled(initialDelay = 2000, fixedDelay = 2000)
    public void initialDelay() {
        System.out.println("initialDelay>>>" + new Date());
    }

    /**
     * 每5秒执行一次
     */
    @Scheduled(cron = "0/5 * * * * *")
    public void cron() {
        System.out.println("cronExpression>>>" + new Date());
    }
}
- 首先使用 @Scheduled 注解开启一个定时任务。
- fixedRate 表示任务执行之间的时间间隔,具体是指两次任务的开始时间间隔,即第二次任务开始时,第一次任务可能还没结束。
- fixedDelay 表示任务执行之间的时间间隔,具体是指本次任务结束到下次任务开始之间的时间间隔。
- initialDelay 表示首次任务启动的延迟时间。
- 所有时间的单位都是毫秒。
二、Quatz
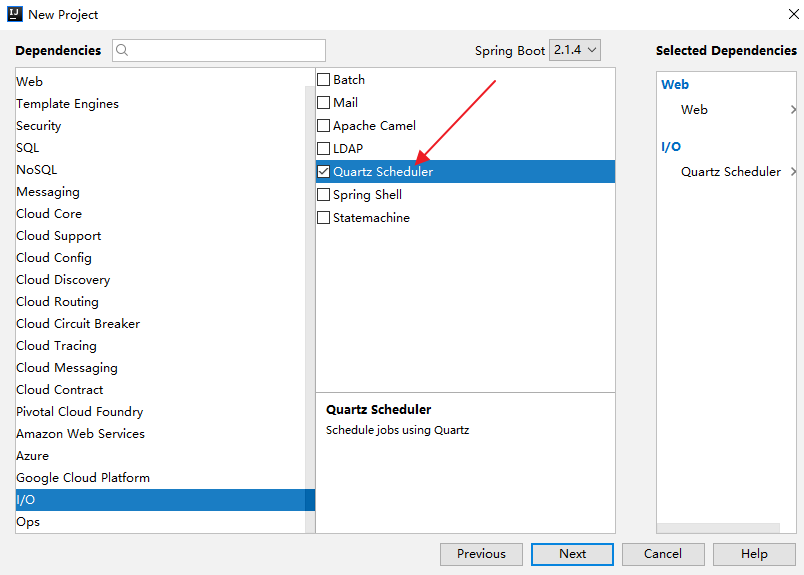
一般在项目中,除非定时任务涉及到的业务实在是太简单,使用 @Scheduled 注解来解决定时任务,否则大部分情况可能都是使用 Quartz 来做定时任务。在 Spring Boot 中使用 Quartz ,只需要在创建项目时,添加 Quartz 依赖即可:
<dependency>
    <groupId>org.springframework.boot</groupId>
    <artifactId>spring-boot-starter-quartz</artifactId>
</dependency>
1:开启定时任务的注解
@EnableScheduling
@SpringBootApplication
public class Springboot18QuartzApplication {
    public static void main(String[] args) {
        SpringApplication.run(Springboot18QuartzApplication.class, args);
    }
}
Quartz 在使用过程中,有两个关键概念,一个是JobDetail(要做的事情),另一个是触发器(什么时候做),要定义 JobDetail,需要先定义 Job,Job 的定义有两种方式:
2.1:Job的第一种定义方式:直接定义bean
/**
 * @ClassName MyJobOne
 * @Author zhangzhixi
 * @Description
 * @Date 2022-2-27 16:58
 * @Version 1.0
 */
@Component
public class MyJobOne {
    public void sayHello() {
        System.out.println(MyJobOne.class + "========>" + new SimpleDateFormat("yyyy-MM-dd HH:mm:ss").format(new Date()));
    }
}
关于这种定义方式说两点:
- 首先将这个 Job 注册到 Spring 容器中。
- 这种定义方式有一个缺陷,就是无法传参。
2.2:Job的第二种定义方式:继承 QuartzJobBean 并实现默认的方法
/**
 * @ClassName MyJonTwo
 * @Author zhangzhixi
 * @Description
 * @Date 2022-2-27 17:01
 * @Version 1.0
 */
@Component
public class MyJonTwo extends QuartzJobBean {

    @Override
    protected void executeInternal(JobExecutionContext jobExecutionContext) {
        new HelloService().sayHello();
    }
}
HelloService:
/**
 * @ClassName HelloService
 * @Author zhangzhixi
 * @Description
 * @Date 2022-2-27 17:07
 * @Version 1.0
 */
public class HelloService {
    public void sayHello() {
        System.out.println(HelloService.class + "========>" + new SimpleDateFormat("yyyy-MM-dd HH:mm:ss").format(new Date()));
    }
}
和第1种方式相比,这种方式支持传参,任务启动时,executeInternal 方法将会被执行。
Job 有了之后,接下来创建类,配置 JobDetail 和 Trigger 触发器,如下:
3:配置触发器
/**
 * @ClassName QuartzConfig
 * @Author zhangzhixi
 * @Description
 * @Date 2022-2-27 17:05
 * @Version 1.0
 */
@Configuration
public class QuartzConfig {
    /**
     * JobDetail的配置1:
     *      使用 MethodInvokingJobDetailFactoryBean 可以配置目标 Bean 的名字和目标方法的名字,这种方式不支持传参。
     * @return
     */
    @Bean
    MethodInvokingJobDetailFactoryBean methodInvokingJobDetailFactoryBean() {
        MethodInvokingJobDetailFactoryBean bean = new MethodInvokingJobDetailFactoryBean();
        bean.setTargetBeanName("myJobOne");
        bean.setTargetMethod("sayHello");
        return bean;
    }

    /**
     * JobDetail的配置2:
     *      使用 JobDetailFactoryBean 可以配置 JobDetail ,任务类继承自 QuartzJobBean ,这种方式支持传参,将参数封装在 JobDataMap 中进行传递。
     * @return
     */
    @Bean
    JobDetailFactoryBean jobDetailFactoryBean() {
        JobDetailFactoryBean bean = new JobDetailFactoryBean();
        bean.setJobClass(MyJonTwo.class);

        JobDataMap map = new JobDataMap();
        map.put("helloService", helloService());

        bean.setJobDataMap(map);
        return bean;
    }


    /**
     * 触发器:simpleTrigger
     * @return
     */
    @Bean
    SimpleTriggerFactoryBean simpleTriggerFactoryBean() {
        SimpleTriggerFactoryBean bean = new SimpleTriggerFactoryBean();
        /*1.设置触发器开始的时间*/
        bean.setStartTime(new Date());
        /*2.设置触发器执行的次数*/
        bean.setRepeatCount(5);
        /*3.设置执行间隔(单位:ms)*/
        bean.setRepeatInterval(3000);
        /*4.添加MethodInvokingJobDetailFactoryBean触发器的设置*/
        bean.setJobDetail(Objects.requireNonNull(methodInvokingJobDetailFactoryBean().getObject()));
        return bean;
    }

    /**
     * 触发器:cronTrigger
     * @return
     */
    @Bean
    CronTriggerFactoryBean cronTrigger() {
        CronTriggerFactoryBean bean = new CronTriggerFactoryBean();
        /*1、添加cron表达式*/
        bean.setCronExpression("0/10 * * * * ?");
        /*2、添加JobDetailFactoryBean的设置*/
        bean.setJobDetail(Objects.requireNonNull(jobDetailFactoryBean().getObject()));
        return bean;
    }

    /**
     * 触发器程序调度工厂,传入触发器
     * @return
     */
    @Bean
    SchedulerFactoryBean schedulerFactoryBean() {
        SchedulerFactoryBean bean = new SchedulerFactoryBean();
        /*传入触发器:参数是可变长参数*/
        bean.setTriggers(cronTrigger().getObject(), simpleTriggerFactoryBean().getObject());
        return bean;
    }

    @Bean
    HelloService helloService() {
        return new HelloService();
    }
}
启动SpringBoot项目即可:

关于这个配置说如下几点:
- JobDetail 的配置有两种方式:MethodInvokingJobDetailFactoryBean 和 JobDetailFactoryBean 。
- 使用 MethodInvokingJobDetailFactoryBean 可以配置目标 Bean 的名字和目标方法的名字,这种方式不支持传参。
- 使用 JobDetailFactoryBean 可以配置 JobDetail ,任务类继承自 QuartzJobBean ,这种方式支持传参,将参数封装在 JobDataMap 中进行传递。
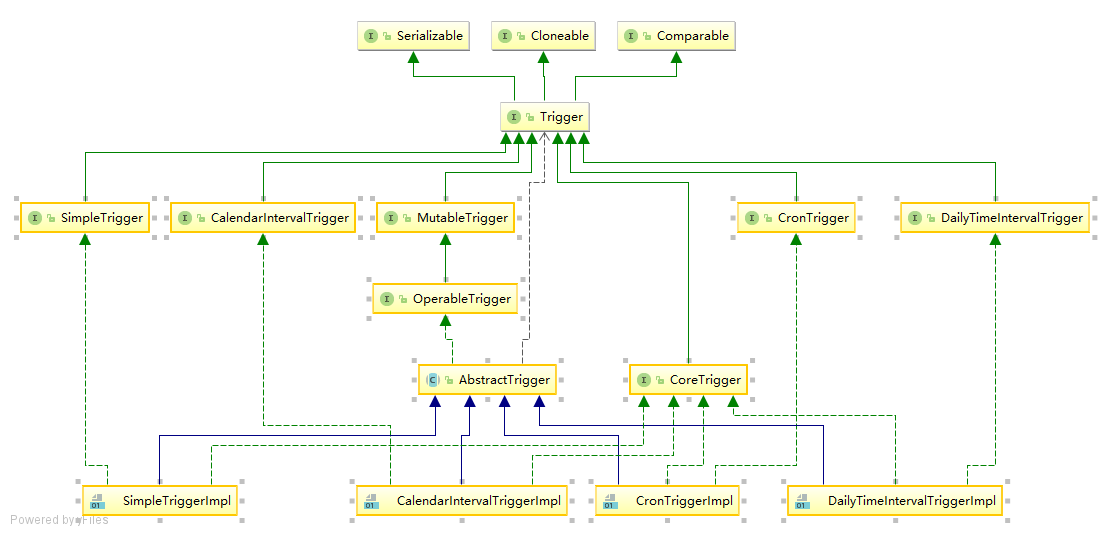
- Trigger 是指触发器,Quartz 中定义了多个触发器,这里向大家展示其中两种的用法,SimpleTrigger 和 CronTrigger 。
- SimpleTrigger 有点类似于前面说的 @Scheduled 的基本用法。
- CronTrigger 则有点类似于 @Scheduled 中 cron 表达式的用法。