一、简介
最近在看Spring Cloud微服务,接下来的时间和大家一起分享我所看到的,公司现在用的是dubbo ,之后有时间也去了解了解dubbo的源码。与dubbo相比较,Spring Cloud 在微服务方面有很多全面的实践。今天主要和大家简单介绍一下其中的一个组件Eureka注册中心。Eureka同其他服务注册中心一样,支持高可用配置。如果Eureka以集群模式不熟,当集群中有分片出现故障时,那么Eureka就转入自我保护模式。它允许在分片故障期间继续提供服务的发现和注册,当故障分片恢复运行时,集群的其他分片会把它们的状态再次同步回来。
二、实践
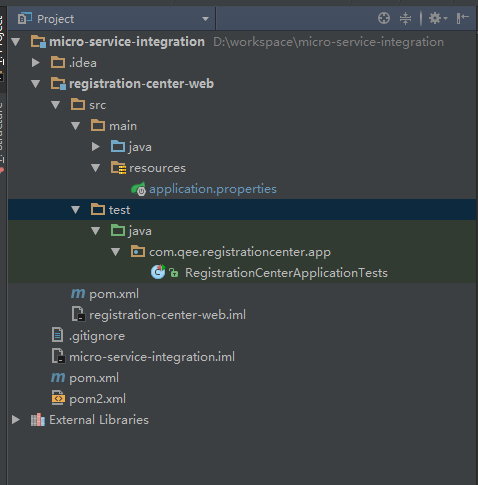
首先我们创建一个Spring Boot的maven工程,名为micro-service-integration。下面有一个子模块名为registration-center-web,该子模块就是我们今天介绍的注册中心。其工程目录如下:
在父工程中pom.xml文件的内容如下:
|
1
2
3
4
5
6
7
8
9
10
11
12
13
14
15
16
17
18
19
20
21
22
23
24
25
26
27
28
29
30
31
32
33
34
35
36
37
38
39
40
41
42
43
|
<?xml version="1.0" encoding="UTF-8"?><project xmlns="http://maven.apache.org/POM/4.0.0" xmlns:xsi="http://www.w3.org/2001/XMLSchema-instance" xsi:schemaLocation="http://maven.apache.org/POM/4.0.0 http://maven.apache.org/xsd/maven-4.0.0.xsd"> <modelVersion>4.0.0</modelVersion> <groupId>spring.cloud</groupId> <artifactId>micro-service-integration</artifactId> <packaging>pom</packaging> <version>1.0-SNAPSHOT</version> <modules> <module>registration-center-web</module> </modules> <name>micro-service-integration</name> <description>Demo project for Spring Boot</description> <parent> <groupId>org.springframework.boot</groupId> <artifactId>spring-boot-starter-parent</artifactId> <version>1.5.2.RELEASE</version> </parent> <dependencyManagement> <dependencies> <dependency> <groupId>org.springframework.cloud</groupId> <artifactId>spring-cloud-dependencies</artifactId> <version>Dalston.RELEASE</version> <type>pom</type> <scope>import</scope> </dependency> <dependency> <groupId>org.springframework.boot</groupId> <artifactId>spring-boot-starter-test</artifactId> <version>1.5.2.RELEASE</version> <scope>test</scope> </dependency> </dependencies> </dependencyManagement></project> |
在该父模块引入 spring-boot-starter-parent作为其父模块,这样可以简单的默认的使用Spring Boot 配置。并且引入Spring Cloud 的版本为Dalston.RELEASE。
而在子模块 registration-center-web 的pom.xml 依赖该Spring Cloud的版本。以后的其他服务也依赖该版本的Spring Cloud。下面是该pom.xml的内容
|
1
2
3
4
5
6
7
8
9
10
11
12
13
14
15
16
17
18
19
20
21
22
23
24
25
26
27
28
29
30
31
32
33
34
35
36
37
38
39
40
41
42
43
44
45
46
47
48
49
50
51
52
53
54
55
56
57
58
59
60
61
62
63
|
<?xml version="1.0" encoding="UTF-8"?><project xmlns="http://maven.apache.org/POM/4.0.0" xmlns:xsi="http://www.w3.org/2001/XMLSchema-instance" xsi:schemaLocation="http://maven.apache.org/POM/4.0.0 http://maven.apache.org/xsd/maven-4.0.0.xsd"> <parent> <artifactId>micro-service-integration</artifactId> <groupId>spring.cloud</groupId> <version>1.0-SNAPSHOT</version> </parent> <modelVersion>4.0.0</modelVersion> <artifactId>registration-center-web</artifactId> <dependencies> <dependency> <groupId>org.springframework.cloud</groupId> <artifactId>spring-cloud-starter-eureka-server</artifactId> </dependency> <dependency> <groupId>org.springframework.boot</groupId> <artifactId>spring-boot-starter-test</artifactId> <scope>test</scope> </dependency> </dependencies> <profiles> <profile> <id>register-first</id> <properties> <final.project.name>registration-center-first</final.project.name> <server.port>8881</server.port> </properties> <activation> <activeByDefault>true</activeByDefault> </activation> </profile> <profile> <id>register-second</id> <properties> <final.project.name>registration-center-second</final.project.name> <server.port>8882</server.port> </properties> </profile> <profile> <id>register-third</id> <properties> <final.project.name>registration-center-third</final.project.name> <server.port>8883</server.port> </properties> </profile> </profiles> <build> <finalName>${final.project.name}</finalName> <resources> <resource> <directory>src/main/resources</directory> <filtering>true</filtering> </resource> </resources> </build></project> |
在该pom.xml 中,可以根据profile中来制定不同的服务启动端口。
接下来我们来看一下java代码
|
1
2
3
4
5
6
7
8
9
10
11
12
13
14
|
package com.qee.registrationcenter.app;import org.springframework.boot.SpringApplication;import org.springframework.boot.autoconfigure.SpringBootApplication;import org.springframework.cloud.netflix.eureka.server.EnableEurekaServer;@SpringBootApplication@EnableEurekaServerpublic class RegistrationCenterApplication { public static void main(String[] args) { SpringApplication.run(RegistrationCenterApplication.class, args); }} |
非常的简单,主要通过main函数启动该工程,2个注解 @SpringBootApplication 和 @EnableEurekaServer。然后我们来看一下我们application.properties文件。
|
1
2
3
4
5
6
7
8
9
10
11
12
13
14
15
16
17
18
19
20
21
22
23
24
25
26
|
server.port=@server.port@spring.application.name=registration-center-webserver.register.port1=8881server.register.port2=8882server.register.port3=8883eureka.instance.hostname=register.center.com#由于该应用为注册中心,所以设置为false,代表不向注册中心注册自己eureka.client.register-with-eureka=true#由于注册中心的职责就是维护服务实例,所以他不需要去检索服务eureka.client.fetch-registry=trueeureka.server.enable-self-preservation=false#默认的注册域#eureka.client.serviceUrl.defaultZone=http://${eureka.instance.hostname}:${server.port}/eureka/eureka.client.serviceUrl.defaultZone=http://${eureka.instance.hostname}:${server.register.port1}/eureka/,http://${eureka.instance.hostname}:${server.register.port2}/eureka/#控制台彩色输出spring.output.ansi.enabled=ALWAYS |
这里我们是搭建一个高可用的注册中心,其中有三个注册中心分别为K1,K2,K3,其中K1的端口为8881 ,K2的端口为8882,K3的端口为8883。接着然后K1向K2,K3注册中心注册自己,而K2向K1,K3注册中心注册自己,而K3向K1,K2注册中心注册自己。由于在启动K1注册中心时,K2和K3注册中心还没开启,所以K1会报异常,但是服务还是会正常启动,同理K2也会由于K3没有启动,所以也会报异常,但是启动K3的时候,K1和K2注册中心已经正常启动,所以K3不会报异常。最后在各自的注册中心可以看到其他2个注册中心最为服务注册上去。各自的访问地址为 http://register.center.com:8881、http://register.center.com:8882、http://register.center.com:8883。
接着我们启动三个注册中心,我们看下如下结果:

三、分析
@EnableEurekaServer 该注解启动一个服务注册中心提供给其他应用进行对话。
eureka.client.register-with-eureka : 该参数代表该Eureka应用(包括注册中心)是否注册到注册中心中,如果只是一个单一注册中心,那么把该参数设置为false,代表不向注册中心注册自己。如果是搭建高可用的集群注册中心,则该属性设置为true。该属性值默认true。
eureka.client.fetch-registry : 该参数代表是否需要检索服务,如果是单一注册中心则不需要去检索服务,则设置为false。该参数默认值为true。
eureka.client.serviceUrl.defaultZone : 该参数指定默认注册中心的注册地址,其他的微服务应用就是通过该属性值来注册服务。
eureka.server.enable-self-preservation :设置为false 代表关闭注册中心的保护机制,默认为true。

其他的详细属性和配置可以查看官方文档。或者留言大家一起讨论。
该工程的gitHub地址为:https://github.com/vOoT/micro-service-integration.git