通过上一篇博客我们可以轻松搭建strtus2的环境,接下来由我来继续介绍spring的环境搭建以及spring注入的简单使用
相关链接:eclipse中SSH三大k框架环境搭建<一>
eclipse中SSH三大框架环境搭建<三>
本例业务需求:将数据库一张表的信息通过JDBC查询出来并显示在页面中
流程:action控制层-->service业务层-->dao数据层-->数据库
第1步:我们还是需要加入spring开发中所需要的jar包
找到下载并解压好的spring文件,然后找到该文件下的libs目录下文件,我们可以将所有jar包复制到我们web项目下的lib目录下

注意:1>***.javadoc.jar文档和***.sources.jar源码我们可以不拷贝到我们的项目中,如果想加深自己的理解小编建议大家看看源码(毕竟这是第一手资料)
2>我们还需要加入commons-logging.jar包。用来记录程序运行时的活动的日志记录。该文件在struts2文件中app目录下的struts2-showcase.war包目录下的WEB-INF下的lib中

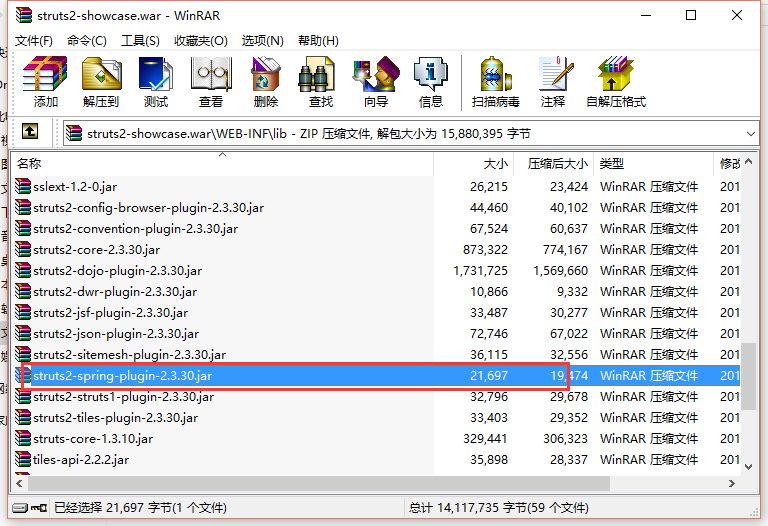
3>我们还需要加入struts2中的一个插件包struts2-spring-plugin-2.3.30.jar(经常容易忘记)
4>由于本例我们还需要操作mySql数据库因此还需加入数据库驱动包mysql-connector-java-5.1.39-bin.jar

第2步:由于本例用到了struts所以还是需要先配置strtus.xml文件
 1 <?xml version="1.0" encoding="UTF-8" ?>
 2 <!DOCTYPE struts PUBLIC
 3     "-//Apache Software Foundation//DTD Struts Configuration 2.3//EN"
 4     "http://struts.apache.org/dtds/struts-2.3.dtd">
 5
 6 <struts>
 7     <!-- 告知Struts2运行时使用Spring来创建对象 -->
 8     <constant name="struts.objectFactory" value="spring" />
 9     <package name="001pck" extends="struts-default">
10         <action name="Index" class="myIndexAction">
11             <result name="success">/WEB-INF/jsp/index.jsp</result>
12         </action>
13
14     </package>
15 </struts>
注意:这里的class并没有引用一个具体的类而是取了一个别名,接下来再由spring给它注入
第3步:配置applicationContext.xml文件
 1 <?xml version="1.0" encoding="UTF-8"?>
 2 <beans xmlns="http://www.springframework.org/schema/beans"
 3         xmlns:xsi="http://www.w3.org/2001/XMLSchema-instance"
 4         xmlns:p="http://www.springframework.org/schema/p"
 5         xmlns:aop="http://www.springframework.org/schema/aop"
 6         xmlns:context="http://www.springframework.org/schema/context"
 7         xmlns:jee="http://www.springframework.org/schema/jee"
 8         xmlns:tx="http://www.springframework.org/schema/tx"
 9         xsi:schemaLocation="
10             http://www.springframework.org/schema/aop http://www.springframework.org/schema/aop/spring-aop-4.2.xsd
11             http://www.springframework.org/schema/beans http://www.springframework.org/schema/beans/spring-beans-4.2.xsd
12             http://www.springframework.org/schema/context http://www.springframework.org/schema/context/spring-context-4.2.xsd
13             http://www.springframework.org/schema/jee http://www.springframework.org/schema/jee/spring-jee-4.2.xsd
14             http://www.springframework.org/schema/tx http://www.springframework.org/schema/tx/spring-tx-4.2.xsd">
15     <!-- 类似于财务部门一样,类就是钱,所有需要类的实例都由srping去管理, pojo除外-->
16     <bean id="myIndexAction" class="action.IndexAction" scope="prototype">
17         <property name="index" ref="myService1"></property>
18     </bean>
19     <!-- index = new IndexServiceImpl() -->
20     <bean id="myDao1" class="dao.BookCardDaoImpl" scope="prototype">
21         <property name="c" ref="myConnection1"></property>
22     </bean>
23
24     <bean id="myService1" class="service.IndexServiceImpl" scope="prototype">
25         <property name="bcd" ref="myDao1"></property>
26     </bean>
27
28     <bean id="myConnection1" class="util.MyConnection_mysql" scope="prototype"></bean>
29
30     <bean id="myConnection2" class="util.MyConnection_sqlserver" scope="prototype"></bean>
31
32 </beans>
在这里我介绍一下这份配置文件的相关信息吧
1 头文件我们一般从官方模板中拷贝过来,需要注意一下版本号
2 bean标记就是我们需要给项目中的每一个实例配置一个bean(pojo除外),当哪一层需要调用时,spring会帮我们注入。
3 bean标记中id属性为在本文件中起一标识作用用来区分其他bean,class属性的值便是当前bean引用了哪一个类 ,scope属性的值为prototype为非单例的意思
4 bean标记中的子标记property便是当前这个类中需要注入的属性,name属性值为我们java类中的属性名,ref属性值为当前类需要引用哪一个实现类。
本例中我们可以看到dao中引用了myConnection1也就是引用了mysql的连接,如此一来便可以轻松切换mySQL和sqlServer两个数据库,而并不需要改动我们的任何逻辑代码。
下面我给出一个dao的样例代码
 1 public class BookCardDaoImpl implements BookCardDao {
 2
 3     //只做属性的申明,不写死具体的实现
 4     private MyConnection c;
 5
 6     //提供一个set方法spring会自动注入
 7     public void setC(MyConnection c) {
 8         this.c = c;
 9     }
10
11     @Override
12     public List<BookCard> getAllCardInfo() {
13
14         // 第一步:获取数据库连接
15         Connection conn = c.getConnection();
16
17         // 第二步:查询数据库
18         // (操作JDBC,需要sql语句,需要执行sql语句对象,需要执行sql语句后结果集合)
19         String sql = "select * from BookCard";// 需要执行的sql语句
20         PreparedStatement stmt = null;// 执行sql语句对象
21         ResultSet rs = null;// 执行sql语句后的结果集
22         try {
23             stmt = conn.prepareStatement(sql);
24             rs = stmt.executeQuery();
25         } catch (Exception e) {
26             e.printStackTrace();
27         }
28
29         // 第三步
30         // 拿到rs后,执行一个遍历以及封装
31         List<BookCard> myBookCardList = new ArrayList<BookCard>();
32         try {
33             while (rs.next()) {
34                 // 风格:实体类是一个pojo对象,一般直接new就行
35                 BookCard bc = new BookCard();
36                 // 进行数据库封装
37                 bc.setCid(rs.getInt("cid"));
38                 bc.setName(rs.getString("name"));
39                 bc.setSex(rs.getString("sex"));
40                 bc.setCardDate(rs.getDate("cardDate"));
41                 bc.setDeposit(rs.getBigDecimal("deposit"));
42                 myBookCardList.add(bc);
43             }
44         } catch (Exception e1) {
45             e1.printStackTrace();
46         }
47
48         //关闭资源
49         try {
50             rs.close();
51             stmt.close();
52             conn.close();
53         } catch (Exception e) {
54             e.printStackTrace();
55         }
56
57         // 第5步返回结果集List给客户端
58         return myBookCardList;
59     }
spring的环境在这一步已经是搭建完成了,我再来介绍一下spring的注入。

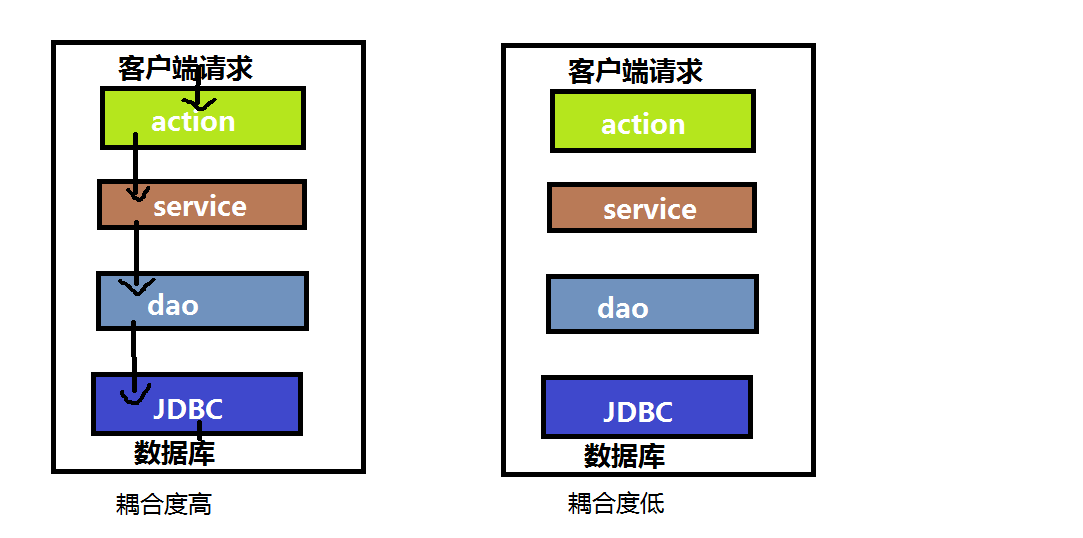
大家可以清晰的看到左边这幅图呢是传统的面向对象编程的写法,每一层都与另外一层紧密耦合,当一层出现问题,层层都需要变动,在软件工程中是大忌
右图中,层与层之间都已经分离出来了,这里具体实现是通过在每一层都定义一个接口,层与层之间调用的都是接口并不关心是哪一个实现类,真正的实现类是谁不在代码中出现而是交给spring让他给我们注入。
