该文章是基于 Hadoop2.7.6_01_部署 进行的
1. 主机规划
|
主机名称 |
IP信息 |
内网IP |
操作系统 |
安装软件 |
备注:运行程序 |
|
mini01 |
10.0.0.11 |
172.16.1.11 |
CentOS 7.4 |
jdk、hadoop、zookeeper、hbase |
QuorumPeerMain、NameNode、HMaster |
|
mini02 |
10.0.0.12 |
172.16.1.12 |
CentOS 7.4 |
jdk、hadoop、zookeeper、hbase |
QuorumPeerMain、ResourceManager、HMaster |
|
mini03 |
10.0.0.13 |
172.16.1.13 |
CentOS 7.4 |
jdk、hadoop、zookeeper、hbase |
QuorumPeerMain、DataNode、NodeManager、HRegionServer |
|
mini04 |
10.0.0.14 |
172.16.1.14 |
CentOS 7.4 |
jdk、hadoop、zookeeper、hbase |
QuorumPeerMain、DataNode、NodeManager、HRegionServer |
|
mini05 |
10.0.0.15 |
172.16.1.15 |
CentOS 7.4 |
jdk、hadoop、zookeeper、hbase |
QuorumPeerMain、DataNode、NodeManager、HRegionServer |
2. Zookeeper部署
共部署5台,所以在mini01~mini05都得部署
2.1. 配置信息
 1 [yun@mini01 conf]$ pwd
 2 /app/zookeeper/conf
 3 [yun@mini01 conf]$ cat zoo.cfg
 4 #单个客户端与单台服务器之间的连接数的限制,是ip级别的,默认是60,如果设置为0,那么表明不作任何限制。
 5 maxClientCnxns=1500
 6 # The number of milliseconds of each tick
 7 tickTime=2000
 8 # The number of ticks that the initial
 9 # synchronization phase can take
10 initLimit=10
11 # The number of ticks that can pass between
12 # sending a request and getting an acknowledgement
13 syncLimit=5
14 # the directory where the snapshot is stored.
15 # do not use /tmp for storage, /tmp here is just
16 # example sakes.
17 # dataDir=/tmp/zookeeper
18 dataDir=/app/bigdata/zookeeper/data
19 # the port at which the clients will connect
20 clientPort=2181
21 #
22 # Be sure to read the maintenance section of the
23 # administrator guide before turning on autopurge.
24 #
25 # http://zookeeper.apache.org/doc/current/zookeeperAdmin.html#sc_maintenance
26 #
27 # The number of snapshots to retain in dataDir
28 #autopurge.snapRetainCount=3
29 # Purge task interval in hours
30 # Set to "0" to disable auto purge feature
31 #autopurge.purgeInterval=1
32
33 # leader和follow通信端口和投票选举端口
34 server.1=mini01:2888:3888
35 server.2=mini02:2888:3888
36 server.3=mini03:2888:3888
37 server.4=mini04:2888:3888
38 server.5=mini05:2888:3888
2.2. 添加myid文件
1 [yun@mini01 data]$ pwd
2 /app/bigdata/zookeeper/data
3 [yun@mini01 data]$ ll
4 total 4
5 -rw-r--r-- 1 yun yun   2 May 26 14:36 myid
6 drwxr-xr-x 2 yun yun 232 Jun 27 14:54 version-2
7 [yun@mini01 data]$ cat myid  # 其中mini01的myid 为1;mini02的myid 为2;mini03的myid 为3;mini04的myid 为4;mini05的myid 为5
8 1
2.3. 环境变量
1 [root@mini01 profile.d]# pwd
2 /etc/profile.d
3 [root@mini01 profile.d]# cat zk.sh
4 export ZK_HOME="/app/zookeeper"
5 export PATH=$ZK_HOME/bin:$PATH
6
7 [root@mini01 profile.d]# logout
8 [yun@mini01 conf]$ source /etc/profile # 重新加载环境变量
2.4. 启动zk服务
1 # 依次在启动mini01、mini02、mini03、mini04、mini05  zk服务
2 [yun@mini01 zookeeper]$ pwd
3 /app/zookeeper
4 [yun@mini01 zookeeper]$ zkServer.sh start
5 JMX enabled by default
6 Using config: /app/zookeeper/bin/../conf/zoo.cfg
7 Starting zookeeper ... STARTED
建议在 /app/zookeeper,因为在启动时,会有相关日志产生
1 [yun@mini01 zookeeper]$ pwd
2 /app/zookeeper
3 [yun@mini01 zookeeper]$ ll zookeeper.out
4 -rw-rw-r-- 1 yun yun 41981 Aug  6 17:24 zookeeper.out
2.5. 查询运行状态
 1 # 其中mini01、mini02、mini04、mini05状态如下
 2 [yun@mini01 zookeeper]$ zkServer.sh status
 3 JMX enabled by default
 4 Using config: /app/zookeeper/bin/../conf/zoo.cfg
 5 Mode: follower
 6
 7 # 其中mini03 状态如下
 8 [yun@mini03 zookeeper]$ zkServer.sh status
 9 JMX enabled by default
10 Using config: /app/zookeeper/bin/../conf/zoo.cfg
11 Mode: leader
3. Hbase部署与配置修改
3.1. 软件部署
1 [yun@mini01 software]$ pwd
2 /app/software
3 [yun@mini01 software]$ tar xf hbase-2.0.0-bin.tar.gz
4 [yun@mini01 software]$ mv hbase-2.0.0 /app/
5 [yun@mini01 software]$ cd
6 [yun@mini01 ~]$ ln -s hbase-2.0.0/ hbase
3.2. 环境变量
注意所有部署hbase的机器【mini01、mini02、mini03、mini04、mini05】都需要该环境变量
1 [root@mini01 profile.d]# pwd
2 /etc/profile.d
3 [root@mini01 profile.d]# cat hbase.sh  # 也可以直接写在 /etc/profile 文件中
4 export HBASE_HOME="/app/hbase"
5 export PATH=$HBASE_HOME/bin:$PATH
6
7 [root@mini01 profile.d]# logout
8 [yun@mini01 hbase]$ source /etc/profile  # 使用yun用户,并重新加载环境变量
3.3. hbase-env.sh 修改
 1 [yun@mini01 conf]$ pwd
 2 /app/hbase/conf
 3 [yun@mini01 conf]$ cat hbase-env.sh
 4 #!/usr/bin/env bash
 5 ………………
 6 # The java implementation to use.  Java 1.8+ required.
 7 # export JAVA_HOME=/usr/java/jdk1.8.0/
 8 export JAVA_HOME=${JAVA_HOME}
 9
10 # Extra Java CLASSPATH elements.  Optional.  # hadoop配置文件的位置
11 # export HBASE_CLASSPATH=
12 export HBASE_CLASSPATH=${HADOOP_HOME}/etc/hadoop/
13 ………………
14 # Tell HBase whether it should manage it's own instance of ZooKeeper or not.
15 # 如果使用独立安装的zookeeper这个地方就是false
16 # export HBASE_MANAGES_ZK=true
17 export HBASE_MANAGES_ZK=false
18 ………………
3.4. hbase-site.xml 修改
 1 [yun@mini01 conf]$ pwd
 2 /app/hbase/conf
 3 [yun@mini01 conf]$ cat hbase-site.xml
 4 <?xml version="1.0"?>
 5 <?xml-stylesheet type="text/xsl" href="configuration.xsl"?>
 6 <!--
 7 /**
 8  *
 9 ………………
10  */
11 -->
12 <configuration>
13   <property>
14     <name> hbase.master.port</name>  <!-- hbasemaster的端口 -->
15     <value>16000</value>
16   </property>
17   <property>
18     <name>hbase.tmp.dir</name>        <!-- hbase 临时存储 -->
19     <value>/app/hbase/tmp</value>
20   </property>
21   <property>
22     <name>hbase.master.maxclockskew</name>   <!-- 时间同步允许的时间差 单位毫秒 -->
23     <value>180000</value>
24   </property>
25   <property>
26     <name>hbase.rootdir</name>
27     <value>hdfs://mini01:9000/hbase</value>  <!-- hbase共享目录,持久化hbase数据  存放在对应的HDFS上 -->
28   </property>
29   <property>
30     <name>hbase.cluster.distributed</name>  <!-- 是否分布式运行,false即为单机 -->
31     <value>true</value>
32   </property>
33   <property>
34     <name>hbase.zookeeper.property.clientPort</name> <!-- zookeeper端口 -->
35     <value>2181</value>
36   </property>
37   <property>
38     <name>hbase.zookeeper.quorum</name>  <!-- zookeeper地址 -->
39     <value>mini01,mini02,mini03,mini04,mini05</value>
40   </property>
41   <property>
42     <name>hbase.zookeeper.property.dataDir</name>  <!-- zookeeper配置信息快照的位置 -->
43     <value>/app/hbase/tmp/zookeeper</value>
44   </property>
45 </configuration>
3.5. regionservers 修改
1 [yun@mini01 conf]$ pwd
2 /app/hbase/conf
3 [yun@mini01 conf]$ cat regionservers  # 从机器的域名
4 mini03
5 mini04
6 mini05
4. Hbase的分发与启动
注意:启动hbase之前,必须保证hadoop集群和zookeeper集群是可用的。
4.1. hbase分发到其他机器
将 /app/hbase-2.0.0 从mini01 分发到mini02【用于HA】、mini03、mini04、mini05
其中配置不需要任何修改
1 scp hbase-2.0.0 yun@mini02:/app
2 scp hbase-2.0.0 yun@mini03:/app
3 scp hbase-2.0.0 yun@mini04:/app
4 scp hbase-2.0.0 yun@mini05:/app
分发完毕后,记得登录不同的主机然后创建软连接
1 [yun@mini02 ~]$ pwd
2 /app
3 [yun@mini02 ~]$ ln -s hbase-2.0.0/ hbase
4.2. 启动程序
 1 [yun@mini01 ~]$ start-hbase.sh
 2 SLF4J: Class path contains multiple SLF4J bindings.
 3 SLF4J: Found binding in [jar:file:/app/hbase-2.0.0/lib/slf4j-log4j12-1.7.25.jar!/org/slf4j/impl/StaticLoggerBinder.class]
 4 SLF4J: Found binding in [jar:file:/app/hadoop-2.7.6/share/hadoop/common/lib/slf4j-log4j12-1.7.10.jar!/org/slf4j/impl/StaticLoggerBinder.class]
 5 SLF4J: See http://www.slf4j.org/codes.html#multiple_bindings for an explanation.
 6 SLF4J: Actual binding is of type [org.slf4j.impl.Log4jLoggerFactory]
 7 running master, logging to /app/hbase/logs/hbase-yun-master-mini01.out
 8 SLF4J: Class path contains multiple SLF4J bindings.
 9 SLF4J: Found binding in [jar:file:/app/hbase-2.0.0/lib/slf4j-log4j12-1.7.25.jar!/org/slf4j/impl/StaticLoggerBinder.class]
10 SLF4J: Found binding in [jar:file:/app/hadoop-2.7.6/share/hadoop/common/lib/slf4j-log4j12-1.7.10.jar!/org/slf4j/impl/StaticLoggerBinder.class]
11 SLF4J: See http://www.slf4j.org/codes.html#multiple_bindings for an explanation.
12 SLF4J: Actual binding is of type [org.slf4j.impl.Log4jLoggerFactory]
13 mini05: running regionserver, logging to /app/hbase/bin/../logs/hbase-yun-regionserver-mini05.out
14 mini04: running regionserver, logging to /app/hbase/bin/../logs/hbase-yun-regionserver-mini04.out
15 mini03: running regionserver, logging to /app/hbase/bin/../logs/hbase-yun-regionserver-mini03.out
master进程
1 [yun@mini01 ~]$ jps
2 1808 SecondaryNameNode
3 1592 NameNode
4 6540 HMaster
5 4158 QuorumPeerMain
6 7998 Jps
slave进程
1 [yun@mini04 ~]$ jps
2 2960 Jps
3 1921 QuorumPeerMain
4 1477 NodeManager
5 1547 DataNode
6 2333 HRegionServer
4.3. zk中的信息
1 [zk: localhost:2181(CONNECTED) 9] ls /hbase
2 [replication, meta-region-server, rs, splitWAL, backup-masters, table-lock, flush-table-proc, master-maintenance, online-snapshot, switch, master, running, draining, namespace, hbaseid, table]

1 [zk: localhost:2181(CONNECTED) 7] ls /hbase/rs
2 [mini03,16020,1533633829928, mini05,16020,1533633829675, mini04,16020,1533633829711]
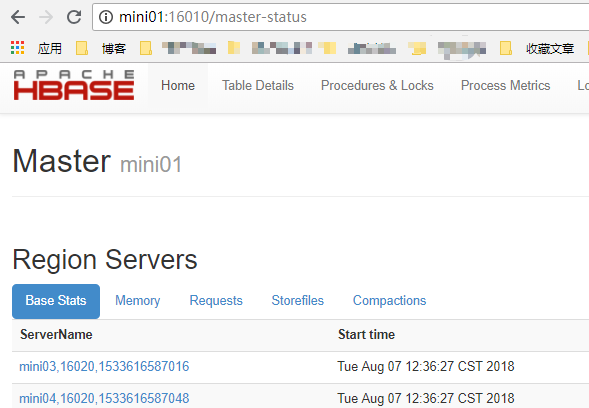
4.4. 浏览器访问
1 http://mini01:16010
5. Hbase的HA
根据规划,mini01和mini02为Hmaster,其中mini01的Hmaster已经起来了
5.1. 启动另一个HMaster
 1 [yun@mini02 ~]$ hbase-daemon.sh start master  # 在mini02起一个 HMaster
 2 running master, logging to /app/hbase/logs/hbase-yun-master-mini02.out
 3 SLF4J: Class path contains multiple SLF4J bindings.
 4 SLF4J: Found binding in [jar:file:/app/hbase-2.0.0/lib/slf4j-log4j12-1.7.25.jar!/org/slf4j/impl/StaticLoggerBinder.class]
 5 SLF4J: Found binding in [jar:file:/app/hadoop-2.7.6/share/hadoop/common/lib/slf4j-log4j12-1.7.10.jar!/org/slf4j/impl/StaticLoggerBinder.class]
 6 SLF4J: See http://www.slf4j.org/codes.html#multiple_bindings for an explanation.
 7 SLF4J: Actual binding is of type [org.slf4j.impl.Log4jLoggerFactory]
 8 [yun@mini02 ~]$
 9 [yun@mini02 ~]$ jps
10 3746 Jps
11 1735 ResourceManager
12 2265 QuorumPeerMain
13 3643 HMaster
5.2. zk中的信息
1 [zk: localhost:2181(CONNECTED) 3] ls /hbase/backup-masters
2 [mini02,16000,1533635137064]
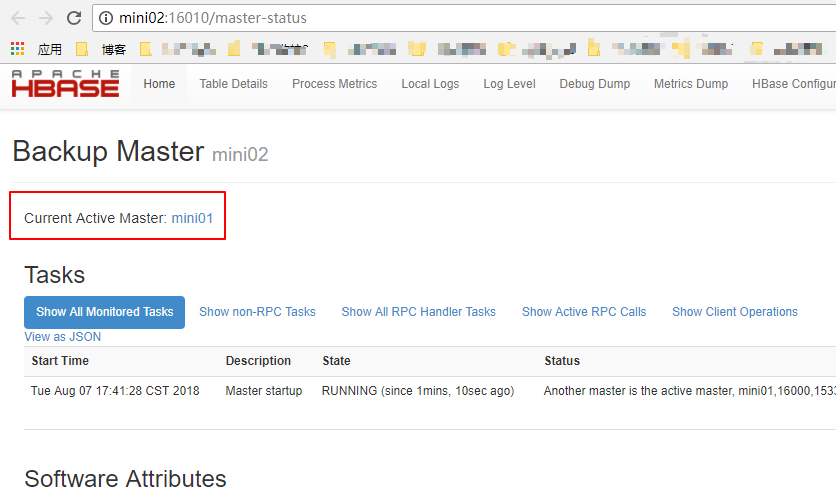
5.3. 浏览器访问
1 http://mini02:16010