之前说了 next 主题的优化和接入评论系统。让我们完成了自己所需的页面风格和排版,也可让访问用户在每篇博文评论,完成博主和访问用户的交互。
本章我们继续讲解其他重要功能。
既然是一个网站,那么我们就需要收集网站访问数据,提供流量趋势、来源分析、转化跟踪、页面热力图、访问流等多种统计分析服务;这时我们就需要引入——百度统计。
上述的统计只能在百度统计中查看,但我想在自己的网站页面直接就能看一些简单的数据。比如:网站访问人数,访问次数,每篇文章访问次数,网站总字数,每篇文章字数,阅读时长估算等。那么我们就可以引入不蒜子统计,字数统计,阅读次数统计了。具体那就参见下文了。
百度统计
需要在百度统计进行注册,并拿到脚本的 ID。
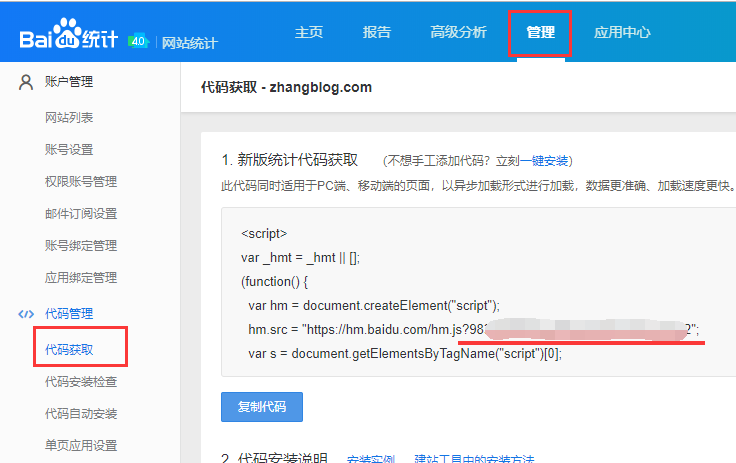
之后在主题配置文件中修改。
1 [root@iZ28xbsfvc4Z next]# pwd  # 主题目录
2 /app/softinsall/hexo/themes/next
3 [root@iZ28xbsfvc4Z next]# vim _config.yml
4 # Baidu Analytics ID
5 baidu_analytics: 983XXXXXXXXXXXXXXXXXXXXXXXXXX2
访问报告查看
过半小时或一小时左右可在百度统计查看报告。

不蒜子统计
编辑主题配置文件中的 busuanzi_count 的配置项。
 1 [root@iZ28xbsfvc4Z next]# pwd  # 主题目录
 2 /app/softinsall/hexo/themes/next
 3 [root@iZ28xbsfvc4Z next]# vim _config.yml
 4 # Show PV/UV of the website/page with busuanzi.
 5 # Get more information on http://ibruce.info/2015/04/04/busuanzi/
 6 busuanzi_count:
 7   # count values only if the other configs are false
 8   enable: true
 9   # custom uv span for the whole site
10   site_uv: true
11   site_uv_header: 本站访客数
12   site_uv_footer: 人次
13   # custom pv span for the whole site
14   site_pv: true
15   site_pv_header: 本站总访问量
16   site_pv_footer: 次
17   # custom pv span for one page only
18   # 每篇博文阅读次数,使用 leancloud 统计。原因是在「首页」中,leancloud 统计也能看阅读次数,而不蒜子则不行。
19   page_pv: false
20   page_pv_header: 本文总阅读量
21   page_pv_footer: 次
不蒜子域名修改
因七牛强制过期『dn-lbstatics.qbox.me』域名,与客服沟通无果,只能更换域名到『busuanzi.ibruce.info』!
修改如下:
1 [root@iZ28xbsfvc4Z next]# pwd  # 主题目录
2 /app/softinsall/hexo/themes/next
3 [root@iZ28xbsfvc4Z next]# vim layout/_third-party/analytics/busuanzi-counter.swig
4 {% if theme.busuanzi_count.enable %}
5 <div class="busuanzi-count">
6   <script async src="https://busuanzi.ibruce.info/busuanzi/2.3/busuanzi.pure.mini.js"></script>
7 ………………
浏览器访问
页面底部

阅读次数统计
在 LeanCloud 中创建 Class
在之前的评论系统中,已经讲解了 LeanCloud 账号的创建、应用创建、获取App ID 和 App Key 已经安全加固。这里仅对阅读次数的 Class 创建做讲解。
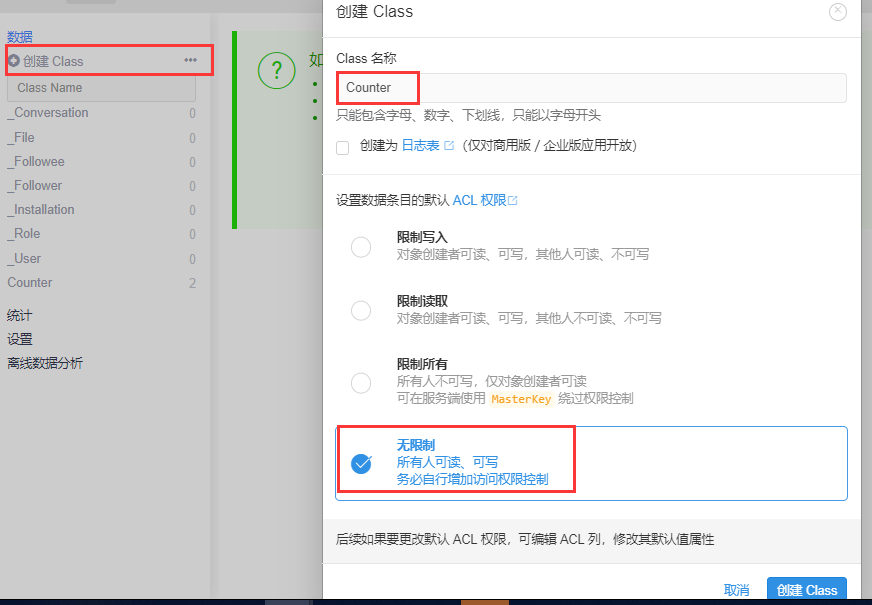
数据栏中,_开头的都是系统预定义好的表。
为了区分,新建一张表来保存数据。为了保证对NexT主题的修改兼容,新建Class名字必须为Counter。 为了避免权限问题导致 次数统计显示不正常,选择无限制,创建Class。
主题配置修改
在主题配置文件中修改:
1 [root@iZ28xbsfvc4Z next]# pwd  # 主题目录
2 /app/softinsall/hexo/themes/next
3 [root@iZ28xbsfvc4Z next]# vim _config.yml
4 # Show number of visitors to each article.
5 # You can visit https://leancloud.cn get AppID and AppKey.
6 leancloud_visitors:
7   enable: true
8   app_id: h7YmXXXXXXXXXXXXXX
9   app_key: VhTGXXXXXXXXXX
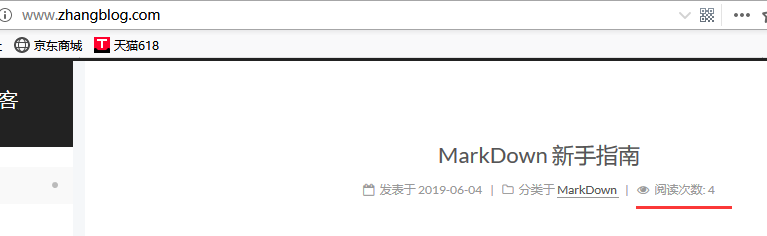
浏览器访问
文章标题
字数统计
用于统计文章的字数以及分析出阅读时间。
安装 wordcount 插件
需要安装的插件
1 [root@iZ28xbsfvc4Z hexo]# pwd  # 站点目录
2 /app/softinsall/hexo
3 [root@iZ28xbsfvc4Z hexo]# npm install hexo-wordcount --save
主题配置修改
在主题配置文件中修改。
 1 [root@iZ28xbsfvc4Z next]# pwd  # 主题目录
 2 /app/softinsall/hexo/themes/next
 3 [root@iZ28xbsfvc4Z next]# vim _config.yml
 4 # Post wordcount display settings
 5 # Dependencies: https://github.com/willin/hexo-wordcount
 6 post_wordcount:
 7   item_text: true  # 文本显示
 8   wordcount: true  # 单篇 字数统计
 9   min2read: true   # 单篇 阅读时长
10   totalcount: true  # 网站 字数统计
11   # 该post_wordcount的所有设置另起一行显示
12   separated_meta: true
13 [root@iZ28xbsfvc4Z next]# vim languages/zh-Hans.yml  # 从英文改为中文
14   totalcount: 本站总字数
浏览器访问
文章标题
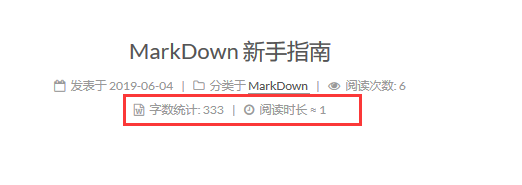
页面底部
推荐阅读
Linux下使用 github+hexo 搭建个人博客01-hexo搭建
Linux下使用 github+hexo 搭建个人博客02-hexo部署到Github Pages
Linux下使用 github+hexo 搭建个人博客03-hexo配置优化
Linux下使用 github+hexo 搭建个人博客04-next主题优化
Linux下使用 github+hexo 搭建个人博客05-next主题接入评论系统
Linux下使用 github+hexo 搭建个人博客06-next主题接入数据统计
Linux下使用 github+hexo 搭建个人博客07-next主题接入搜索和站点管理