1 install software
apt -y install qemu-kvm libvirt-daemon-system libvirt-daemon virtinst bridge-utils libosinfo-bin
apt -y install virt-manager qemu-system libvirt-dev libxen-dev
apt -y install ovmf
2 enable iommu
2.1Config BIOS
- Intel Based: Enable "Intel VT-d". May also be called "Intel Virtualization Technology" or simply "VT-d" on some motherboards.
- AMD Based: Enable "SVM". May also be called "AMD Virtualization" or simply "AMD-V".
- Note: I've seen "IOMMU" as it's own separate option on one of my motherboards, but not on any of my other motherboards. Make sure it's enabled if you do see it. If you don't see it, it's likely rolled into one of the former VT-d or AMD-V options listed above.
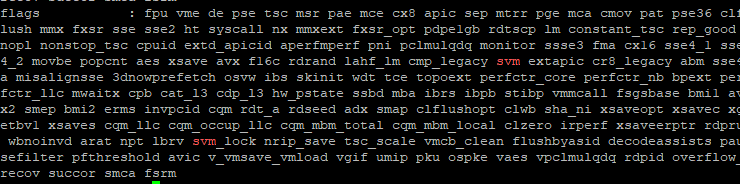
2.2Checking for IOMMU Support on your CPU
On Debian for my AMD processor, it's as easy as this:
cat /proc/cpuinfo | grep --color svm
You can see it highlighted below:
The Intel equivalent is this:
cat /proc/cpuinfo | grep --color vmx
2.3Enabling IOMMU in Linux
NOTE: Before you do the following, it's helpful to go back in your BIOS and make sure that the Primary GPU is set to integrated and not using your passthrough graphics card. This is called "Boot GPU" and "Primary Graphics" in my BIOS.
Add the following options to your GRUB_CMDLINE_LINUX or GRUB_CMDLINE_LINUX_DEFAULT
option in the /etc/default/grub file。
AMD:
GRUB_CMDLINE_LINUX_DEFAULT="quiet amd_iommu=on iommu=pt pcie_acs_override=downstream,multifunction video=vesafb:off video=efifb:off"
amd_iommu=on iommu=pt video=efifb:off pcie_acs_override=downstream,multifunction video=vesafb:off
For me, it will look like this. If there's options in there already, leave them alone.
Intel:
intel_iommu=on iommu=pt video=efifb:off pcie_acs_override=downstream video=vesafb:off
And then update GRUB:
sudo grub-mkconfig -o /boot/grub/grub.cfg
to rebuild your Grub config.
If your computer boots without error Before we celebrate, let's make sure IOMMU is really enabled
dmesg | grep -i -e DMAR -e IOMMU
do you see the line Intel-IOMMU: enabled or something along those lines for amd? Hopefully, if not, make sure your cpu supports IOMMU and you correctly followed the prevoius steps
2.4Finding IOMMU Groups
Before looking at the IOMMU Groups, I want to make sure that my graphics card is visible to the OS. I run the following command:
sudo dmesg | grep -i -e DMAR -e IOMMU
lspci -nnk | grep VGA
For me, this results in 3 graphics controllers being shown: The ASPEED one that's part of my motherboard, the NVIDIA one that's my T400 graphics card, and the AMD one which is the Vega graphics that's part of my CPU. Of course, you'll likely see different.

To list all the IOMMU groups they are part of, we'll use the following script that someone else wrote:
#!/bin/bash
shopt -s nullglob
for g in /sys/kernel/iommu_groups/*; do
    echo "IOMMU Group ${g##*/}:"
    for d in $g/devices/*; do
        echo -e "\t$(lspci -nns ${d##*/})"
    done;
done;
Take note of the IOMMU Group your graphics card is in. Note that mine is in IOMMU Group 7:

The Vega graphics that are integrated with my CPU are in IOMMU Group 4:

The group containg your gpu (the one you want to use in your VM) should only contain the VGA controller, and audio device. If you have more than that, refer to https://wiki.archlinux.org/index.php/PCI_passthrough_via_OVMF#Bypassing_the_IOMMU_groups_(ACS_override_patch) Though that will not be covered in this guide
The whole group should be captured by totally,not partly.
Congratulations! You have successfully enabled IOMMU and your groups are valid, time to move on
3 isolate gpu with vfio
In this step we will be using VFIO to isolate your gpu. When this step is complete, your video card should no longer be able to output video to your computer, so be sure you have two GPUs.
With a custom kernel you must enable VFIO manually https://wiki.gentoo.org/wiki/GPU_passthrough_with_libvirt_qemu_kvm#VFIO
IOMMU interrupt remapping
echo "options vfio_iommu_type1 allow_unsafe_interrupts=1" > /etc/modprobe.d/iommu_unsafe_interrupts.conf
echo "options kvm ignore_msrs=1 report_ignored_msrs=0" > /etc/modprobe.d/kvm.conf
Blacklist drivers from loading
echo "blacklist nouveau" >> /etc/modprobe.d/blacklist.conf
echo "blacklist nvidia" >> /etc/modprobe.d/blacklist.conf
echo "blacklist radeon" >> /etc/modprobe.d/blacklist.conf
echo "blacklist amdgpu" >> /etc/modprobe.d/blacklist.conf
echo "blacklist nvidiafb" >> /etc/modprobe.d/blacklist.conf
echo "blacklist snd_hda_intel" >> /etc/modprobe.d/blacklist.conf
edit /etc/default/grub config
add followings to GRUB_CMDLINE_LINUX
modprobe.blacklist=nouveau,nvidia,radeon,nvidiafb,snd_hda_intel
Enable modules
echo vfio >> /etc/modules
echo vfio_iommu_type1 >> /etc/modules
echo vfio_pci >> /etc/modules
echo vfio_virqfd >> /etc/modules
At this point you should still have your IOMMU groups displayed. Find the IOMMU group, of the video card you want to passthrough, and take not of each devices id Example: [10de:1c02] [10de:10f1] Be sure to take note of every device in your target IOMMU group, because you must pass all of them to the VM
echo "options vfio-pci ids=10de:1f82,10de:10fa disable_vga=1" > /etc/modprobe.d/vfio.conf
Update and save all the setting
update-initramfs -u
I recommend using modprobe to interact with VFIO Create the file /etc/modprobe.d/vfio.conf Now add the following to the file: options vfio-pci ids=10de:1c02,10de:10f1 the order is part of it. Notice how I listed both devices for my gpu, seperated by a comma.
For grub:
edit
/etc/mkinitcpio.conf
Add MODULES=(... vfio_pci vfio vfio_iommu_type1 vfio_virqfd ...) and HOOKS=(... modconf ...) Now to regenerate your initramfs mkinitcpio -p linux, instead of typing linux, press tab to see what it corrects to. You want it to be your kernel.
Now reboot once again. If all went well, you should no longer see input from the graphics card you passed through. To verify
dmesg | grep -i vfio
, if you see your devices, perfect If not, also check lspci -nnk and find your graphics card Make sure
Kernel driver
in
use: vfio-pci
That means vfio has successfully captured your gpu
If not, and you are on nvidia: edit /etc/modprobe.d/nvidia.conf and add the following lines
softdep nouveau pre: vfio-pci
softdep nvidia pre: vfio-pci
softdep nvidia* pre: vfio-pci
Reboot, it should work now
Since you have passed your graphics card to vfio, your vm will be outputted from the passed gpu itself Be sure to connect it to a monitor, because that is the only way you will be able to see your vm
4 Configure Bridge networking for KVM virtual machines.
ip addr
1: lo: <LOOPBACK,UP,LOWER_UP> mtu 65536 qdisc noqueue state UNKNOWN group default qlen 1000
    link/loopback 00:00:00:00:00:00 brd 00:00:00:00:00:00
    inet 127.0.0.1/8 scope host lo
       valid_lft forever preferred_lft forever
    inet6 ::1/128 scope host
       valid_lft forever preferred_lft forever
2: enp1s0: <BROADCAST,MULTICAST,UP,LOWER_UP> mtu 1500 qdisc pfifo_fast state UP group default qlen 1000
    link/ether 52:54:00:0c:48:f6 brd ff:ff:ff:ff:ff:ff
    inet 10.0.0.30/24 brd 10.0.0.255 scope global enp1s0
       valid_lft forever preferred_lft forever
    inet6 fe80::5054:ff:fe0c:48f6/64 scope link
       valid_lft forever preferred_lft forever
把原来的网卡都注释掉,改成如下的
vim /etc/network/interfaces
# This file describes the network interfaces available on your system
# and how to activate them. For more information, see interfaces(5).

source /etc/network/interfaces.d/*

# The loopback network interface
auto lo
iface lo inet loopback

# The primary network interface
allow-hotplug enp1s0
# change existing setting like follows
iface enp1s0 inet manual
#address 10.0.0.30
#network 10.0.0.0
#netmask 255.255.255.0
#broadcast 10.0.0.255
#gateway 10.0.0.1
#dns-nameservers 10.0.0.10

# add bridge interface setting
# for [hwaddress] line, specify the same MAC address with physical one ([enp1s0] on this example)
# set this param explicitly if different MAC address is assigned to bridge ingterface
auto br0
iface br0 inet static
address 10.0.0.30
network 10.0.0.0
netmask 255.255.255.0
broadcast 10.0.0.255
gateway 10.0.0.1
dns-nameservers 10.0.0.10
bridge_ports enp1s0
bridge_stp off
hwaddress ether 52:54:00:0c:48:f6
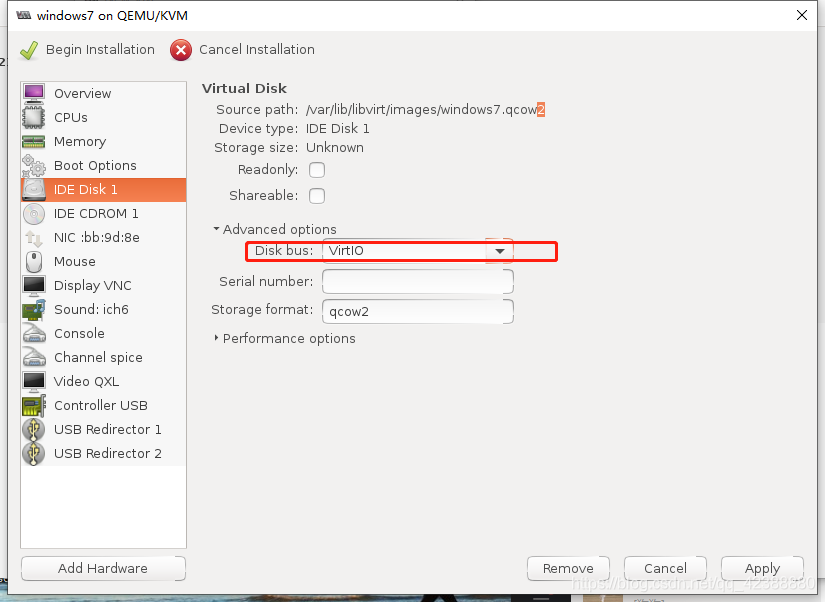
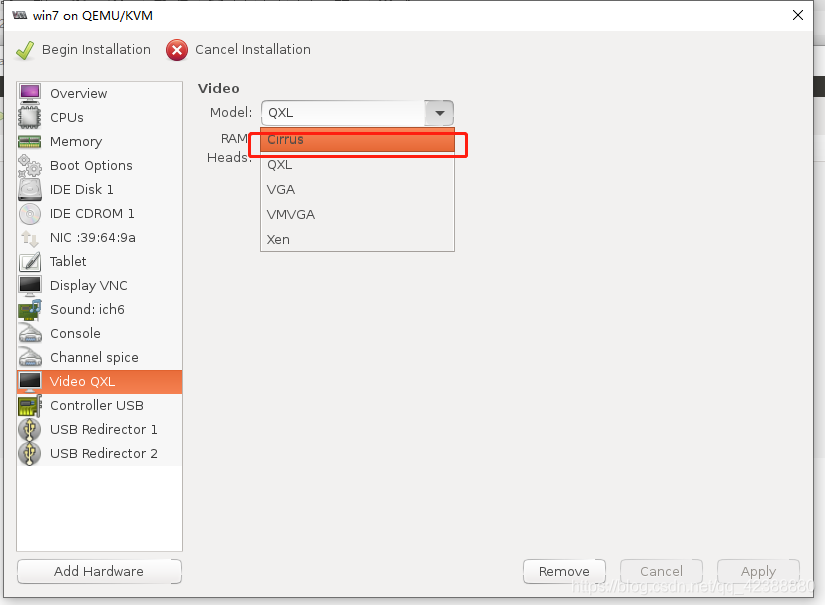
5 install virtual machine
virt-manager

New VM
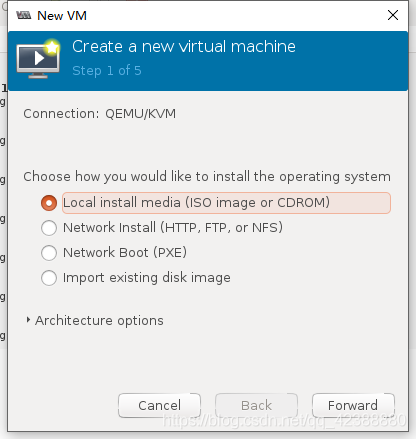
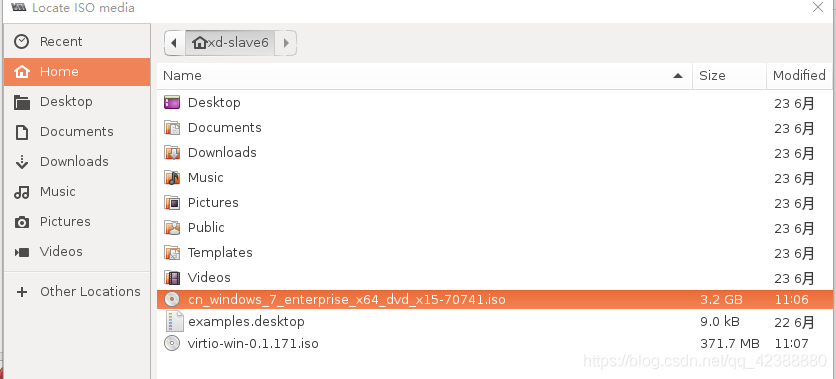
choose ISO image
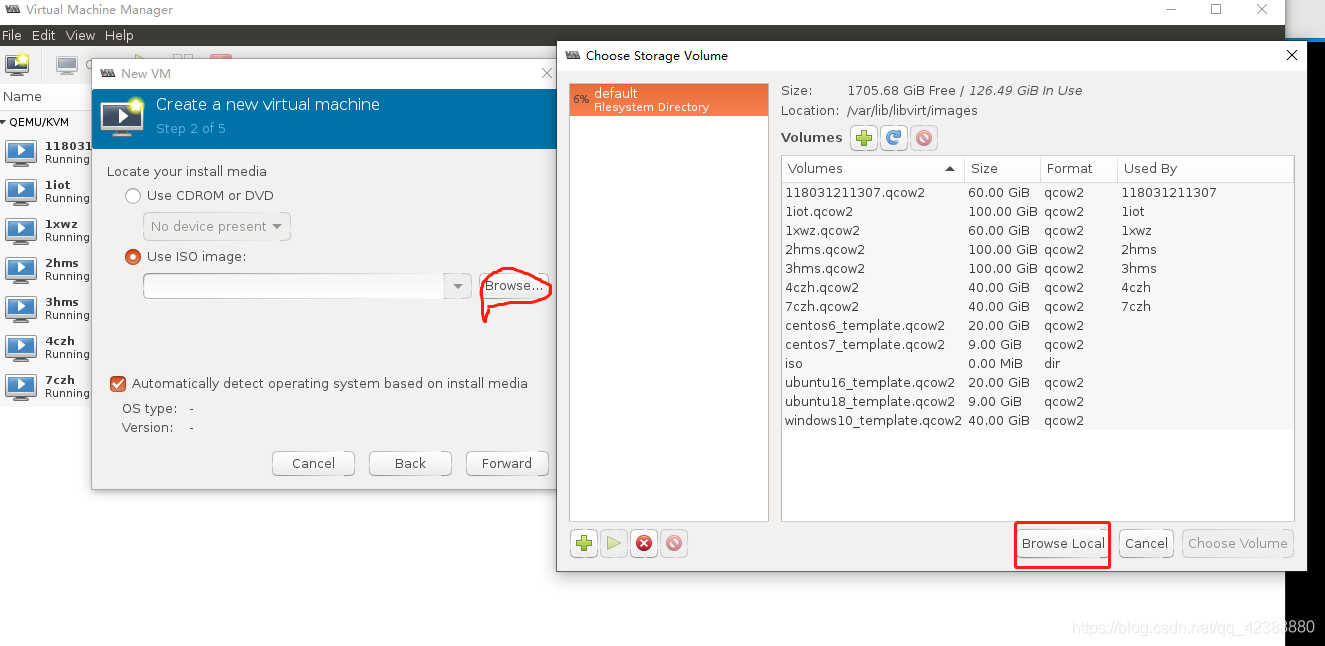
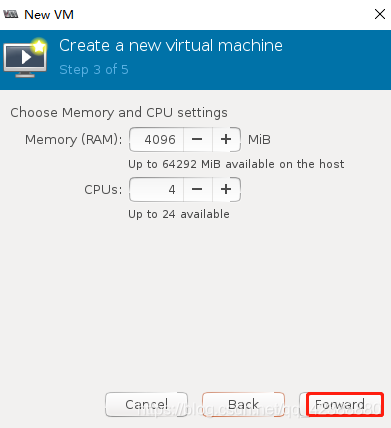

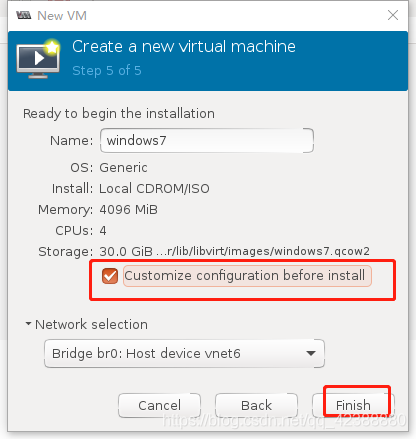
注意创建虚拟机时选择自己配置,在最初的设定页面上选择引导方式为UFFI(这个功能也就是刚才安装的OVMF支持的)一直到把Windows系统安装完成。

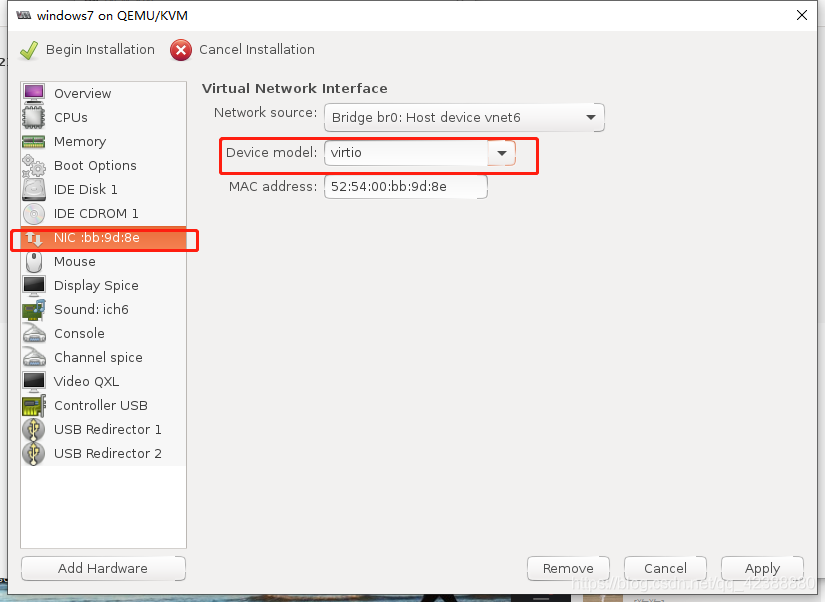
add virtio-win

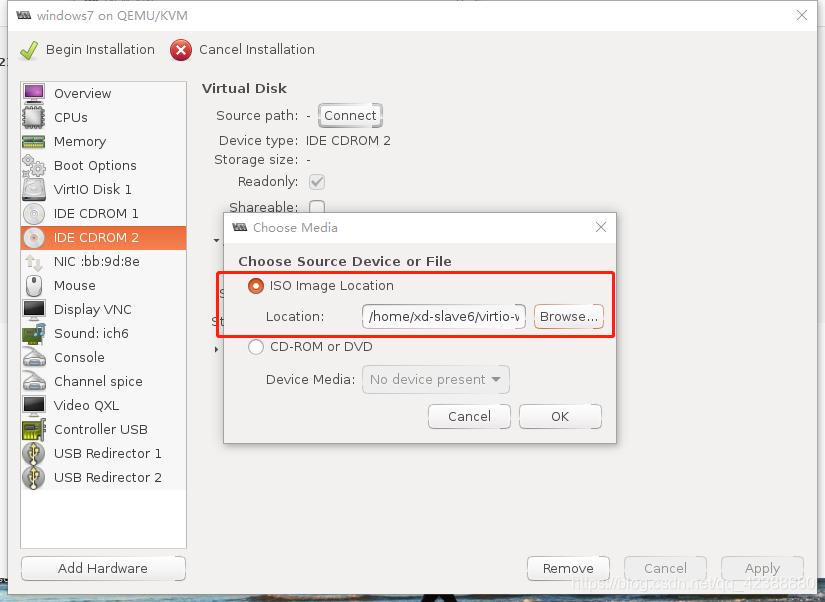
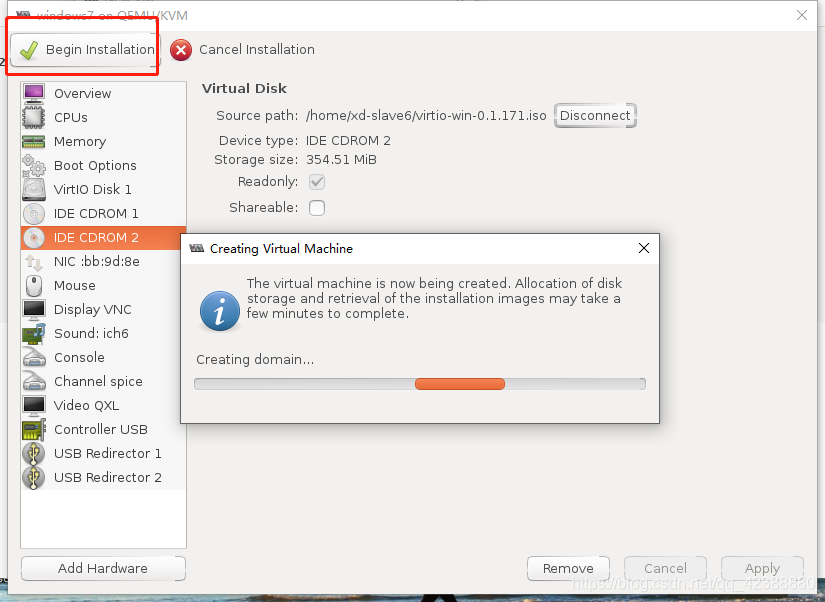
load drviver while installing system
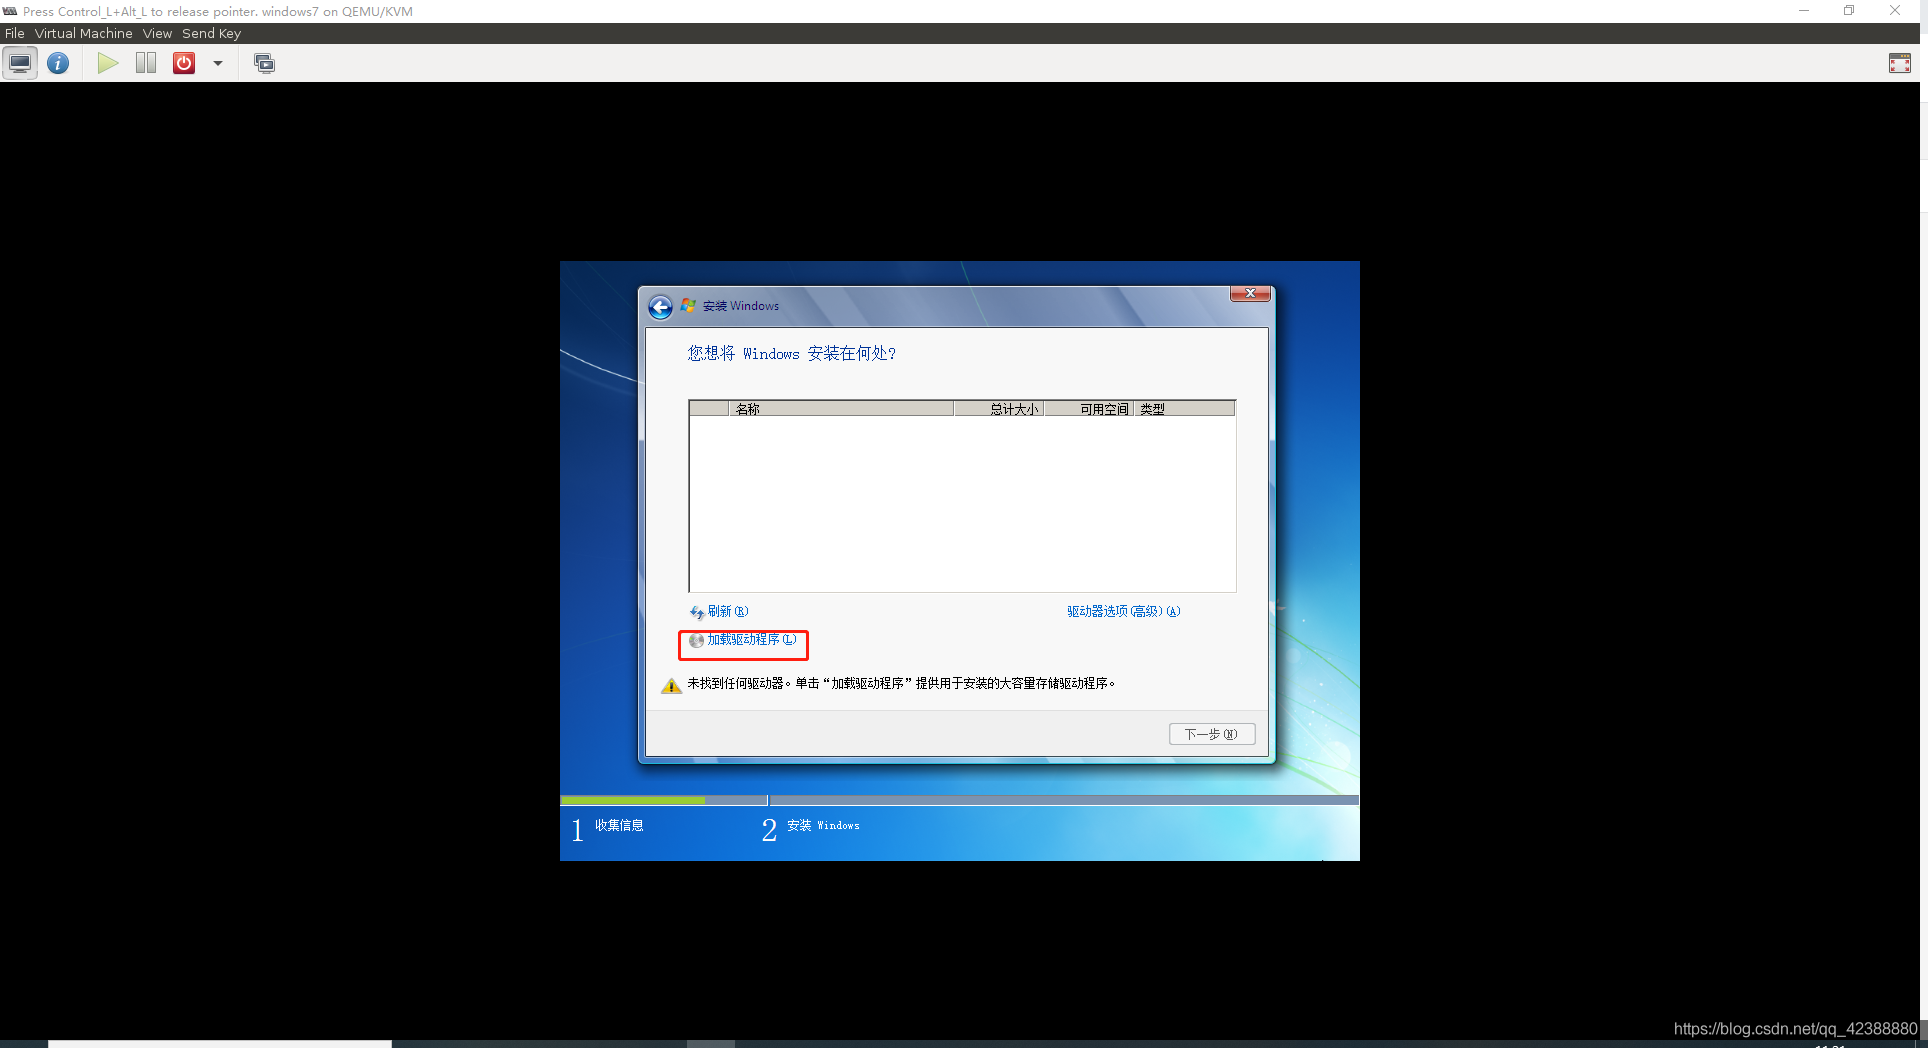
post install
先不将虚拟机关闭,一定不能关闭
此时在终端命令行输入:
virsh edit 虚拟机名
进行编辑,选择vim的编辑方式
在devices目录下添加:
<channel type='unix'>
      <source mode='bind'/>
      <target type='virtio' name='org.qemu.guest_agent.0'/>
      <address type='virtio-serial' controller='0' bus='0' port='1'/>
 </channel>
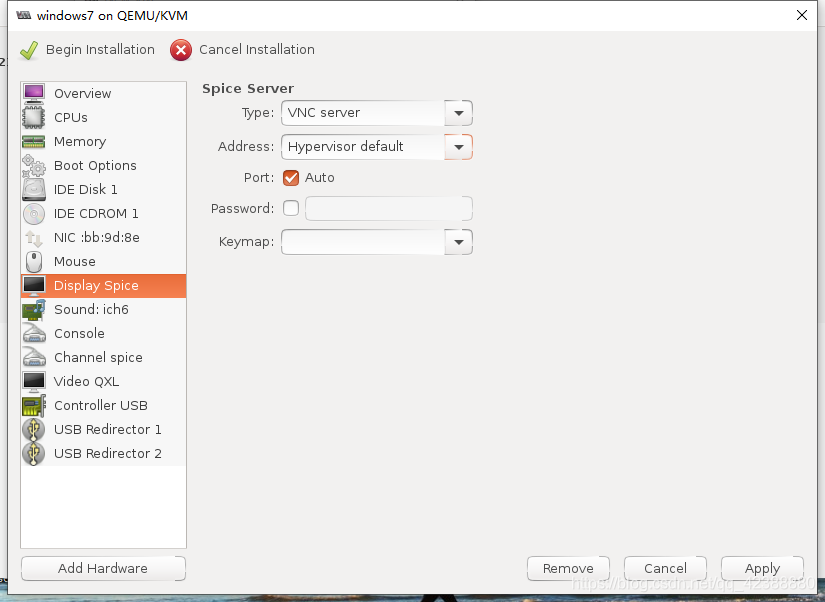
打开文件会发现已经存在vnc的通道了,记住端口不能冲突,将vnc的端口修改为2,
wq保存退出。
下面进入虚拟机中操作:
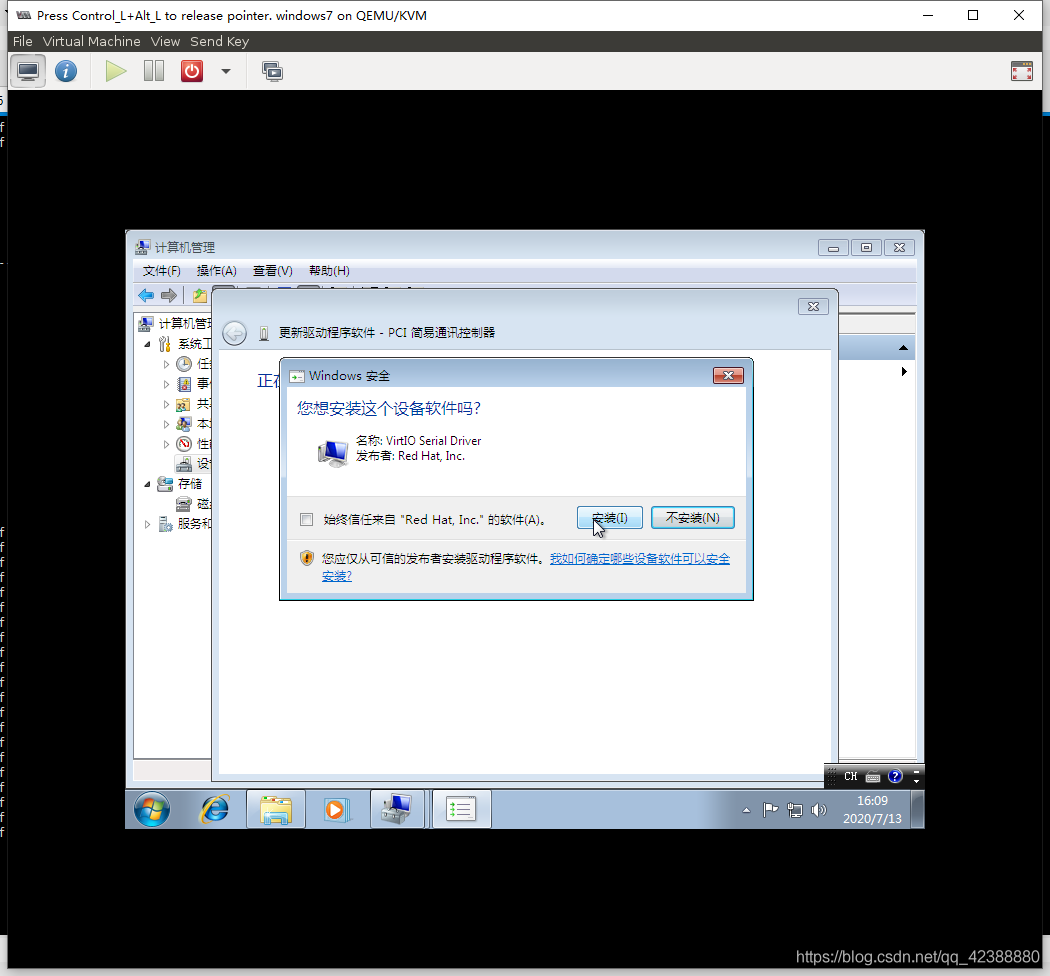
进入设备管理器中,图中鼠标处,应该有两栏,分别是PCI简单通信控制器,以及PCI设备,博主第一驱动更新完忘截图了。右击更新驱动程序。
针对PCI简单通信控制器,右击更新驱动程序,选择virtio-win中的vioserial一栏
在vioserial中选择对应windows7的目录,操作和下图针对PCI设备一样。
针对PCI设备如下:
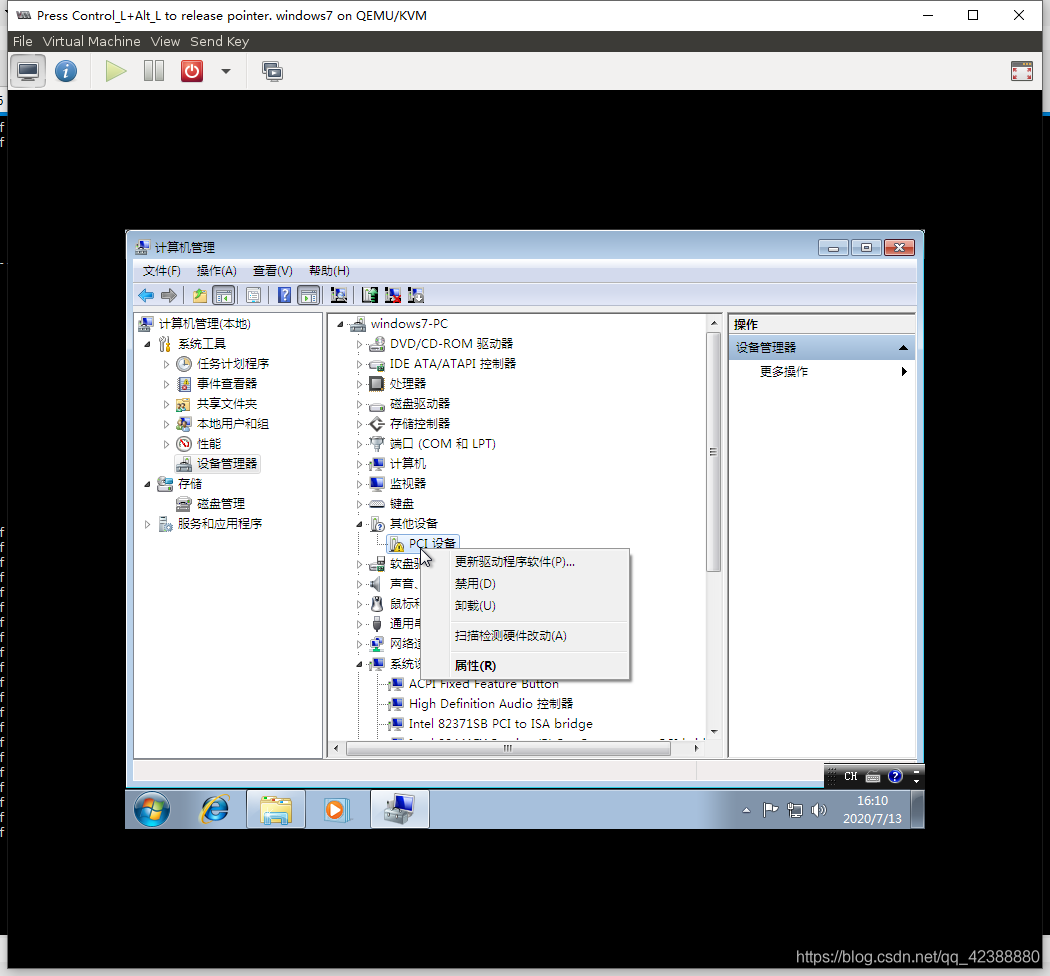
浏览virtio-win-0.1.171
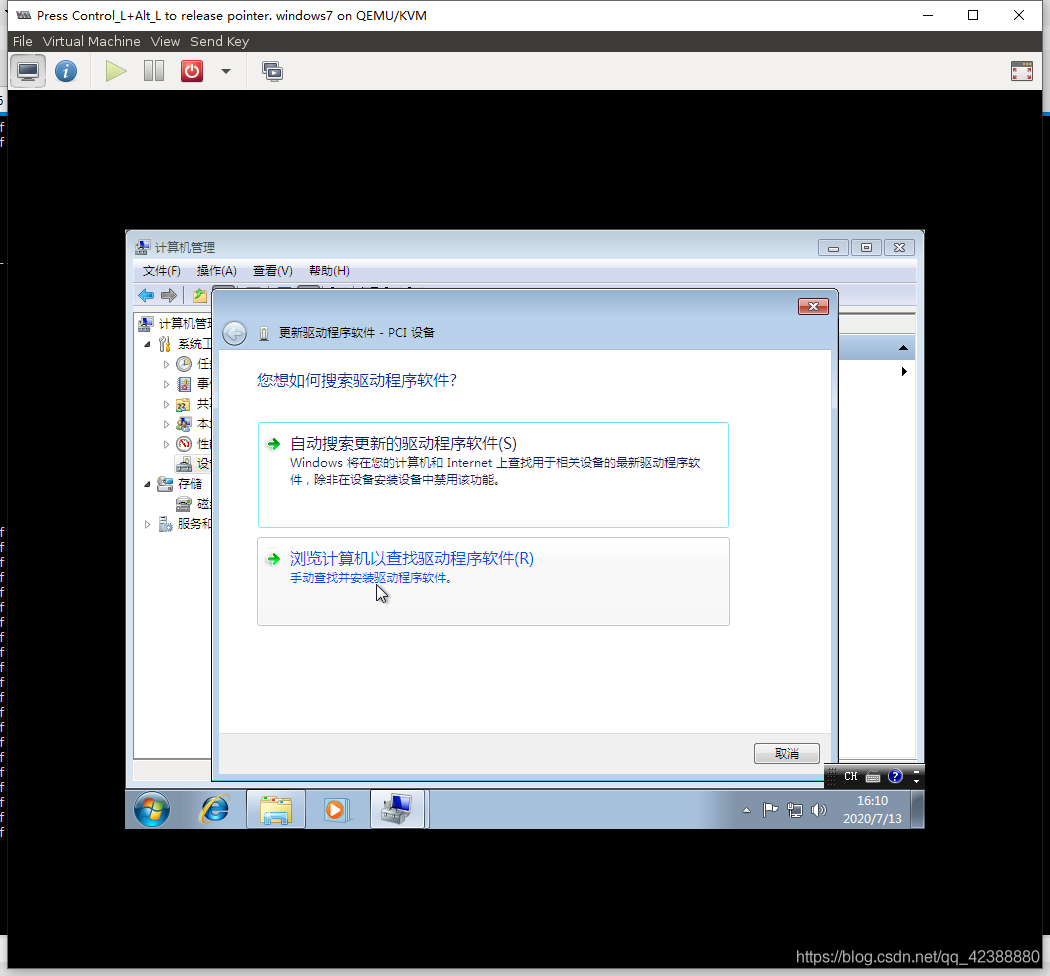

两个驱动更新完毕后,会出现下图所示:

在安装qemu-guest-agent前,配置结果如图


开始安装qemu-guest
在计算机中,选择DVD驱动,也就是virtio-win驱动,进入guest-agent文件下
双击qemu-ga-i386。
那么就是完成了qga的安装了。
宿主机终端输入:
virsh shutdown 虚拟机名

virsh start 虚拟机名
不要直接reboot,测试虚拟机能否命令行关闭。
等虚拟机启动后,终端检测:
virsh qemu-agent-command windows7(虚拟机名) '{"execute":"guest-network-get-interfaces"}'
返回结果:
{"return":[{"name":"����b�","ip-addresses":[{"ip-address-type":"ipv6","ip-address":"fe80::6884:5b02:38e:10c3%11","prefix":64},{"ip-address-type":"ipv4","ip-address":"192.168.11.162","prefix":20}],"statistics":{"tx-packets":17,"tx-errs":0,"rx-bytes":19216,"rx-dropped":0,"rx-packets":26,"rx-errs":0,"tx-bytes":26024,"tx-dropped":0},"hardware-address":"52:54:00:a7:d8:71"},{"name":"Loopback Pseudo-Interface 1","ip-addresses":[{"ip-address-type":"ipv6","ip-address":"::1","prefix":128},{"ip-address-type":"ipv4","ip-address":"127.0.0.1","prefix":8}],"statistics":{"tx-packets":0,"tx-errs":0,"rx-bytes":0,"rx-dropped":0,"rx-packets":0,"rx-errs":0,"tx-bytes":0,"tx-dropped":0}},{"name":"isatap.internal.example.org","ip-addresses":[{"ip-address-type":"ipv6","ip-address":"fe80::5efe:192.168.11.162%12","prefix":128}],"statistics":{"tx-packets":0,"tx-errs":0,"rx-bytes":0,"rx-dropped":0,"rx-packets":0,"rx-errs":0,"tx-bytes":0,"tx-dropped":0},"hardware-address":"00:00:00:00:00:00"}]}
到此,配置完windows7的镜像并能通过qemu获取IP
将此镜像先克隆一份,以防下部操作的失败,(关闭虚拟机)
virt-clone -o windows7 -n windows7-bak.qcow2 -f windows7-bak.qcow2
清除镜像的缓存:超级权限下操作
virt-sysprep -d windows7
这样就有了一份干净的定制镜像了。
将windows7的文件复制到别的目录下进行转换格式
cp windows7.qcow2 /home/master/
cd /home/master/
转换格式,删除镜像中多余空间
sudo qemu-img convert -O qcow2 windows7.qcow2 windows7_template.qcow2
这样就做好了windows7的模板镜像
reference:
1.KVM中windows7镜像制作并配置qemu后获取windows7虚拟机IP
2.KVM GPU Passthrough Tutorial
3.VFIO-GPU-PASSTHROUGH-KVM-GUIDE
4.kvm-gpu-passthrough-on-debian-buster.md
5.kvm