Flask是一个Python编写的Web 微框架,让我们可以使用Python语言快速实现一个网站或Web服务。
一、安装Flask模块
pip install flask
二、运行第一个Flask程序
打开一个Python文件,输入下面的内容并运行该文件。然后访问localhost:5000/index,我们应当可以看到浏览器上输出了Hello World
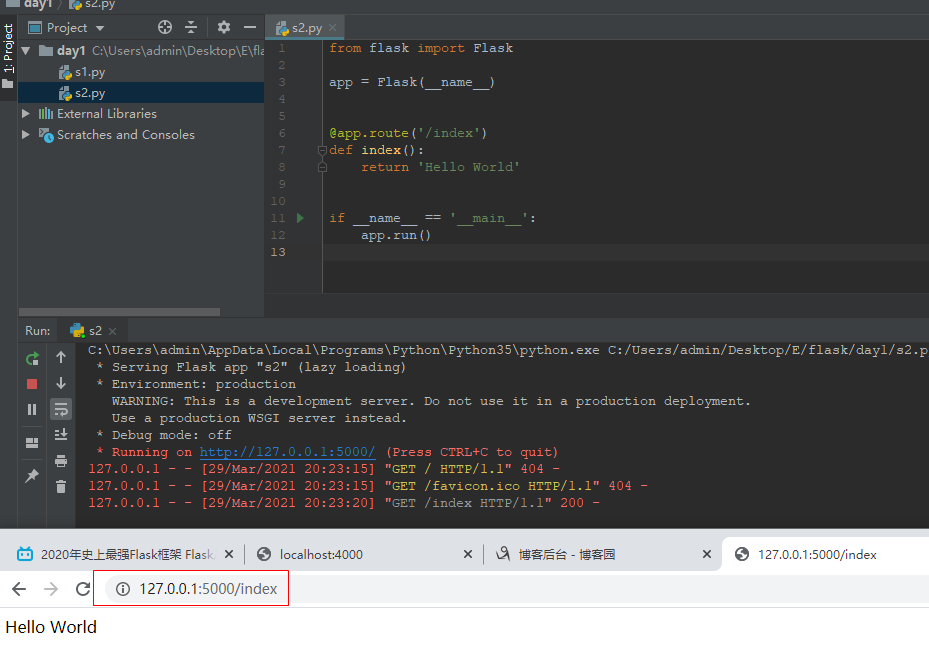
from flask import Flask

app = Flask(__name__)


@app.route('/index')
def index():
    return 'Hello World'


if __name__ == '__main__':
    app.run()
三、调试模式
Flask内置了调试模式,可以自动重载代码并显示调试信息。这需要我们开启调试模式:FLASK_DEBUG=1,然后再次运行程序,会看到有这样的输出。这时候如果再次修改代码,会发现这次Flask会自动重启。
* Restarting with stat
* Debugger is active!
* Debugger PIN: 157-063-180
* Running on http://127.0.0.1:5000/ (Press CTRL+C to quit)
四、Flask快速使用示例:用户登录
app.py:
from flask import Flask, render_template, request, redirect, session

app = Flask(__name__)
app.secret_key = '1121'   # 对session进行加密

USER_DICT = {
    '1': {'name': '大军', 'age': 18},
    '2': {'name': '大志', 'age': 25},
    '3': {'name': '梅凯', 'age': 10},
    '4': {'name': '院长', 'age': 69}
}


@app.route('/login', methods=['GET', 'POST'])
def index():
    if request.method == 'GET':
        return render_template('login.html')


    # request.form获取POST传过来的数据
    usr = request.form.get('usr')
    pwd = request.form.get('pwd')
    if usr == 'ZGS' and pwd == '1121':
        # 用户信息放入session
        session['usr_info'] = usr
        return redirect('/home')
    else:
        return render_template('login.html', msg='用户名或密码错误')
        # return render_template('login.html', **{'msg:'用户名或密码错误'})


@app.route('/home')
def home():
    usr_info = session.get('usr_info')
    if not usr_info:
        return redirect('/login')
    return render_template('index.html', usr_dict=USER_DICT)


@app.route('/logout')
def logout():
    del session['usr_info']
    return redirect('/login')


@app.route('/detail')
def detail():
    usr_info = session.get('usr_info')
    if not usr_info:
        return redirect('/login')

    uid = request.args.get('uid')
    info = USER_DICT.get(uid)
    return render_template('detail.html', info=info)


if __name__ == '__main__':
    app.run()
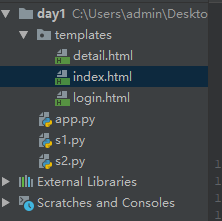
login.html:
<!DOCTYPE html>
<html lang="zh-cn">
<head>
    <meta charset="UTF-8">
    <meta http-equiv="X-UA-Compatible" content="IE=edge">
    <meta name="viewport" content="width=device-width, initial-scale=1">
    <title>休息系统,用户登录</title>
</head>
<body>
    <h1>登录</h1>
    <form method="post">
        <input type="text" name="usr">
        <input type="password" name="pwd">
        <input type="submit" value="提交"> {{msg}}
    </form>
</body>
</html>
index.html:
<!DOCTYPE html>
<html lang="zh-cn">
<head>
    <meta charset="UTF-8">
    <meta http-equiv="X-UA-Compatible" content="IE=edge">
    <meta name="viewport" content="width=device-width, initial-scale=1">
    <title>首页</title>
</head>
<body>
    <ul>
        {% for k,v in usr_dict.items()%}
            <li> {{v.name}} <a href="/detail?uid={{k}}">查看详细</a></li>
        {% endfor %}
    </ul>
</body>
</html>
detail.html:
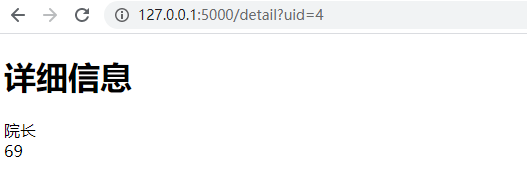
<!DOCTYPE html>
<html lang="zh-cn">
<head>
    <meta charset="UTF-8">
    <meta http-equiv="X-UA-Compatible" content="IE=edge">
    <meta name="viewport" content="width=device-width, initial-scale=1">
    <title>详细信息</title>
</head>
<body>
    <h1>详细信息</h1>
    <div>{{info.name}}</div>
    <div>{{info.age}}</div>
</body>
</html>
页面效果:
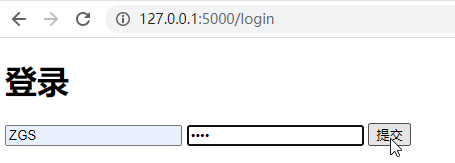
输入用户名密码,点击登录:
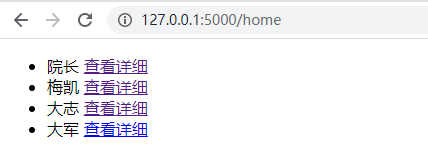
点击查看详情:
五、各参数解释
1、路由:
路由通过使用Flask的app.route装饰器来设置
2、URL:
在Web程序中常常需要获取某个页面的URL,在Flask中需要使用url_for('方法名')来构造对应方法的URL
3、HTTP方法:
需要处理具体的HTTP方法,在Flask中使用route装饰器的method参数设置
@app.route('/login', methods=['GET', 'POST'])
def index():
    if request.method == 'GET':
        return render_template('login.html')
4、静态文件:
Web程序中常常需要处理静态文件,在Flask中需要使用url_for函数并指定static端点名和文件名。在下面的例子中,实际的文件应放在static/文件夹下。
url_for('static', filename='style.css')
5、生成模板
Flask默认使用Jinja2作为模板,模板文件需要放在templates文件夹下。使用 Jinja 模板,只需要使用render_template函数并传入模板文件名和参数名。
from flask import Flask, render_template, request, redirect, session
app = Flask(__name__)

USER_DICT = {
    '1': {'name': '大军', 'age': 18},
    '2': {'name': '大志', 'age': 25},
    '3': {'name': '梅凯', 'age': 10},
    '4': {'name': '院长', 'age': 69}
}


@app.route('/home')
def home():
    usr_info = session.get('usr_info')
    if not usr_info:
        return redirect('/login')
    return render_template('index.html', usr_dict=USER_DICT)
相应模板:
<!DOCTYPE html>
<html lang="zh-cn">
<head>
    <meta charset="UTF-8">
    <meta http-equiv="X-UA-Compatible" content="IE=edge">
    <meta name="viewport" content="width=device-width, initial-scale=1">
    <title>首页</title>
</head>
<body>
    <ul>
        {% for k,v in usr_dict.items()%}
            <li> {{v.name}} <a href="/detail?uid={{k}}">查看详细</a></li>
        {% endfor %}
    </ul>
</body>
</html>
页面访问:
6、Request 对象
Request 对象是一个全局对象,利用它的属性和方法,我们可以方便的获取从页面传递过来的参数。
method属性会返回HTTP方法的类似,例如post和get。
form属性是一个字典,如果数据是POST类型的表单,就可以从form属性中获取:request.form.get('usr')。如果数据是由GET方法传送过来的,可以使用args属性获取:request.args.get(uid)