每次看到别人的招聘信息,好多都是要求熟练使用Core Animation(CA)。木办法呀,那就学习吧。看到那些很长的名字的类还有很长的方法等等等等,就头疼,觉得太难了。你是不是也有这种情况?
我只想说:世上无难事,只怕有心人。只要我们能够静下心认真的看看,其实也不是那么难的。不罗嗦了。开始正题:
------------------------------------------------------------------------文章比较长,做好心理准备哈------------------------------------------------------------------------
这里主要介绍以下几块:(参考《iOS图形图像、动画和多媒体编程技术最佳实践》)
1、视图动画
2、iOS7自定的视图的过渡动画
3、iOS7 UIKit力学
4、iOS 7 运动效果(Motion Effects)
5、Core Animation
废话不多说,开始第一块:
视图动画
最简单的动画:
- (void)presentViewController:(UIViewController *)viewControllerToPresent animated: (BOOL)flag completion:(void (^)(void))completion NS_AVAILABLE_IOS(5_0);
简单把,我们用代码进行视图切换的时候都会用到这个,其中的flag就是用来开启动画的。所以平常我们都会用到动画,只不过是没有注意罢了。
下面来看个比较简单的一个动画:
先看看要实现的效果:

怎么实现的呢?看看代码:
- (IBAction)buttonAction:(id)sender {
//    //方法1
//    _myButton.alpha = 0;
//    [UIView beginAnimations:@"animation" context:nil];
//
//    [UIView setAnimationDuration:1.5];
//    [UIView setAnimationDelegate:self];
//    [UIView setAnimationDidStopSelector:@selector(showButton)];
//        _ballLabel.frame = CGRectMake(_ballLabel.frame.origin.x, _ballLabel.frame.origin.y+200*flag, _ballLabel.frame.size.width, _ballLabel.frame.size.height);
//    flag = -flag;
//    [UIView commitAnimations];

//    //方法2:没控制按钮隐藏显示
//    [UIView animateWithDuration:1.5 animations:^{
//        CGRect frame = self.ballLabel.frame;
//        frame.origin.y += 200*flag;
//        self.ballLabel.frame = frame;
//        flag = -flag;
//    }];
    //动画3:当小球动时按钮消失,当小球不动时按钮出现
     _myButton.alpha = 0;
    [UIView animateWithDuration:1.5 animations:^{

        CGRect frame = self.ballLabel.frame;
        frame.origin.y +=200*flag;
        self.ballLabel.frame = frame;
        flag = -flag;
    } completion:^(BOOL finished) {
        _myButton.alpha = 1;
    }];
}
- (void)showButton {
    _myButton.alpha = 1;
}
上面的三种方法都能实现相同的效果。
在iOS4之前,如果我们想获取动画开始和结束事件,我们需要设置委托对象,然后通过下面两个方法来设置:
+ (void)setAnimationWillStartSelector:(SEL)selector;                // default = NULL. -animationWillStart:(NSString *)animationID context:(void *)context
+ (void)setAnimationDidStopSelector:(SEL)selector;
第一个是动画刚开始要触发的动作,第二个市动画结束时要触发的动作。
后来iOS升级后可以在回调中进行处理了。就像动画3一样。
如果针对我们平时用到的简单动画,用UIView这种就可以了。
简单的动画就这样完了????里面的额函数什么意思呢???那就看一下最重要的两个吧。
+ (void)beginAnimations:(NSString *)animationID context:(void *)context;
标记动画开始(或执行)块的开头。
+ (void)commitAnimations;
标记动画开始(执行)块的结束,并且安排动画执行。
我们可以在中间写上一些自定义的东西。比如我们需要设置动画重复次数,开始时间,或者其他的。
------------------------------------------------应该能够接受吧,耐心看看------------------------------------------------
看看第三种方法:
+ (void)animateWithDuration:(NSTimeInterval)duration animations:(void (^)(void))animations completion:(void (^)(BOOL finished))completion NS_AVAILABLE_IOS(4_0);
这个方法高度封装,你可以不用上面说的第一种方法来标记开始和结束了。直接用这个方法。
duration:动画执行的时间。
animations:后面的block是动画执行的内容。
completion:后面的block是当动画结束时的操作。
个人建议还是使用下面那种方法,毕竟新版本的东西。
累么?不累看看下面的过渡动画。
过渡动画就是两个视图进行切换的时候的动画。先看看效果:

直接看看代码:
/**
 动画还有很多属性:例如动画曲线、过渡(界面跳转)动画、重复次数和自动反转等。
 */
- (IBAction)transitionAction1:(UIButton *)sender {
    [UIView beginAnimations:@"animagtionID" context:nil];
    [UIView setAnimationDuration:1.0];
    [UIView setAnimationCurve:UIViewAnimationCurveEaseIn];  //设置动画曲线:这里有四种UIViewAnimationCurveEaseInOut:缓入缓出。设置出场或者入场的速度。
    [UIView setAnimationRepeatAutoreverses:NO];   //如果设置成yes,那么会执行在返回。
    switch (sender.tag) {
        case 1:
            [UIView setAnimationTransition:UIViewAnimationTransitionCurlUp forView:self.view cache:YES];
            break;
        case 2:
            [UIView setAnimationTransition:UIViewAnimationTransitionFlipFromLeft forView:self.view cache:YES];
            break;
        case 3:
            [UIView setAnimationTransition:UIViewAnimationTransitionCurlDown forView:self.view cache:YES];
            break;
        case 4:
            [UIView setAnimationTransition:UIViewAnimationTransitionFlipFromRight forView:self.view cache:YES];
            break;
        default:
            break;
    }
    [UIView commitAnimations];
    //在ios4后添加了+transitionWithView:duration:options:animations:completion:指定的视图容器内创建动画过渡。+transitionFromView:toView:duration:options:completion:在指定的两个视图之间创建动画过渡。

}
其实也很简单,只不过在原来简单动画的基础上添加了一个:
+ (void)setAnimationTransition:(UIViewAnimationTransition)transition forView:(UIView *)view cache:(BOOL)cache;
typedef NS_ENUM(NSInteger, UIViewAnimationTransition) {
    UIViewAnimationTransitionNone,
    UIViewAnimationTransitionFlipFromLeft,
    UIViewAnimationTransitionFlipFromRight,
    UIViewAnimationTransitionCurlUp,
    UIViewAnimationTransitionCurlDown,
};
这就是UIViewAnimationTransition的枚举。里面就是这几种类型。感兴趣可以自己试试。
----------------------------------------------------------------------打断一下----------------------------------------------------------------------
transition:过渡;转变;转换;变调的意思。
----------------------------------------------------------------------打断结束----------------------------------------------------------------------
所以遇到animationTransition不要觉得它很难以理解:就是动画过渡的意思。
接下来的iOS7自定义动画只是简单介绍一下吧。因为。。。。。。。。。。。。。。
视图过渡有两种情况:树形结构导航和模态导航。
树形的就类似与表格点击cell进入另一个视图。是通过UINavigationController控制器堆栈实现的视图过渡。
模态导航:是通过UIViewController控制器实现的。
树形的自定义动画需要涉及两个协议:UIViewControllerAnimatedTransitioning和UINavigationAnimatedTransitioning协议。
@protocol UIViewControllerAnimatedTransitioning <NSObject>

// This is used for percent driven interactive transitions, as well as for container controllers that have companion animations that might need to
// synchronize with the main animation.
- (NSTimeInterval)transitionDuration:(id <UIViewControllerContextTransitioning>)transitionContext;
// This method can only  be a nop if the transition is interactive and not a percentDriven interactive transition.
- (void)animateTransition:(id <UIViewControllerContextTransitioning>)transitionContext;


@optional
这是UIViewControllerAnimatedTransitioning的协议内容。要想去自定义动画就去实现这两个代理方法。
我只知道下面两句:
  UIViewController *fromVC = [transitionContext viewControllerForKey:UITransitionContextFromViewControllerKey];
    UIViewController *toVC = [transitionContext viewControllerForKey:UITransitionContextToViewControllerKey];
通过transitionContext可以得到从哪个视图的那个视图和到哪个视图的那个视图。。。(有点绕,,,)
然后剩下的多查看一些资料学习把。
模态导航自定义过渡动画需要在视图控制器实现UIViewControllerTransitioningDelegate协议。
@protocol UIViewControllerTransitioningDelegate <NSObject>

@optional
- (id <UIViewControllerAnimatedTransitioning>)animationControllerForPresentedController:(UIViewController *)presented presentingController:(UIViewController *)presenting sourceController:(UIViewController *)source;

- (id <UIViewControllerAnimatedTransitioning>)animationControllerForDismissedController:(UIViewController *)dismissed;

- (id <UIViewControllerInteractiveTransitioning>)interactionControllerForPresentation:(id <UIViewControllerAnimatedTransitioning>)animator;

- (id <UIViewControllerInteractiveTransitioning>)interactionControllerForDismissal:(id <UIViewControllerAnimatedTransitioning>)animator;

- (UIPresentationController *)presentationControllerForPresentedViewController:(UIViewController *)presented presentingViewController:(UIViewController *)presenting sourceViewController:(UIViewController *)source NS_AVAILABLE_IOS(8_0);

@end
这个是协议内容。具体的实现自定义模态视图就是在这些代理方法中设置的。
------------------------------------------------------------------------------UIKit力学来了------------------------------------------------------------------------------
先复习一下英语:
dynamics:动力学,力学。
attachment:附件;依恋
collision:碰撞,冲突
gravity:重力
snap:
突然折断,拉断;猛咬;啪地关上。
开始力学学习。
UIKit力学可以使得视图对象具有真实的物理运动效果。在游戏中能够实现物理效果的技术叫物理引擎。
力学中用到的类:
UIDynamicAnimator:它可以理解为动态的动画师,它为他的动态的元素提供物理相关的能力和动画,并且提供动画环境。是用来存放要使用的力学行为(UIDynamicBehavior)。
UIDynamicBehavior有6个类:
UIAttachmentBehavior:吸附
UICollisionBehavior:碰撞
UIGravityBehavior:重力
UIPushBehavior:推
UISnapBehavior:甩
UIDynamicItemBehavior:
对于每个力学行为都有多个力学项目:(UIDynamicItem)。其中UIDynamicAnimator的ReferenceView属性指向了所要呈现的视图。
总体概括:一个UIDynamicAnimator可以包含多个力学行为,通过addBehavior方法添加力学行为。一个力学行为可以包括多个力学项目,通过addItem添加。还有UIDynamicAnimator与ReferenceView之间是1:1关系,即一个UIDynamicAnimator只有一个ReferenceView与之对应。
--------------------------------------------------下面的行为触发为了方便都是在视图加载出现后触发的--------------------------------------------------
重力行为:
- (void)viewDidLoad {
    [super viewDidLoad];
    _gravityButton.backgroundColor = [UIColor blackColor];
    _gravityButton.layer.cornerRadius = _gravityButton.frame.size.height/2;


}
- (void)viewDidAppear:(BOOL)animated {
    [super viewDidAppear:YES];
    animator = [[UIDynamicAnimator alloc] initWithReferenceView:self.view];   //存放要使用的力学行为
    gravity = [[UIGravityBehavior alloc] init];   //新建一个重力力学行为
    [animator addBehavior:gravity];   //将重力力学行为添加到力学行为里
    //设置重力方向
    CGVector gravityDirection = {0.0,0.5};//设置重力方向
    [gravity setGravityDirection:gravityDirection];
    [gravity addItem:_gravityButton];   //将_gravityButton对象添加到力学行为gravity对象中,其中_gravityButton是模拟重力行为的视图对象。
}
主要是我用了一个button,然后刚进入这个界面,button就会由于重力作用自由落体。效果如下:

简单介绍一下实现:
首先需要创建一个动画师(UIDynamicAnimator)用于存放要使用的重力行为。referenceView你可以理解为为动态动画师准备的视图。
然后是设置重力方向,其中的CGVector:
struct CGVector {
  CGFloat dx;
  CGFloat dy;
};
就是一个结构体而已。定义了重力的 方向。(感兴趣的可以自己调整查看效果)
然后就是把重力行为添加到animator中。
其中
[gravity addItem:_gravityButton]; //将_gravityButton对象添加到力学行为gravity对象中,其中_gravityButton是模拟重力行为的视图对象。
添加元素你就可以理解成那个对象需要使用该力学行为,就把那个元素添加进去。
---------------------------------------------------------------重力行为结束---------------------------------------------------------------
碰撞行为:
- (void)viewDidLoad {
    [super viewDidLoad];
    _myButton.layer.cornerRadius = _myButton.frame.size.height/2;

    // Do any additional setup after loading the view.
}
//碰撞行为中特有的方法是碰撞检测,我们可以检测运动的物体和ReferenceView:[collsion setTranslatesReferenceBoundsIntoBoundary:YES];
//检测是否与其他物体边界发生碰撞的方法:
/*
 CGPoint p1 = barrier.frame.origin;
 CGPoint p2 = CGPointMake(p1*x+barrier.frame.size.width,p1.y);
 [collision addBoundaryWithdIdentifier:@"barrier" fromPoint:p1 toPoint:p2];
 */
- (void)viewDidAppear:(BOOL)animated {
    [super viewDidAppear:YES];
    animator = [[UIDynamicAnimator alloc] initWithReferenceView:self.view];
    garvity = [[UIGravityBehavior alloc] initWithItems:@[_myButton]];
    CGVector vector = {0.0,1.9};
    [garvity setGravityDirection:vector];
    [animator addBehavior:garvity];


    //碰撞行为
    collision = [[UICollisionBehavior alloc] initWithItems:@[_myButton]];
    collision.translatesReferenceBoundsIntoBoundary = YES;
    [animator addBehavior:collision];
}
效果图:

具体实现就不多说了,加了一个重力行为,然后落地后设置碰撞。
这里主要介绍亮点:
第一:检测是否与ReferenceView边界发生碰撞方法如下:
[collision setTranslatesReferenceBoundsIntoBoundary:YES];
第二:检测是否与其他物体边界发生碰撞方法如下:
 CGPoint p1 = barrier.frame.origin;
 CGPoint p2 = CGPointMake(p1*x+barrier.frame.size.width,p1.y);
 [collision addBoundaryWithdIdentifier:@"barrier" fromPoint:p1 toPoint:p2];
其中的barrier就是其他视图对象。具体可以理解一下慢慢。
---------------------------------------------------------------碰撞行为结束---------------------------------------------------------------
吸附行为:
- (void)viewDidLoad {
    [super viewDidLoad];
//    self.view.backgroundColor = []
}
- (void)viewDidAppear:(BOOL)animated {
    [super viewDidAppear:YES];
    animator = [[UIDynamicAnimator alloc] initWithReferenceView:self.view];

    //重力行为
    gravity = [[UIGravityBehavior alloc] initWithItems:@[_boxImageView]];
    [animator addBehavior:gravity];

    //碰撞行为
    collision = [[UICollisionBehavior alloc] initWithItems:@[_boxImageView]];
    [collision addBoundaryWithIdentifier:@"barrier" fromPoint:_barrier.frame.origin toPoint:CGPointMake(_barrier.frame.origin.x+_barrier.frame.size.width, _barrier.frame.origin.y)];

    collision.translatesReferenceBoundsIntoBoundary = YES;
    collision.collisionDelegate = self;
    [animator addBehavior:collision];
    /*
     UIDynamicItemBehavior是行为限制,
     */
    UIDynamicItemBehavior *itemBehaver = [[UIDynamicItemBehavior alloc] initWithItems:@[_boxImageView]];
    itemBehaver.elasticity = 0.5;
    [animator addBehavior:itemBehaver];
}
#pragma mark -
- (void)collisionBehavior:(UICollisionBehavior *)behavior beganContactForItem:(id<UIDynamicItem>)item withBoundaryIdentifier:(id<NSCopying>)identifier atPoint:(CGPoint)p {
    attach = [[UIAttachmentBehavior alloc] initWithItem:_attachPoint attachedToItem:_boxImageView];

    [animator addBehavior:attach];
}
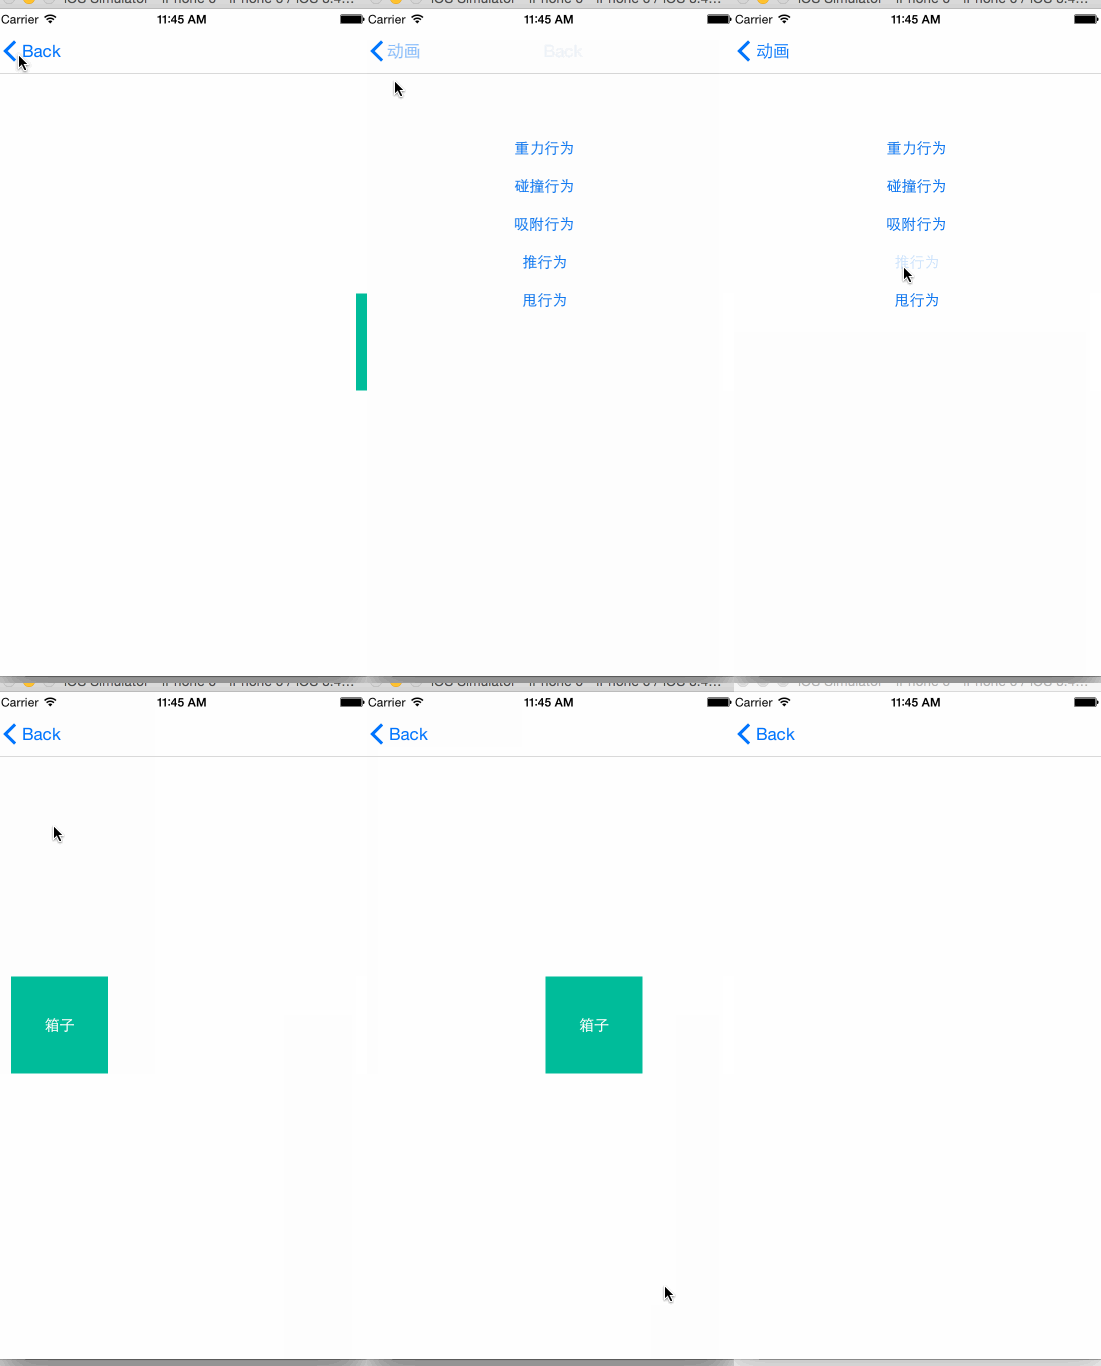
效果如下:

其中的图片是_boxImageView。方块是_attachPoint。
这里我们需要实现UICollisionBehaviorDelegate代理方法。上面有个UIDynamicItemBehavior类。可以暂时把它理解为行为限制类。一会再说:
---------------------------------------------------------------吸附行为结束---------------------------------------------------------------
推行为:
/*
 推行为可以让视图对象朝着某个方向运行,这个推力有瞬间和持续两种方式。
 设置推行为需要考虑方向和力的大小。
 */
- (void)viewDidAppear:(BOOL)animated {
    [super viewDidAppear:YES];
    animator = [[UIDynamicAnimator alloc] initWithReferenceView:self.view];
    push = [[UIPushBehavior alloc] initWithItems:@[_box] mode:UIPushBehaviorModeContinuous];
    CGVector pushDirection = {0.5,0};
    [push setPushDirection:pushDirection];
    [push setMagnitude:5.0f];
    [animator addBehavior:push];
}
效果如下:

这里说一下:推行为有瞬间和持续两种方式。
瞬间行为:UIPushBehaviorModeInstantaneous:运动比较快。
持续行为:UIPushBehaviorModeContinuous:由慢变快
还有setMagnitude:方法是用来设置推的力度。
---------------------------------------------------------------推行为结束---------------------------------------------------------------
甩行为:
/*
 能够时物体朝着某个目标点抛出甩出。并且有瞬间加速度,由慢及快,再由快及慢,最后停止在目标点。
 */
- (void)viewDidAppear:(BOOL)animated {
    CGPoint p = [[self view] center];
    animator = [[UIDynamicAnimator alloc] initWithReferenceView:self.view];
    snap = [[UISnapBehavior alloc] initWithItem:_testButton snapToPoint:p];
    [animator addBehavior:snap];
}
效果如下:

这里没什么可说的,看一下代码就行了。大概甩的动作就是:
能够时物体朝着某个目标点抛出甩出。并且有瞬间加速度,由慢及快,再由快及慢,最后停止在目标点。
---------------------------------------------------------------甩行为结束---------------------------------------------------------------
UIDynamicItemBehavior:
它是用来设置力学行为参数的。参数包括:弹性系数、摩擦系数、阻力和密度等物理属性
density:密度:
elasticity:弹力系数0-1.0表示没有反弹,1表示完全弹性碰撞
friction:摩擦系数
resistance:阻力,CGFLOAT_MAX表示最大阻力
allowRotation:是否允许旋转。
angularResistance:角阻力,物理旋转时候,旋转方向的阻力。
---------------------------------------------------------------力学结束---------------------------------------------------------------
现在看一下:iOS7运动效果:(Motion Effects)
运动效果主要提供的API是UIInterpolatingMotionEffect类。
UIView可以调用addMotionEffect:方法来添加运动效果。看例子:
- (void)viewDidLoad {
    [super viewDidLoad];
//    [[UIApplication sharedApplication] setStatusBarHidden:YES];
    //设置图片的偏移量
    UIInterpolatingMotionEffect * imageEffe = [[UIInterpolatingMotionEffect alloc] initWithKeyPath:@"center.x" type:UIInterpolatingMotionEffectTypeTiltAlongHorizontalAxis];
    imageEffe.maximumRelativeValue = @50.0;
    imageEffe.minimumRelativeValue = @-50.0;
    [self.imageView addMotionEffect:imageEffe];


    UIInterpolatingMotionEffect *nameEffe = [[UIInterpolatingMotionEffect alloc] initWithKeyPath:@"center.x" type:UIInterpolatingMotionEffectTypeTiltAlongHorizontalAxis];
    nameEffe.maximumRelativeValue = @100.0;
    nameEffe.minimumRelativeValue = @-100.0;
    [self.nameButton addMotionEffect:nameEffe];
}
这个在模拟器无法查看,只能真机查看,当左右晃动设备的时候,里面的图片也在移动。
---------------------------------------------------------------------------不行了---------------------------------------------------------------------------
Core Animation下一个博客在介绍吧。因为它很重要。很重要。很重要。
添加个源码把:http://pan.baidu.com/s/1hq2HN4g
附
1.水波纹效果示例。