1、Config配置中心概念
(1)概念
SpringCloud的Config分为服务端和客户端两部分,服务端也称为分布式配置中心,它是一个独立的微服务应用,用来连接配置服务器并为客户端提供获取配置信息,加密/解密信息等访问接口。客户端则是通过指定的配置中心来管理应用资源,以及与业务相关的配置内容,并在启动的时候从配置中心获取和加载配置信息配置服务器默认采用git来存储配置信息,这样就有助于对环境配置进行版本管理,并且可以通过git客户端工具来方便的管理和访问配置内容(各个微服务不再是独立的个体而是受到Config Server的管理,Config Server的配置信息是从Git上获取的)
(2)优点
集中管理配置文件
不同环境不同配置,动态化的配置更新,分环境部署
运行期间动态调整配置,不再需要在每个服务部署的机器上编写配置文件,服务会向配置中心统一拉取配置自己的信息
当配置发生变动时,服务不需要重启即可感知到配置的变化并应用新的配置
将配置信息以REST接口的形式暴露
2、SpringCloud Config服务端的配置
(1)在Github上新建一个仓库
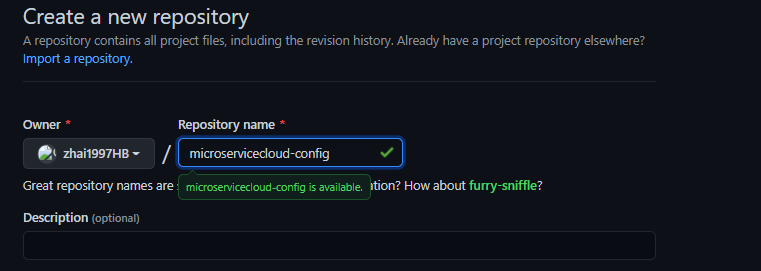
(2)复制仓库的地址
git@github.com:zhai1997HB/microservicecloud-config.git
(3)将仓库拉取到本地,并新建application.yml文件,配置后将配置信息提交到Github
spring:
  profiles:
    active:
      - dev
---
spring:
  profiles: dev     #开发环境
  application:
    name: microservicecloud-config-zhb-dev
---
spring:
  profiles: test   #测试环境
  application:
    name: microservicecloud-config-zhb-test
(4)新建模块(myspringcloud-config-3344)
添加依赖:
<dependencies>
        <dependency>
            <groupId>junit</groupId>
            <artifactId>junit</artifactId>
            <version>4.11</version>
            <scope>test</scope>
        </dependency>
        <dependency>
            <groupId>org.springframework.cloud</groupId>
            <artifactId>spring-cloud-config-server</artifactId>
        </dependency>
        <!-- 图形化监控 -->
        <dependency>
            <groupId>org.springframework.boot</groupId>
            <artifactId>spring-boot-starter-actuator</artifactId>
        </dependency>
        <!-- 熔断 -->
        <dependency>
            <groupId>org.springframework.cloud</groupId>
            <artifactId>spring-cloud-starter-hystrix</artifactId>
        </dependency>
        <dependency>
            <groupId>org.springframework.cloud</groupId>
            <artifactId>spring-cloud-starter-eureka</artifactId>
        </dependency>
        <dependency>
            <groupId>org.springframework.cloud</groupId>
            <artifactId>spring-cloud-starter-config</artifactId>
        </dependency>
        <dependency>
            <groupId>org.springframework.boot</groupId>
            <artifactId>spring-boot-starter-jetty</artifactId>
        </dependency>
        <dependency>
            <groupId>org.springframework.boot</groupId>
            <artifactId>spring-boot-starter-web</artifactId>
        </dependency>
        <dependency>
            <groupId>org.springframework.boot</groupId>
            <artifactId>spring-boot-starter-test</artifactId>
        </dependency>
        <!-- 热部署插件 -->
        <dependency>
            <groupId>org.springframework</groupId>
            <artifactId>springloaded</artifactId>
        </dependency>
        <dependency>
            <groupId>org.springframework.boot</groupId>
            <artifactId>spring-boot-devtools</artifactId>
        </dependency>
    </dependencies>
新建配置文件:
server:
  port: 3344

spring:
  application:
    name:  myspringcloud-config
  cloud:
    config:
      server:
        git:
          uri: git@github.com:zhai1997HB/microservicecloud-config.git
创建启动类:
@SpringBootApplication
@EnableConfigServer
public class ConfigStartSpringCloudApp {
    public static void main(String[] args) {
        SpringApplication.run(ConfigStartSpringCloudApp.class,args);
    }
}
(5)测试
http://localhost:3344/application-dev.yml
能够访问到Github上的配置文件的信息
读取配置文件的规则:
/{application}-{profile}.yml
/{application}/{profile}[/{label}]
/{label}/{application}-{profile}.yml
3、SpringCloud Config客户端配置
(1)新建yml配置文件并将该配置文件上传到git仓库
spring:
  profiles:
    active:
      - dev
---
server:
  port: 8201
spring:
  profiles: dev
  application:
    name: myspringcloud-config-client
eureka:
  client:
    service-url:
      defaultZone: http://localhost:7001/eureka/
---
server:
  port: 8202
spring:
  profiles: test
  application:
    name: myspringcloud-config-client
eureka:
  client:
    service-url:
      defaultZone: http://localhost:7001/eureka/
(2)新建myspringcloud-config-client-3355模块
添加客户端依赖:
   <dependency>
     <groupId>org.springframework.cloud</groupId>
     <artifactId>spring-cloud-starter-config</artifactId>
   </dependency>
(3)新建文件bootstrap.yml文件
spring:
  cloud:
    config:
      name: microservicecloud-config-client #需要从github上读取的资源名称,注意没有yml后缀名
      profile: dev   #本次访问的配置项
      label: master
      uri: http://localhost:3344  #本微服务启动后先去找3344号服务,通过SpringCloudConfig获取GitHub的服务地址
bootstrap.yml是系统级的,优先级更加高。新增了一个`bootstrap.yml`文件,能够保证`Bootstrap Context`和`Application Context`配置的分离