公司有个SpringBoot项目需要加个监控,网上找了下发现大家都在推荐SpringBootAdmin。SpringBoot Admin是开源社区孵化的项目,用于对SpringBoot应用的管理和监控。SpringBoot Admin 分为服务端(spring-boot-admin-server)和客户端(spring-boot-admin-client),服务端和客户端之间采用http通讯方式实现数据交互;单体项目中需要整合spring-boot-admin-client才能让应用被监控。在SpringCloud项目中,spring-boot-admin-server 是直接从注册中心抓取应用信息,不需要每个微服务应用整合spring-boot-admin-client就可以实现应用的管理和监控。
本文只叙述SpringBoot Admin 管理和监控单体应用 ,不涉及SpringCloud相关的内容 。
一、快速入门
1.1 SpringBoot Admin服务端的搭建
(1) Maven依赖说明
SpringBoot版本
    <parent>
        <groupId>org.springframework.boot</groupId>
        <artifactId>spring-boot-starter-parent</artifactId>
        <version>2.2.10.RELEASE</version>
        <relativePath/> <!-- lookup parent from repository -->
    </parent>
6
1
<parent>2
<groupId>org.springframework.boot</groupId>3
<artifactId>spring-boot-starter-parent</artifactId>4
<version>2.2.10.RELEASE</version>5
<relativePath/> <!-- lookup parent from repository -->6
</parent> 添加SpringBootAdmin server依赖及SpringBoot web 依赖
    <dependency>
        <groupId>org.springframework.boot</groupId>
        <artifactId>spring-boot-starter-web</artifactId>
    </dependency>

    <!--这里由于我的springboot版本是2.2.10.RELEASE,所以 springboot admin 也要用2.2.x版-->
    <dependency>
        <groupId>de.codecentric</groupId>
        <artifactId>spring-boot-admin-starter-server</artifactId>
        <version>2.2.4</version>
    </dependency>
1
<dependency>2
<groupId>org.springframework.boot</groupId>3
<artifactId>spring-boot-starter-web</artifactId>4
</dependency>5
6
<!--这里由于我的springboot版本是2.2.10.RELEASE,所以 springboot admin 也要用2.2.x版-->7
<dependency>8
<groupId>de.codecentric</groupId>9
<artifactId>spring-boot-admin-starter-server</artifactId>10
<version>2.2.4</version>11
</dependency>(2)application.yml中配置端口
# 指定端口
server:
	port: 23333
1
# 指定端口2
server3
port23333(3)编写启动类并开启SpringBootAdminServer
    package com.zcode.monitor.server;
    import de.codecentric.boot.admin.server.config.EnableAdminServer;
    import org.springframework.boot.SpringApplication;
    import org.springframework.boot.autoconfigure.SpringBootApplication;
    /**
     * AdminServerApplication
     * @author ZENG.XIAO.YAN
     * @version 1.0
     * @Date 2020-11-12
     */
    @EnableAdminServer // 开启 springboot admin 服务端
    @SpringBootApplication
    public class AdminServerApplication {

        public static void main(String[] args) {
            SpringApplication.run(AdminServerApplication.class,args);
        }
    }
1
package com.zcode.monitor.server;2
import de.codecentric.boot.admin.server.config.EnableAdminServer;3
import org.springframework.boot.SpringApplication;4
import org.springframework.boot.autoconfigure.SpringBootApplication;5
/**6
* AdminServerApplication7
* @author ZENG.XIAO.YAN8
* @version 1.09
* @Date 2020-11-1210
*/11
// 开启 springboot admin 服务端12
13
public class AdminServerApplication {14
15
public static void main(String[] args) {16
SpringApplication.run(AdminServerApplication.class,args);17
}18
}(4)浏览器访问测试

1.2 SpringBootAdmin client端搭建
备注:所谓的 client端就是指我们需要被监控的应用端。这里我们写一个简单点的SpringBoot web应用做演示
(1)Maven依赖说明
SpringBoot版本如下
    <parent>
        <groupId>org.springframework.boot</groupId>
        <artifactId>spring-boot-starter-parent</artifactId>
        <version>2.2.10.RELEASE</version>
        <relativePath/> <!-- lookup parent from repository -->
    </parent>
1
<parent>2
<groupId>org.springframework.boot</groupId>3
<artifactId>spring-boot-starter-parent</artifactId>4
<version>2.2.10.RELEASE</version>5
<relativePath/> <!-- lookup parent from repository -->6
</parent> 添加SpringBootAdmin client 依赖及SpringBoot web 依赖。这里不需要添加SpringBoot actuator 依赖,因为SpringBootAdmin client里面已经包含了actuator相关依赖
        <dependency>
            <groupId>org.springframework.boot</groupId>
            <artifactId>spring-boot-starter-web</artifactId>
        </dependency>

        <!--这里由于我的springboot版本是2.2.10.RELEASE,所以 springboot admin 也要用2.2.x版-->
        <dependency>
            <groupId>de.codecentric</groupId>
            <artifactId>spring-boot-admin-starter-client</artifactId>
            <version>2.2.4</version>
        </dependency>
1
<dependency>2
<groupId>org.springframework.boot</groupId>3
<artifactId>spring-boot-starter-web</artifactId>4
</dependency>5
6
<!--这里由于我的springboot版本是2.2.10.RELEASE,所以 springboot admin 也要用2.2.x版-->7
<dependency>8
<groupId>de.codecentric</groupId>9
<artifactId>spring-boot-admin-starter-client</artifactId>10
<version>2.2.4</version>11
</dependency>(2) application.yml配置
在yml中需要 配置如下信息:
- 应用端口
- 开放端点用于SpringBootAdmin 监控
- 配置应用名称(该名称会在SpringBoot Admin的管理页面显示)
- 配置Admin Server的地址
- 配置下日志文件的文件名和存放位置 (如果不配置则会看不到日志)
# 端口
server:
  port: 9088


#开放端点用于SpringBoot Admin的监控
management:
  endpoints:
    web:
      exposure:
        include: '*'

spring:
  application:
    name: admin-client # 给client应用取个名字

  boot:
    admin:
      client:
        url:  http://localhost:23333   #这里配置admin server 的地址

logging:
  file:
    name: admin-client.log  #配置生成日志文件名称
1
# 端口2
server3
port90884
5
6
#开放端点用于SpringBoot Admin的监控7
management8
endpoints9
web10
exposure11
include'*'12
13
spring14
application15
nameadmin-client # 给client应用取个名字16
17
boot18
admin19
client20
urlhttp//localhost23333 #这里配置admin server 的地址21
22
logging23
file24
nameadmin-client.log #配置生成日志文件名称(3)写一个Controller模拟一个普通的接口
通过浏览器访问这个接口就会打印日志,具体代码如下
    /**
     * HelloController
     *
     * @author ZENG.XIAO.YAN
     * @version 1.0
     * @Date 2020-11-16
     */
    @Slf4j
    @RestController
    @RequestMapping("api")
    public class HelloController {
        private AtomicInteger count = new AtomicInteger(0);

        @GetMapping("hi")
        private String sayHi() {
            // 每次进来如打印下日志
            log.info("{} 啪...我第{}次进来了.", LocalDateTime.now(),  count.addAndGet(1));
            // 每次进来new 个大对象,便于监控观察堆内存变化
            byte[] bytes = new byte[100*1024*1024];
            log.info("new了 100MB");
            return "hi springboot addmin " + LocalDateTime.now();
        }
    }
23
23
1
/**2
* HelloController3
*4
* @author ZENG.XIAO.YAN5
* @version 1.06
* @Date 2020-11-167
*/8
9
10
("api")11
public class HelloController {12
private AtomicInteger count = new AtomicInteger(0);13
14
("hi")15
private String sayHi() {16
// 每次进来如打印下日志17
log.info("{} 啪...我第{}次进来了.", LocalDateTime.now(), count.addAndGet(1));18
// 每次进来new 个大对象,便于监控观察堆内存变化19
byte[] bytes = new byte[100*1024*1024];20
log.info("new了 100MB");21
return "hi springboot addmin " + LocalDateTime.now();22
}23
}(4)写个启动类
启动类代码就很简单了,就是一个普通的SpringBoot项目的启动类,上面没加其他注解。具体如下
@SpringBootApplication
public class AdminClientApplication {

    public static void main(String[] args) {
        SpringApplication.run(AdminClientApplication.class, args);
    }
}
1
2
public class AdminClientApplication {3
4
public static void main(String[] args) {5
SpringApplication.run(AdminClientApplication.class, args);6
}7
}8
1.3 效果展示
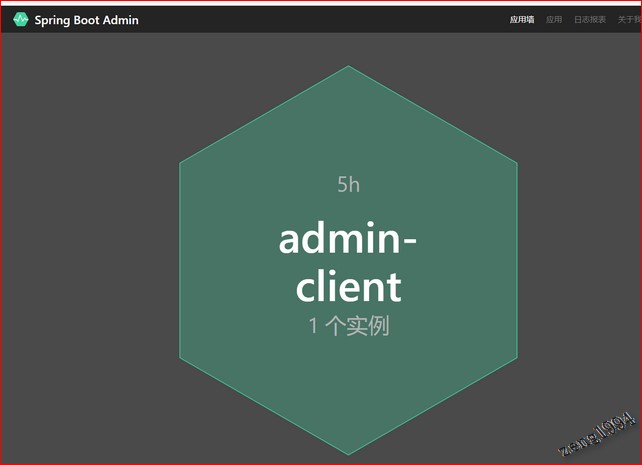
(1)已管理的应用会在应用墙上展示
当我们的admin-client项目启动后,在 admin-server的管理页面的应用墙上就能看到admin-client这个应用了,具体可参考下图
(2)可查看应用的具体信息
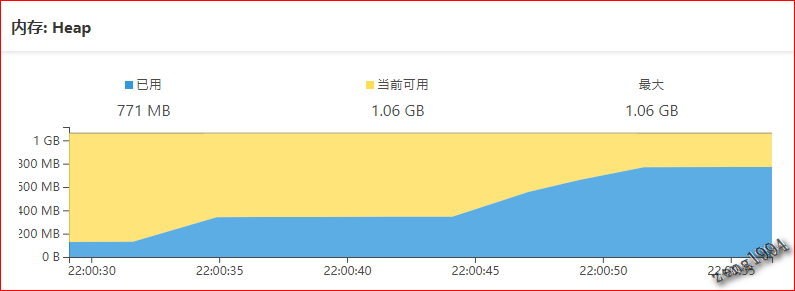
在应用墙点击这个应用,我们可以看到这个应用的具体信息,如堆内存变化及线程数等。具体可参考下图

(3)日志查看及堆内存变化观察
请求多次后在网页上可以实时的看到日志如下图

由于我们直接new了100MB的大对象,此时可以查看细节中的堆内存变化;具体如下图
二、安全性
2.1 admin-server端安全加固
这个SpringBoot Admin的管理后台如果没密码就能访问,那实在太不安全了,因此我们要给它加上登录的功能。
参考SpringBoot Admin的官方文档,我们可以在Admin-Server端添加Spring Security 相关依赖及就可以实现需要登录后才能访问网页管理面板。
下面开始具体的改造
(1)admin-server 添加Spring Security 相关依赖
        <!--springboot admin 安全相关-->
        <dependency>
            <groupId>org.springframework.boot</groupId>
            <artifactId>spring-boot-starter-security</artifactId>
        </dependency>
5
1
<!--springboot admin 安全相关-->2
<dependency>3
<groupId>org.springframework.boot</groupId>4
<artifactId>spring-boot-starter-security</artifactId>5
</dependency>(2)admin-server 设置账号和密码
在application.yml配置账号和密码
# 配置一个账号和密码
spring:
  security:
    user:
      name: admin
      password: root123456
6
1
# 配置一个账号和密码2
spring3
security4
user5
nameadmin6
passwordroot123456(3)admin-server 添加一个Spring Security 配置类
    @Configuration
    public class SecuritySecureConfig extends WebSecurityConfigurerAdapter {
        private final String adminContextPath;

        public SecuritySecureConfig(AdminServerProperties adminServerProperties) {
            this.adminContextPath = adminServerProperties.getContextPath();
        }

        @Override
        protected void configure(HttpSecurity http) throws Exception {
            SavedRequestAwareAuthenticationSuccessHandler successHandler = new SavedRequestAwareAuthenticationSuccessHandler();
            successHandler.setTargetUrlParameter("redirectTo");
            successHandler.setDefaultTargetUrl(adminContextPath + "/");
            http.authorizeRequests()
                    //1.配置所有静态资源和登录页可以公开访问
                    .antMatchers(adminContextPath + "/assets/**").permitAll()
                    .antMatchers(adminContextPath + "/login").permitAll()
                    .anyRequest().authenticated()
                    .and()
                    //2.配置登录和登出路径
                    .formLogin().loginPage(adminContextPath + "/login").successHandler(successHandler).and()
                    .logout().logoutUrl(adminContextPath + "/logout").and()
                    //3.开启http basic支持,admin-client注册时需要使用
                    .httpBasic().and()
                    .csrf()
                    //4.开启基于cookie的csrf保护
                    .csrfTokenRepository(CookieCsrfTokenRepository.withHttpOnlyFalse())
                    //5.忽略这些路径的csrf保护以便admin-client注册
                    .ignoringAntMatchers(
                            adminContextPath + "/instances",
                            adminContextPath + "/actuator/**"
                    );
        }
    }
34
1
2
public class SecuritySecureConfig extends WebSecurityConfigurerAdapter {3
private final String adminContextPath;4
5
public SecuritySecureConfig(AdminServerProperties adminServerProperties) {6
this.adminContextPath = adminServerProperties.getContextPath();7
}8
9
10
protected void configure(HttpSecurity http) throws Exception {11
SavedRequestAwareAuthenticationSuccessHandler successHandler = new SavedRequestAwareAuthenticationSuccessHandler();12
successHandler.setTargetUrlParameter("redirectTo");13
successHandler.setDefaultTargetUrl(adminContextPath + "/");14
http.authorizeRequests()15
//1.配置所有静态资源和登录页可以公开访问16
.antMatchers(adminContextPath + "/assets/**").permitAll()17
.antMatchers(adminContextPath + "/login").permitAll()18
.anyRequest().authenticated()19
.and()20
//2.配置登录和登出路径21
.formLogin().loginPage(adminContextPath + "/login").successHandler(successHandler).and()22
.logout().logoutUrl(adminContextPath + "/logout").and()23
//3.开启http basic支持,admin-client注册时需要使用24
.httpBasic().and()25
.csrf()26
//4.开启基于cookie的csrf保护27
.csrfTokenRepository(CookieCsrfTokenRepository.withHttpOnlyFalse())28
//5.忽略这些路径的csrf保护以便admin-client注册29
.ignoringAntMatchers(30
adminContextPath + "/instances",31
adminContextPath + "/actuator/**"32
);33
}34
}(4)admin-server 安全加固后访问测试
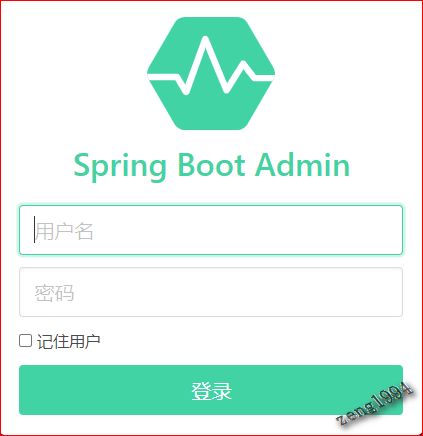
当我们输入正确的账号密码登录后,情况如下图

这个时候的应用数居然变成了0了,在我们没进行安全加固时是有一个admin-client应用的,为什么就不见了?
原因是添加了账号密码认证后,admin-client端也需要配置下 admin-server的账号和密码。
(5)admin-client 端设置 admin-server的账号密码
admin-client 注册到 admin-server时,admin-server端有个http Basic认证,通过了认证后 admin-client才能注册到 admin-server上。
admin-client的application.yml中配置访问密码配置可参考下面代码
spring:
  application:
    name: admin-client # 给client应用取个名字

  boot:
    admin:
      client:
        url:  http://localhost:23333 #这里配置admin server 的地址
        # 配置 admin-server的账号和密码
        username: admin
        password: root123456
11
1
spring2
application3
nameadmin-client # 给client应用取个名字4
5
boot6
admin7
client8
urlhttp//localhost23333 #这里配置admin server 的地址9
# 配置 admin-server的账号和密码10
usernameadmin 11
passwordroot123456(6) 再次访问 admin-server 管理后台
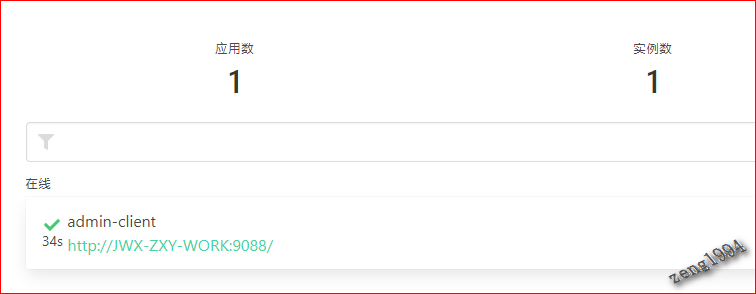
当我们登录后,终于再次看到了我们的admin-client这个应用
2.2 admin-client端的安全
admin-client端如果把actuator 端点都暴露出来,是非常不安全的。因此我们可以添加Spring Security对admin-client 也进行安全加固。
下面所有操作均在admin-client中进行
(1)添加Spring Security依赖
        <!--spring security-->
        <dependency>
            <groupId>org.springframework.boot</groupId>
            <artifactId>spring-boot-starter-security</artifactId>
        </dependency>
5
1
<!--spring security-->2
<dependency>3
<groupId>org.springframework.boot</groupId>4
<artifactId>spring-boot-starter-security</artifactId>5
</dependency>(2)yml配置
yml中需要设置client的账号和密码,官网相关配置如下图所示
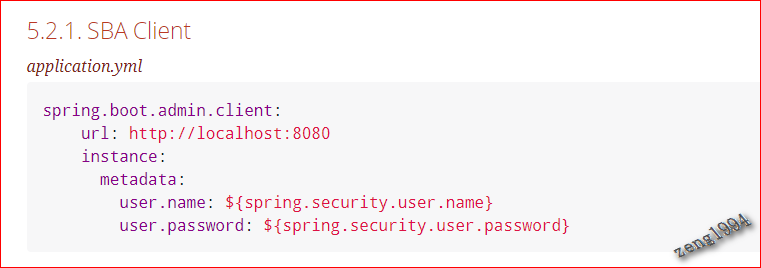
本次演示的admin-client的相关yml配置参考下面代码
spring:
  application:
    name: admin-client # 给client应用取个名字

  boot:
    admin:
      client:
        url:  http://localhost:23333 #这里配置admin server 的地址
        # 配置 admin-server的账号和密码
        username: admin
        password: root123456
        instance:
          metadata:
            # 这里配置admin-client的账号和密码
            user.name: ${spring.security.user.name}
            user.password: ${spring.security.user.password}

  # admin-client 的用户名和密码
  security:
    user:
      name: clientAdmin
      password: 123456
22
1
spring2
application3
nameadmin-client # 给client应用取个名字4
5
boot6
admin7
client8
urlhttp//localhost23333 #这里配置admin server 的地址9
# 配置 admin-server的账号和密码10
usernameadmin11
passwordroot12345612
instance13
metadata14
# 这里配置admin-client的账号和密码15
user.name$spring.security.user.name16
user.password$spring.security.user.password17
18
# admin-client 的用户名和密码19
security20
user21
nameclientAdmin22
password123456(3)添加Spring Security 配置类
为何要到配置?因为Spring Security不配置时会把所有请求都拦截的,而我们这里只需要拦截监控端点/actuator/**即可。同时,官网中提到admin-server访问admin-client时,也是采用http Basic认证方式的;因此需要配置Spring Security支持Http Basic认证方式。
    @Configuration
    @Slf4j
    public class SpringSecurityActuatorConfig extends WebSecurityConfigurerAdapter {

        public SpringSecurityActuatorConfig() {
            log.info("SpringSecurityActuatorConfig... start");
        }

        @Override
        protected void configure(HttpSecurity http) throws Exception {
            //  这个配置只针对  /actuator/** 的请求生效
            http.antMatcher("/actuator/**")
                    // /actuator/下所有请求都要认证
                    .authorizeRequests().anyRequest().authenticated()
                    // 启用httpBasic认证模式,当springboot admin-client 配置了密码时,
                    // admin-server走httpbasic的认证方式来拉取client的信息
                    .and().httpBasic()
                    // 禁用csrf
                    .and().csrf().disable();

        }
    }
22
22
1
2
3
public class SpringSecurityActuatorConfig extends WebSecurityConfigurerAdapter {4
5
public SpringSecurityActuatorConfig() {6
log.info("SpringSecurityActuatorConfig... start");7
}8
9
10
protected void configure(HttpSecurity http) throws Exception {11
// 这个配置只针对 /actuator/** 的请求生效12
http.antMatcher("/actuator/**")13
// /actuator/下所有请求都要认证14
.authorizeRequests().anyRequest().authenticated()15
// 启用httpBasic认证模式,当springboot admin-client 配置了密码时,16
// admin-server走httpbasic的认证方式来拉取client的信息17
.and().httpBasic()18
// 禁用csrf19
.and().csrf().disable();20
21
}22
}(4)效果展示
admin-server端依旧能看到admin-client的信息,说明我们添加SpringSecurity 后 admin-server的监控管理功能正常,具体见下图
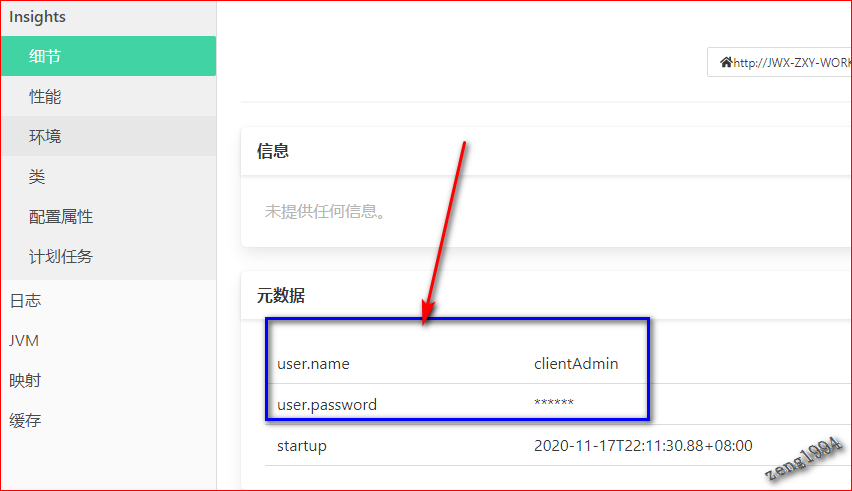
当我们去访问admin-client的监控端点 http://localhost:9088/actuator/health 时,发现需要进行http Basic认证;这也证明了我们的认证拦截只拦截了监控端点。效果如下图

(5)存在的问题
通过上面的一通配置,admin-client 添加 Spring Security 对actuator的端点进行安全认证的功能是实现了,但也存在着问题。
当我们项目本来就是使用SpringSecurity 安全框架进行认证和授权时。上述的配置就要做修改了。因为我们一般都不用HttpBasic认证,而是用的表单登录认证。也就出现了配置多个Spring Security的问题。虽然有这个问题,但是网上还是有解决方案的。
(6)多个Spring Security共存方案
这个方案是在Spring Security官方文档里面找到的
官网关键信息截图如下:

里面的重点就是通过添加Order注解来指定多个Spring Security的优先级
下面直接贴上我的代码;为了直观,我就在同一个类里面建了2个静态的Spring Security配置类
/**
 * SpringSecurity 表单和HttpBasic 共存配置参考,写在一个类里面方便对比
 * @author ZENG.XIAO.YAN
 * @Date 2020-11-11
 * @version 1.0
 */
@Slf4j
public class SpringSecurityConfig2 {

    /*
     * 这个表单和HttpBasic 共存配置玩法,参考url如下:
     *  官方url:https://docs.spring.io/spring-security/site/docs/4.2.3.BUILD-SNAPSHOT/reference/htmlsingle/#multiple-httpsecurity
     *  项目启动日志如下,可以看到创建了2条过滤链
	 * 2020-11-11 22:57:56.340  INFO 12692 --- [main] o.s.s.web.DefaultSecurityFilterChain: Creating filter chain: Ant [pattern='/actuator/**'],
	 * 2020-11-11 22:57:56.344  INFO 12692 --- [main] o.s.s.web.DefaultSecurityFilterChain: Creating filter chain: any request,
     */


    /**
     * HttpBasic 认证方式,只对/actuator/** 生效,由于设置了Order,优先级会高于FormLoginWebSecurityConfigurerAdapter
     * @author ZENG.XIAO.YAN
     * @Date 2020-11-11
     * @version 1.0
     */
    @Configuration
    @Order(1)
    public static class HttpBasicSecurityConfigurationAdapter extends WebSecurityConfigurerAdapter {

        public HttpBasicSecurityConfigurationAdapter() {
            log.info("HttpBasicSecurityConfigurationAdapter... start");
        }

        protected void configure(HttpSecurity http) throws Exception {
            //  这个配置只针对  /actuator/** 的请求生效
            http.antMatcher("/actuator/**")
                    // /actuator/下所有请求都要认证
                    .authorizeRequests().anyRequest().authenticated()
                    // 启用httpBasic认证模式,当springboot admin-client 配置了密码时,
                    // admin-server走httpbasic的认证方式来拉取client的信息
                    .and().httpBasic()
                    // 禁用csrf
                    .and().csrf().disable();
        }
    }

    /**
     * 表单登录认证方式配置,由于没有指定Order,所以默认是最大2147483647,数值越大,优先级越低
     * @author ZENG.XIAO.YAN
     * @Date 2020-11-11
     * @version 1.0
     */
    @Configuration
    public static class FormLoginWebSecurityConfigurerAdapter extends WebSecurityConfigurerAdapter {

        public FormLoginWebSecurityConfigurerAdapter() {
            log.info("FormLoginWebSecurityConfigurerAdapter... start");
        }

        @Override
        protected void configure(HttpSecurity http) throws Exception {
            http.authorizeRequests()
                .anyRequest().authenticated()
                .and()
                .formLogin();
        }
    }

}
68
68
1
/**2
* SpringSecurity 表单和HttpBasic 共存配置参考,写在一个类里面方便对比3
* @author ZENG.XIAO.YAN4
* @Date 2020-11-115
* @version 1.06
*/7
8
public class SpringSecurityConfig2 {9
10
/*11
* 这个表单和HttpBasic 共存配置玩法,参考url如下:12
* 官方url:https://docs.spring.io/spring-security/site/docs/4.2.3.BUILD-SNAPSHOT/reference/htmlsingle/#multiple-httpsecurity13
* 项目启动日志如下,可以看到创建了2条过滤链14
* 2020-11-11 22:57:56.340 INFO 12692 --- [main] o.s.s.web.DefaultSecurityFilterChain: Creating filter chain: Ant [pattern='/actuator/**'],15
* 2020-11-11 22:57:56.344 INFO 12692 --- [main] o.s.s.web.DefaultSecurityFilterChain: Creating filter chain: any request,16
*/17
18
19
/**20
* HttpBasic 认证方式,只对/actuator/** 生效,由于设置了Order,优先级会高于FormLoginWebSecurityConfigurerAdapter21
* @author ZENG.XIAO.YAN22
* @Date 2020-11-1123
* @version 1.024
*/25
26
(1)27
public static class HttpBasicSecurityConfigurationAdapter extends WebSecurityConfigurerAdapter {28
29
public HttpBasicSecurityConfigurationAdapter() {30
log.info("HttpBasicSecurityConfigurationAdapter... start");31
}32
33
protected void configure(HttpSecurity http) throws Exception {34
// 这个配置只针对 /actuator/** 的请求生效35
http.antMatcher("/actuator/**")36
// /actuator/下所有请求都要认证37
.authorizeRequests().anyRequest().authenticated()38
// 启用httpBasic认证模式,当springboot admin-client 配置了密码时,39
// admin-server走httpbasic的认证方式来拉取client的信息40
.and().httpBasic()41
// 禁用csrf42
.and().csrf().disable();43
}44
}45
46
/**47
* 表单登录认证方式配置,由于没有指定Order,所以默认是最大2147483647,数值越大,优先级越低48
* @author ZENG.XIAO.YAN49
* @Date 2020-11-1150
* @version 1.051
*/52
53
public static class FormLoginWebSecurityConfigurerAdapter extends WebSecurityConfigurerAdapter {54
55
public FormLoginWebSecurityConfigurerAdapter() {56
log.info("FormLoginWebSecurityConfigurerAdapter... start");57
}58
59
60
protected void configure(HttpSecurity http) throws Exception {61
http.authorizeRequests()62
.anyRequest().authenticated()63
.and()64
.formLogin();65
}66
}67
68
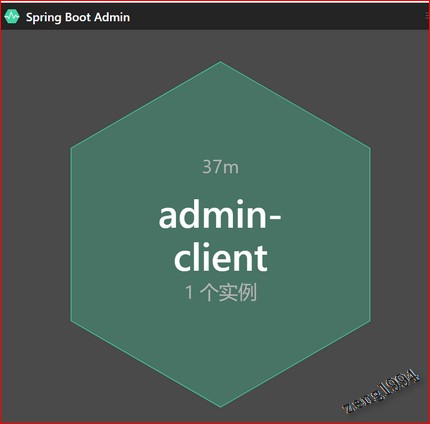
} 添加完这个配置类后,记得把我们上面配置的SpringSecurityActuatorConfig 这个类删除了,然后重启项目。效果如下:


访问admin-server 的管理页面,发现admin-client应用信息正常,说明本次修改的Spring Security配置没有问题
三、小结
(1)本文介绍了SpringBoot Admin的简单使用,同时介绍了admin-server端的安全配置和admin-client端的安全配置
(2)在介绍admin-client端的安全配置时,引申出了 如何实现多个SpringSecurity 配置 共存