1、主机slave
注:没有包的可以去下载
yum -y install gcc gcc-c++
上传包 rsync-3.1.3.tar.gz
使用tar命令解压

使用gcc gcc-c++编译
./configure --prefix=/usr/local/rsync && make && make install

编译完成后修改配置文件:
vim rsyncd.conf

uid = nobody
gid = nobody
use chroot = no
max connections = 10
strict modes = yes
pid file = /var/run/rsyncd.pid
lock file = /var/run/rsync.lock
log file = /var/run/rsyncd.log

[web1]
path = /var/lib/mysql/
comment = web1 file
ignore errors
read only = no
write only = no
hosts allow = 192.168.80.129
#hosts deny =
list = false
uid = root
pid = root
auth users = web
secrets file = /etc/server.pass
~
保存退出;
加权限;chmod 600 rsyncd.conf
启动服务:

编写用户和密码:
保存退出;
chmod 600 /etc/server.pass
  增加权限
关闭防火墙:

2、主master服务配置;
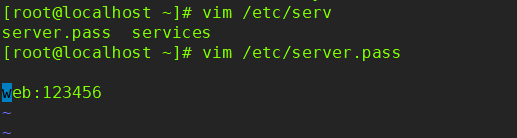
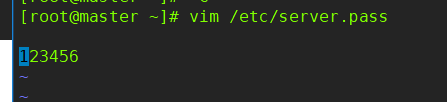
vim /etc/server.pass
保存退出;
chmod 600 /etc/server.pass
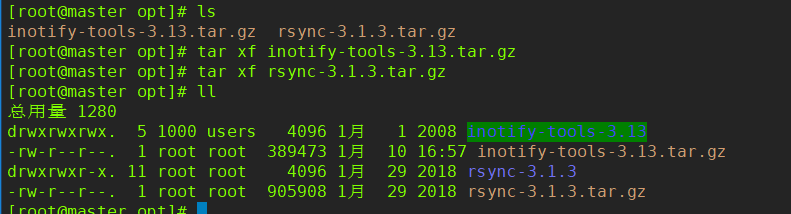
上传包

解压文件;
 tar xf inotify-tools-3.13.tar.gz

 tar xf rsync-3.1.3.tar.gz
编译安装rsync:
./configure --prefix=/usr/local/rsync && make && make install

在主服务器上只需要安装不需要启动!!!!!!!!!!!!!!!!!!!!!!!
编译安装inotify:
./configure --prefix=/usr/local/inotify && make && make install

关闭防火墙后测试!!!!!!!!!
/usr/local/rsync/bin/rsync -av /var/lib/mysql/ web@192.168.80.133::web1 --password-file=/etc/server.pass

如果成功则编写脚本

#!/bin/bash
host1=192.168.80.133
src=/var/lib/mysql/
dst1=web1
user=web
/usr/local/inotify/bin/inotifywait -mrq --timefmt "%d%m%y%H:%M" --format "%T%w%f%e" -e modify,delete,create,attrib $src
| while read files
        do
        /usr/local/rsync/bin/rsync -vzrtopgq --delete --progress --password-file=/etc/server.pass $src $user@$host1::$dst1
        echo "${files} web is ok" >>/tmp/rsync.log 2>&1
        done
执行脚本测试

最后查看一下日志:
