1)android显示图片可以使用imageView来呈现,而且也可以通过ImageButton来实现给button添加图片。
2)在创建一个ImageView后,显示图片绑定元素是:android:src="@android:drawable/btn_dialog"
3)后台操作绑定图片函数:imgView.setImageResource(R.drawable.pic0);,其中drawable是我们可以显示工程res下所有drawable的文件夹中的图片元素的。
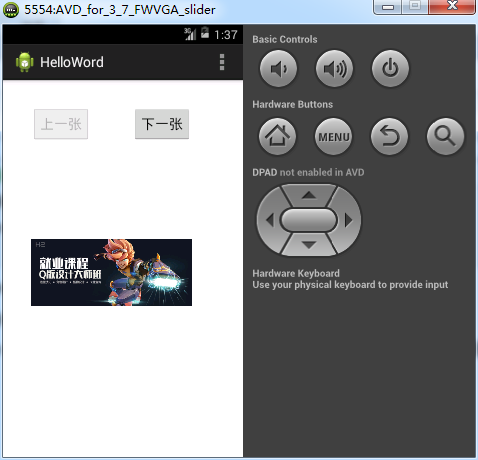
学习示例,实现一个前后翻页切换图片的功能:
效果:
源代码:res/layout/activity_main.xml


<RelativeLayout xmlns:android="http://schemas.android.com/apk/res/android"
    xmlns:tools="http://schemas.android.com/tools"
    android:layout_width="match_parent"
    android:layout_height="match_parent"
    android:paddingBottom="@dimen/activity_vertical_margin"
    android:paddingLeft="@dimen/activity_horizontal_margin"
    android:paddingRight="@dimen/activity_horizontal_margin"
    android:paddingTop="@dimen/activity_vertical_margin"
    tools:context=".MainActivity" >

    <TextView
        android:id="@+id/tvShow"
        android:layout_width="wrap_content"
        android:layout_height="wrap_content"
        android:layout_alignParentBottom="true"
        android:layout_marginBottom="74dp"
        android:text="" />

    <Button
        android:id="@+id/btnNext"
        android:layout_width="wrap_content"
        android:layout_height="wrap_content"
        android:layout_alignParentTop="true"
        android:layout_marginLeft="54dp"
        android:layout_marginTop="18dp"
        android:layout_toRightOf="@+id/btnPrevious"
        android:text="下一张" />

    <Button
        android:id="@+id/btnPrevious"
        android:layout_width="wrap_content"
        android:layout_height="wrap_content"
        android:layout_alignBaseline="@+id/btnNext"
        android:layout_alignBottom="@+id/btnNext"
        android:layout_marginLeft="21dp"
        android:layout_toRightOf="@+id/tvShow"
        android:text="上一张" />

    <ImageView
        android:id="@+id/imgView"
        android:layout_width="wrap_content"
        android:layout_height="wrap_content"
        android:layout_alignLeft="@+id/btnPrevious"
        android:layout_alignRight="@+id/btnNext"
        android:layout_below="@+id/btnPrevious"
        android:layout_marginTop="24dp"
        android:src="@android:drawable/btn_dialog" />


</RelativeLayout>
后台源代码:
  1 package com.example.helloword;
  2
  3 import android.app.Activity;
  4 import android.app.AlertDialog;
  5 import android.content.DialogInterface;
  6 import android.content.DialogInterface.OnClickListener;
  7 import android.os.Bundle;
  8 import android.renderscript.Script.KernelID;
  9 import android.view.KeyEvent;
 10 import android.view.Menu;
 11 import android.view.View;
 12 import android.widget.Button;
 13 import android.widget.EditText;
 14 import android.widget.ImageView;
 15 import android.widget.TextView;
 16
 17 public class MainActivity extends Activity {
 18     private Button btnNext, btnPrevious;
 19     private ImageView imgView;
 20     private int imgIndex = 0;
 21
 22     @Override
 23     protected void onCreate(Bundle savedInstanceState) {
 24         super.onCreate(savedInstanceState);
 25         setContentView(R.layout.activity_main);
 26
 27         btnNext = (Button) this.findViewById(R.id.btnNext);
 28         btnPrevious = (Button) this.findViewById(R.id.btnPrevious);
 29         imgView = (ImageView) this.findViewById(R.id.imgView);
 30
 31         final int[] imageItems = new int[] { R.drawable.pic0, R.drawable.pic1,
 32                 R.drawable.pic2 };
 33
 34         imgView.setImageResource(imageItems[imgIndex]);
 35         btnPrevious.setEnabled(false);
 36         btnNext.setEnabled(true);
 37
 38         btnNext.setOnClickListener(new View.OnClickListener() {
 39             @Override
 40             public void onClick(View arg0) {
 41                 imgIndex = imgIndex + 1;
 42                 if (imgIndex >= imageItems.length - 1) {
 43                     btnNext.setEnabled(false);
 44                 } else {
 45                     btnNext.setEnabled(true);
 46                 }
 47
 48                 if (imgIndex > 0) {
 49                     btnPrevious.setEnabled(true);
 50                 }else{
 51                     btnPrevious.setEnabled(false);
 52                 }
 53
 54                 imgView.setImageResource(imageItems[imgIndex]);
 55             }
 56         });
 57
 58         btnPrevious.setOnClickListener(new View.OnClickListener() {
 59             @Override
 60             public void onClick(View arg0) {
 61                 imgIndex = imgIndex - 1;
 62
 63                 if (imgIndex == 0) {
 64                     btnPrevious.setEnabled(false);
 65                 } else {
 66                     btnPrevious.setEnabled(true);
 67                 }
 68
 69                 if (imgIndex >= imageItems.length - 1) {
 70                     btnNext.setEnabled(false);
 71                 } else {
 72                     btnNext.setEnabled(true);
 73                 }
 74
 75                 imgView.setImageResource(imageItems[imgIndex]);
 76             }
 77         });
 78     }
 79
 80     @Override
 81     public boolean onCreateOptionsMenu(Menu menu) {
 82         // Inflate the menu; this adds items to the action bar if it is present.
 83         getMenuInflater().inflate(R.menu.main, menu);
 84         return true;
 85     }
 86
 87     @Override
 88     public boolean onKeyUp(int keyCode, KeyEvent event) {
 89         // 当点击回退时,弹出该窗口(也就相当于关闭操作)
 90         if (keyCode == KeyEvent.KEYCODE_BACK) {
 91             new AlertDialog.Builder(this).setTitle("是否退出?")
 92                     .setPositiveButton("确定", new OnClickListener() {
 93                         @Override
 94                         public void onClick(DialogInterface arg0, int arg1) {
 95                             finish();
 96                         }
 97                     }).setNegativeButton("取消", null).show();
 98             return true;
 99         }
100         return super.onKeyUp(keyCode, event);
101     }
102 }