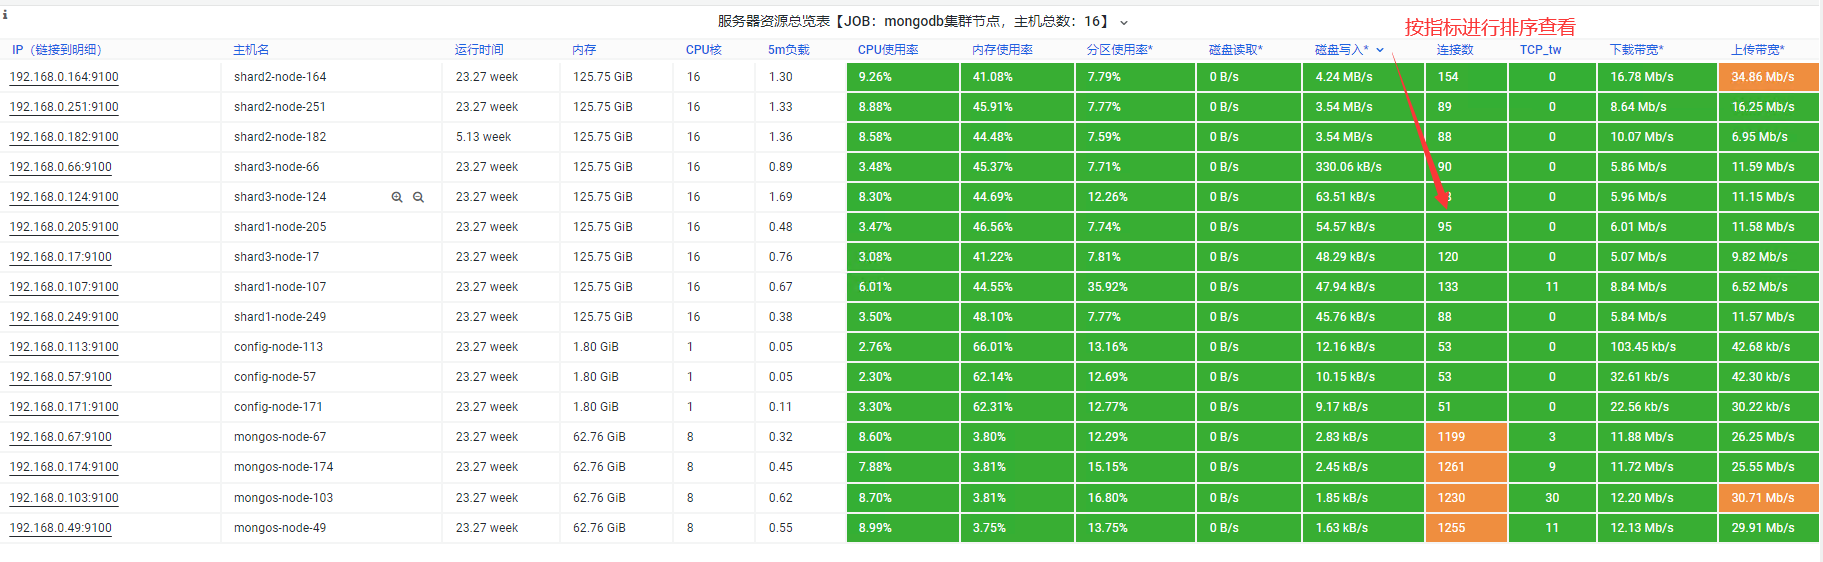
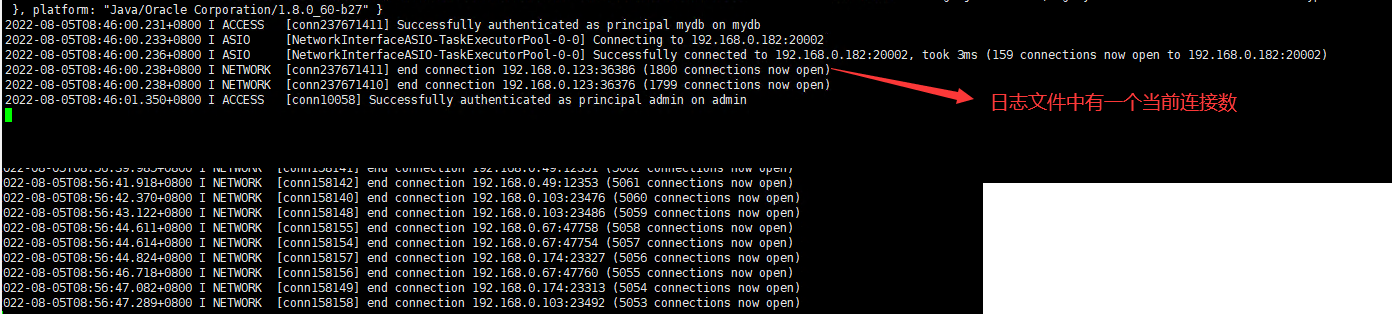
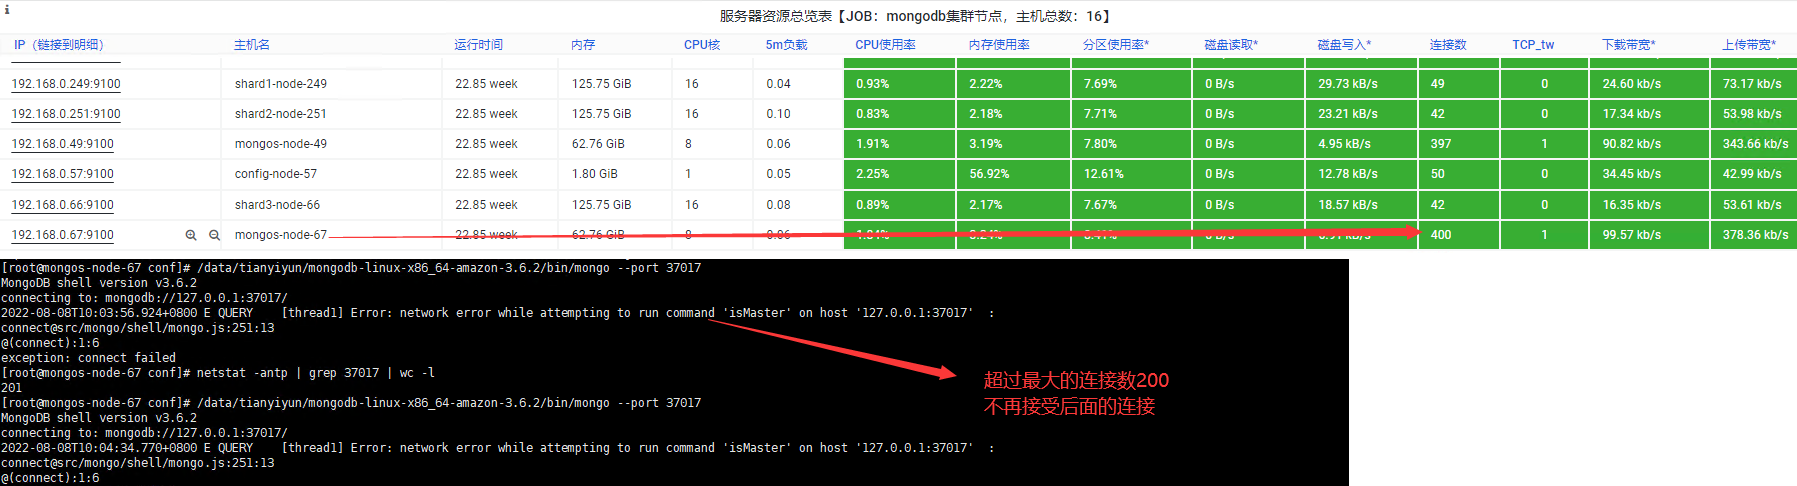
连接数暴涨
mongodb集群每运行一段时间就会存在数据写入数据速度变得非常慢,这个时候如果重启所有节点的服务就可以恢复正常.单独重启mongos服务连接数会降下来,但是写入数据还是会变得很慢.
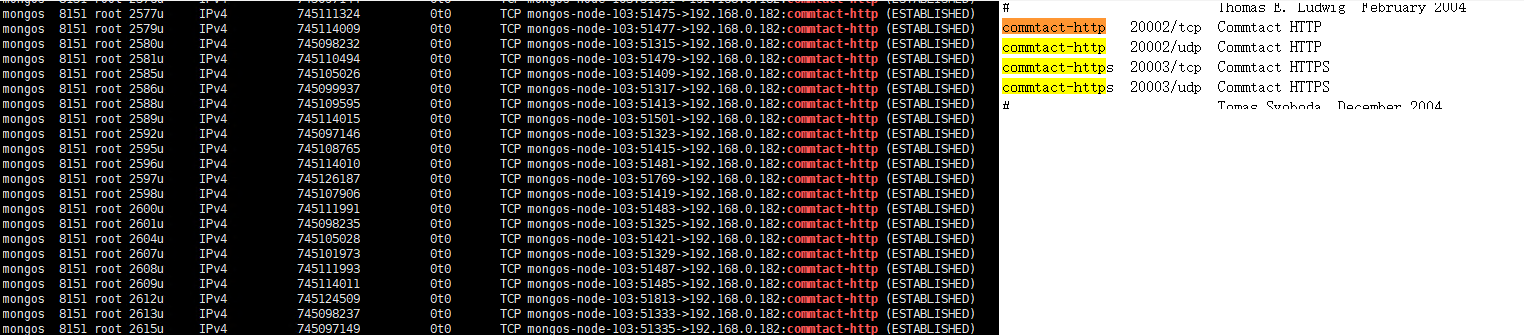
因为运行一段时候后,mongodb集群中的shard节点的连接数积累的比较多导致mongodb集群应用层性能达到临界值,无法处理新的客户端请求
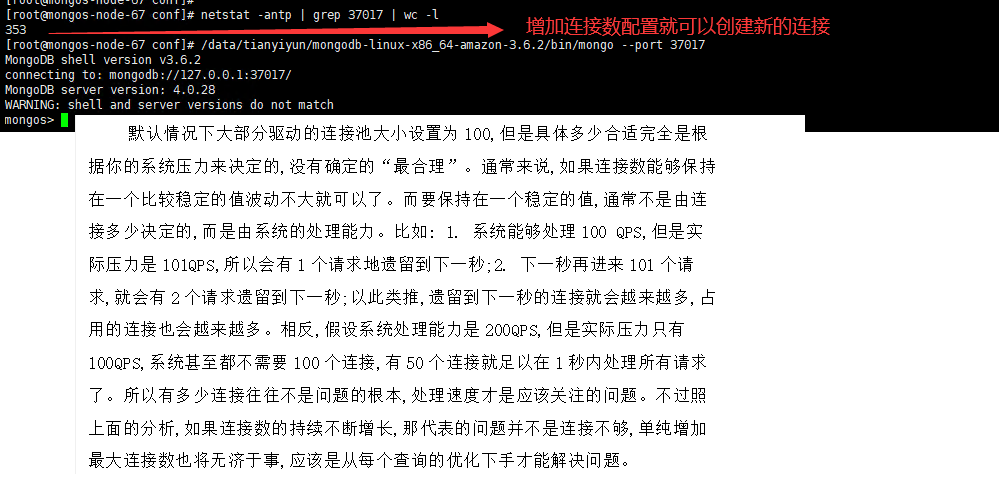
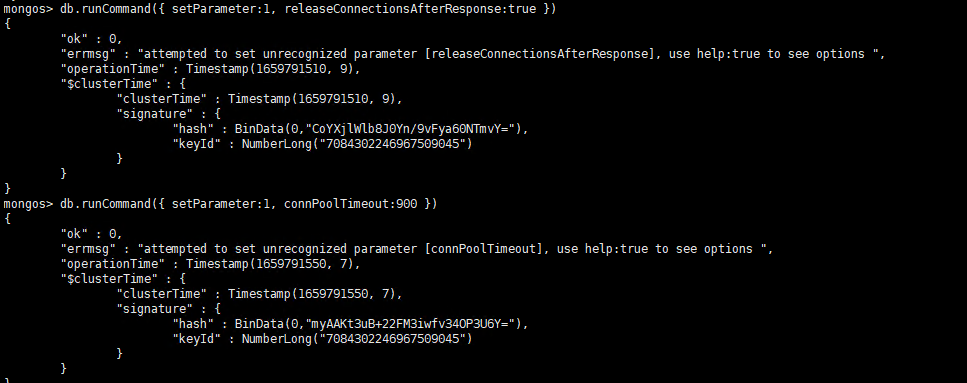
限制mongodb集群连接数
对于每个mongos->mongod连接是单独缓存的,并且该连接不能重复使用,即使该连接是空闲时也是如此,一直到连接关闭连接回到连接池中才能再使用;releaseConnectionsAfterResponse 参数启用后,mongos->mongod之间的连接在完成一个读操作或者安全写操作后能够重复使用(把连接放到连接池中而不是缓存,即更早的回归到连接池中),releaseConnectionsAfterResponse参数简单讲就是mongos->mongod的连接更早的回到连接池中,这样就不会开太多的连接了,从而减少连接数
由于每个连接需要使用10M(stack size默认为10240)的内存,这导致相当大的内存开销
通过优化连接池,将连接数控制在了800个左右,然后通过修改内核的stack size值,从默认的10M修改到1M,使连接占用的内存大大减少


# BEGIN ANSIBLE MANAGED BLOCK
#配置文件内容
#——————————————–
pidfilepath = /data/tianyiyun/shard1/log/shard1.pid
dbpath = /data/tianyiyun/shard1/data
logpath = /var/log/mongodb/shard1.log
logappend = true

bind_ip = 0.0.0.0
port = 20001
fork = false

#副本集名称
replSet = shard1

#declare this is a shard db of a cluster
shardsvr = true

#设置最大连接数
#一定要合理的设置这个值
#最大值为20000,但是一般到2000的连接,mongodb自身会出现性能问题
maxConns = 2000
# END ANSIBLE MANAGED BLOCK

auth=true
keyFile=/data/tianyiyun/conf/keyFile.key
~
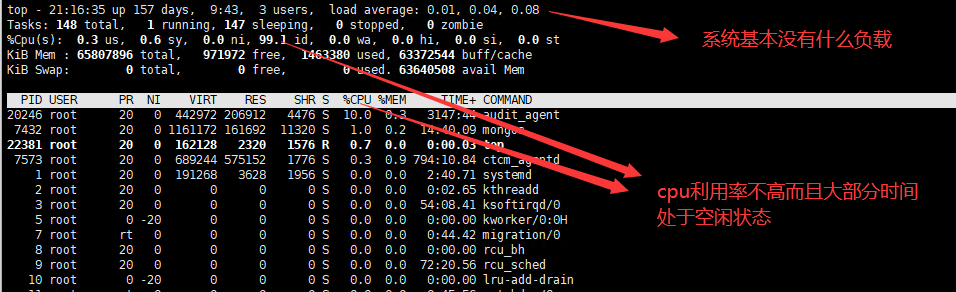
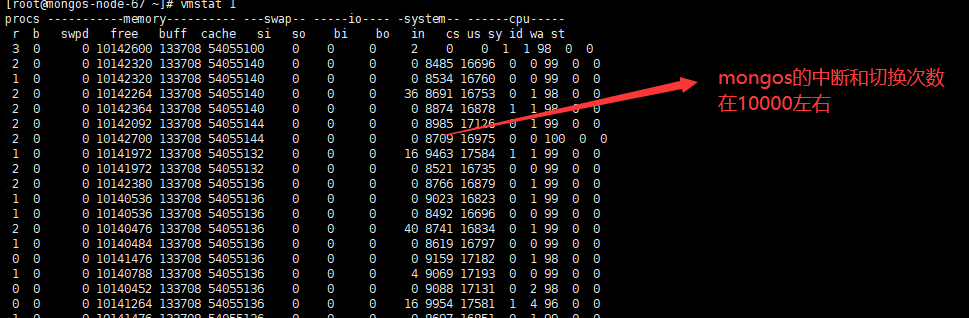
正常状态节点的负载

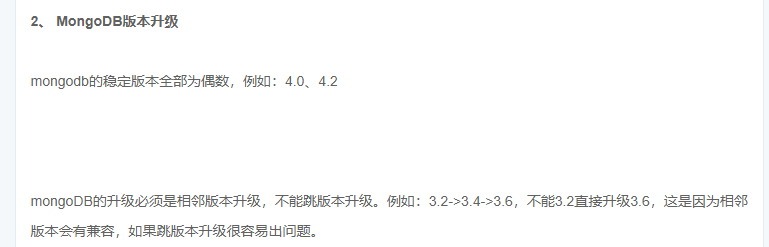
mongodb集群升级
1.配置hosts
[config]
192.168.0.57
192.168.0.171
192.168.0.113

[mongos]
192.168.0.49
192.168.0.103
192.168.0.67
192.168.0.174

[shard1]
192.168.0.249
192.168.0.107
192.168.0.205

[shard2]
192.168.0.251
192.168.0.164
192.168.0.182

[shard3]
192.168.0.66
192.168.0.17
192.168.0.124
2.配置资源清单
- hosts: all
  gather_facts: false
  tasks:
  - name: "copy_mongo_package"
    copy: src=/root/mongodb-linux-x86_64-rhel70-6.0.0.tgz dest=/data/tianyiyun/
    become: yes
  - name: "unzip package"
    shell: tar -zxf /data/tianyiyun/mongodb-linux-x86_64-rhel70-6.0.0.tgz -C /data/tianyiyun
  - name: "create softlink"
    shell: "cd /data/tianyiyun && ln -s mongodb-linux-x86_64-rhel70-6.0.0 mongodb"
- hosts: all
  gather_facts: false
  tasks:
  - name: "create softlink"
    shell: "cd /data/tianyiyun && rm -fr mongodb && ln -s mongodb-linux-x86_64-rhel70-4.2.21  mongodb"
ansible-playbook -i mongohosts mongoupgrade.yaml


ansible -i mongohosts shard3 -m shell -a "supervisorctl status"
ansible -i mongohosts shard2 -m shell -a "supervisorctl start all"
ansible -i mongohosts mongos -m shard1 -a "supervisorctl start all"
ansible -i mongohosts config -m shard1 -a "supervisorctl start all"
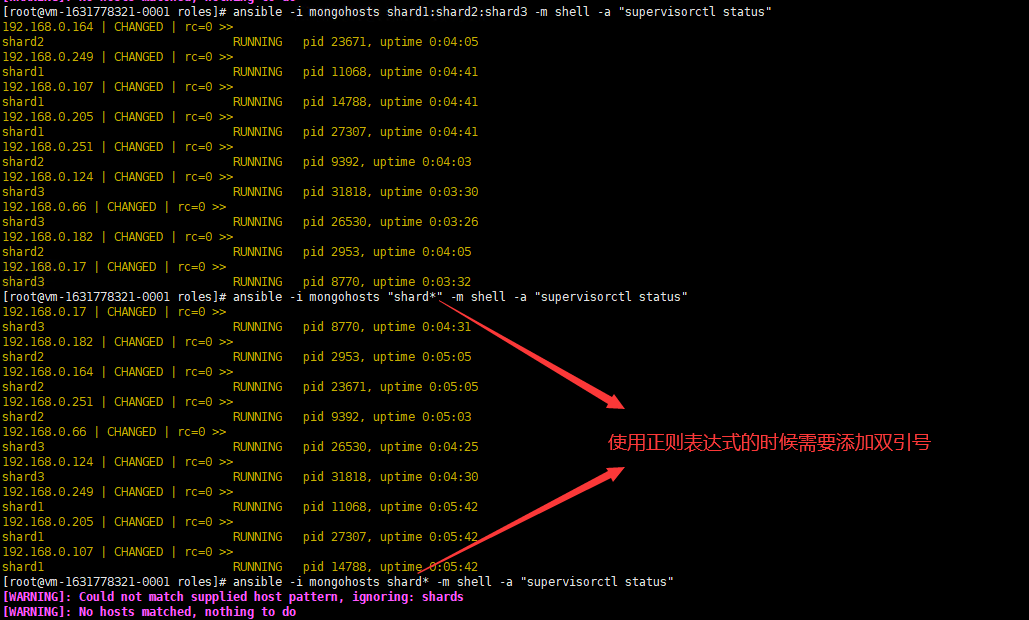
ansible -i mongohosts shard1:shard2:shard3 -m shell -a "supervisorctl status"
ansible -i mongohosts "shard*" -m shell -a "supervisorctl status"

CPU负载暴涨
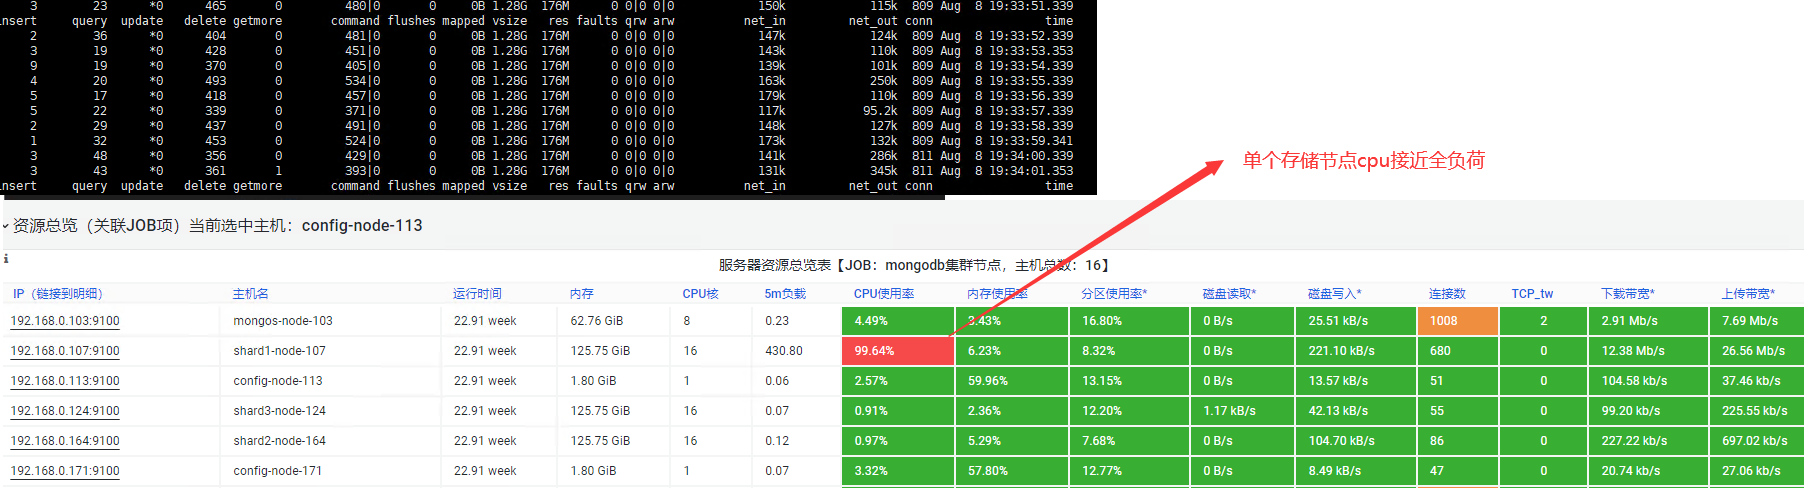
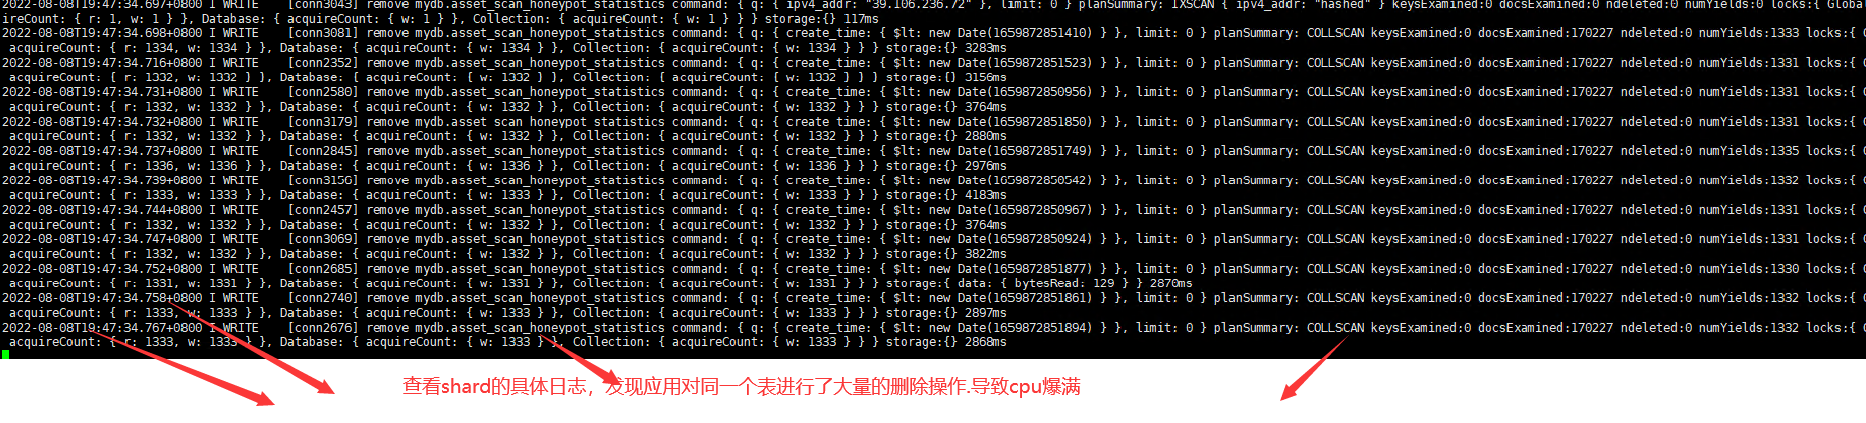
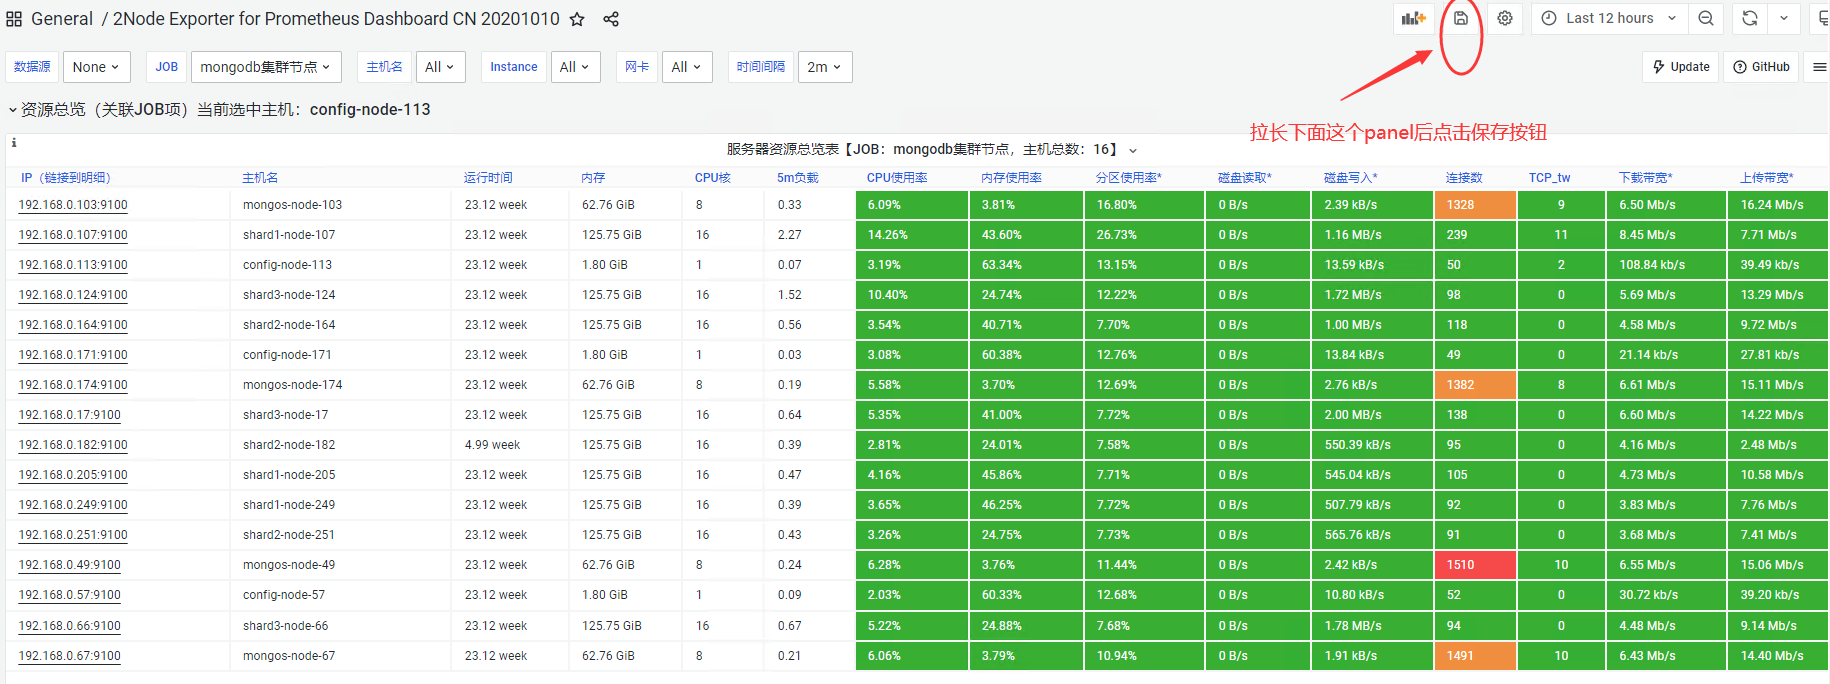
自定义微调监控大屏展示