本篇大概讲述了项目创建,创建登陆页面,首页轮播图和列表,个人中心这四块功能,后续会陆续补充项目创建时的优化和总结
本系列UI框架采用uView来实现,最新的到2.X版本了,本系列暂用1.X为例,比较好上手
uView官网地址:https://v1.uviewui.com/
(1)导入脚手架
首先下载uView的“脚手架空白工程”,下载地址:https://v1.uviewui.com/components/resource.html,
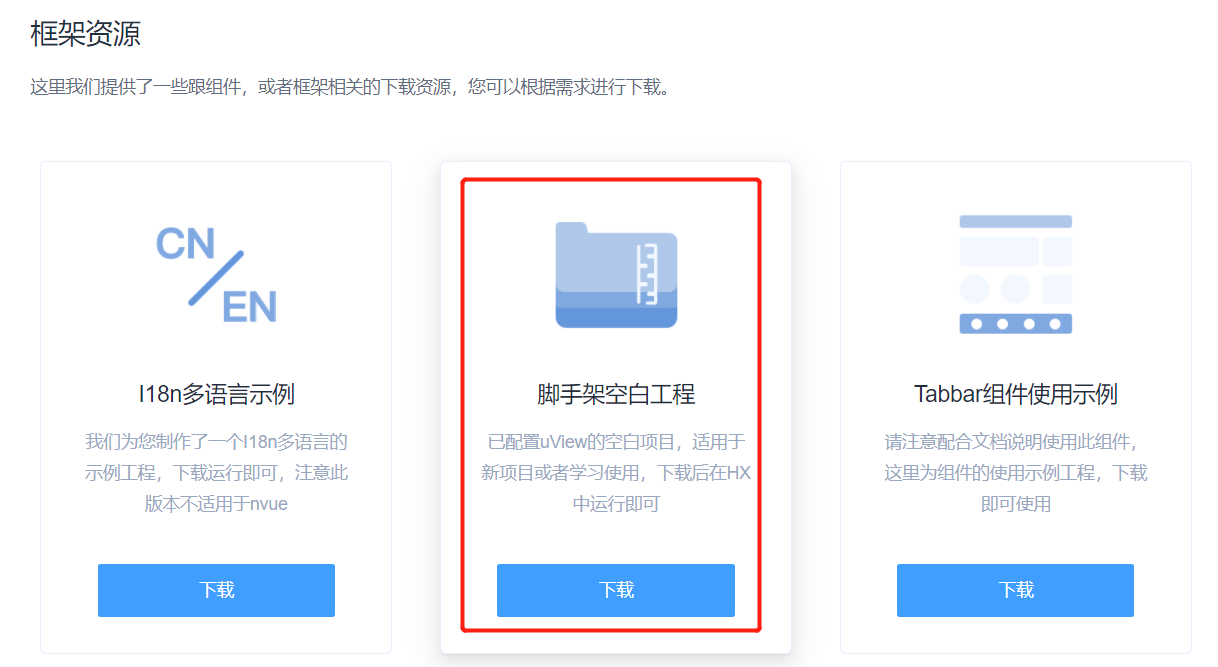
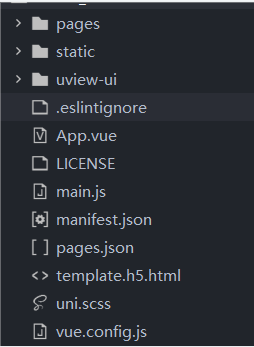
并将文件导入到我们项目中,形成的项目文档结构如下图所示:
点击顶部菜单“运行”-》“运行到浏览器”-》Chrome,显示效果如下:
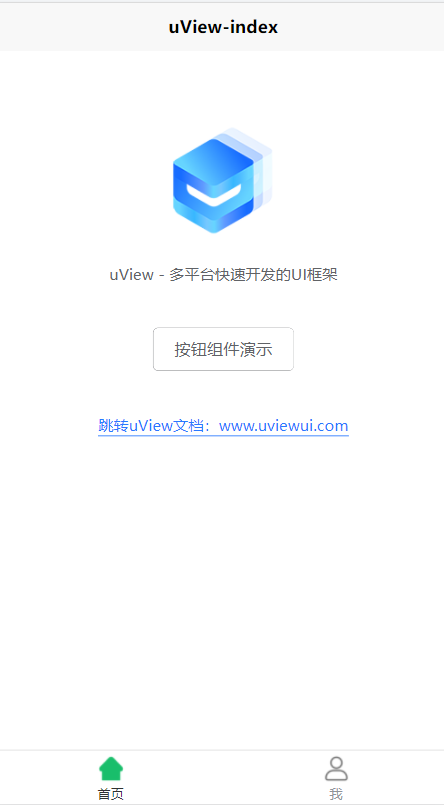
uView为我们生成了Tabbar,"首页"和"我"对应的vue页面
每个vue页面大致由三部分组成:
template: 页面结构
script: 用于业务逻辑 ,data(){}用于初始化数据,,methods对应函数
style: 页面样式
<template>
    <view>
    </view>
</template>
<script>
    export default {
        data() {
            return {

            }
        },
        methods: {

        }
    }
</script>

<style>

</style>
(2)uniapp常用命令和组件
在正式开始开发项目之前,首先了解下uniapp的常用命令
v-bind:使用data中定义的变量或者使用表达式 v-bind:class="msg"
v-on:可以简写成@ 绑定事件,.stop可以防止实践穿透
v-model:双向绑定 v-model="msg" 在表单中使用非常方便,直接获取表单数据
v-if,v-else-if: 条件判断
v-show:是否显示
v-if和v-show的比较,v-if能决定某个元素或区块是否挂载,一般v-if比较常用
v-for:列表渲染
uniapp基础组件:https://uniapp.dcloud.io/component/README
(3)登陆功能
首先在“pages”下创建目录“login”,在该目录下创建页面“index.vue”,代码如下:
 1 <template>
 2     <view class="wrap">
 3         <view class="top"></view>
 4         <view class="content">
 5             <view class="title u-text-center">欢迎登录</view>
 6             <input class="u-border-bottom u-margin-20" type="text" v-model="username" placeholder="请输入账号" />
 7             <input class="u-border-bottom u-margin-20" type="password" v-model="password" placeholder="请输入密码" />
 8             <button @tap="submit" :style="[inputStyle]" class="getCaptcha">登陆</button>
 9         </view>
10
11     </view>
12 </template>
13
14 <script>
15     export default {
16         data() {
17             return {
18                 username: '',
19                 password: ''
20             }
21         },
22         computed: {
23             inputStyle() {
24                 let style = {};
25                 if (this.username && this.password) {
26                     style.color = "#fff";
27                     style.backgroundColor = this.$u.color['warning'];
28                 }
29                 return style;
30             }
31         },
32         methods: {
33             submit() {
34
35                 uni.setStorageSync('username', this.username);
36                 var localStorageUser = uni.getStorageSync('username');
37                 this.$u.toast(localStorageUser + ',登陆成功');
38                 uni.reLaunch({
39                     url:'/pages/index/index'
40                 })
41             }
42         }
43     };
44 </script>
45
46 <style lang="scss" scoped>
47     .wrap {
48         font-size: 28rpx;
49
50         .content {
51              600rpx;
52             margin: 80rpx auto 0;
53
54             .title {
55                 font-size: 60rpx;
56                 font-weight: 500;
57                 margin-bottom: 100rpx;
58             }
59
60             input {
61                 text-align: left;
62                 margin-bottom: 10rpx;
63                 padding-bottom: 6rpx;
64             }
65
66             .tips {
67                 color: $u-type-info;
68                 margin-bottom: 60rpx;
69                 margin-top: 8rpx;
70             }
71
72             .getCaptcha {
73                 background-color: rgb(253, 243, 208);
74                 color: $u-tips-color;
75                 border: none;
76                 font-size: 30rpx;
77                 padding: 12rpx 0;
78
79                 &::after {
80                     border: none;
81                 }
82             }
83         }
84     }
85 </style>
效果如下:
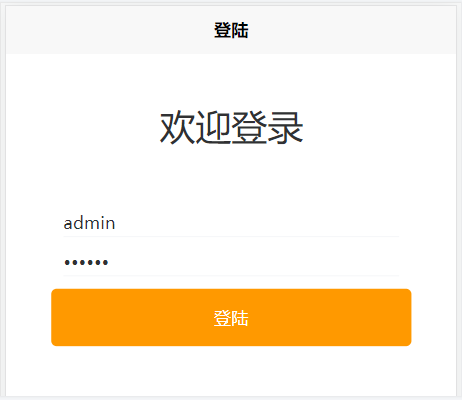
其中,按钮绑定提交事件“submit”,v-model双向绑定用户名密码,通过localStorage本地存储用户信息,跳转至首页。实际开发中,用户名信息应设为动态获取,后续将通过Vuex进行优化
(4)创建首页
首页的布局我们以轮播图和信息列表为例,效果图如下
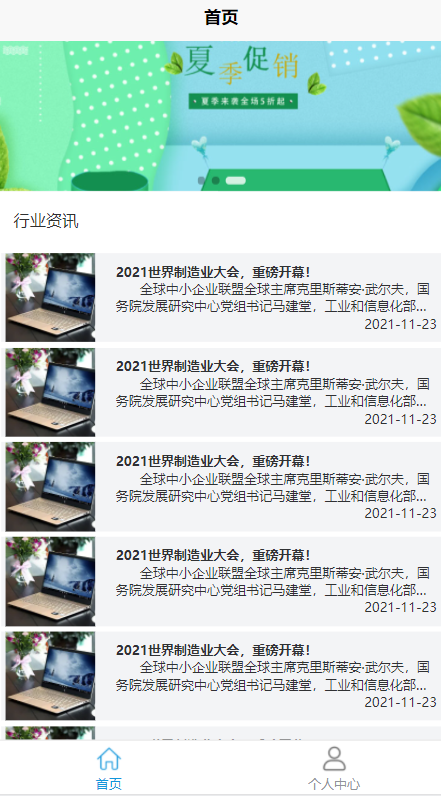
A.首先是轮播图,使用uView的Swiper插件
<view class="wrap"> <u-swiper :list="list"></u-swiper> </view>
list数据绑定
data() {
return {
list: [{
        image: 'https://cdn.uviewui.com/uview/swiper/1.jpg',
        title: '昨夜星辰昨夜风,画楼西畔桂堂东'
    },
    {
        image: 'https://cdn.uviewui.com/uview/swiper/2.jpg',
        title: '身无彩凤双飞翼,心有灵犀一点通'
    },
    {
        image: 'https://cdn.uviewui.com/uview/swiper/3.jpg',
        title: '谁念西风独自凉,萧萧黄叶闭疏窗,沉思往事立残阳'
    }
],
}
        },
B.列表也很简单,主要是样式和布局,代码如下,用for循环遍历十次,即十条信息
 1 <view class="u-margin-10 info" v-for="count in 10">
 2   <navigator url="/pages/news/newsdetails/newsdetails"   hover-class="navigator-hover">
 3   <u-row gutter="16">
 4     <u-col span="3">
 5         <view>
 6             <u-image width="150rpx" height="150rpx" src="/static/test/1.jpg" class="u-flex-nowrap">
 7             </u-image>
 8         </view>
 9     </u-col>
10     <u-col span="9">
11         <view class="info_title u-line-1 u-text-left u-col-top">2021世界制造业大会,重磅开幕!</view>
12         <view class="info_content u-line-2 u-text-left u-col-top">
13             全球中小企业联盟全球主席克里斯蒂安·武尔夫,国务院发展研究中心党组书记马建堂,工业和信息化部党组成员、副部长辛国斌,上海合作组织秘书长弗拉基米尔·诺罗夫,韩国驻华大使张夏成,上海市人民政府副市长张为,海尔集团创始人、董事局名誉主席张瑞敏将发表致辞或视频致辞
14         </view>
15         <view class="info_date u-text-right u-col-top">2021-11-23</view>
16     </u-col>
17   </u-row>
18   </navigator>
19 </view>
样式文件大致如下:
 1 .info {
 2     background-color: $u-bg-color;
 3 }
 4 .info-img {
 5      50rpx;
 6     height: 50rpx;
 7 }
 8
 9 .info_title {
10     font-weight: 700;
11     font-size: 20rpx;
12 }
13
14 .info_content {
15     font-size: 20rpx;
16     text-indent: 2em;
17 }
18
19 .info_date {
20     font-size: 20rpx;
21     color: $u-main-color;
22 }
本篇的列表会在下文继续优化,绑定动数据,下拉加载更多,数据分页,并对列表进行组件化,以及父子组件之间的值传递
(5)个人中心
个人中心比较简单,点击退出回到登陆页面,账号就是登陆账号,从本地缓存中读取
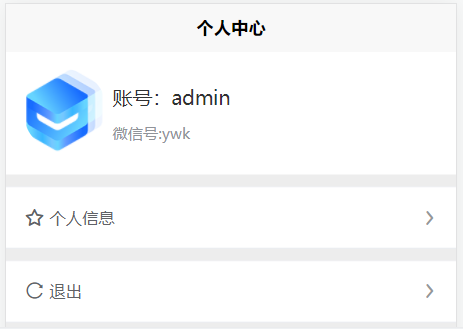
主要代码如下:
 1 <view class="u-flex user-box u-p-t-30 u-p-l-30 u-p-r-20 u-p-b-30">
 2     <view class="u-m-r-10">
 3     <u-avatar :src="pic" size="140"></u-avatar>
 4     </view>
 5     <view class="u-flex-1">
 6     <view class="u-font-18 u-p-b-20">账号:{{username}}</view>
 7     <view class="u-font-14 u-tips-color">微信号:ywk</view>
 8     </view>
 9  </view>
10
11 <view class="u-m-t-20">
12     <u-cell-group>
13     <u-cell-item icon="star" title="个人信息"></u-cell-item>
14     </u-cell-group>
15 </view>
16
17 <view class="u-m-t-20">
18     <u-cell-group>
19     <u-cell-item icon="reload" title="退出" @click="logout"></u-cell-item>
20     </u-cell-group>
21 </view>
总结:通过uView导入空白脚手架后,通过uniapp常用命令和组件,搭建了一个基础的移动App项目。
下一期将对Api网络请求进行优化和封装,完善首页列表的功能。
以上,仅用于学习和总结!