1、Eureka简介
文档:https://cloud.spring.io/spring-cloud-netflix/spring-cloud-netflix.html
#####################接下来开始程序啦########################
SpringCloud的所有的组件开发步骤:
    1、添加依赖
    2、添加配置(.yml文件)
    3、添加注解
1、pom.xml

<?xml version="1.0" encoding="UTF-8"?>
<project xmlns="http://maven.apache.org/POM/4.0.0" xmlns:xsi="http://www.w3.org/2001/XMLSchema-instance"
         xsi:schemaLocation="http://maven.apache.org/POM/4.0.0 http://maven.apache.org/xsd/maven-4.0.0.xsd">
    <modelVersion>4.0.0</modelVersion>
    <parent>
        <groupId>org.springframework.boot</groupId>
        <artifactId>spring-boot-starter-parent</artifactId>
        <version>2.1.3.RELEASE</version>
        <relativePath/> <!-- lookup parent from repository -->
    </parent>
    <groupId>com.test</groupId>
    <artifactId>eureka-server</artifactId>
    <version>0.0.1-SNAPSHOT</version>
    <name>eureka-server</name>
    <description>Demo project for Spring Boot</description>

    <properties>
        <java.version>1.8</java.version>
        <spring-cloud.version>Greenwich.SR1</spring-cloud.version>
    </properties>

    <dependencies>
        <dependency>
            <groupId>org.springframework.boot</groupId>
            <artifactId>spring-boot-starter-web</artifactId>
        </dependency>
        <dependency>
            <groupId>org.springframework.cloud</groupId>
            <artifactId>spring-cloud-starter-netflix-eureka-server</artifactId>
        </dependency>

        <dependency>
            <groupId>org.springframework.boot</groupId>
            <artifactId>spring-boot-starter-test</artifactId>
            <scope>test</scope>
        </dependency>
    </dependencies>

    <dependencyManagement>
        <dependencies>
            <dependency>
                <groupId>org.springframework.cloud</groupId>
                <artifactId>spring-cloud-dependencies</artifactId>
                <version>${spring-cloud.version}</version>
                <type>pom</type>
                <scope>import</scope>
            </dependency>
        </dependencies>
    </dependencyManagement>

    <build>
        <plugins>
            <plugin>
                <groupId>org.springframework.boot</groupId>
                <artifactId>spring-boot-maven-plugin</artifactId>
            </plugin>
        </plugins>
    </build>

</project>
从pom.xml可以看出来,这个pom是建立在springboot的基础上添加了
<dependency>
            <groupId>org.springframework.cloud</groupId>
            <artifactId>spring-cloud-starter-netflix-eureka-server</artifactId>
</dependency>
2、添加配置
server:
  port: 8661  #默认为8761,本人是因为这个端口被占用,所以改为8661

eureka:
  instance:
    hostname: localhost  #主机名
  client:
    registerWithEureka: false   #由于是单机模式,所以这两项都设为false
    fetchRegistry: false
    serviceUrl:
      defaultZone: http://${eureka.instance.hostname}:${server.port}/eureka/  #eureka的URL地址
#题外话
  #玩过springboot的都知道,在application.yml可以配置值,在代码中通过@Value注解去获取值,即
  # @Value("${user.userServicePath}")
  # private String userServicePath;
3、在启动类添加注解(@EnableEurekaServer)
package com.test.eurekaserver;

import org.springframework.boot.SpringApplication;
import org.springframework.boot.autoconfigure.SpringBootApplication;
import org.springframework.cloud.netflix.eureka.server.EnableEurekaServer;

@SpringBootApplication
@EnableEurekaServer
public class EurekaServerApplication {
    public static void main(String[] args) {
        SpringApplication.run(EurekaServerApplication.class, args);
    }

}
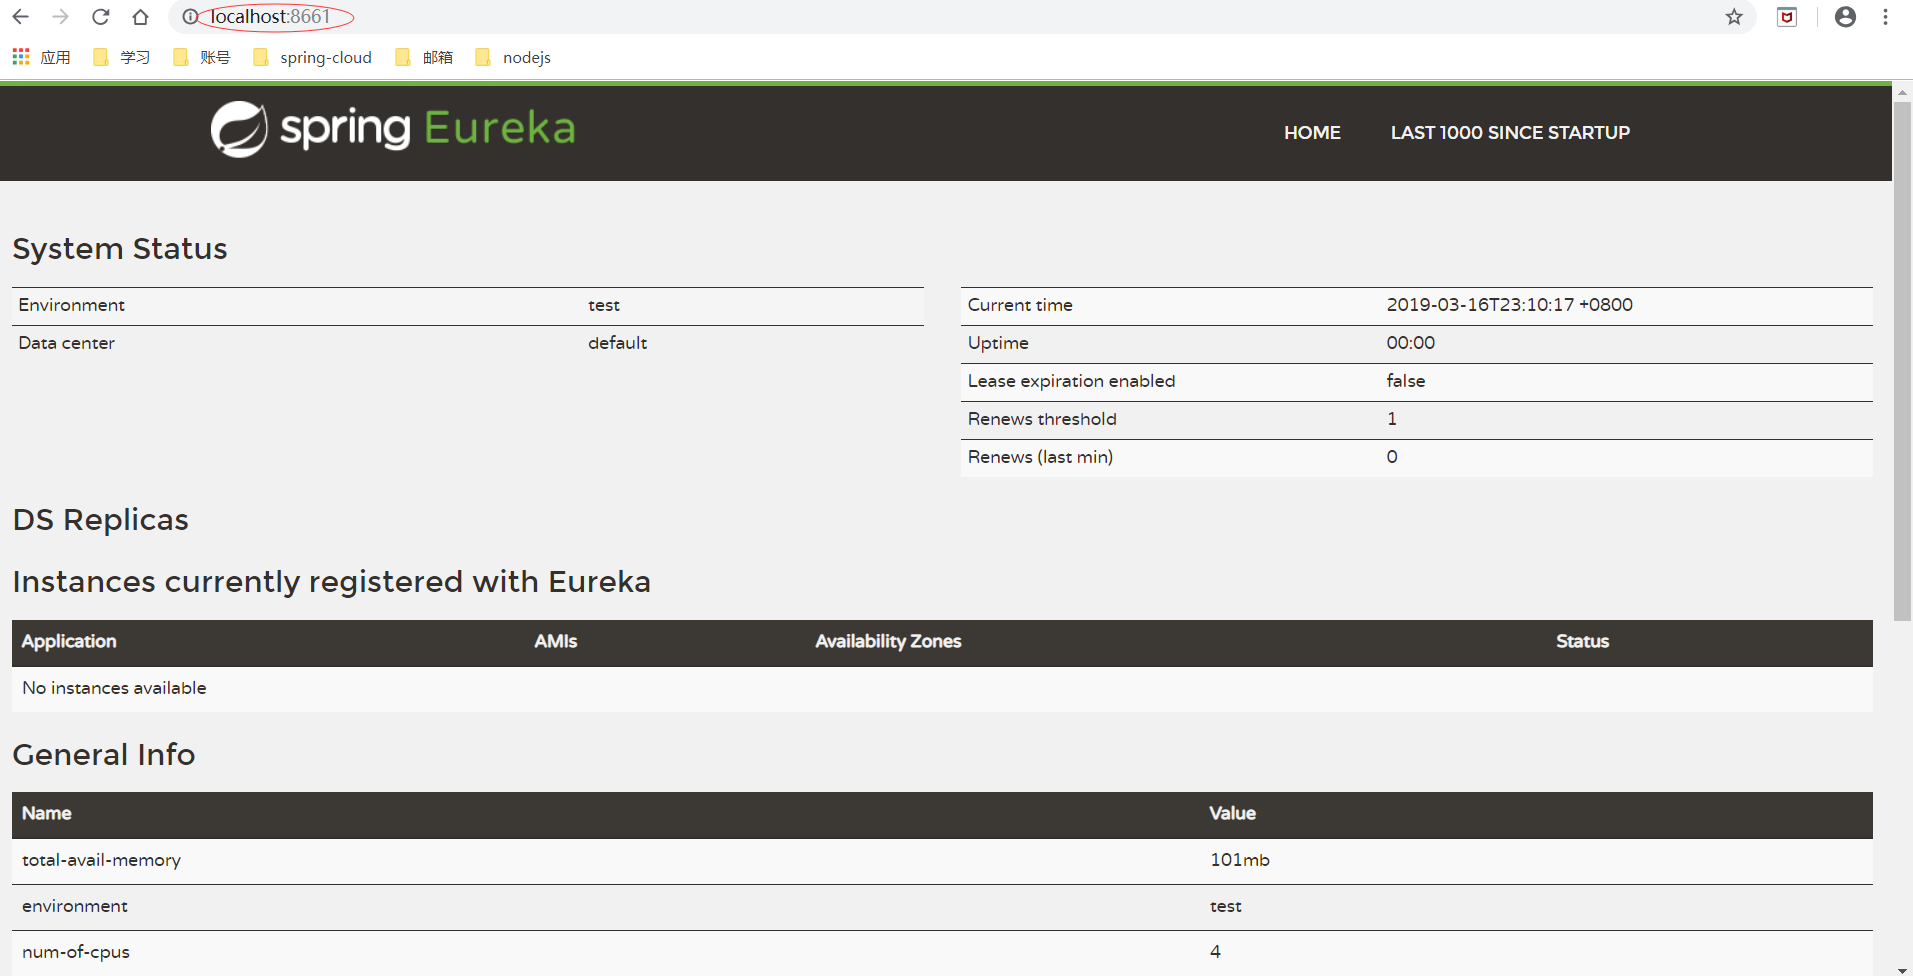
4、访问路径
http://localhost:8661/
注意:页面中的可以在application.yml文件可以进行配置,具体的配置可以百度下springcloud的配置

