一.创建Spring Boot项目
引入Thymeleaf和Web模块以及Spring Security模块方便进行测试,先在pom文件中将 spring-boot-starter-security 的依赖注解掉测试。
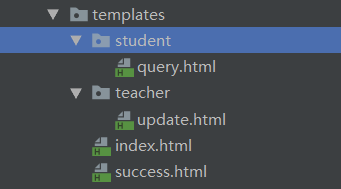
二.创建几个用于测试的页面
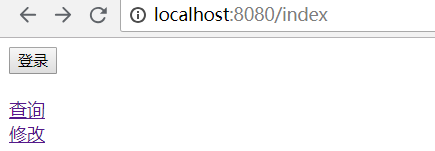
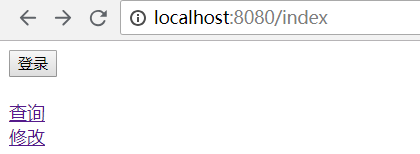
<!DOCTYPE html><!--index页面-->
<html lang="en" xmlns:th="http://www.thymeleaf.org">
<head>
    <meta charset="UTF-8">
    <title>Title</title>
</head>
<body>
    <form th:action="@{/success}"><input type="submit" value="登录"></form>
    <br>
    <a th:href="@{/student/query}">查询</a>
    <br>
    <a th:href="@{/teacher/update}">修改</a>
</body>
</html>
<!DOCTYPE html><!--success页面-->
<html lang="en" xmlns:th="http://www.thymeleaf.org">
<head>
    <meta charset="UTF-8">
    <title>Title</title>
</head>
<body>
<form th:action="@{/logout}"><input type="submit" value="注销"></form>
<br>
<a th:href="@{/student/query}">查询</a>
<br>
<a th:href="@{/teacher/update}">修改</a>
</body>
</html>
query.html页面和update页面就放一两句话用于测试即可
三.创建控制器
@Controller
public class MyController {
@RequestMapping("/index")
public String index(){
return "index";
}
@RequestMapping("/success")
public String success(){
return "success";
}
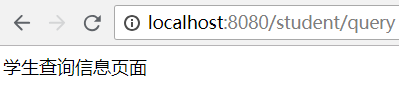
@RequestMapping("/student/query")
public String query(){
return "/student/query";
}
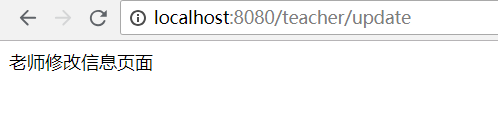
@RequestMapping("/teacher/update")
public String update(){
return "/teacher/update";
}
}
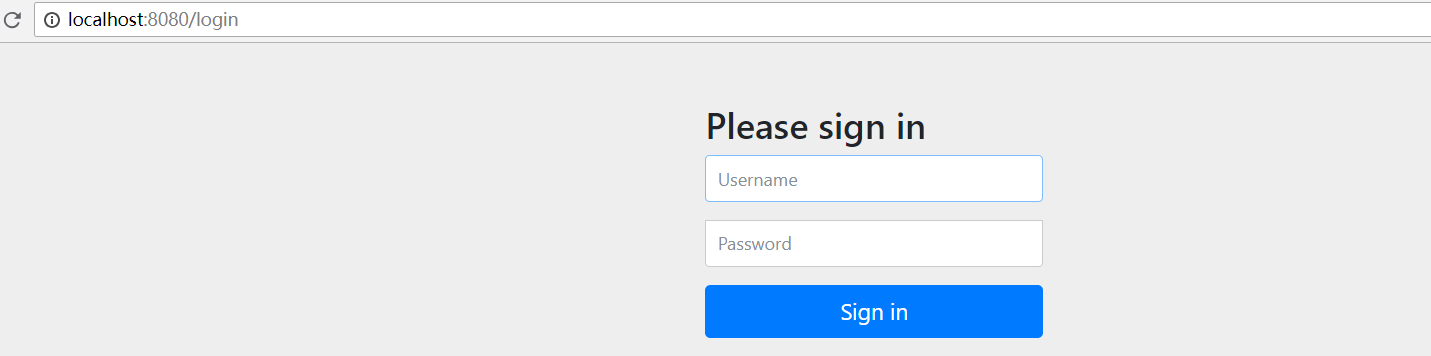
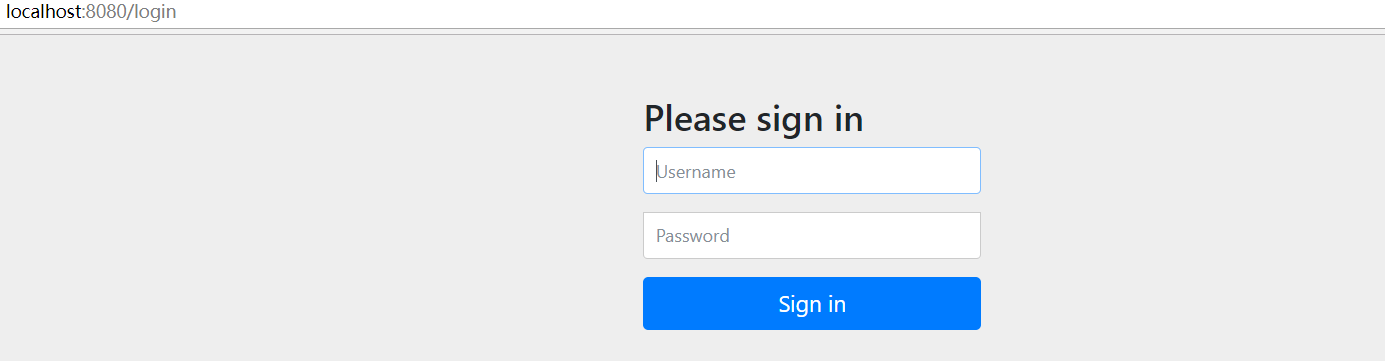
四.导入security前
五.导入security模块后
访问任何页面都需要登录,如下图所示:
六.设置权限规则及登录注销
添加一个配置类如下
@EnableWebSecurity
public class MySecurityConfig extends WebSecurityConfigurerAdapter {
    //自定义权限规则
    @Override
    protected void configure(HttpSecurity http) throws Exception {
        http.authorizeRequests().antMatchers("/index").permitAll()   //permitall不需要任何权限
                .antMatchers("/student/**").hasRole("student")  //需要student权限
                .antMatchers("/teacher/**").hasRole("teacher") //需要teacher权限
                .antMatchers("/success").hasRole("student"); //需要student权限

        //开启登录功能
        http.formLogin();
        //开启注销功能并指定注销后的页面
        http.logout().logoutSuccessUrl("/index");
    }

    //自定义验证规则(如果不开启的话,访问需要权限的页面就会抛出403,拒绝访问)
    @Override
    protected void configure(AuthenticationManagerBuilder auth) throws Exception {
        //super.configure(auth);
        auth.inMemoryAuthentication().withUser("zs").password("123456").roles("student");
        auth.inMemoryAuthentication().withUser("ww").password("123456").roles("student","teacher");
    }
}
测试:
访问localhost:8080/index后
访问localhost:8080/teacher/update则会跳转到
用对应拥有权限的用户登录后即可进入页面,但是用户权限不够的话还是会出现403错误
注意:如果是Spring Boot2.0.3及以上的版本,登录后会抛java.lang.IllegalArgumentException: There is no PasswordEncoder mapped for the id "null"异常,这是因为密码没有没有指定加密方式。
解决方案:
添加自定义的PasswordEncoder,代码如下
public class MyPasswordEncoder implements PasswordEncoder {
    @Override
    public String encode(CharSequence charSequence) {
        return charSequence.toString();
    }

    @Override
    public boolean matches(CharSequence charSequence, String s) {
        return s.equals(charSequence.toString());
    }
}
并且,自定义验证规则添加上自定义的PasswordEncoder
 @Override
    protected void configure(AuthenticationManagerBuilder auth) throws Exception {
        auth.inMemoryAuthentication().passwordEncoder(new MyPasswordEncoder()).withUser("zs").password("123456").roles("student");
        auth.inMemoryAuthentication().passwordEncoder(new MyPasswordEncoder()).withUser("ww").password("123456").roles("student","teacher");
    }
七.根据登录状态显示信息
1.导入thymeleaf与security整合的模块
<dependency>
            <groupId>org.thymeleaf.extras</groupId>
            <artifactId>thymeleaf-extras-springsecurity4</artifactId>
            <version>3.0.4.RELEASE</version>
        </dependency>
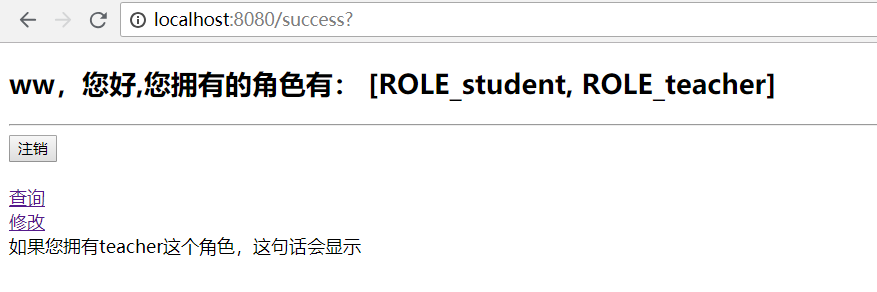
2.修改页面,例如修改success.html页面
<!DOCTYPE html><!--success页面-->
<html xmlns:th="http://www.thymeleaf.org"
      xmlns:sec="http://www.thymeleaf.org/thymeleaf-extras-springsecurity4">
<head>
    <meta charset="UTF-8">
    <title>Title</title>
</head>
<body>
<div sec:authorize="isAuthenticated()">
    <h2><span sec:authentication="name"></span>,您好,您拥有的角色有:
        <span sec:authentication="principal.authorities"></span></h2>
</div>
<hr>
<form th:action="@{/logout}" method="post"><input type="submit" value="注销"></form>
<br>
<a th:href="@{/student/query}">查询</a>
<br>
<a th:href="@{/teacher/update}">修改</a>
<div sec:authorize="hasRole('teacher')">如果您拥有teacher这个角色,这句话会显示</div>
</body>
</html>
访问登录后如下图所示
注意:我这里的thymeleaf-extras-springsecurity4版本是3.0.4,但是Spring Boot的版本是2.1.4,可能是jar包冲突问题,sec属性不起作用

解决办法:修改SpringBoot版本到2.0.x及以下,例如本人修改如下:

八.记住用户
可以直接在开启登录功能后添加一行代码即可
http.rememberMe();
九.自定义登录页面
如果不想使用其自带的登录页面,可以在开启登录页面的时候自定义登录页面(注意,xxxx页面中的表单的用户名输入框的name属性和下面对应,密码输入框的name属性也和下面的对应)
http.formLogin().usernameParameter("name").passwordParameter("password").loginPage("/xxxx");
自定义的登录页案例如下
<!DOCTYPE html>
<html xmlns:th="http://www.thymeleaf.org">
<head>
<meta charset="UTF-8">
<title>Insert title here</title>
</head>
<body>
    <div align="center">
        <form th:action="@{/xxxx}" method="post">
            用户名:<input name="name"/><br>
            密码:<input name="password"><br/>
            <input type="checkbox" name="remeberme"> 记住我<br/>
            <input type="submit" value="登陆">
        </form>
    </div>
</body>
</html>