一、开启IDEA的自动编译(静态)
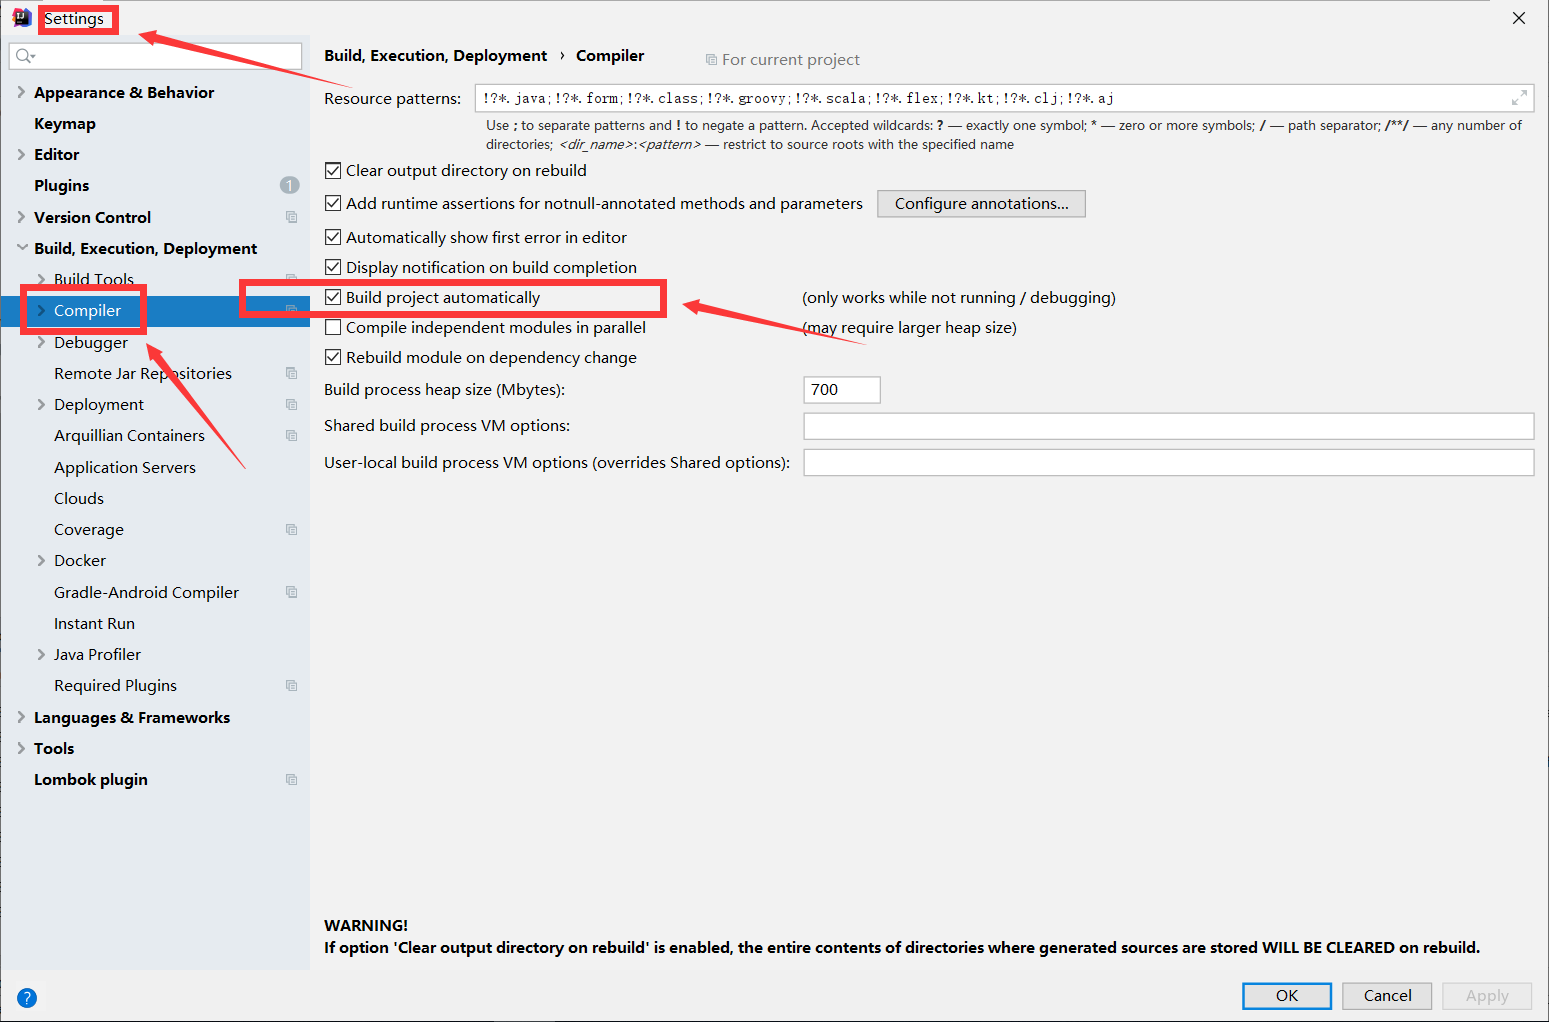
具体步骤:打开顶部工具栏 File -> Settings -> Default Settings -> Build -> Compiler 然后勾选 Build project automatically 。

二、开启IDEA的自动编译(动态)
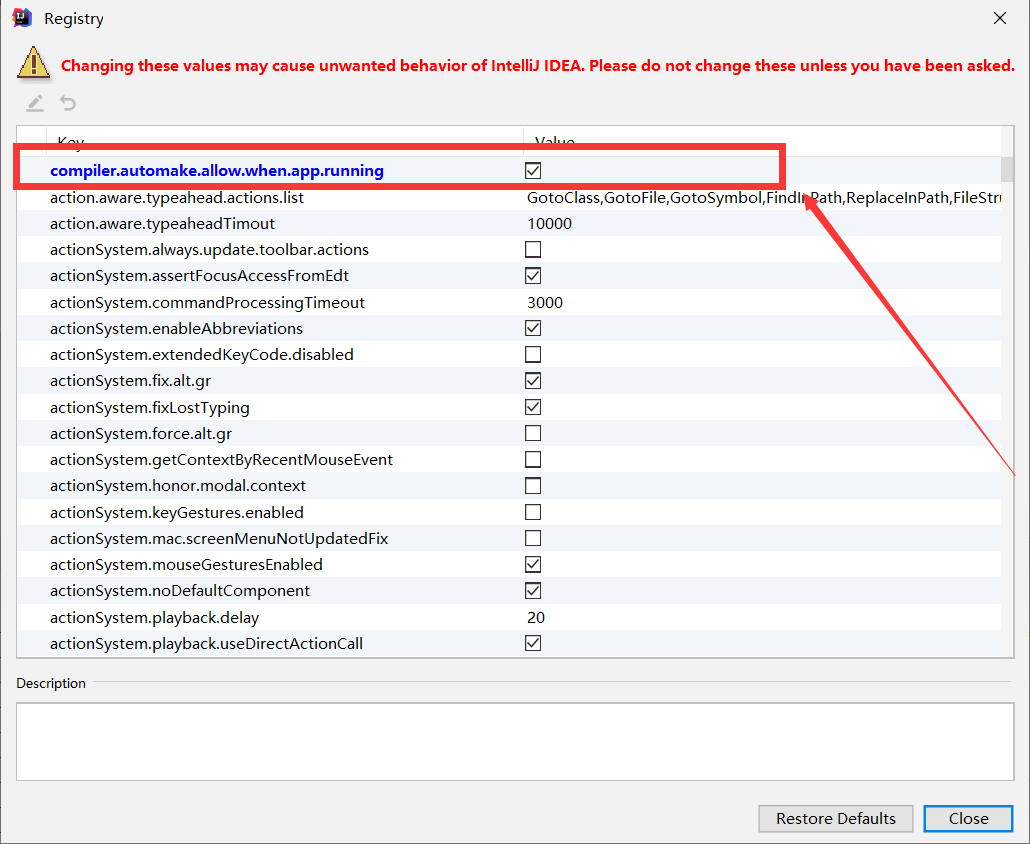
具体步骤:同时按住 Ctrl + Shift + Alt + / 然后进入Registry ,勾选自动编译并调整延时参数。
- compiler.automake.allow.when.app.running -> 自动编译
- compile.document.save.trigger.delay -> 自动更新文件
PS:网上极少有人提到compile.document.save.trigger.delay 它主要是针对静态文件如JS CSS的更新,将延迟时间减少后,直接按F5刷新页面就能看到效果!

三、开启IDEA的热部署策略(非常重要)
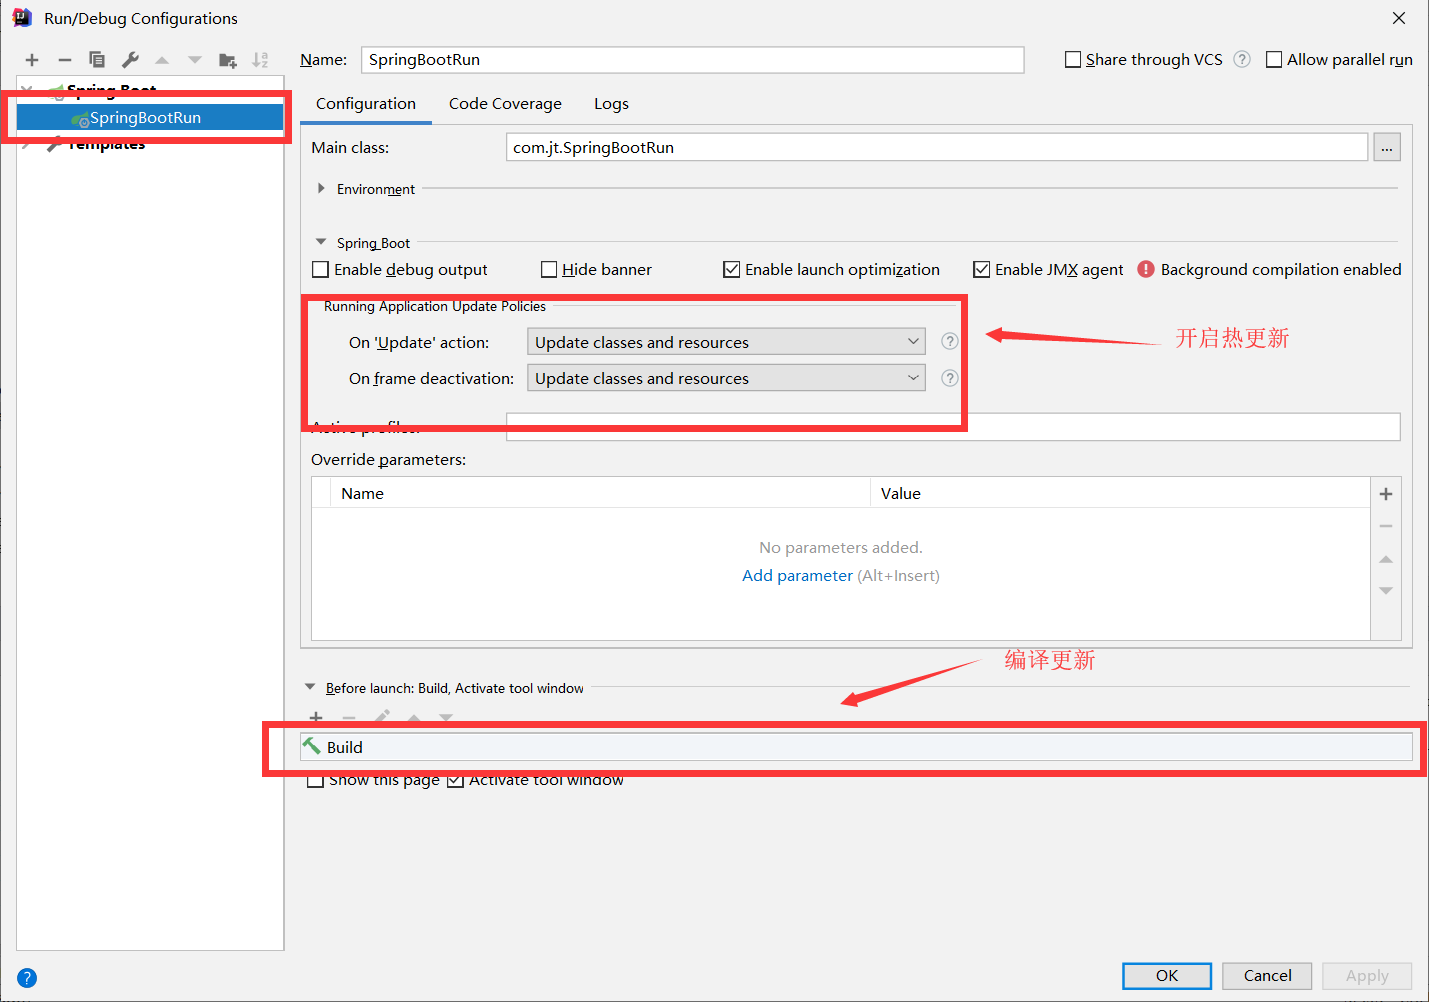
具体步骤:顶部菜单- >Edit Configurations->SpringBoot插件->目标项目->勾选热更新。

四、在项目添加热部署插件(可选)
温馨提示:
如果因为旧项目十分臃肿,导致热重启很慢而影响开发效率,笔者建议直接在POM移除spring-boot-devtools依赖,然后使用Control+Shift+F9进行免启动快速更新!!
具体步骤:在POM文件添加热部署插件
       <dependency>
            <groupId>org.springframework.boot</groupId>
            <artifactId>spring-boot-devtools</artifactId>
            <scope>runtime</scope>
        </dependency>
五、关闭浏览器缓存(重要)
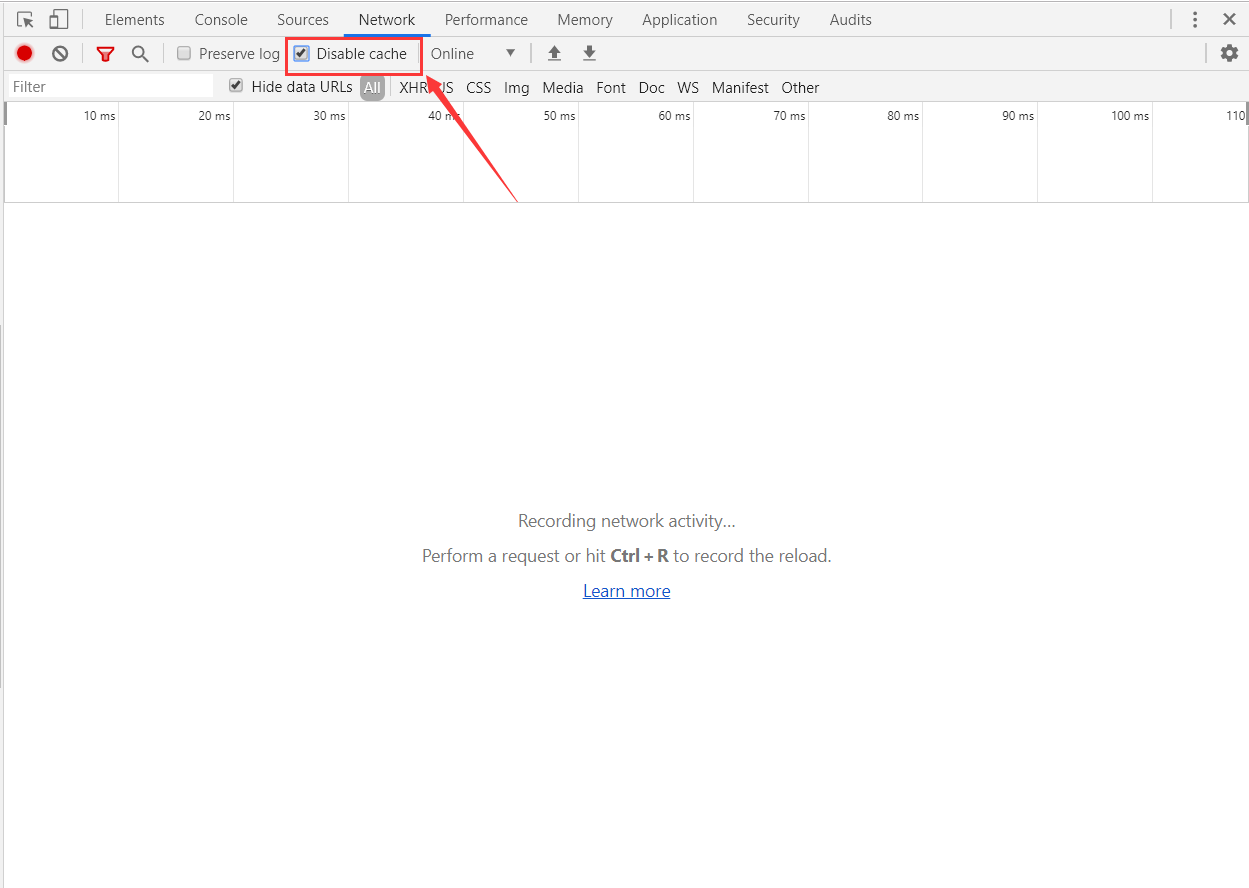
打开谷歌浏览器,打开F12的Network选项栏,然后勾选【✅】Disable cache 。
