版权声明:本文为博主原创文章,遵循 CC 4.0 BY-SA 版权协议,转载请附上原文出处链接和本声明。
本文链接:https://blog.csdn.net/sinat_34766121/article/details/89084983GitHub:
https://github.com/reese0329/testng
接口测试用例编写
Testng使用
断言使用
接口测试框架Rest assured使用
Jsonschema的使用
接口测试主要关注点响应结构
数据来源
数据格式
数据正确性
业务逻辑
用例设计—参数要考虑的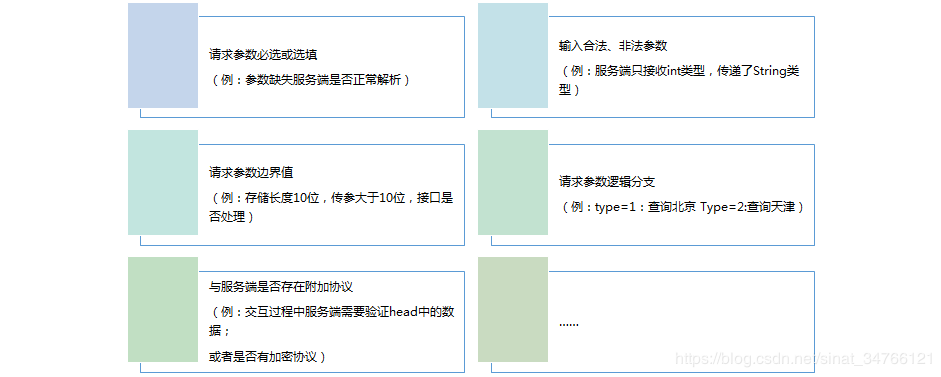
用例设计—结果要验证的
数据库交互是否生效: 点赞,数据库数据变化

用例的管理与维护
•功能测试模式:为了更快速会选用EXCEL、思维导图进行用例管理。
•自动化测试模式:使用测试脚本进行管理。

注:
对于接口的提测,建议是分批提测,最好不要所有接口统一提测,分批测试可以在较短的时间内完成接口测试,也可以提前辅助客户端进行联调,不会占用较长的项目周期。
接口需求分析结合需求文档+接口文档来进行对照分析
•分析出需求文档中所有涉及接口的功能点,并罗列功能点相关业务逻辑
•分析接口功能点是否包含在了接口文档中
•分析接口文档中描述的实现是否能够满足或者覆盖接口功能点及其业务逻辑
•是否需要上层服务支持,服务端是否已提交数据需求
建议先与服务端达成一致:
•需求宣讲完成后,优先产出接口文档(便于测试同学进行接口分析)
•接口文档与客户端先行确认,再进行接口开发(预防后续反工的风险)
•服务端提供接口开发排期表(方便进行测试排期)
16'
<dependency>
<groupId>org.testng</groupId>
<artifactId>testng</artifactId>
<version>6.1.1</version>
<scope>test</scope>
</dependency>
37'
在pom.xml中引入testng测试框架
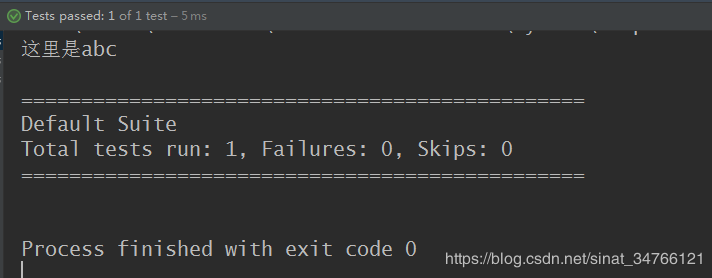
将功能测试用例转换为脚本
import org.testng.annotations.Test;

public class testng {
    @Test
    public void abc(){
        System.out.println("这里是abc");
    }
}
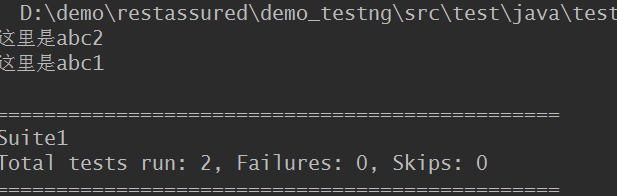
运行多个测试用例
import org.testng.annotations.Test;

public class testng {
    @Test
    public void abc(){
        System.out.println("这里是abc");
    }

    @Test
    public void abc1(){
        System.out.println("这里是abc1");
    }

    @Test
    public void abc2(){
        System.out.println("这里是abc2");
    }

}
四、注解说明
TestNG支持多种注解,可以进行各种组合,如下进行简单的说明
注解 描述
@BeforeSuite 在该套件的所有测试都运行在注释的方法之前,仅运行一次
@AfterSuite 在该套件的所有测试都运行在注释方法之后,仅运行一次
@BeforeClass 在调用当前类的第一个测试方法之前运行,注释方法仅运行一次
@AfterClass 在调用当前类的第一个测试方法之后运行,注释方法仅运行一次
@BeforeTest 注释的方法将在属于test标签内的类的所有测试方法运行之前运行
@AfterTest 注释的方法将在属于test标签内的类的所有测试方法运行之后运行
@BeforeGroups 配置方法将在之前运行组列表。 此方法保证在调用属于这些组中的任何一个的第一个测试方法之前不久运行
@AfterGroups 此配置方法将在之后运行组列表。该方法保证在调用属于任何这些组的最后一个测试方法之后不久运行
@BeforeMethod 注释方法将在每个测试方法之前运行
@AfterMethod 注释方法将在每个测试方法之后运行
@DataProvider 标记一种方法来提供测试方法的数据。 注释方法必须返回一个Object [] [],其中每个Object []可以被分配给测试方法的参数列表。 要从该DataProvider接收数据的@Test方法需要使用与此注释名称相等的dataProvider名称
@Factory 将一个方法标记为工厂,返回TestNG将被用作测试类的对象。 该方法必须返回Object []
@Listeners 定义测试类上的侦听器
@Parameters 描述如何将参数传递给@Test方法
@Test 将类或方法标记为测试的一部分,此标记若放在类上,则该类所有公共方法都将被作为测试方法
常用注解使用:
1.@BeforeClass @AfterClass 在运行类之前或之后执行一次
@BeforeClass 中可写入初始数据
@AfterClass 清除数据
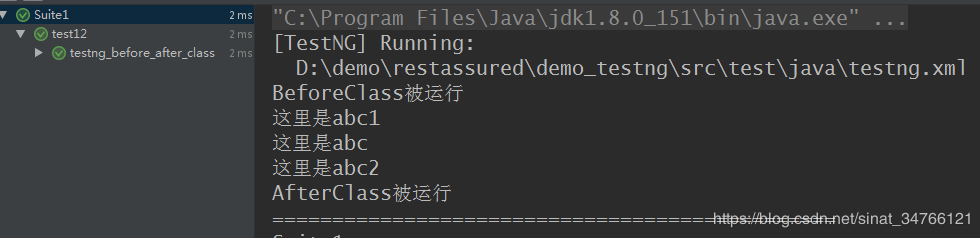
testng_before_after_class.java
import org.testng.annotations.AfterClass;
import org.testng.annotations.BeforeClass;
import org.testng.annotations.Test;

public class testng_before_after_class {

    //    运行testng_before_after_class类的时,会执行一次
    @BeforeClass
    public void BeforeClass(){
        System.out.println("BeforeClass被运行");
    }

    @AfterClass
    public void AfterClass(){
        System.out.println("AfterClass被运行");
    }

//    运行每个测试方法进都会被执行到
    @Test
    public void abc(){
        System.out.println("这里是abc");
    }

    @Test
    public void abc1(){
        System.out.println("这里是abc1");
    }

    @Test
    public void abc2(){
        System.out.println("这里是abc2");
    }

}
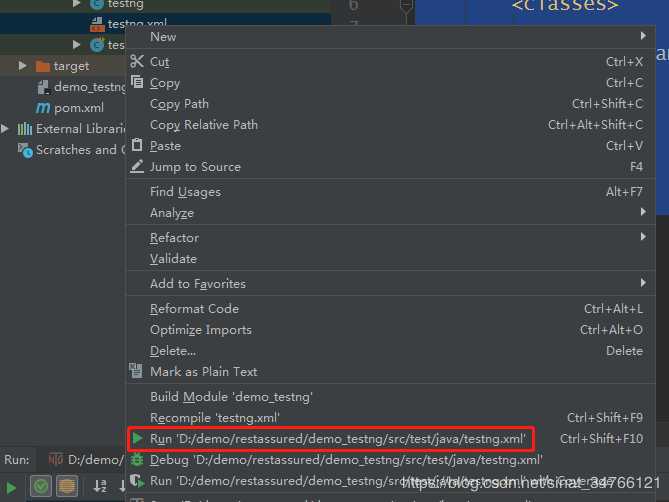
创建xml文件
class name需要与测试的class类名一致
一个测试套件可以包含多个类
<?xml version="1.0" encoding="UTF-8"?>
<!DOCTYPE suite SYSTEM "http://testng.org/testng-1.0.dtd" >
<!--可以同时开启多条线程进行测试任务-->
<suite name="Suite1"  parallel="methods" thread-count="2">
    <test name="test12">
        <classes>

            <class name="testng_before_after_class" >
            </class>


        </classes>
    </test>
</suite>
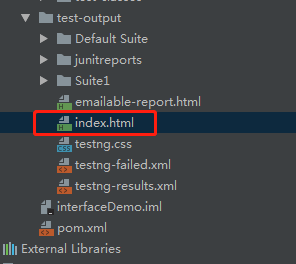
2.将测试结果输出到一个xml文件中
https://www.jianshu.com/p/5b5ab46f6ec0
Run -> Edit Configurations

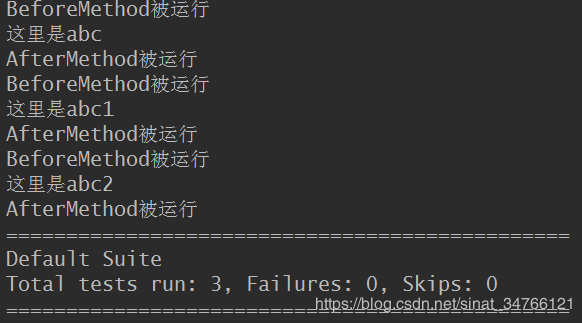
3.method
@BeforeMethod
    public void BeforeMethod(){
        System.out.println("BeforeMethod被运行");
    }

    @AfterMethod
    public void AfterMethod(){
        System.out.println("AfterMethod被运行");
    }

import org.testng.annotations.*;

public class testng_method {
//    运行每个测试方法进都会被执行到
    @BeforeMethod
    public void BeforeMethod(){
    System.out.println("BeforeMethod被运行");
}

    @AfterMethod
    public void AfterMethod(){
        System.out.println("AfterMethod被运行");
    }
    @Test
    public void abc(){
        System.out.println("这里是abc");
    }

    @Test
    public void abc1(){
        System.out.println("这里是abc1");
    }

    @Test
    public void abc2(){
        System.out.println("这里是abc2");
    }

}
4. @Test(enabled = false)
//    未完成的用例,不希望被执行
    @Test(enabled = false)
    public void function3(){

        System.out.println(33);

    }
import org.testng.annotations.AfterMethod;
import org.testng.annotations.BeforeMethod;
import org.testng.annotations.Test;

public class testng_enable {

    @Test(enabled = false)
    public void abc(){
        System.out.println("这里是abc");
    }

    @Test
    public void abc1(){
        System.out.println("这里是abc1");
    }

    @Test
    public void abc2(){
        System.out.println("这里是abc2");
    }

}

5.执行顺序
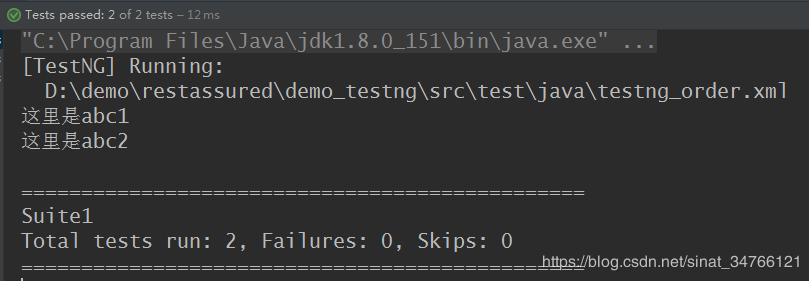
a.testng_order.xml 按xml中方法顺序执行
<?xml version="1.0" encoding="UTF-8"?>
<!DOCTYPE suite SYSTEM "http://testng.org/testng-1.0.dtd" >
<!--可以同时开启多条线程进行测试任务-->
<suite name="Suite1"  parallel="methods" thread-count="2">
    <test name="test12">
        <classes>

            <class name="testng_enable" >
                    <methods>
                        <include name="abc2" />
                        <include name="abc1" />
                    </methods>
            <!--<class name="testng_base" >-->
            </class>


        </classes>
    </test>
</suite>
b.按默认顺序执行 <test name="test12" preserve-order="true">
<?xml version="1.0" encoding="UTF-8"?>
<!DOCTYPE suite SYSTEM "http://testng.org/testng-1.0.dtd" >
<!--可以同时开启多条线程进行测试任务-->
<suite name="Suite1"  parallel="methods" thread-count="2">
    <test name="test12" preserve-order="true">
        <classes>

            <class name="testng_enable" >
                    <methods>
                        <include name="abc2" />
                        <include name="abc1" />
                    </methods>
            <!--<class name="testng_base" >-->
            </class>


        </classes>
    </test>
</suite>
6.分组测试
//将多个测试用例进行分组
    @Test(groups = {"group1"})
    public void function4(){

        System.out.println(444);

    }

    @Test(groups = {"group1"})
    public void function5(){

        System.out.println(555);

    }

    @Test(groups = {"group2"})
    public void function6(){

        System.out.println(666);

    }
testng_group
import org.testng.annotations.AfterMethod;
import org.testng.annotations.BeforeMethod;
import org.testng.annotations.Test;

public class testng_group {

    @Test(groups = "group1")
    public void abc(){
        System.out.println("这里是abc");
    }

    @Test(groups = "group1")
    public void abc1(){
        System.out.println("这里是abc1");
    }

    @Test(groups = "group2")
    public void abc2(){
        System.out.println("这里是abc2");
    }

}
testng_group.xml
<?xml version="1.0" encoding="UTF-8"?>
<!DOCTYPE suite SYSTEM "http://testng.org/testng-1.0.dtd" >
<!--可以同时开启多条线程进行测试任务-->
<suite name="Suite1"  parallel="methods" thread-count="2">
    <test name="test_group" >
        <groups>
            <run>
                <include name="group1" />
            </run>
        </groups>
        <classes>
            <class name="testng_group" >
            <!--<class name="testng_base" >-->
            </class>
        </classes>
    </test>
</suite>
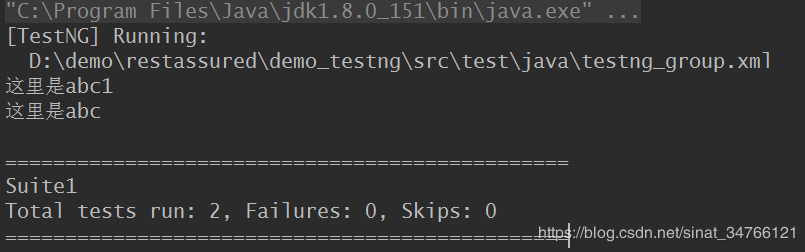
不在分组的里的测试用例不会被执行
7.依赖测试
登录信息
依赖两个函数
import org.testng.annotations.AfterMethod;
import org.testng.annotations.BeforeMethod;
import org.testng.annotations.Test;

public class testng_depend {

    @Test
    public void abc(){
        System.out.println("这里是abc");
    }

    @Test
    public void abc1(){
        System.out.println("这里是abc1");
    }

    @Test
    public void abc2(){
        System.out.println("这里是abc2");
    }

    @Test(dependsOnMethods = {"abc","abc2"})
    public void function(){
        System.out.println(444);
    }

}
run function函数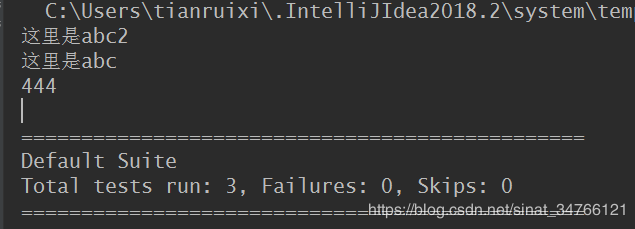
run testng_depend类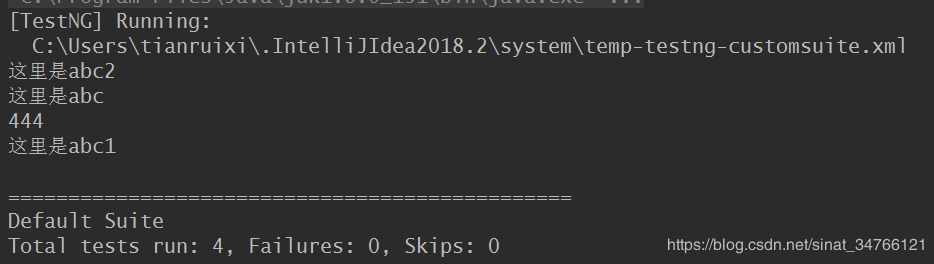
1‘8
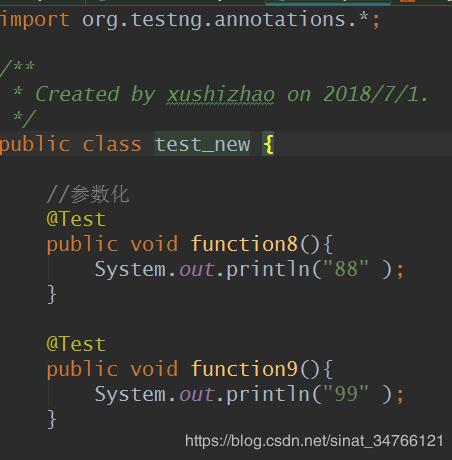
8.构造参数化
testng_parameters.java
import org.testng.annotations.BeforeTest;
import org.testng.annotations.Parameters;
import org.testng.annotations.Test;

public class testng_parameters {
    //参数化
    @Test
    @Parameters("username")
    public void function8(String test1) {
        System.out.println("name == " + test1);
    }
}
testng_parameters.xml
<parameter name="username" value="trx" />
<?xml version="1.0" encoding="UTF-8"?>
<!DOCTYPE suite SYSTEM "http://testng.org/testng-1.0.dtd" >
<!--可以同时开启多条线程进行测试任务-->
<suite name="Suite_parameters"  parallel="methods" thread-count="2">
    <test name="test0411">
        <parameter name="username" value="trx" />
        <classes>

            <class name="testng_parameters" >
            </class>


        </classes>
    </test>
</suite>
junit开发用来做单元测试
1‘15
9.线程
提高测试效率 并行执行
类并行执行 parallel="classes"
<?xml version="1.0" encoding="UTF-8"?>
<!DOCTYPE suite SYSTEM "http://testng.org/testng-1.0.dtd" >
<!--可以同时开启多条线程进行测试任务-->
<suite name="Suite1"  parallel="classes" thread-count="2">
    <test name="test12">
        <classes>
            <class name="testng_enable" >
            </class>
            <class name="testng_method" >
            </class>
        </classes>
    </test>
</suite>
方法并行执行 parallel="methods"
<?xml version="1.0" encoding="UTF-8"?>
<!DOCTYPE suite SYSTEM "http://testng.org/testng-1.0.dtd" >
<!--可以同时开启多条线程进行测试任务-->
<suite name="Suite1"  parallel="methods" thread-count="2">
    <test name="test12">
        <classes>
            <class name="testng_enable" >
            </class>
            <!--<class name="testng_method" >-->
            <!--</class>-->
        </classes>
    </test>
</suite>
断言assertDemo
引入testng断言
import org.testng.Assert;
import org.testng.annotations.DataProvider;
import org.testng.annotations.Parameters;
import org.testng.annotations.Test;


public class testng_assert {

    @Test
    public void assertTest(){

        String str1 = "testerhome";
        String str2 = "testerhome";
        Assert.assertEquals(str1,str2,"判断是否相等");


        boolean bl = true;
        boolean b2 = false;
        Assert.assertTrue(bl,"判断是否为true");
        Assert.assertFalse(b2,"判断是否为false");


        Object str3 = null ;
        Assert.assertNull(str3,"判断是否为nul");
        Assert.assertNotNull(str3,"判断是否不为null");

    }
}

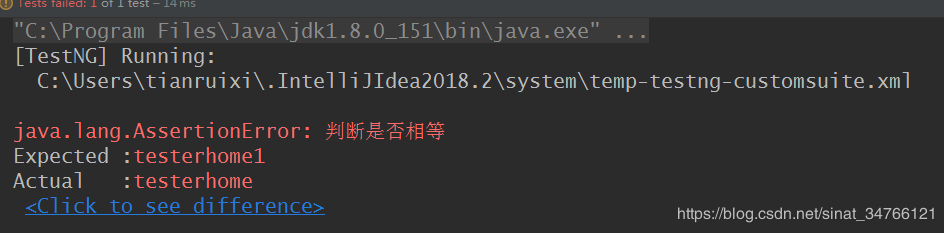
import org.testng.Assert;
import org.testng.annotations.DataProvider;
import org.testng.annotations.Parameters;
import org.testng.annotations.Test;


public class testng_assert {


    @Test
    public void assertTest(){

        String str1 = "testerhome";
        String str2 = "testerhome1";
        Assert.assertEquals(str1,str2,"判断是否相等");


        boolean bl = true;
        boolean b2 = false;
        Assert.assertTrue(bl,"判断是否为true");
        Assert.assertFalse(b2,"判断是否为false");


        Object str3 = null ;
        Assert.assertNull(str3,"判断是否为nul");
        Assert.assertNotNull(str3,"判断是否不为null");

    }
}
1‘19
接口测试框架的选型推荐使用Rest assured框架进行接口测试,语法足够简单,编写测试用例速度快,而且还提供了
相应的断言机制、json验证以及封装了相关jsonpath、xmlpath,使接口测试更加方便快捷。
rest_assured.java
<dependency>
    <groupId>io.rest-assured</groupId>
    <artifactId>rest-assured</artifactId>
    <version>3.0.2</version>
</dependency>


<dependency>
    <groupId>io.rest-assured</groupId>
    <artifactId>json-path</artifactId>
    <version>3.0.2</version>
</dependency>

<dependency>
    <groupId>io.rest-assured</groupId>
    <artifactId>json-schema-validator</artifactId>
    <version>3.0.2</version>
</dependency>
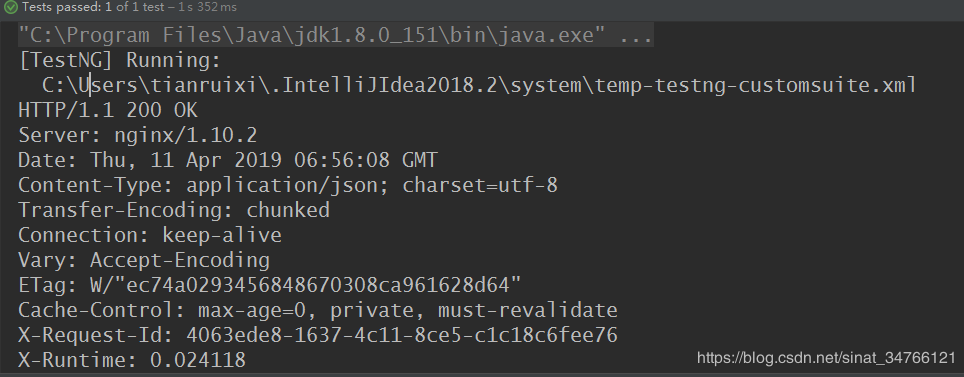
发起请求 get("https://testerhome.com/api/v3/topics.json?limit=1&offset=0&type=last_actived").prettyPeek();
.prettyPeek() 打印返回结果
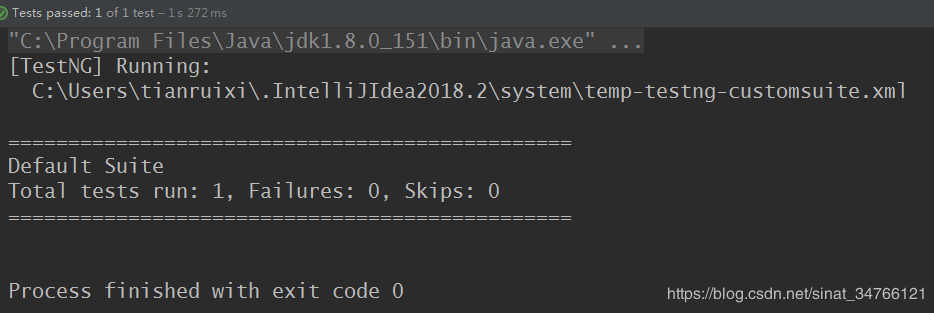
import io.restassured.response.Response;
import org.testng.Assert;
import org.testng.annotations.Test;

import java.util.ArrayList;
import java.util.List;

import static io.restassured.RestAssured.get;
import static io.restassured.RestAssured.given;
import static io.restassured.module.jsv.JsonSchemaValidator.matchesJsonSchemaInClasspath;


public class rest_assured {
    @Test
    public void getfunction1() throws Exception {

        //结构验证
        get("https://testerhome.com/api/v3/topics.json?limit=1&offset=0&type=last_actived")
                .prettyPeek();
    }
}
入参
import io.restassured.response.Response;
import org.testng.Assert;
import org.testng.annotations.Test;

import java.util.ArrayList;
import java.util.List;

import static io.restassured.RestAssured.get;
import static io.restassured.RestAssured.given;
import static io.restassured.module.jsv.JsonSchemaValidator.matchesJsonSchemaInClasspath;


public class rest_assured {
    @Test
    public void getfunction2() throws Exception {
//        int statuscode =
                given().param("limit", 2).and().param("offset", 0).and()
                .param("type", "last_actived")
                .get("https://testerhome.com/api/v3/topics.json").prettyPeek();
    }
}
返回信息同上
given().param("valueName","value").and.param("valueName1","value1").get("url")import io.restassured.response.Response; import org.testng.Assert; import org.testng.annotations.Test; import java.util.ArrayList; import java.util.List; import static io.restassured.RestAssured.get; import static io.restassured.RestAssured.given; import static io.restassured.module.jsv.JsonSchemaValidator.matchesJsonSchemaInClasspath; public class rest_assured { @Test public void getfunction2() throws Exception { Response response = given().param("limit", 2).and().param("offset", 0).and() .param("type", "last_actived") .get("https://testerhome.com/api/v3/topics.json"); // response.getCookies(); // response.getContentType(); Assert.assertEquals(200,response.statusCode()); } }
将请求数据放Map,将Map赋值给URL
@Test
    public void getfunction3() throws Exception {


        Map<String, Object> parameters = new HashMap<String, Object>();
        parameters.put("limit", 2);
        parameters.put("offset", 0);
        parameters.put("type", "last_actived");

        int statuscode =         given().params(parameters).get("https://testerhome.com/api/v3/topics.json")
.getStatusCode();

    }
post请求
   @Test
    public void postfunction2() throws Exception {
        Response response =
                given()
                        .cookie("ll="108288"; bXXXXXXXXXXXXXXXXXXXX")
                        .contentType("application/x-www-form-urlencoded")
                        .param("ck","aIY0")
                        .param("comment","test0411")
                .post("https://www.douban.com/");
//        response.getCookies();
//        response.getContentType();
        Assert.assertEquals(200,response.statusCode());
    }
入参
@Test
    public void postfunction3() throws Exception {


        Map<String, Object> parameters = new HashMap<String, Object>();
        parameters.put("ck","aIY0");
        parameters.put("comment","test0411");

        int statuscode = given()
                .cookie("ll="108288"; bid=xxxxxx")
                .contentType("application/x-www-form-urlencoded")
                .params(parameters)
                .post("https://www.douban.com/").getStatusCode();

    }
支持put请求
1‘31
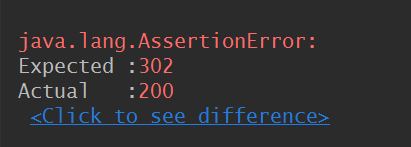
断言取值获取返回信息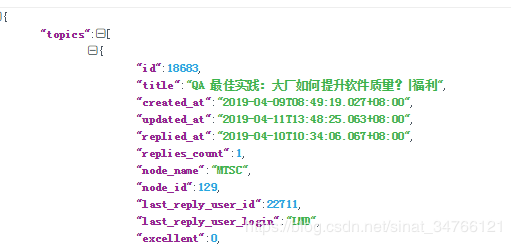
@Test
    public void assert_Test() throws Exception {

        //断言验证
        Response response = get("https://testerhome.com/api/v3/topics.json?limit=1&offset=0&type=last_actived");
        int statuscode = response.statusCode();
        Assert.assertEquals(200, statuscode, "接口返回正确");
        String title = response.jsonPath().getString("topics[0].title");
        Assert.assertEquals("QA 最佳实践:大厂如何提升软件质量?|福利",title,"标题正确");

    }

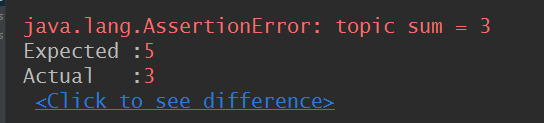
获取topic数量并断言有3个topic
 @Test
    public void assert_Test() throws Exception {

        //断言验证
        Response response = get("https://testerhome.com/api/v3/topics.json?limit=1&offset=0&type=last_actived");
        int statuscode = response.statusCode();
        Assert.assertEquals(200, statuscode, "接口返回正确");
        String title = response.jsonPath().getString("topics[0].title");
        Assert.assertEquals("QA 最佳实践:大厂如何提升软件质量?|福利",title,"标题正确");
        //获取topic数量
        int topicsize = response.jsonPath().getList("topics").size();
        Assert.assertEquals(3,topicsize,"topic sum = 3");

    }

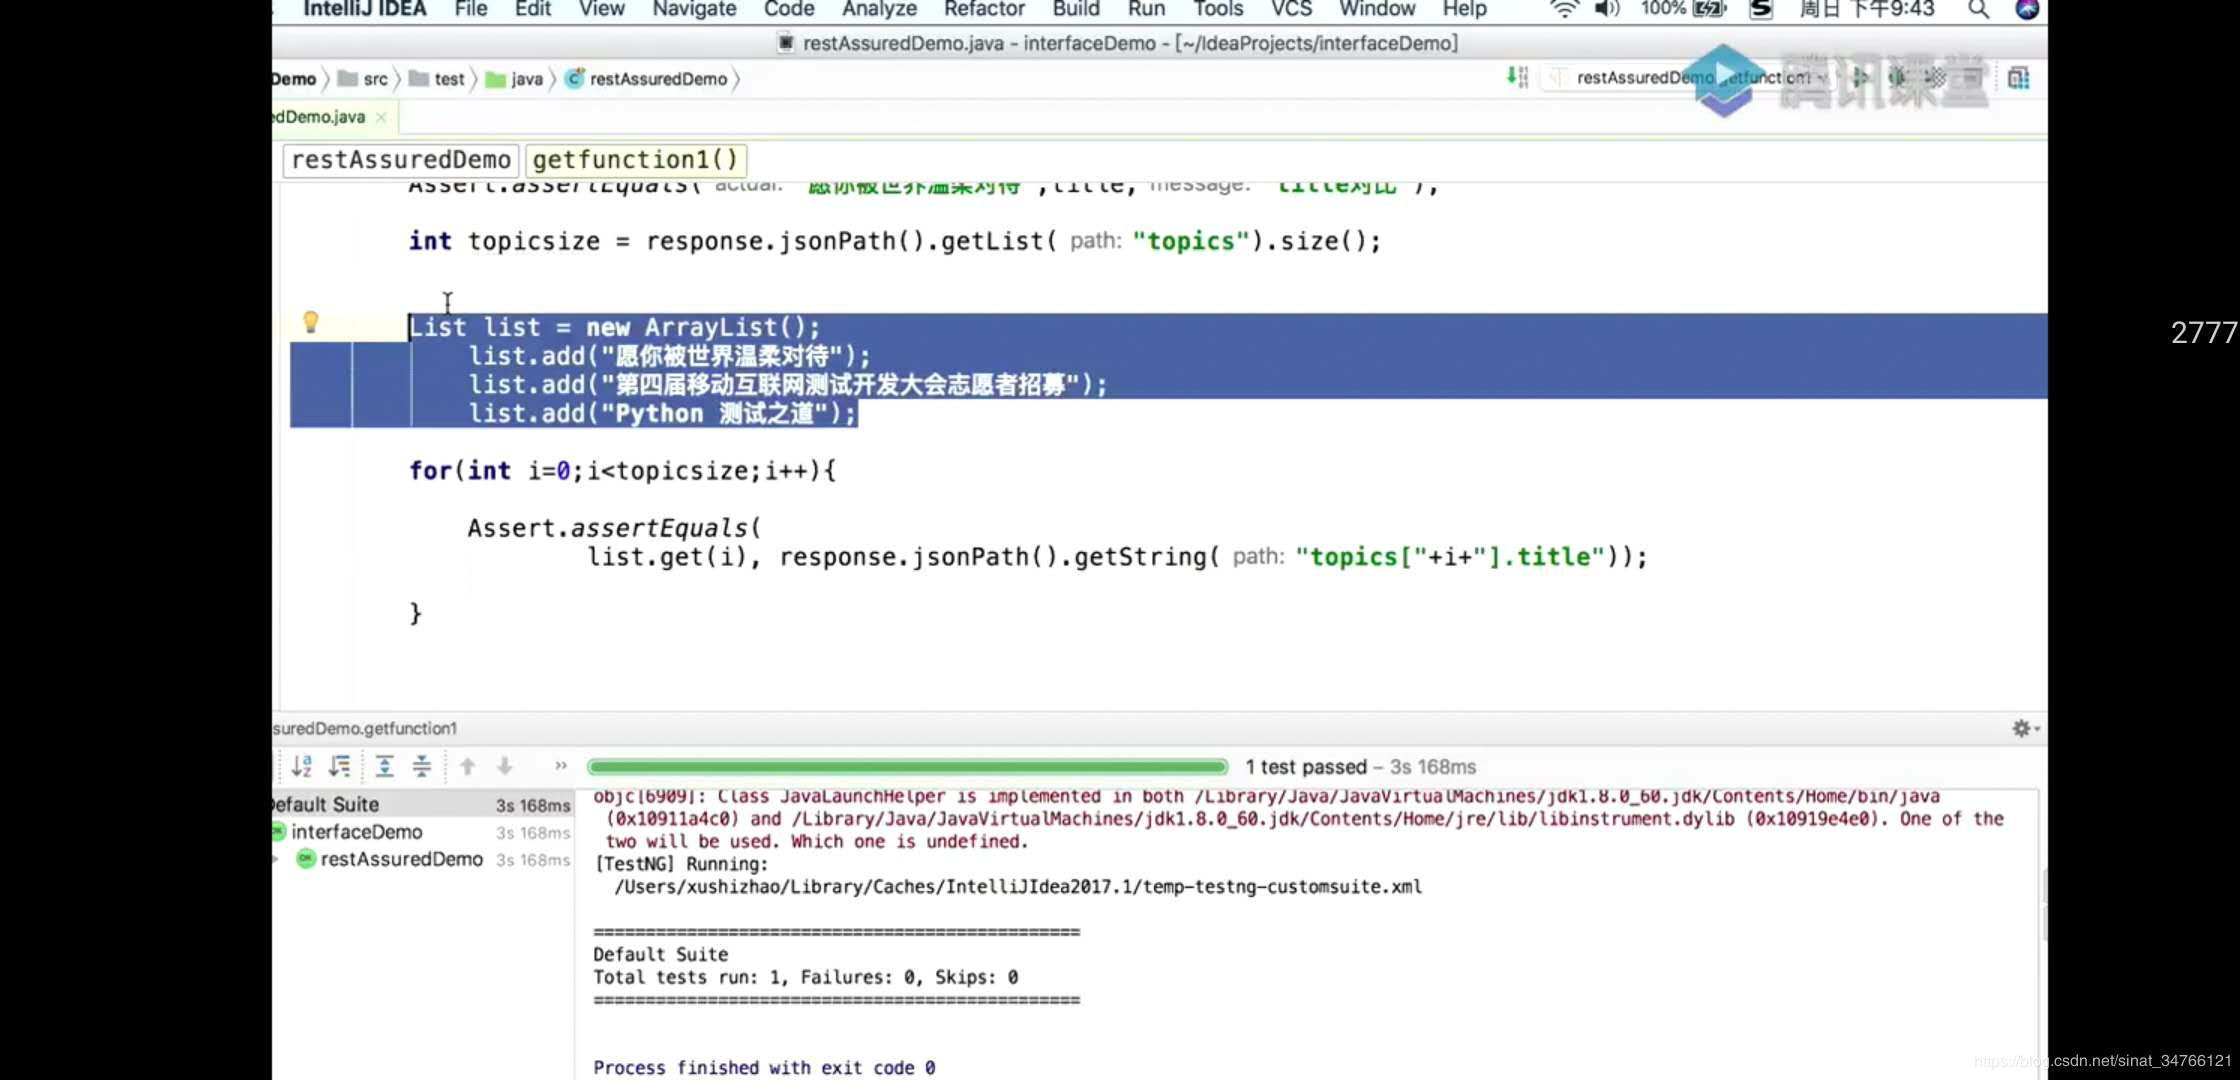
@Test
    public void assert_Test_topicsize() throws Exception {

        //断言验证
        Response response = get("https://testerhome.com/api/v3/topics.json?limit=1&offset=0&type=last_actived");
        //获取topic数量
        int topicsize = response.jsonPath().getList("topics").size();

        List list = new ArrayList();
        list.add("QA 最佳实践:大厂如何提升软件质量?|福利");

        for (int i=0;i<topicsize;i++) {
            Assert.assertEquals(
                    list.get(0), response.jsonPath().getString("topics["+i+"].title"));
        }
    }
比对所有结果
1‘38
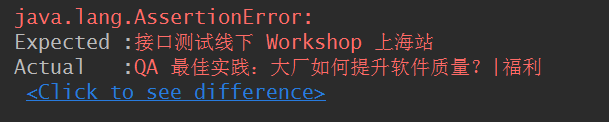
结果有问题
@Test
    public void assert_Test_topicsize() throws Exception {

        //断言验证
        Response response = get("https://testerhome.com/api/v3/topics.json?limit=1&offset=0&type=last_actived");

        //获取topic数量
        int topicsize = response.jsonPath().getList("topics").size();

        //提前构造
        List list = new ArrayList();
        list.add("QA 最佳实践:大厂如何提升软件质量?|福利");
        list.add("接口测试线下 Workshop 上海站");
        list.add("TesterHome 广州沙龙 2019年 第 1 期报名中!");
        for (int i=0;i<topicsize;i++) {
            Assert.assertEquals(
                    list.get(i), response.jsonPath().getString("topics[" + i + "].title"));
        }
    }
1‘’43‘43
数据加工 前端只显示3个字符
数据比对
1‘45
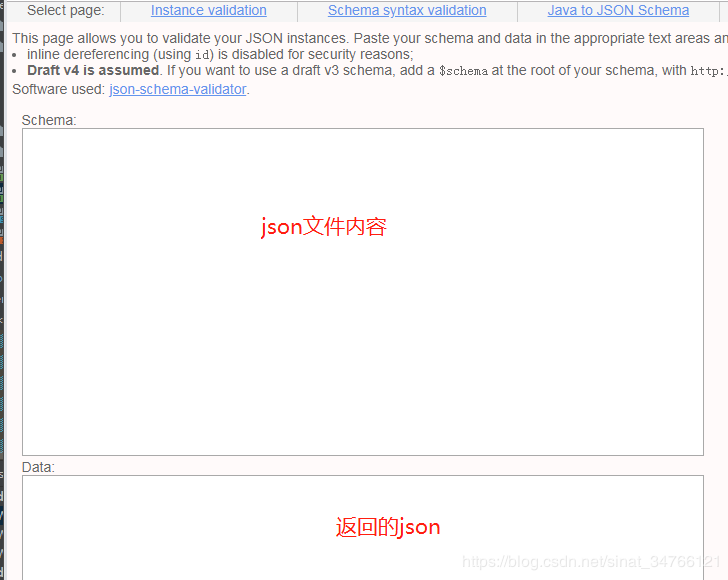
Jsonschema的使用http://json-schema.org
Json schema的编写
在rest assured中的应用
http://json-schema.org/draft-04/schema#json-schema版本为draft-04
优先验证接口结构
验证返回的json结构是否有缺失
逻辑
数据的准确性 -- 写循环验证所有数据的准确性
接口的类型也很重要!!!
 @Test
    public void jsonscheme(){

        get("https://testerhome.com/api/v3/topics.json?limit=1&offset=0&type=last_actived")
                .then().assertThat().body(matchesJsonSchemaInClasspath("topics.json"));

    }
新建示例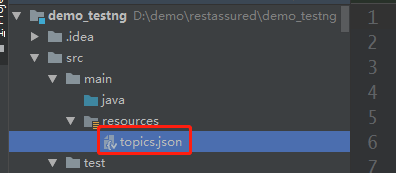
{
  "$schema": "http://json-schema.org/draft-04/schema#",
  "title": "topics",
  "type": "object",
  "properties": {
    "topics": {
      "type": "array",
      "items":{
        "type":"object",
        "properties":{
          "id":{ "type":"integer"},
          "title":{"type":"string"},
          "user":{"type": "object",
          "properties": {
            "id":{"type": "integer"},
            "login":{"type": "string"}
          }},
          "deleted":{"type":"boolean"},
          "closed_at":{"type":"null"}
        },
        "required":["id","title","created_at"]
      }
    }
  },
  "required": [
    "topics"
  ]
}
缺失验证
验证Jsonschema编写正确
http://json-schema-validator.herokuapp.com/