|
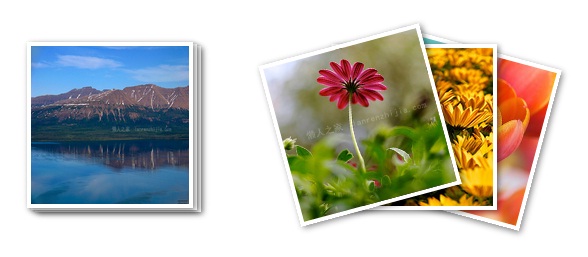
这是一款基于jQuery和CSS3的图片层叠展开特效,让鼠标滑过图片时即可触发这些特效。主要由HTML、CSS以及jQuery代码组成。

HTML代码:
把要用到的小图片列出来,HTML结构非常简单。
- <div id="page_wrap">
- <!--Stack 1 -->
- <div class="image_stack" style="margin-left:600px">
- <img id="photo1" class="stackphotos" src="images/lanrenzhijia2.jpg" >
- <img id="photo2" class="stackphotos" src="images/lanrenzhijia3.jpg" >
- <img id="photo3" class="stackphotos" src="images/lanrenzhijia1.jpg" >
- </div>
- <!--Stack 2 -->
- <div class="image_stack" style="margin-left:300px">
- <img id="photo1" class="stackphotos" src="images/lanrenzhijia4.jpg" >
- <img id="photo2" class="stackphotos" src="images/lanrenzhijia5.jpg" >
- <img id="photo3" class="stackphotos" src="images/lanrenzhijia6.jpg" >
- </div>
-
- <div class="single_photo">
- <ul id="pics">
- <li><a href="#pic1" title="Photo"><img src="images/lanrenzhijia3.jpg" alt="picture"></a></li>
- </ul>
- </div>
- </div>
接下来是CSS,相对复杂一点,因为有用到CSS3相关的一些特性。
CSS代码:
主要是rotate实现图片翻转折叠的效果,另外指定了0.2s的ease动画。
- .image_stack img { /* css style for photo stack */
- border: none;
- text-decoration: none;
- position: absolute;
- margin-left:0px;
- 5074px;
- height: 5074px;
- }
- .image_stack { /* css style for photo stack */
- 400px;
- position: absolute;
- margin:60px 10px 10px;
- }
- .image_stack img { /* css style for photo stack */
- position: absolute;
- border: 4px solid #FFF;
- box-shadow: 2px 2px 8px rgba(0, 0, 0, 0.5);
- -moz-box-shadow: 2px 2px 8px rgba(0, 0, 0, 0.5);
- -webkit-box-shadow: 2px 2px 8px rgba(0, 0, 0, 0.5);
- z-index: 9999;
- /* Firefox */
- -moz-transition: all 0.2s ease;
- /* WebKit */
- -webkit-transition: all 0.2s ease;
- /* Opera */
- -o-transition: all 0.2s ease;
- /* Standard */
- transition: all 0.2s ease;
- }
- .image_stack #photo1 { /* position of last photo in the stack */
- top: 8px;
- left: 108px;
- }
- .image_stack #photo2 {/* position of middle photo in the stack */
- top: 6px;
- left: 104px;
- }
- .image_stack #photo3 {/* position of first photo at the top in the stack */
- top: 4px;
- left: 100px;
- right: 100px;
- }
- .image_stack .rotate1 {/* rotate last image 15 degrees to the right */
- -webkit-transform: rotate(15deg); /* safari and chrome */
- -moz-transform: rotate(15deg);/*firefox browsers */
- transform: rotate(15deg);/*other */
- -ms-transform:rotate(15deg); /* Internet Explorer 9 */
- -o-transform:rotate(15deg); /* Opera */
- }
- .image_stack .rotate2 {/* css not used*/
- -webkit-transform: rotate(0deg); /* safari and chrome */
- -moz-transform: rotate(0deg);/*firefox browsers */
- transform: rotate(0deg);/*other */
- -ms-transform:rotate(0deg); /* Internet Explorer 9 */
- -o-transform:rotate(0deg); /* Opera */
- }
- .image_stack .rotate3 {/*rotate first image 15 degrees to the left*/
- -webkit-transform: rotate(-15deg); /* safari and chrome */
- -moz-transform: rotate(-15deg); /*firefox browsers */
- transform: rotate(-15deg);/*other */
- -ms-transform:rotate(-15deg); /* Internet Explorer 9 */
- -o-transform:rotate(-15deg); /* Opera */
- cursor: pointer;
- }
jQuery代码:
- $(document).ready(function() {
- $(".image_stack").delegate('img', 'mouseenter', function() {//when user hover mouse on image with div id=stackphotos
- if ($(this).hasClass('stackphotos')) {//
- // the class stackphotos is not really defined in css , it is only assigned to each images in the photo stack to trigger the mouseover effect on these photos only
-
- var $parent = $(this).parent();
- $parent.find('img#photo1').addClass('rotate1');//add class rotate1,rotate2,rotate3 to each image so that it rotates to the correct degree in the correct direction ( 15 degrees one to the left , one to the right ! )
- $parent.find('img#photo2').addClass('rotate2');
- $parent.find('img#photo3').addClass('rotate3');
- $parent.find('img#photo1').css("left","150px"); // reposition the first and last image
- $parent.find('img#photo3').css("left","50px");
- }
- })
- .delegate('img', 'mouseleave', function() {// when user removes cursor from the image stack
- $('img#photo1').removeClass('rotate1');// remove the css class that was previously added to make it to its original position
- $('img#photo2').removeClass('rotate2');
- $('img#photo3').removeClass('rotate3');
- $('img#photo1').css("left","");// remove the css property 'left' value from the dom
- $('img#photo3').css("left","");
-
- });;
- });
其实jQuery也没什么事情,主要是动态为图片增加和删除类,用addClass和removeClass实现,这样鼠标滑过图片就可以翻转,鼠标离开图片又能够恢复,很不错吧。
|
