前言
gulp-file-include是gulp插件,它提供了一个 include 方法让我们可以像后端模板那样把公共部分的页面导入进来,实现 html 复用。
环境准备
gulp-file-include 是gulp的插件,所以需要先安装gulp
npm install -g gulp
npm install gulp --save-dev
npm install gulp-file-include --save-dev
gulp 版本目前是4.0.2
include 使用
目录结构
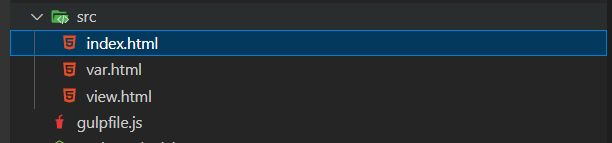
index.html
<!DOCTYPE html>
<html>
  <body>
  @@include('./view.html')
  @@include('./var.html', {
    "name": "haoxin",
    "age": 12345,
    "socials": {
      "fb": "facebook.com/include",
      "tw": "twitter.com/include"
    }
  })
  </body>
</html>
view.html
<h1>view</h1>
var.html
<label>@@name</label>
<label>@@age</label>
<strong>@@socials.fb</strong>
<strong>@@socials.tw</strong>
gulpfile.js 合并html
var gulp = require('gulp');       // 导入gulp
const fileinclude = require('gulp-file-include');


gulp.task('fileinclude', async ()=> {
  gulp.src(['src/index.html'])
    .pipe(fileinclude({
      prefix: '@@',
      basepath: '@file'
    }))
    .pipe(gulp.dest('dist/'));
});
执行命令
gulp fileinclude
就可以得到dist/index.html
<!DOCTYPE html>
<html lang="en">
<head>
    <meta charset="UTF-8">
    <meta http-equiv="X-UA-Compatible" content="IE=edge">
    <meta name="viewport" content="width=device-width, initial-scale=1.0">
    <title>Document</title>
</head>
<body>
    <h1>include 使用示例</h1>
    <h1>view</h1>
    <label>haoxin</label>
<label>12345</label>
<strong>facebook.com/include</strong>
<strong>twitter.com/include</strong>
    </body>
</html>
filters
filters 可以把markdown 文档转成html 标签, 需先安装插件
npm install markdown
index.html
<!DOCTYPE html>
<html>
  <body>
  @@include(markdown('view.md'))
  @@include('./var.html', {
    "name": "haoxin",
    "age": 12345,
    "socials": {
        "fb": "facebook.com/include",
        "tw": "twitter.com/include"}
  })
  </body>
</html>
view.md
# 环境
vscode

# 环境准备

1.安装
> npm install gulp -g

2.安装md插件
> npm install markdown
gulpfile.js
const fileinclude = require('gulp-file-include');
const markdown = require('markdown');
const gulp = require('gulp');

gulp.task('fileinclude', async function() {
  gulp.src(['src/index.html'])
    .pipe(fileinclude({
      filters: {
        markdown: markdown.parse
      }
    }))
    .pipe(gulp.dest('dist/'));
});
执行 gulp fileinclude后生成的dist/index.html
<!DOCTYPE html>
<html>
  <body>
  <h1>环境</h1>

<p>vscode</p>

<h1>环境准备</h1>

<p>1.安装</p>

<blockquote><p>npm install gulp -g</p></blockquote>

<p>2.安装md插件</p>

<blockquote><p>npm install markdown</p></blockquote>
  <label>haoxin</label>
<label>12345</label>
<strong>facebook.com/include</strong>
<strong>twitter.com/include</strong>
  </body>
</html>
if 使用
index.html
@@include('some.html', { "nav": true })

@@if (name === 'test' && nav === true) {
  @@include('test.html')
}
gulpfile.js
fileinclude({
  context: {
    name: 'test'
  }
});
for 使用
index.html
<ul>
@@for (var i = 0; i < arr.length; i++) {
  <li>`+arr[i]+`</li>
}
</ul>
gulpfile.js
fileinclude({
  context: {
    arr: ['test1', 'test2']
  }
});
loop 使用
index.html
<body>
  @@loop('loop-article.html', [
    { "title": "My post title", "text": "<p>lorem ipsum...</p>" },
    { "title": "Another post", "text": "<p>lorem ipsum...</p>" },
    { "title": "One more post", "text": "<p>lorem ipsum...</p>" }
  ])
</body>
loop-article.html
<article>
  <h1>@@title</h1>
  @@text
</article>
loop + data.json
data.json
[
  { "title": "My post title", "text": "<p>lorem ipsum...</p>" },
  { "title": "Another post", "text": "<p>lorem ipsum...</p>" },
  { "title": "One more post", "text": "<p>lorem ipsum...</p>" }
]
loop-article.html
<body>
  @@loop("loop-article.html", "data.json")
</body>
webRoot内置上下文变量
上下文的webRoot字段包含从源文档到源根的相对路径(除非上下文选项中已设置该值)。
support/contact/index.html
<!DOCTYPE html>
<html>
  <head>
    <link type=stylesheet src=@@webRoot/css/style.css>
  </head>
  <body>
    <h1>Support Contact Info</h1>
    <footer><a href=@@webRoot>Home</a></footer>
  </body>
  </body>
</html>
result:
<!DOCTYPE html>
<html>
  <head>
    <link type=stylesheet src=../../css/style.css>
  </head>
  <body>
    <h1>Support Contact Info</h1>
    <footer><a href=../..>Home</a></footer>
  </body>
  </body>
</html>