前言
测试一个web网站的时候,通常需要先登录。要是每个脚本都写一次登录流程,太麻烦了,于是我们会想到写一个公共函数,这样每次去调用函数即可。
cypress 里面提供了一个 commands.js 可以自定义命令,如使用cy.login(user,password)就能调用了
登录
前面写了一个登陆的案例,参考https://www.cnblogs.com/yoyoketang/p/12873091.html
// # 上海-悠悠,QQ交流群:750815713

describe('登陆web网站案例', function() {
    beforeEach(() => {
          cy.visit('http://ip:8080/zentao/user-login.html')
        })

    it("登陆案例", function()
    {
        // 输入用户名
        cy.get('#account').type('admin')
              .should('have.value', 'admin')
        // 输入密码
        cy.get('[name="password"]').type('***123456')
              .should('have.value', '***123456')
        // 提交表单
        cy.get('#submit').click()
        // 判断页面跳转到 /zentao/my/
        cy.url().should('include', '/zentao/my/')
        // and '欢迎您:admin' in page
        cy.get('body').should('contain', '我的地盘')
        // 判断存在cookie值 'zentaosid'
        cy.getCookie('zentaosid').should('exist')
    })
    })
自定义命令
在cypress/support/commands.js 自定义一个login的命令,方便用例调用
// # 上海-悠悠,QQ交流群:750815713

Cypress.Commands.add('login', (name, password) => {
    cy.visit('http://ip:8080/zentao/user-login.html')
    // 输入用户名
    cy.get('#account').type(name)
          .should('have.value', name)
    // 输入密码
    cy.get('[name="password"]').type(password)
          .should('have.value', password)
    // 提交表单
    cy.get('#submit').click()
    // 判断页面跳转到 /zentao/my/
    cy.url().should('include', '/zentao/my/')
    // and '欢迎您:admin' in page
    cy.get('body').should('contain', '我的地盘')
    // 判断存在cookie值 'zentaosid'
    cy.getCookie('zentaosid').should('exist')
})
接下来写个登录后,访问首页的案例,看是否调用成功
// # 上海-悠悠,QQ交流群:750815713

describe('登录后-访问首页', function() {
    beforeEach(() => {
          cy.login("admin", "****123456")

        })


    it("访问首页", () =>
        {
            cy.visit("http://ip:8080/zentao/my/")
            cy.url().should('include', '/zentao/my/')
            cy.title().should('contain', '我的地盘 - 禅道')
        })

    it("访问后台管理", () =>
        {
            cy.visit("http://ip:8080/zentao/admin/")
            cy.url().should('include', '/zentao/admin/')
            cy.title().should('contain', '后台管理 - 禅道')
        })

    })
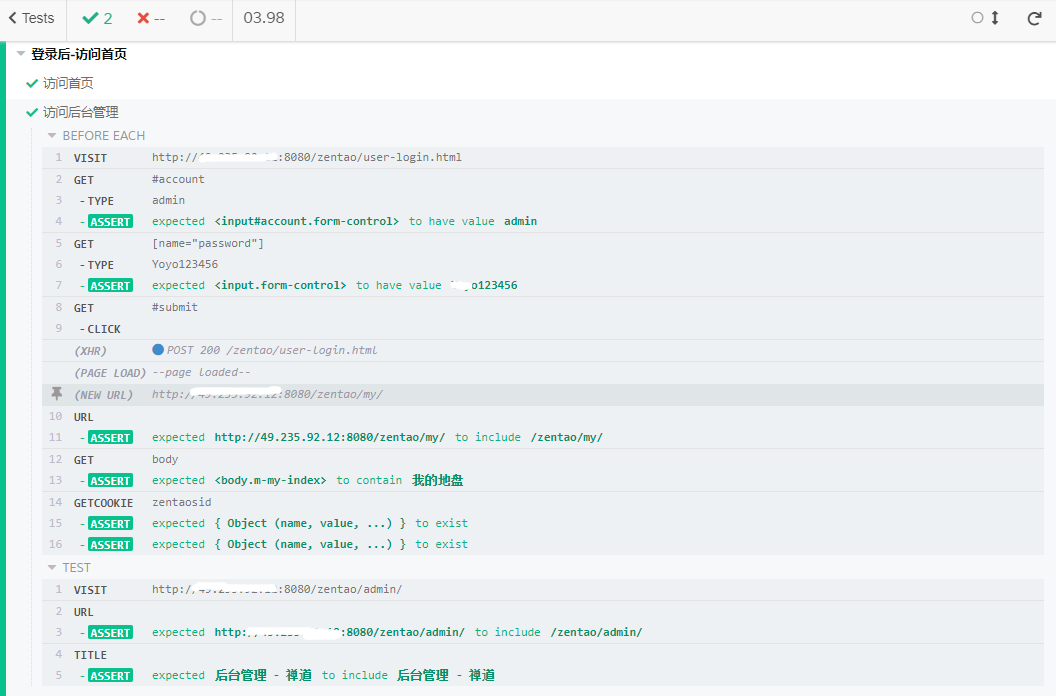
运行结果

beforeEach() 会每个用例都会运行一次,这样会有个弊端,所以使用before()
多个用例记住cookies
Cypress会在每个test运行前自动的清掉所有的cookie。可以用 preserveOnce() 来在多个test之间保留cookie,这在有登录要求的自动化测试方面很方便。
Cypress.Cookies.preserveOnce('key name1', 'key name2')
// # 上海-悠悠,QQ交流群:750815713

describe('登录后-访问首页', function() {
    before(() => {
          cy.login("admin", "****123456")

        })

    beforeEach(function () {
        // before each test, we can automatically preserve the
        // 'zentaosid' and 'csrftoken' cookies. this means they
        // will not be cleared before the NEXT test starts.
        Cypress.Cookies.preserveOnce('zentaosid', 'csrftoken')
      })
    it("访问首页", () =>
        {
            cy.visit("http://ip:8080/zentao/my/")
            cy.url().should('include', '/zentao/my/')
            cy.title().should('contain', '我的地盘 - 禅道')
        })

    it("访问后台管理", () =>
        {
            cy.visit("http://ip:8080/zentao/admin/")
            cy.url().should('include', '/zentao/admin/')
            cy.title().should('contain', '后台管理 - 禅道')
        })

    })
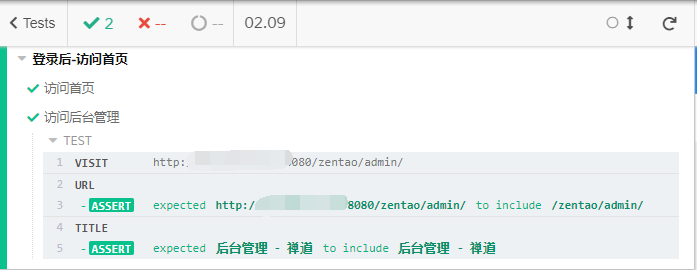
再次运行就会发现第二个用例不会重复执行登录内容了

request 登录
cypress 不同于 selenium,登录还可以有一种更优雅的方式,发 request 请求实现,参考这篇https://www.cnblogs.com/yoyoketang/p/13045333.html
QQ交流群:939110556
