下载Tomcat,官网上下载的文件都是绿色免安装的。我下载的是:
apache-tomcat-7.0.12-windows-x86.zip
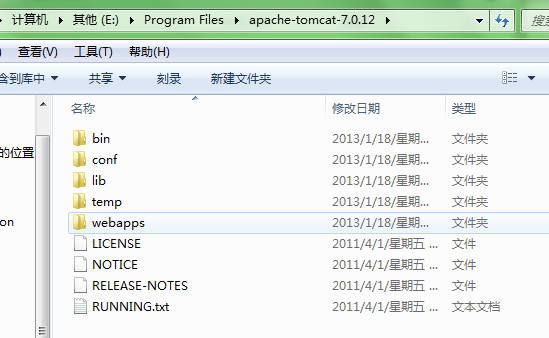
解压后如图:
设置Tomcat环境变量
新建:
变量名:TOMCAT_HOME
变量值:你的TOMCAT所在目录
如上面的:E:\Program Files\apache-tomcat-7.0.12
之后双击目录下的startup.bat运行。
窗口一闪而过,不知道正确了没有,在command下运行,报错了:

就设置了环境变量JAVA_HOME,不知为什么还一如既往提示上面的错误?
采用了一位博主提出的办法,原文如下:
对于使用IDE开发的程序员来讲,并不是所有人都对自己用来吃饭的工具了如指掌。常在阴沟跑,哪能不翻船。为此我把自己使用Tomcat/Eclipse的一些经验教训整理了一下,会陆续的贴出来,也许会帮到和我遇到同样问题的人。
先讲一个Tomcat的问题。很多人兴冲冲的下载了一个Tomcat,跑到bin看到一个startup.bat就去执行,结果提示Neither the JAVA_HOME nor the JRE_HOME environment variable is defined At least one of these environment variable is needed to run this program。好,再去下载个最新版本的JDK,Install完成之后却还是提示Neither the JAVA_HOME nor the JRE_HOME environment variable is defined At least one of these environment variable is needed to run this program。搞得对Tomcat的学习热情冷了一半。
因是后来较新版本的JDK(例如我使用的JDK1.6)安装完不会自动登记环境变量JAVA_HOME,JRE_HOME。像我在单位的环境,我的用户是受限制的(PowerUser),不方便设环境变量,于是我就找到了另外一个方法。
先看Tomcat的startup.bat,它调用了catalina.bat,而catalina.bat则调用了setclasspath.bat。只要在setclasspath.bat的开头声明环境变量,如我的就是:
rem ---------------------------------------------------------------------------
rem Set CLASSPATH and Java options
rem
rem $Id: setclasspath.bat 505241 2007-02-09 10:22:58Z jfclere $
rem ---------------------------------------------------------------------------
set JAVA_HOME=D:\Java\jdk1.6.0_11
set JRE_HOME=D:\Java\jre6
rem Make sure prerequisite environment variables are set
if not "%JAVA_HOME%" == "" goto gotJdkHome
if not "%JRE_HOME%" == "" goto gotJreHome
echo Neither the JAVA_HOME nor the JRE_HOME environment variable is defined
echo At least one of these environment variable is needed to run this program
goto exit
......
这样在每次运行startup.bat时就注册了JAVA_HOME,JRE_HOME。控制台窗口关闭后,这两个变量也将消失,不会再占用内存。运行一下,最终提示“信息:Server startup in xxxxx ms”就大功告成了。
EOF
注意,apache端口号为80,tomcat则是8080,所以不会产生冲突。
启动成功后,在浏览器输入:
http://localhost:8080/
出现tomcat主页,则Tomcat安装成功。
常用的tomcat配置设置小技巧
一、端口8080改为80,从而http://localhost:8080/web项目 可以直接写为:http://localhos/web项目
tomcat目录/bin/文件夹下:编辑server.xml文档,
将:<Connector port="8080" protocol="HTTP/1.1" connectionTimeout="20000" redirectPort="8443" />
改为:<Connector port="80" protocol="HTTP/1.1" connectionTimeout="20000" redirectPort="8443" />
重启后就ok了。
还有跟多内容:参考:
http://wenku.baidu.com/view/f4bc2ed276a20029bd642d38.html
linux安装:
1. apt-get install
1.1 Find an available Tomcat package to install
$ sudo apt-cache search tomcat
//...
tomcat7 - Servlet and JSP engine
tomcat7-admin - Servlet and JSP engine -- admin web applications
tomcat7-common - Servlet and JSP engine -- common files
tomcat7-docs - Servlet and JSP engine -- documentation
tomcat7-examples - Servlet and JSP engine -- example web applications
1.2 Install the following Tomcat packages :
$ sudo apt-get install tomcat7-admin
$ sudo apt-get install tomcat7
1.3 Done. Tomcat is installed and configured automatically.
我按照报错:
Creating config file /etc/logrotate.d/tomcat7 with new version
* Starting Tomcat servlet engine tomcat7 [fail]
invoke-rc.d: initscript tomcat7, action "start" failed.
Setting up authbind (2.1.1) ...
Processing triggers for ureadahead (0.100.0-16) ..
但是输入ip:8080访问正常。
访问控制台需要密码,
/conf/tomcat-users.xml 文件内容:
<tomcat-users>
<!--
NOTE: By default, no user is included in the "manager-gui" role required
to operate the "/manager/html" web application. If you wish to use this app,
you must define such a user - the username and password are arbitrary.
-->
<!--
NOTE: The sample user and role entries below are wrapped in a comment
and thus are ignored when reading this file. Do not forget to remove
<!.. ..> that surrounds them.
-->
<tomcat-users>
<role rolename="tomcat"/>
<role rolename="role1"/>
<user username="tomcat" password="tomcat" roles="tomcat"/>
<user username="both" password="tomcat" roles="tomcat,role1"/>
<user username="role1" password="tomcat" roles="role1"/>
<user username="admin" password="admin" roles="tomcat" />
</tomcat-users>
2. Where is Tomcat installed?
2.1 Tomcat auto start script is created in /etc/init.d/ folder.
$ sudo /etc/init.d/tomcat7 start
$ sudo /etc/init.d/tomcat7 stop
$ sudo /etc/init.d/tomcat7 restart
2.2 Tomcat bin folder is created in /usr/share/tomcat7.
$ ls -lsa /usr/share/tomcat7/

 4 drwxr-xr-x   4 root root  4096 Mac  11 23:21 .
12 drwxr-xr-x 282 root root 12288 Mac  11 23:21 ..
 4 drwxr-xr-x   2 root root  4096 Mac  11 23:21 bin
 4 -rw-r--r--   1 root root    39 Jul  31  2013 defaults.md5sum
 4 -rw-r--r--   1 root root  2030 Jul  31  2013 defaults.template
 4 drwxr-xr-x   2 root root  4096 Mac  11 23:21 lib
 4 -rw-r--r--   1 root root    53 Jul  31  2013 logrotate.md5sum
 4 -rw-r--r--   1 root root   118 Jul  31  2013 logrotate.template
2.3 Tomcat conf and logs folders are created in /var/lib/tomcat7.
$ ls -lsa /var/lib/tomcat7/

4 drwxr-xr-x  6 root    root    4096 Mac  11 23:21 .
4 drwxr-xr-x 64 root    root    4096 Mac  11 23:21 ..
4 drwxr-xr-x  3 tomcat7 tomcat7 4096 Mac  11 23:21 common
0 lrwxrwxrwx  1 root    root      12 Mac   5 01:20 conf -> /etc/tomcat7
0 lrwxrwxrwx  1 root    root      17 Mac   5 01:20 logs -> ../../log/tomcat7
4 drwxr-xr-x  3 tomcat7 tomcat7 4096 Mac  11 23:21 server
4 drwxr-xr-x  3 tomcat7 tomcat7 4096 Mac  11 23:21 shared
4 drwxrwxr-x  3 tomcat7 tomcat7 4096 Mac  11 23:21 webapps
0 lrwxrwxrwx  1 root    root      19 Mac   5 01:20 work -> ../../cache/tomcat7
References
参考:http://www.mkyong.com/tomcat/how-to-install-tomcat-in-ubuntu/
linux不通过yum或apt-install安装。
2、安装Tomcat
1)下载apache-tomcat-6.0.10.tar.gz
2)#tar -zxvf apache-tomcat-6.0.10.tar.gz ;//解压
3)#cp -R apache-tomcat-6.0.10 /usr/local/tomcat;//拷贝apache-tomcat-6.0.10到/usr/local/下并重命名为tomcat
设置环境变量
|
1
2
3
4
|
vi /etc/profile
加入如下两条
CATALINA_HOME=/usr/local/apache-tomcat-7.0.28/
PATH=$JAVA_HOME/bin:/usr/local/apache-tomcat-7.0.28/bin/:$PATH
|
. /etc/profile
启动服务
|
1
|
/usr/local/apache-tomcat-7.0.28/bin/catalina.sh start
|
或者(推荐用startup.sh)
|
1
|
/usr/local/apache-tomcat-7.0.28/bin/startup.sh
|
/usr/local/tomcat/bin/startup.sh; //启动tomcat
/usr/local/tomcat/bin/shutdown.sh 关闭tomcat
netstat -lnt
发现了80开头的端口
Active Internet connections (only servers)
Proto Recv-Q Send-Q Local Address Foreign Address State
tcp 0 0 0.0.0.0:111 0.0.0.0:* LISTEN
tcp 0 0 0.0.0.0:759 0.0.0.0:* LISTEN
tcp 0 0 127.0.0.1:631 0.0.0.0:* LISTEN
tcp 0 0 127.0.0.1:25 0.0.0.0:* LISTEN
tcp 0 0 ::ffff:127.0.0.1:8005 :::* LISTEN
tcp 0 0 :::8009 :::* LISTEN
tcp 0 0 :::8080 :::* LISTEN
tcp 0 0 :::22 :::* LISTEN