h5或flash中,可以直接对矢量对象,比如line, rectange旋转,但是pygame中,仅支持对image旋转,本以为这个是很简单的事情,但是发现还是有很多小猫腻的,记录一下:
先看一个错误的版本:


 1 import pygame
 2 import sys
 3
 4 pygame.init()
 5
 6 SIZE = WIDTH, HEIGHT = 200, 400
 7 BLACK = 0, 0, 0
 8 angle = 1
 9
10 screen = pygame.display.set_mode(SIZE)
11 leaf = pygame.image.load("leaf.png")
12 leafRect = leaf.get_rect()
13 # 定位到舞台中心
14 leafRect = leafRect.move((WIDTH - leafRect.width) / 2, (HEIGHT - leafRect.height) / 2)
15
16 clock = pygame.time.Clock()
17
18 while True:
19
20     for event in pygame.event.get():
21         if event.type == pygame.QUIT:
22             sys.exit()
23
24     # 旋转图片
25     leaf = pygame.transform.rotate(leaf, angle)
26     angle += 1
27
28     # 默认背景为白色,所以每渲染一帧,要对背景重新填充,否则会有上一帧的残影
29     screen.fill(BLACK)
30     # 将旋转后的图象,渲染矩形里
31     screen.blit(leaf, leafRect)
32     # 正式渲染
33     pygame.display.update()
34     # 控制帧数<=100
35     clock.tick(100)
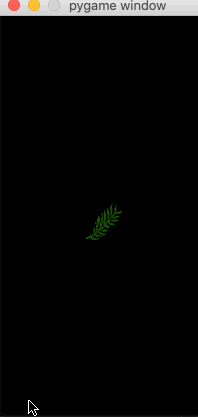
代码中的leaf.png图例如下:

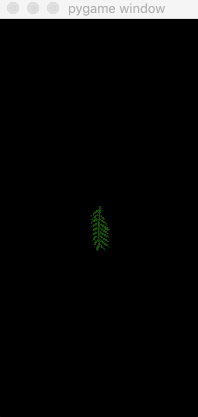
跑一把:
这明显跟我想的不一样!代码里并没有对叶子做移动操作,只是每帧旋转1度而已,为啥它要飘到舞台之外?
仔细review了下代码,25行:leaf = pygame.transform.rotate(leaf, angle) 这里有问题,pygame在这方面做得说实话不算太好,字面上的意思,这行的效果,应该是每次在原来的基础上,继续加速旋转(因为每次angle+1,相当于每帧旋转角度越来越大)。
需要用一个新变量存储旋转后的图片,参考下面的代码:
 1 import pygame
 2 import sys
 3
 4 pygame.init()
 5
 6 SIZE = WIDTH, HEIGHT = 200, 400
 7 BLACK = 0, 0, 0
 8 angle = 1
 9
10 screen = pygame.display.set_mode(SIZE)
11 leaf = pygame.image.load("leaf.png")
12 leafRect = leaf.get_rect()
13 leafRect = leafRect.move((WIDTH - leafRect.width) / 2, (HEIGHT - leafRect.height) / 2)
14
15 clock = pygame.time.Clock()
16
17 while True:
18
19     for event in pygame.event.get():
20         if event.type == pygame.QUIT:
21             sys.exit()
22
23     keys = pygame.key.get_pressed()
24
25     # 旋转图片(注意:这里要搞一个新变量,存储旋转后的图片)
26     newLeaf = pygame.transform.rotate(leaf, angle)
27     angle += 1
28
29     screen.fill(BLACK)
30     screen.blit(newLeaf, leafRect)
31     pygame.display.update()
32     clock.tick(100)
总算不乱跑,开始正经的旋转了:
但是仔细观察,还是有点小问题,旋转过程中,叶子的中心位置总在晃动,预期效果最好是旋转过程中,中心点不变。至于晃动的原因,叶子图片并不是一个圆形,pygame中,任何一个Surface对象,总有一个外切的矩形对象(通过get_rect()方法可以获得),图片旋转后,这个外切Rect对象的尺寸跟着变化,导致中心点也变化了。
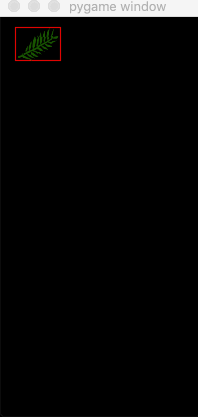
校正方法如下(为了方便观察,我们把叶子外围正切的矩形也画出来)
做为对比,刚才的中心晃动版本,也把矩形画出来,参考以下代码:
 1 import pygame
 2 import sys
 3
 4 pygame.init()
 5
 6 SIZE = WIDTH, HEIGHT = 200, 400
 7 BLACK = 0, 0, 0
 8 angle = 1
 9
10 screen = pygame.display.set_mode(SIZE)
11 leaf = pygame.image.load("leaf.png")
12 leafRect = leaf.get_rect()
13 leafRect = leafRect.move((WIDTH - leafRect.width) / 2, (HEIGHT - leafRect.height) / 2)
14
15 clock = pygame.time.Clock()
16
17 while True:
18
19     for event in pygame.event.get():
20         if event.type == pygame.QUIT:
21             sys.exit()
22
23     keys = pygame.key.get_pressed()
24
25     # 旋转图片(注意:这里要搞一个新变量,存储旋转后的图片)
26     newLeaf = pygame.transform.rotate(leaf, angle)
27     newRect = newLeaf.get_rect()
28     angle += 1
29
30     screen.fill(BLACK)
31     screen.blit(newLeaf, leafRect)
32     pygame.draw.rect(screen, (255, 0, 0), leafRect, 1)
33     pygame.draw.rect(screen, (0, 255, 0), newRect, 1)
34     pygame.display.update()
35     clock.tick(100)
校正中心点后的版本:
 1 import pygame
 2 import sys
 3
 4 pygame.init()
 5
 6 SIZE = WIDTH, HEIGHT = 200, 400
 7 BLACK = 0, 0, 0
 8 angle = 1
 9
10 screen = pygame.display.set_mode(SIZE)
11 leaf = pygame.image.load("leaf.png")
12 leafRect = leaf.get_rect()
13 leafRect = leafRect.move((WIDTH - leafRect.width) / 2, (HEIGHT - leafRect.height) / 2)
14
15 clock = pygame.time.Clock()
16
17 while True:
18
19     for event in pygame.event.get():
20         if event.type == pygame.QUIT:
21             sys.exit()
22
23     keys = pygame.key.get_pressed()
24
25     # 旋转图片(注意:这里要搞一个新变量,存储旋转后的图片)
26     newLeaf = pygame.transform.rotate(leaf, angle)
27     # 校正旋转图片的中心点
28     newRect = newLeaf.get_rect(center=leafRect.center)
29     angle += 1
30
31     screen.fill(BLACK)
32     # 这里要用newRect区域,绘制图象
33     screen.blit(newLeaf, newRect)
34     pygame.draw.rect(screen, (255, 0, 0), leafRect, 1)
35     pygame.draw.rect(screen, (0, 255, 0), newRect, 1)
36     pygame.display.update()
37     clock.tick(100)
运行后的对照图如下(左侧为中心晃动的版本,右侧为中心点不变的版本)
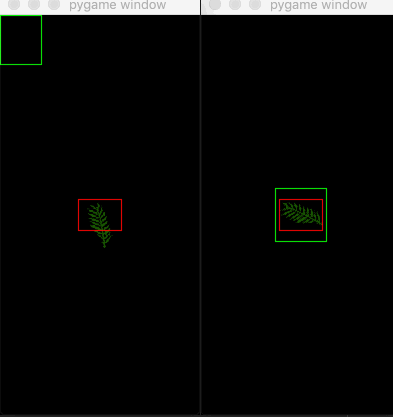
思考一下:为什么左侧的图,绿色的矩形框,一直在左上角,而右侧的绿矩形框,会在中心?
答案:Rect对象默认生成时,其left,top属性都是0, 所以旋转后的新图片,其外切矩形一直是在(0,0)位置,但是校正后的版本,get_rect(center=...)这里指定了中心点,所以newRect对象被对齐到跟红色Rect一样的中心位置。
(题外话:至于需要不需要中心点校正,完全看游戏场景,就本例而言,如果只是模拟一片树叶落下,好象中心点晃动,也并不影响视觉感受,所以下面的示例,均没有做中心点校正处理)
结合之前学到的东西,再加点趣味性,让叶子在舞台上飘动起来,同时加入边界碰撞检测,但是要注意:叶子在旋转过程中,外要的矩形尺寸,也会随之变化(这会影响边界检测),为了观察方便,在叶子外面画一个框框。
 1 import pygame
 2 import sys
 3
 4 pygame.init()
 5
 6 SIZE = WIDTH, HEIGHT = 200, 400
 7 BLACK = 0, 0, 0
 8 RED = 255, 0, 0
 9 SPEED = [1, 1]
10 angle = 1
11
12 screen = pygame.display.set_mode(SIZE)
13 originLeaf = pygame.image.load("leaf.png")
14 originRect = originLeaf.get_rect()
15
16 clock = pygame.time.Clock()
17
18 while True:
19
20     for event in pygame.event.get():
21         if event.type == pygame.QUIT:
22             sys.exit()
23
24     # 利用矩形对象的move方法,让rect移动
25     originRect = originRect.move(SPEED[0], SPEED[1])
26     # 注意:这里一定要用一个新变量newLeaf,保存旋转后的image对象
27     newLeaf = pygame.transform.rotate(originLeaf, angle)
28     angle += 1
29
30     # 注意:这里要定义一个新rect对象,因为图象旋转后,其外切的矩形尺寸会变化
31     newRect = newLeaf.get_rect()
32     # 默认的newRect位置在(0,0),要实现矩形外框跟随,必须赋值到新位置
33     newRect.left, newRect.top = originRect.left, originRect.top
34
35     # 左右边界反弹的处理
36     if newRect.left <= 0 or newRect.right >= WIDTH:
37         SPEED[0] = -SPEED[0]
38
39     # 上下边界反弹的处理
40     if newRect.top <= 0 or newRect.bottom >= HEIGHT:
41         SPEED[1] = -SPEED[1]
42
43     # 默认背景为白色,所以每渲染一帧,要对背景重新填充,否则会有上一帧的残影
44     screen.fill(BLACK)
45     # 画新矩形
46     pygame.draw.rect(screen, RED, newRect, 1)
47     # 将旋转后的图象,渲染到新矩形里
48     screen.blit(newLeaf, originRect)
49     # 正式渲染
50     pygame.display.update()
51     # 控制帧数<=100
52     clock.tick(100)
基本达到效果了,但是细心观察的话,发现右边界和下边界,碰撞检测其实不够完美,从视觉上看,明明已经到了边界,但是没有及时反弹。

修正一下:
 1 import pygame
 2 import sys
 3
 4 pygame.init()
 5
 6 SIZE = WIDTH, HEIGHT = 200, 400
 7 BLACK = 0, 0, 0
 8 RED = 255, 0, 0
 9 SPEED = [1, 1]
10 angle = 1
11
12 screen = pygame.display.set_mode(SIZE)
13 originLeaf = pygame.image.load("leaf.png")
14 originRect = originLeaf.get_rect()
15
16 clock = pygame.time.Clock()
17
18 while True:
19
20     for event in pygame.event.get():
21         if event.type == pygame.QUIT:
22             sys.exit()
23
24     # 利用矩形对象的move方法,让rect移动
25     originRect = originRect.move(SPEED[0], SPEED[1])
26     # 注意:这里一定要用一个新变量newLeaf,保存旋转后的image对象
27     newLeaf = pygame.transform.rotate(originLeaf, angle)
28     angle += 1
29
30     # 注意:这里要定义一个新rect对象,因为图象旋转后,其外切的矩形尺寸会变化
31     newRect = newLeaf.get_rect()
32     # 默认的newRect位置在(0,0),要实现矩形外框跟随,必须赋值到新位置
33     newRect.left, newRect.top = originRect.left, originRect.top
34
35     # 左右边界反弹的处理
36     if newRect.left <= 0 or newRect.right >= WIDTH:
37         SPEED[0] = -SPEED[0]
38         # 图片移动到接近右边界时(比如:right=198),由于旋转的作用,可能导致叶子一下横过来了,
39         # right突然会变成210,这样就算速度取反了,由于SPEED[0]=-1,需要10帧后,才能从视觉上真正看到反弹成功(即:210减到200,需要10次)
40         if newRect.right > WIDTH:
41             originRect.left = WIDTH - newRect.width
42
43     # 上下边界反弹的处理
44     if newRect.top <= 0 or newRect.bottom >= HEIGHT:
45         SPEED[1] = -SPEED[1]
46         # 类似右边界的校正处理,防止叶子接近下边界时,由于旋转,一下从横到竖,高度突然加大,导致越界
47         if newRect.bottom > HEIGHT:
48             originRect.top = HEIGHT - newRect.height
49
50     # 默认背景为白色,所以每渲染一帧,要对背景重新填充,否则会有上一帧的残影
51     screen.fill(BLACK)
52     # 画新矩形
53     pygame.draw.rect(screen, RED, newRect, 1)
54     # 将旋转后的图象,渲染到新矩形里
55     screen.blit(newLeaf, originRect)
56     # 正式渲染
57     pygame.display.update()
58     # 控制帧数<=100
59     clock.tick(100)
看上去好多了
最后再加点料,根据叶子的运动情况,动态调整背景颜色:
 1 import pygame
 2 import sys
 3 import random
 4 import math
 5
 6 pygame.init()
 7
 8 SIZE = WIDTH, HEIGHT = 200, 400
 9 BACKGROUND_COLOR = (0, 0, 0)
10
11 screen = pygame.display.set_mode(SIZE)
12 leaves = []
13
14
15 class Leaf(object):
16     def __init__(self, pos=[10, 10], speed=[1, 1]):
17         self.imageSrc = pygame.image.load("leaf.png")
18         self.rect = self.imageSrc.get_rect()
19         self.image = self.imageSrc
20         self.speed = speed
21         self.angle = 0
22         self.pos = pos
23         self.rect = self.rect.move(pos[0], pos[1])
24
25     def move(self):
26         self.rect = self.rect.move(self.speed[0], self.speed[1])
27         new_rect = self.image.get_rect()
28         new_rect.left, new_rect.top = self.rect.left, self.rect.top
29         if new_rect.left < 0 or new_rect.right > WIDTH:
30             self.speed[0] = -self.speed[0]
31             if new_rect.right > WIDTH:
32                 self.rect.left = WIDTH - new_rect.width
33             if new_rect.left < 0:
34                 self.rect.left = 0
35         if new_rect.top < 0 or new_rect.bottom > HEIGHT:
36             self.speed[1] = -self.speed[1]
37             if new_rect.bottom > HEIGHT:
38                 self.rect.top = HEIGHT - new_rect.height
39
40     def draw(self):
41         screen.blit(self.image, self.rect)
42
43     def rotate(self):
44         self.image = pygame.transform.rotate(self.imageSrc, self.angle)
45         self.angle += random.randint(1, 5)
46         if math.fabs(self.angle) == 360:
47             self.angle = 0
48
49
50 def init():
51     for i in range(0, 3):
52         leaf = Leaf([random.randint(50, WIDTH - 50), random.randint(30, HEIGHT - 200)],
53                     [random.randint(1, 2), random.randint(1, 2)])
54         leaf.move()
55         leaves.append(leaf)
56
57
58 def to255(x):
59     if x > 1:
60         x = 1
61     return int(255 * math.fabs(x))
62
63
64 clock = pygame.time.Clock()
65 init()
66
67 while True:
68
69     for event in pygame.event.get():
70         if event.type == pygame.QUIT:
71             sys.exit()
72
73     first_rect = leaves[0].rect
74
75     # 根据第1片叶子的运动情况,随机切换背景色
76     color_r = to255(first_rect.top / HEIGHT)
77     color_g = to255(first_rect.left / WIDTH)
78     color_b = to255(math.fabs(first_rect.left) / (math.fabs(first_rect.top) + math.fabs(first_rect.left) + 1))
79     # print(color_r, color_g, color_b)
80     screen.fill((color_r, color_g, color_b))
81
82     # 将旋转后的图象,渲染到新矩形里
83     for item in leaves:
84         item.rotate()
85         item.move()
86         item.draw()
87
88     # 正式渲染
89     pygame.display.update()
90     # 控制帧数<=100
91     clock.tick(100)

下边界检测时,还能做些变化,比如:叶子落到地面以下,就重新放回顶端,这样就有漫天落叶,绵绵不断的感觉:
 1 import pygame
 2 import sys
 3 import random
 4 import math
 5
 6 pygame.init()
 7
 8 SIZE = WIDTH, HEIGHT = 200, 400
 9 BACKGROUND_COLOR = (230, 255, 230)
10
11 screen = pygame.display.set_mode(SIZE)
12 leaves = []
13
14
15 class Leaf(object):
16     def __init__(self, pos=[10, 10], speed=[1, 1]):
17         self.imageSrc = pygame.image.load("leaf.png")
18         self.rect = self.imageSrc.get_rect()
19         self.image = self.imageSrc
20         self.speed = speed
21         self.angle = 0
22         self.pos = pos
23         self.rect = self.rect.move(pos[0], pos[1])
24
25     def move(self):
26         self.rect = self.rect.move(self.speed[0], self.speed[1])
27         new_rect = self.image.get_rect()
28         new_rect.left, new_rect.top = self.rect.left, self.rect.top
29         if new_rect.left < 0 or new_rect.right > WIDTH:
30             self.speed[0] = -self.speed[0]
31             if new_rect.right > WIDTH:
32                 self.rect.left = WIDTH - new_rect.width
33             if new_rect.left < 0:
34                 self.rect.left = 0
35         if new_rect.top > HEIGHT:
36             self.rect.bottom = 0
37
38     def draw(self):
39         screen.blit(self.image, self.rect)
40
41     def rotate(self):
42         self.image = pygame.transform.rotate(self.imageSrc, self.angle)
43         self.angle += random.randint(1, 5)
44         if math.fabs(self.angle) == 360:
45             self.angle = 0
46
47
48 def init():
49     for i in range(0, 5):
50         leaf = Leaf([random.randint(50, WIDTH - 50), random.randint(30, HEIGHT)],
51                     [random.randint(1, 2), random.randint(1, 2)])
52         leaf.move()
53         leaves.append(leaf)
54
55
56 clock = pygame.time.Clock()
57 init()
58
59 while True:
60
61     for event in pygame.event.get():
62         if event.type == pygame.QUIT:
63             sys.exit()
64
65     screen.fill(BACKGROUND_COLOR)
66
67     # 将旋转后的图象,渲染到新矩形里
68     for item in leaves:
69         item.rotate()
70         item.move()
71         item.draw()
72
73     # 正式渲染
74     pygame.display.update()
75     # 控制帧数<=100
76     clock.tick(100)

参考:https://www.pygame.org/wiki/RotateCenter?parent=CookBook