Using WSPBuilder is rather straight-forward and for most features the default configuration settings work fine. But what happens when you want to include custom CAS policies or change the default folder names? Fortunately, WSPBuilder has an extremely robust set of configuration switches to handle these cases.
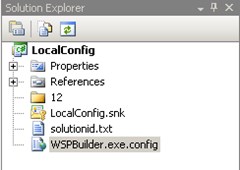
If you look in the folder you installed WSPBuilder into, which is typically C:Program FilesWSPToolsWSPBuilderExtensions, you should see a WSPBuilder.exe.config file. This is the default config file that WSPBuilder uses whenever building a WSP file. We are able to edit this file to change the global settings, but we can also use a local config file on a per project basis. To use a local config file, simply add a copy of the default config file into the root of your project as shown below:
Now that we have a config file added to our project, we can edit this file and change settings appropriately. For example, if we wanted to specify the name for our WSP for this project only, we could use a local config file similar to the one illustrated below:
1.<?xml version="1.0" encoding="utf-8" ?>2.<configuration>3.<appsettings>4.<add value="Test.wsp" key="WSPName" />5.</appsettings>6.</configuration>Once we changed our local config file, we can rebuild our WSP and our new settings will be used. In this case, the WSP would be named Test.wsp instead of LocalConfig.wsp.
Hopefully this post quickly illustrates the benefits and ease of using local config files for your WSPBuilder projects. Make sure to check out the WSPBuilder manual for a full list of configuration switches that can be used
