运维开发笔记整理-Django的template的使用
作者:尹正杰
版权声明:原创作品,谢绝转载!否则将追究法律责任。
在上一篇博客中我们学习了HttpResponse 和JsonResponse方法。现在我们来说一下Django内置模板,我们可以把漂亮的网页返回给用户,当然,咱们是学习阶段,主要还是为了方便说名知识点为主,因此在我的html文件只是设计到变量的传递,并不设计css或者js等。
一.加载模板-从文件加载内容案例
1>.loader模块
django.template.loader这个模块提供了两种方法加载模板:
get_template(template_name, using=None) #加载指定模板,并返回Template对象
select_template(template_name_list, using=None) #它和"get_template"方法类似,它尝试每个名称并返回第一个存在的模板
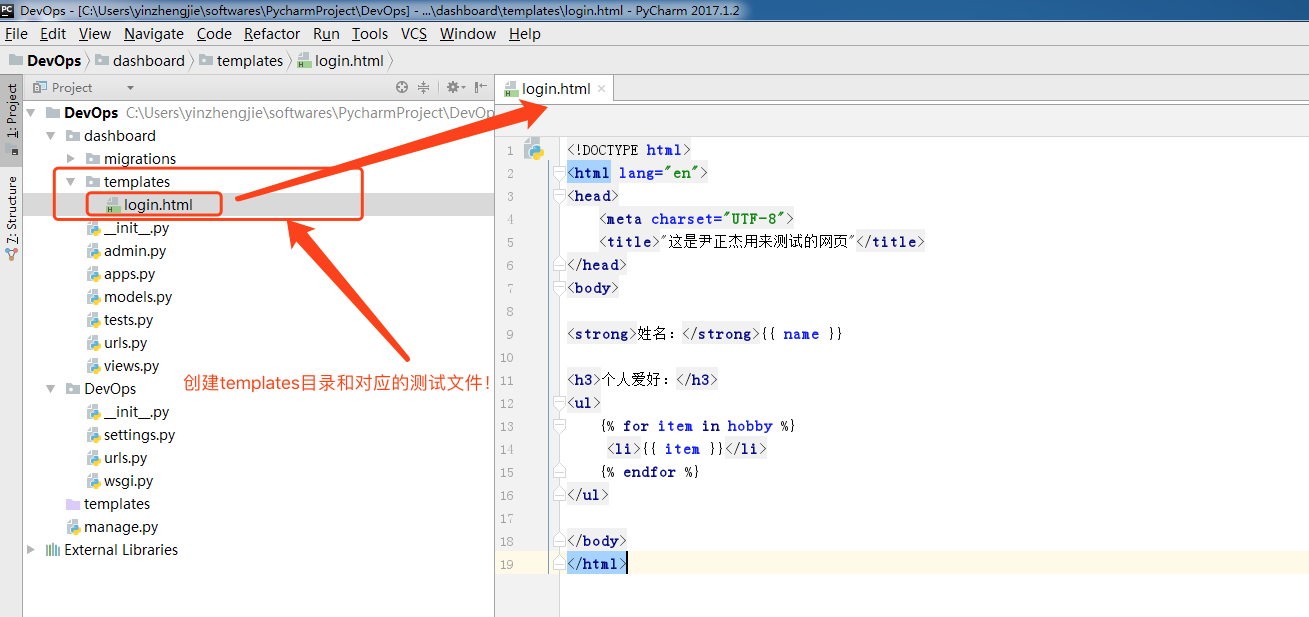
2>.在APP中创建一个templates目录用于存放模板文件
<!DOCTYPE html>
<html lang="en">
<head>
    <meta charset="UTF-8">
    <title>"这是尹正杰用来测试的网页"</title>
</head>
<body>

<strong>姓名:</strong>{{ name }}

<h3>个人爱好:</h3>
<ul>
    {% for item in hobby %}
     <li>{{ item }}</li>
    {% endfor %}
</ul>

</body>
</html>

3>.编辑APP中的urls.py文件
#!/usr/bin/env python
#_*_conding:utf-8_*_
#@author :yinzhengjie
#blog:http://www.cnblogs.com/yinzhengjie/tag/python%E8%87%AA%E5%8A%A8%E5%8C%96%E8%BF%90%E7%BB%B4%E4%B9%8B%E8%B7%AF/

from django.conf.urls import url
from . import  views

urlpatterns = [
    url(r"^$",views.index),
    url(r"^login",views.login)
]
4>.编写视图函数
#!/usr/bin/env python
#_*_conding:utf-8_*_
#@author :yinzhengjie
#blog:http://www.cnblogs.com/yinzhengjie/tag/python%E8%87%AA%E5%8A%A8%E5%8C%96%E8%BF%90%E7%BB%B4%E4%B9%8B%E8%B7%AF/

from django.http import HttpResponse,JsonResponse
from django.template import Context,loader


def login(request):
    t = loader.get_template("login.html")
    context = {
        "name": "尹正杰",
        "hobby":["Java","Python","Golang","PHP","C++","Shell","VBS"],
    }
    return HttpResponse(t.render(context, request))


def index(request):
    data = {
        "name":"yinzhengjie",
        "age":"26",
    }
    return JsonResponse(data)
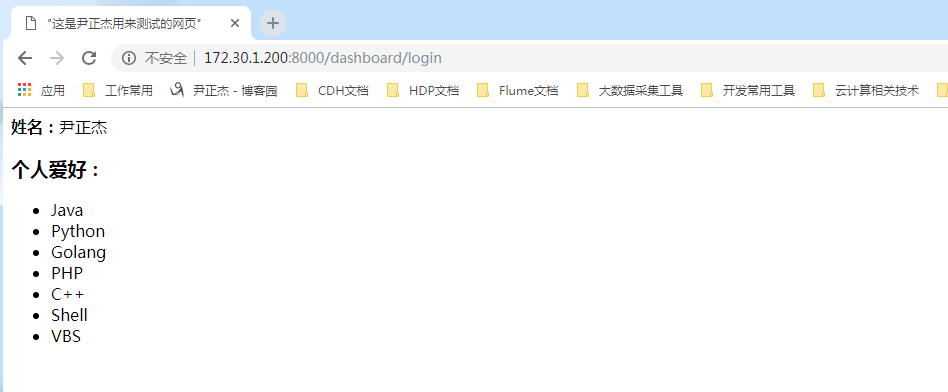
5>.启动项目后访问:http://172.30.1.200:8000/dashboard/login

二.使用reader模板可以快速进行网页渲染(说白了就是字符串替换的过程!)
1>.使用render方法加载模板
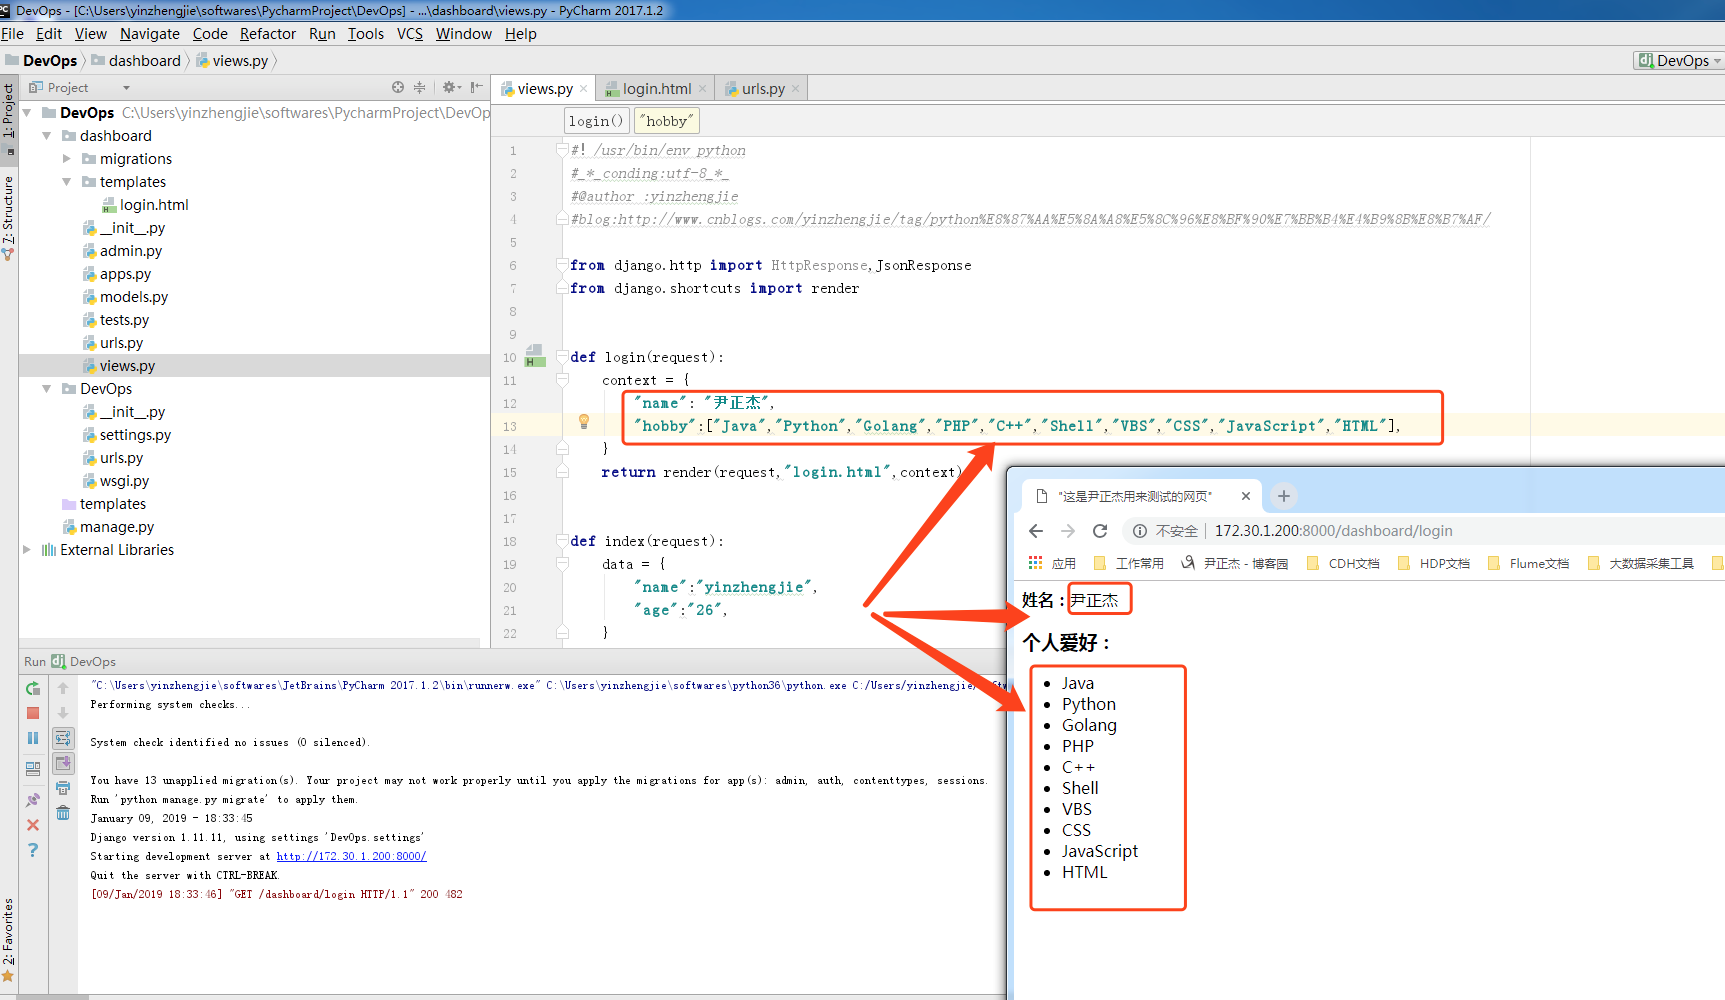
是不是觉得上面使用HttpResponse方法返回网页的方式很复杂?其实我们可以使用reader模块进行渲染。
from django.shortcuts import render


def login(request):
    context = {
        "name": "尹正杰",
        "hobby":["Java","Python","Golang","PHP","C++","Shell","VBS"],
    }
    return render(request,"login.html",context)
2>.启动项目后,很显然参数是可以传递过来的,地址栏访问:http://172.30.1.200:8000/dashboard/login
