1.七层负载均衡:
根据url 调度不同的集群   url.cheng.com
	10.0.0.5
	10.0.0.7		/pass
	10.0.0.8		/user

1.web01和web02配置  (只不过代码不一样)
[root@web01 conf.d]# cat url.cheng.com.conf
server {
	listen 80;
	server_name url.cheng.com;
	root /code;

	location / {
	index index.html;
	}
}

[root@web01 code]# cat index.html
Hello PC.....

[root@web02 code]# cat index.html
Hello phone....

2.lb【10.0.0.5】配置
[root@lb01 conf.d]# cat proxy_url.cheng.com.conf
upstream user {
	server 172.16.1.8;
}
upstream pass {
	server 172.16.1.7;
}

server {
	listen 80;
	server_name url.cheng.com;


	location /user {
	proxy_pass http://user/;
	include proxy_params;
	}

	location /pass {
	proxy_pass http://pass/;
	include proxy_params;
	}
}

3.检测语法并重启nginx服务
[root@lb01 ~]# nginx -t
[root@lb01 conf.d]# systemctl restart nginx
2.在使用proxy_pass反向代理时,最后结尾添加/和不添加/有什么区别?
查看区别详细描述链接
1.不添加 /
	用户如果请求:    http://url.cheng.com/user
	会被代理至后端:  http://url.cheng.com/user

2.添加 /
	用户如果请求: http://url.cheng.com/user
	会被代理至后端:  http://url.cheng.com/
3.根据设备调度不同的集群( 浏览器 ) ( 手机 )
10.0.0.5--------》lb【负载均衡】
10.0.0.7		pc
10.0.0.8		phone
1.所有的web【01-02】都需要配置   ( 代码不一样)
[root@web01 conf.d]# cat agent.cheng.com.conf
server {
	listen 80;
	server_name agent.cheng.com;
	root /code;

	location / {
	index index.html;
	}

}

2.代理配置【10.0.0.5】
[root@lb01 conf.d]# cat proxy_agent.cheng.com.conf
upstream pc {
	server 172.16.1.7:80;
	}

upstream phone {
	server 172.16.1.8:80;
	}

server {
	listen 80;
	server_name agent.cheng.com;

	location / {
	#默认都走PC
	proxy_pass http://pc;
	include proxy_params;
	default_type text/html;
	charset utf-8;

	#如果是Android或iphone,则走phone
	if ( $http_user_agent ~* "android|iphone|iPad") {
	proxy_pass http://phone;
		}

	#如果是IE浏览器,要么拒绝访问,要么返回一个正版的浏览器下载界面
	if ( $http_user_agent ~* "Trident"){
	return 200 '<a href="https://www.cnblogs.com/yinwu/p/11569452.html" target="_blank">点击访问正版</a>';
		}

	}
}
4.四层负载均衡
1、什么是四层 OSI 传输层 TCP/IP UDP/TCP
四层是基于转发方式:
2、四层负载均衡使用场景
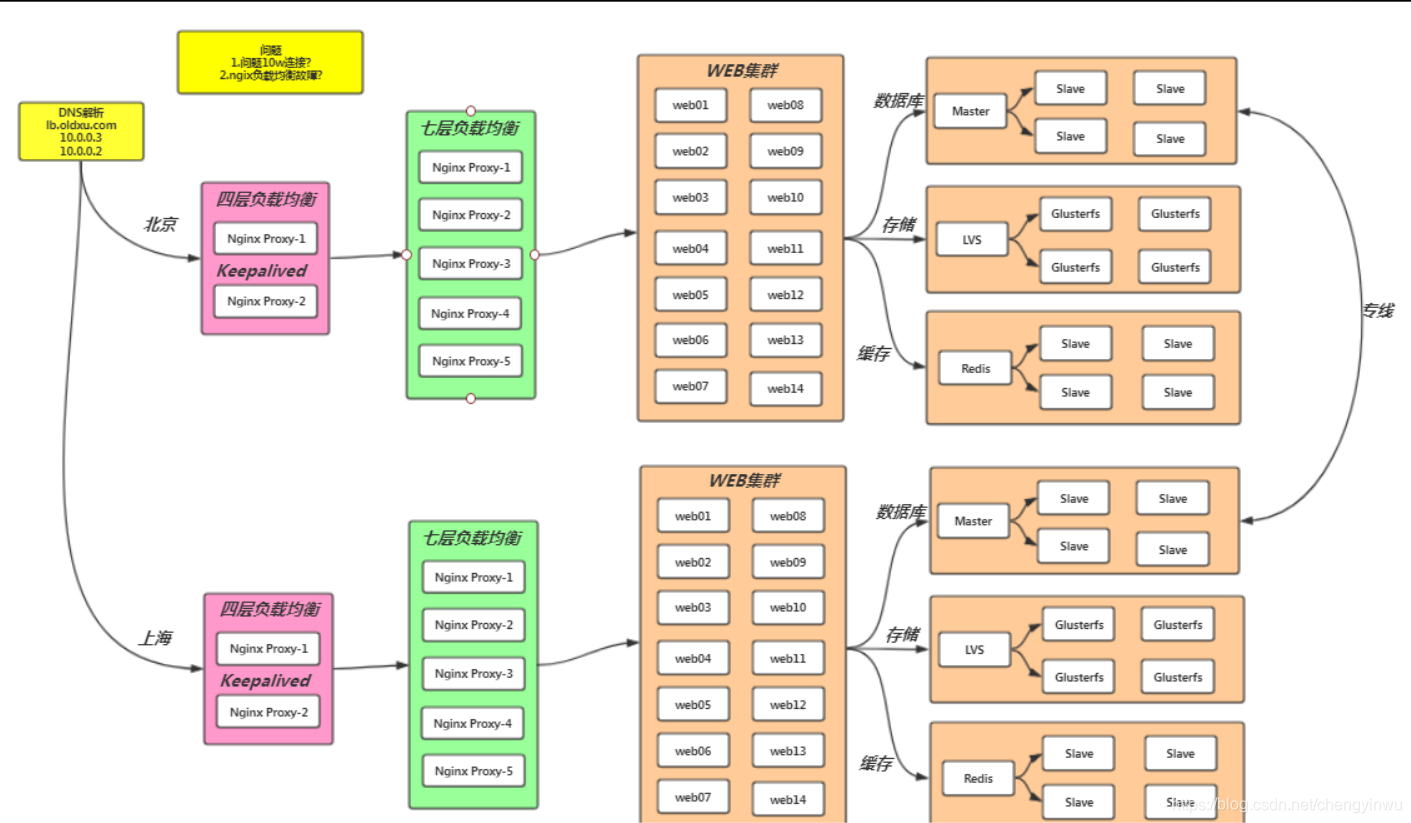
1.四层负载均衡 + 七层负载均衡
2.dns + 多机房 + 四层负载均衡+七层负载均衡
3.SOA 松耦合架构
登录 passport.jd.com
注册 reg.jd.com
商品详情 pro.jd.com
4.基于端口的转发
5.Nginx四层配置+nginx七层+web集群--->场景实战
环境准备:
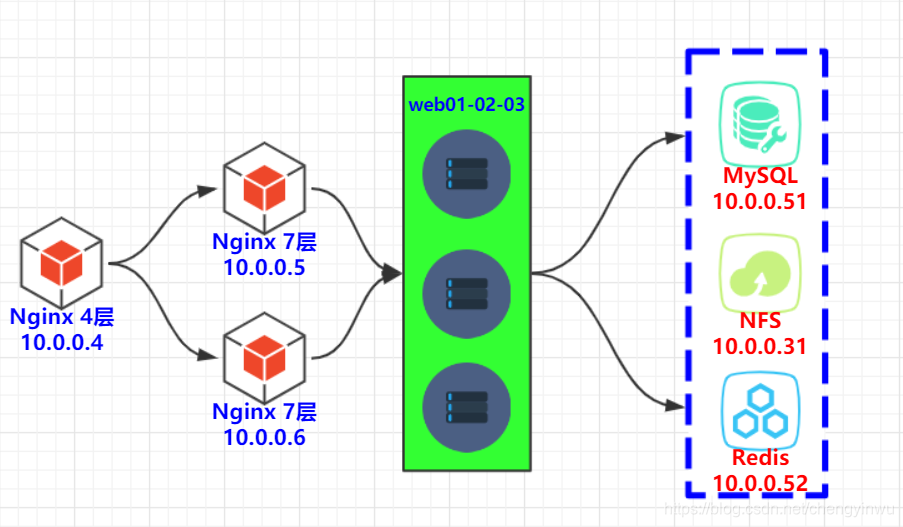
实战操作:
1.服务器10.0.0.6安装nginx
[root@lb02 ~]# yum install nginx

2.将10.0.0.5(七层负载)这台机器nginx下的所有文件分别推送至10.0.0.6和10.0.0.4
[root@lb01 ~]# scp -rp /etc/nginx root@172.16.1.6:/etc/
[root@lb01 ~]# scp -rp /etc/nginx root@172.16.1.4:/etc/

3.检测并重启nginx服务
[root@lb02 ~]# nginx -t
[root@lb02 ~]# systemctl restart nginx

4.将zh.cheng.com域名作解析,测试10.0.0.6七层负载是否配置?

5.将所有域名做解析至10.0.0.4

6.定义四层配置文件路径:
	[root@lb03 ~]# vim /etc/nginx/nginx.conf
	include /etc/nginx/conf.c/*.conf;

7.进行初始化操作  【注意:若不删除七层负载的配置,无法正常使用四层,因为都是占用80端口导致nginx启动失败】
	[root@lb03 ~]# rm -f /etc/nginx/conf.d/default.conf
	[root@lb03 ~]# mkdir /etc/nginx/conf.c

8.配置四层负载均衡
[root@lb03 conf.c]# cat all.conf
stream {
	upstream zh {
	server 172.16.1.5:80;
	server 172.16.1.6:80;

	}

	server {
	listen 80;
	proxy_pass zh;
	proxy_timeout 3s;      #超时时间
	proxy_connect_timeout 3s;	#连接时间
	}

}

[root@lb03 conf.c]# nginx -t
[root@lb03 conf.c]# systemctl restart nginx
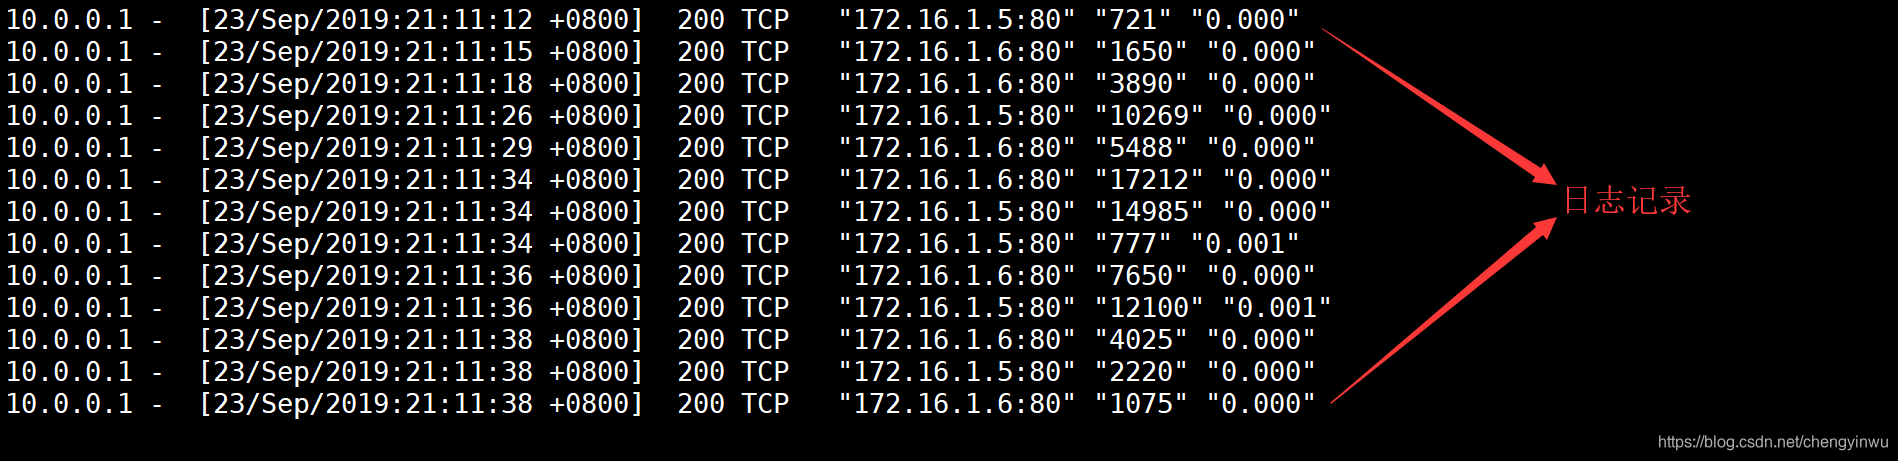
9.通过浏览器访问以及查看5和6的日志进行验证
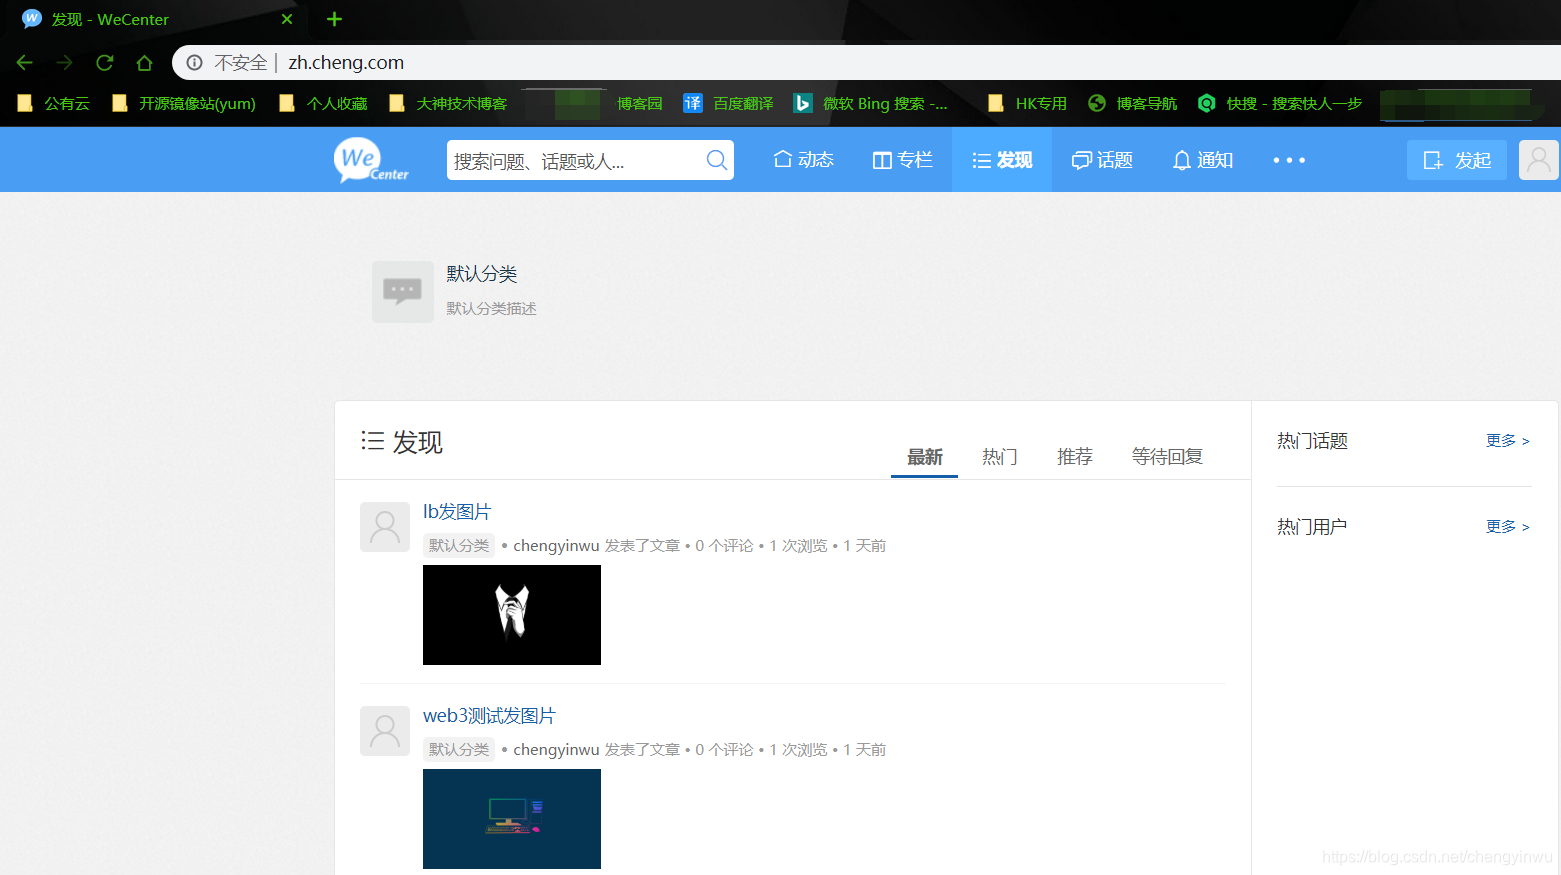
通过以下日志我们可以看出轮询的效果!!!


nginx是1.9版本以后才引入的四层负载均衡
stream模块实现,但stream不能出现在http层
--with-stream
-with-stream_ssl_module
-with-stream_realip_module
1.stream模块介绍:
		stream {
			upstream backend {
				hash $remote_addr consistent;
				server backend1.example.com:12345 weight=5;
				server 127.0.0.1:12345 max_fails=3 fail_timeout=30s;
				server unix:/tmp/backend3;
			}
			server {
				listen 12345;
				proxy_connect_timeout 1s;
				proxy_timeout 3s;
				proxy_pass backend;
			}
		}
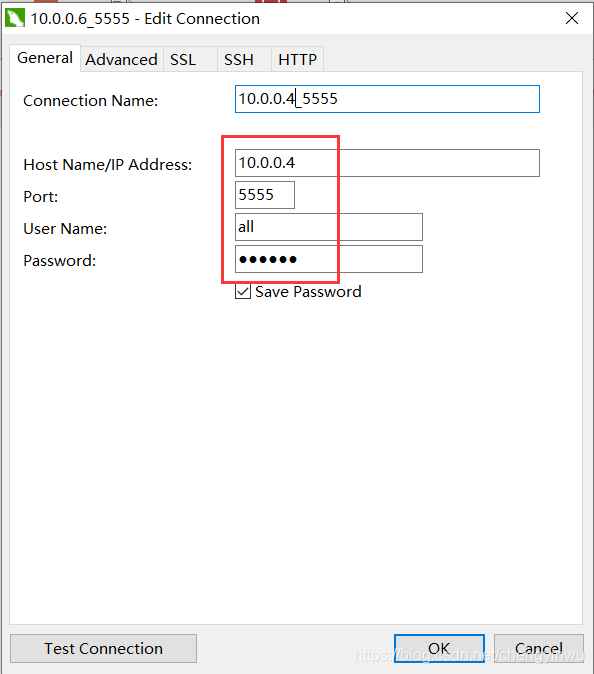
2.基于端口的转发:
需求: 用户连接10.0.0.4的6666端口,其实连接的是172.16.1.7的22/TCP端口
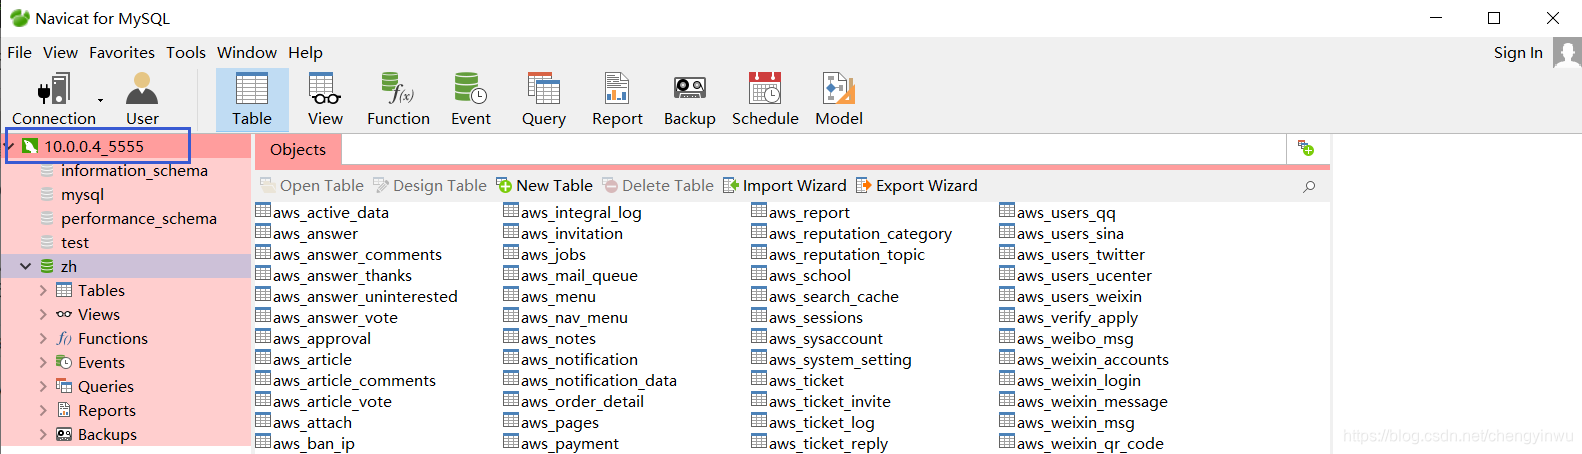
需求: 用户连接10.0.0.4的5555端口,其实连接的是172.16.1.51的3306/TCP端口
1.将7和51这台机器的WAN口断掉
2.配置四层负载
[root@lb03 conf.c]# cat all.conf
stream {
	upstream zh {
	server 172.16.1.5:80;
	server 172.16.1.6:80;

	}

        upstream ssh {
        server 172.16.1.7:22;
        }

        upstream mysql {
        server 172.16.1.51:3306;
        }

        server {
        listen 6666;
        proxy_pass ssh;
        }

        server {
        listen 5555;
        proxy_pass mysql;
        }

	server {
	listen 80;
	proxy_pass zh;
	proxy_timeout 3s;           #超时时间
	proxy_connect_timeout 3s;	#连接时间
	}

}

3.测试转发后的端口是否能正常登陆
[root@lb03 conf.c]# ssh root@172.16.1.7 6666      ------>>>可正常登陆
4.四层负载均衡怎么记录日志 必须在stream层,不能出现在http层?
	log_format  proxy '$remote_addr -  [$time_local]  $status $protocol'
                '   "$upstream_addr" "$upstream_bytes_sent" "$upstream_connect_time"' ;

        access_log /var/log/nginx/tcp.log proxy;
6.配置阿里云四层负载均衡 实现端口转发
公网666转到内网的22
公网80 转到内网的多台7层负载均衡的80
- 根据url调度
- 根据设备调度
- 四层负载均衡
- 四层负载均衡使用场景
4+7
dns+4+7
SOA - 四层+七层负载的配置
- 四层转发的配置
- 四层日志记录
- 阿里云四层负载
7.架构图